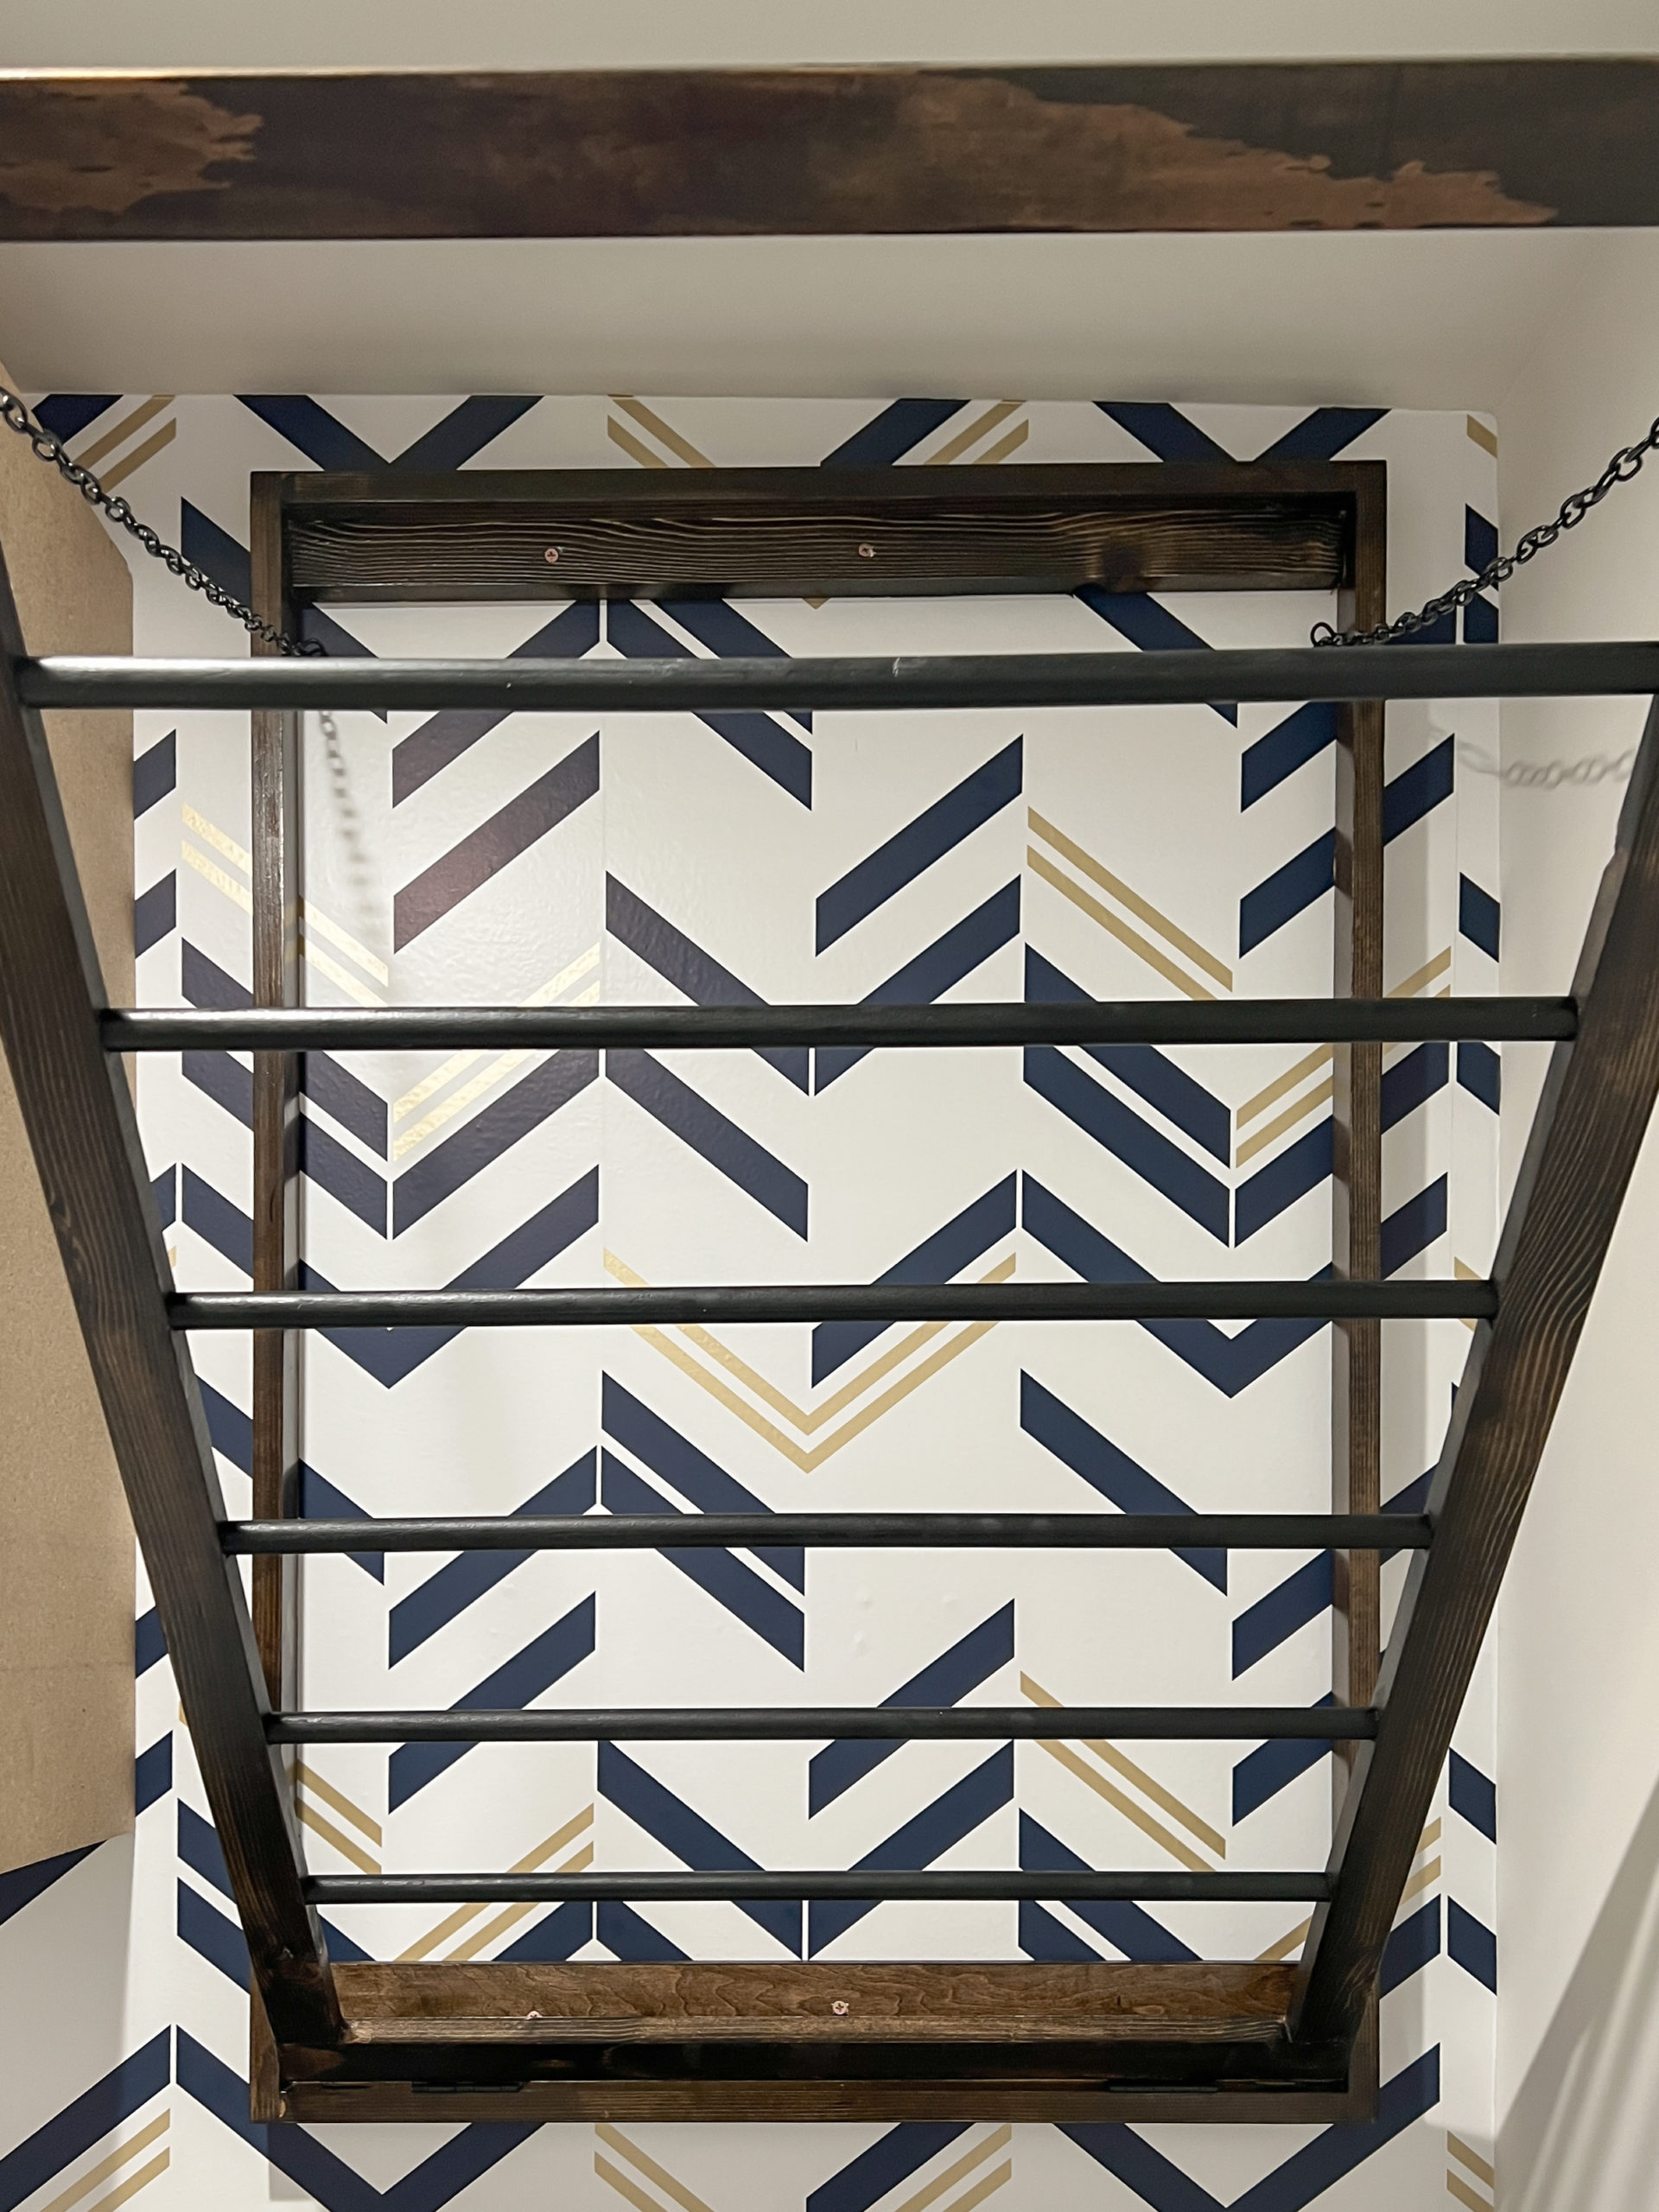
DIY Wall Mounted Laundry Drying Rack
Why does no one tell you that there’s a direct correlation between how old you are and the percentage of your laundry that you hang to dry?!
I’ve gotten to the point that I sometimes even contemplate air drying socks— because it seems like a waste to run such a small dryer load. I always underestimate the amount of drying space that I’ll need on the drying rack when I do a load of laundry, so much that my air-dry laundry is starting to take over the guest room.
I’ve seen similar laundry drying racks on Pinterest but never got around to building my own. Then, my friend Diff (*Sara) asked if I would give her small laundry closet a makeover and I knew it was the perfect time to build this space-saving drying rack. Since the drying rack folds into itself, it takes up almost no room when it’s not in use!
Click Here to see Diff’s full laundry makeover blog (with total cost)!

Is you’re laundry also taking over your bedroom (or other rooms in your house)? Follow my tutorial for this beginner friendly DIY, and take back your bedroom!
(This post contains affiliate links which means I receive a small compensation at no cost to you. As an Amazon Associate I earn from qualifying purchases. You can read more about it here. Thank you for supporting my blog!)
MATERIALS:
TOOLS:
Miter Saw (miter box works too!)
Kreg Jig & 1-1/4″ Pocket Hole Screws
This drill bit set has a 5/8″ Woodboring Spade Bit
Hand Sander (220 grit paper)
I made my drying rack 38″ long by 26.5″ wide so the tutorial and cuts listed will be specific to that size. You can change the size to whatever fis in your space, just make sure to pay extra attention to how the pieces are being put together so you can figure out how to calculate the cuts you’ll need for your custom-sized drying rack.
STEP 1: Cut your frames and dowels
This build consists of two rectangular frames– the outer frame that will be the part that mounts to the wall, and the inner frame that will have the rods on it, meant to hang your clothes on. Cut the following pieces out of your 1×2″ boards:
- 2- 38″
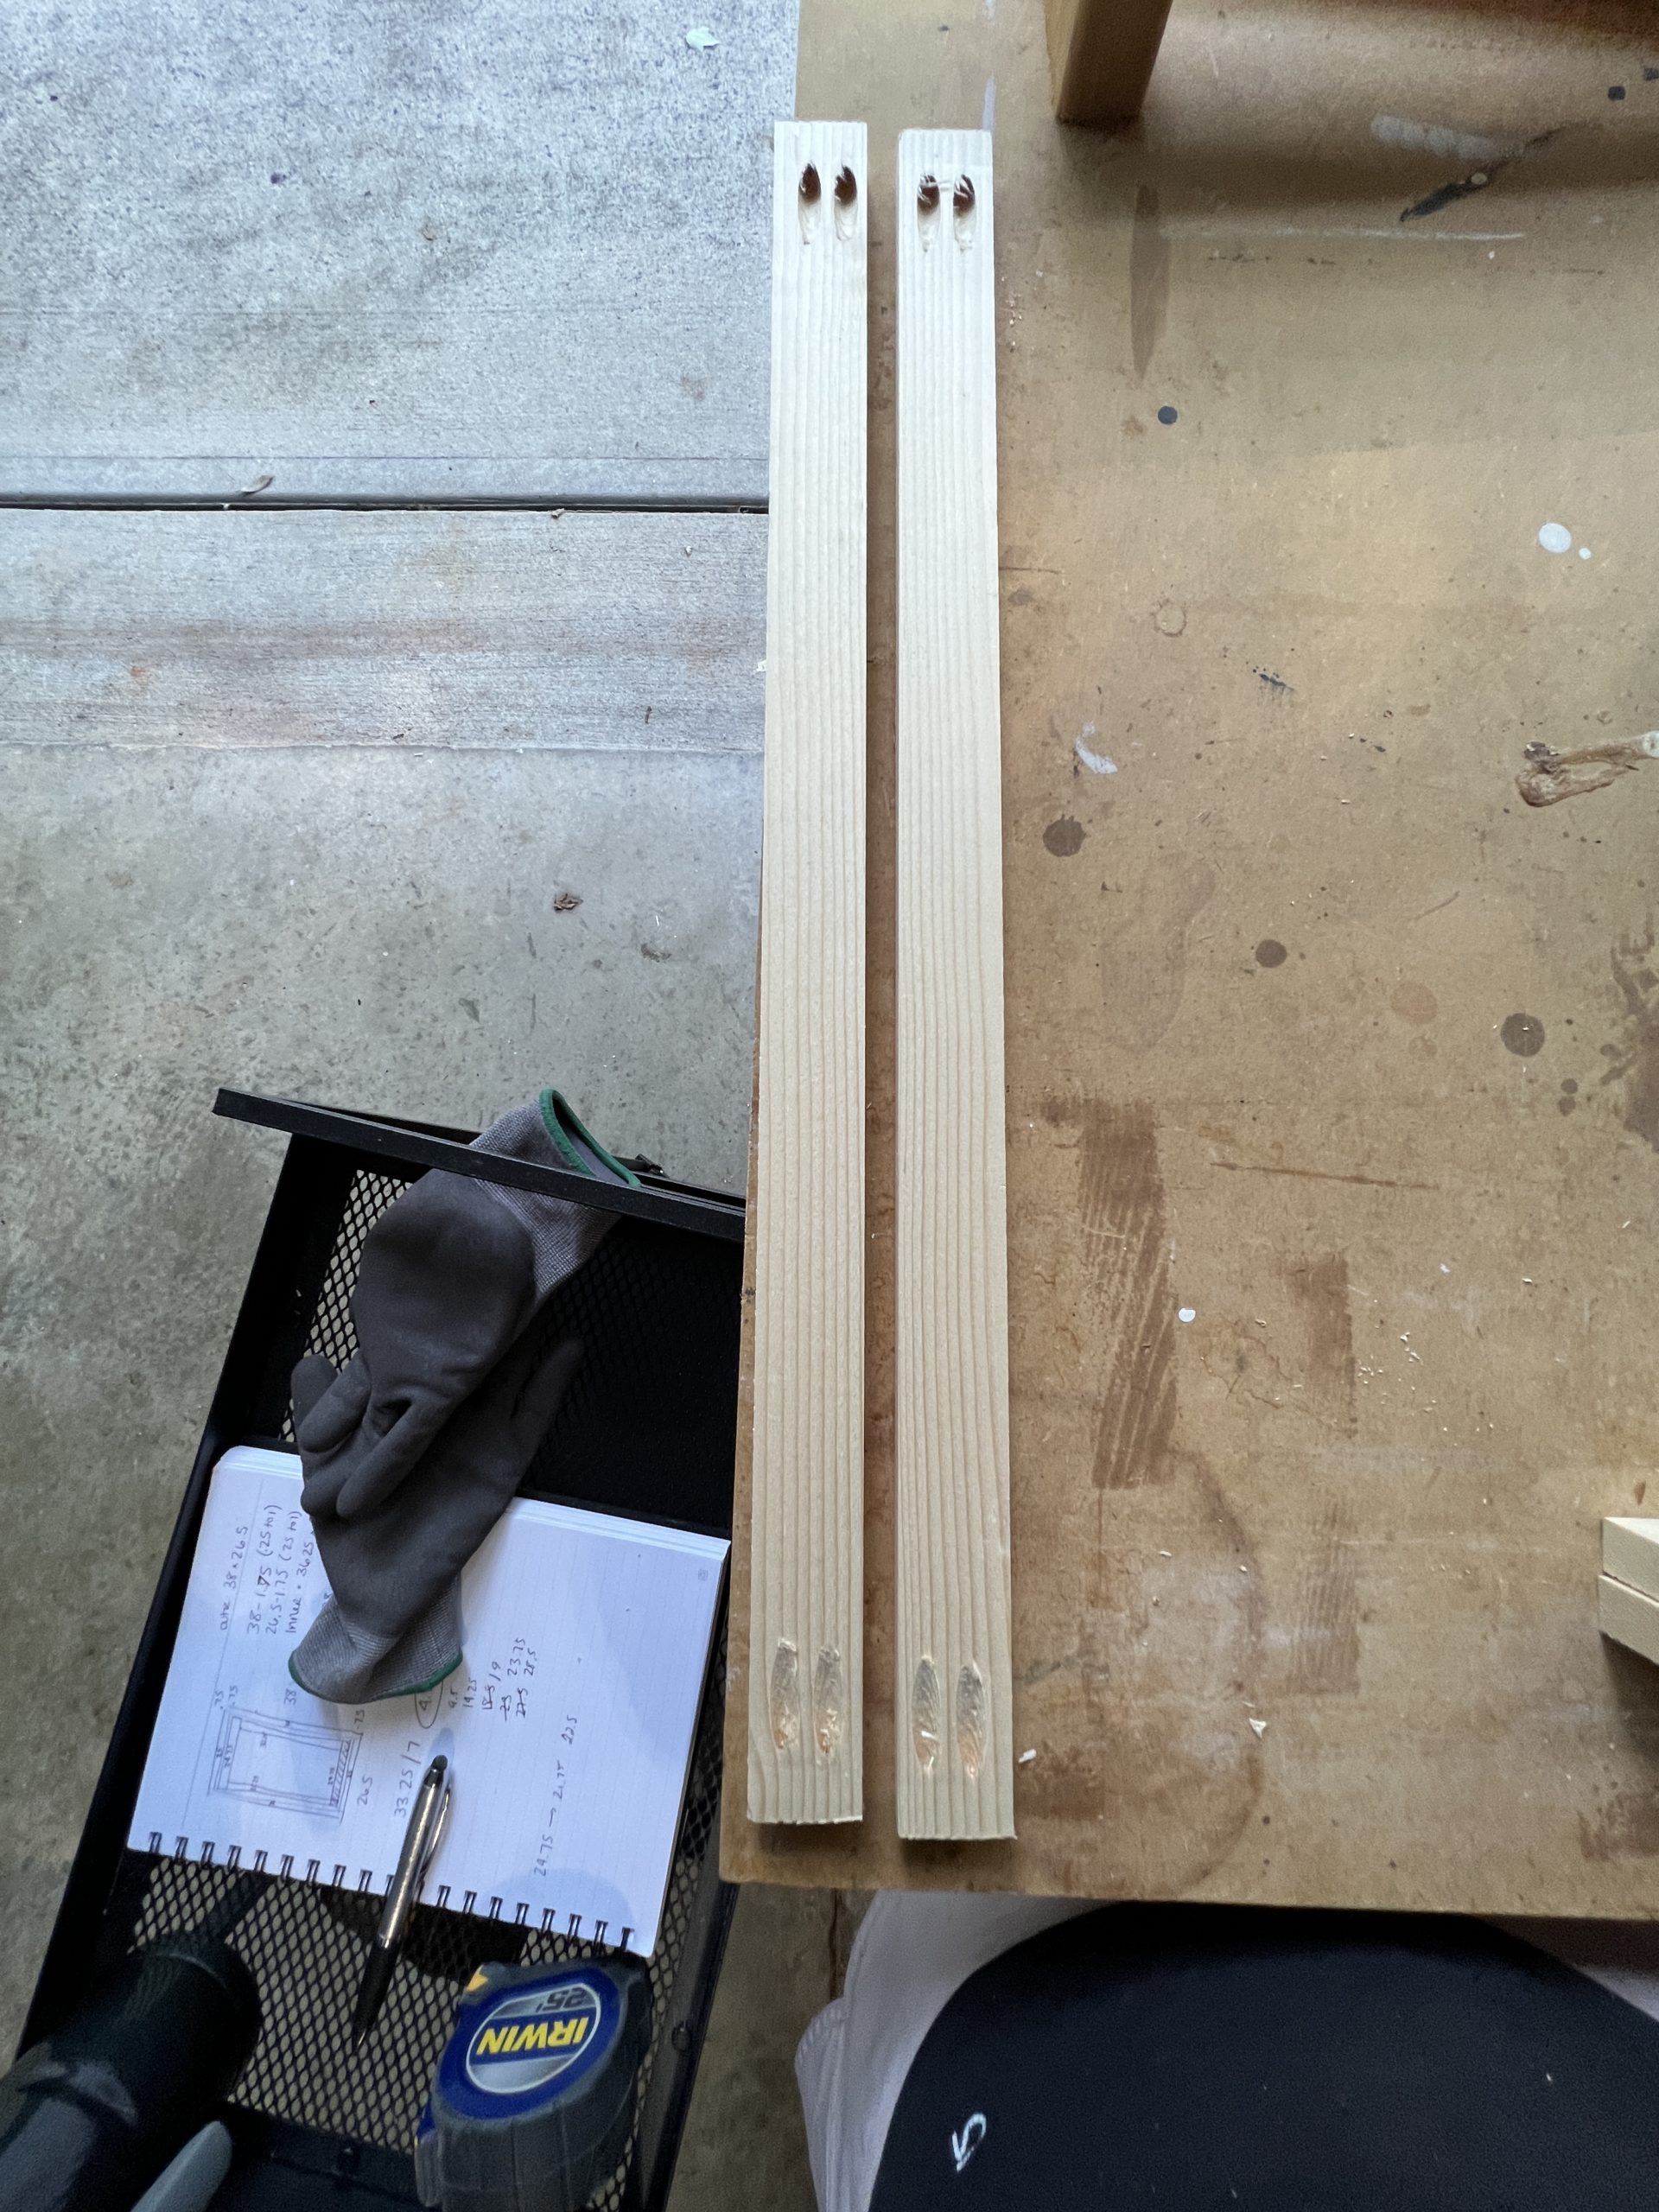
- 2- 33.25″- add one pocket hole into each end of these boards, on the narrow face
- 4- 25- add two pocket holes to each end of these boards, on the wide face
- 2- 24.75
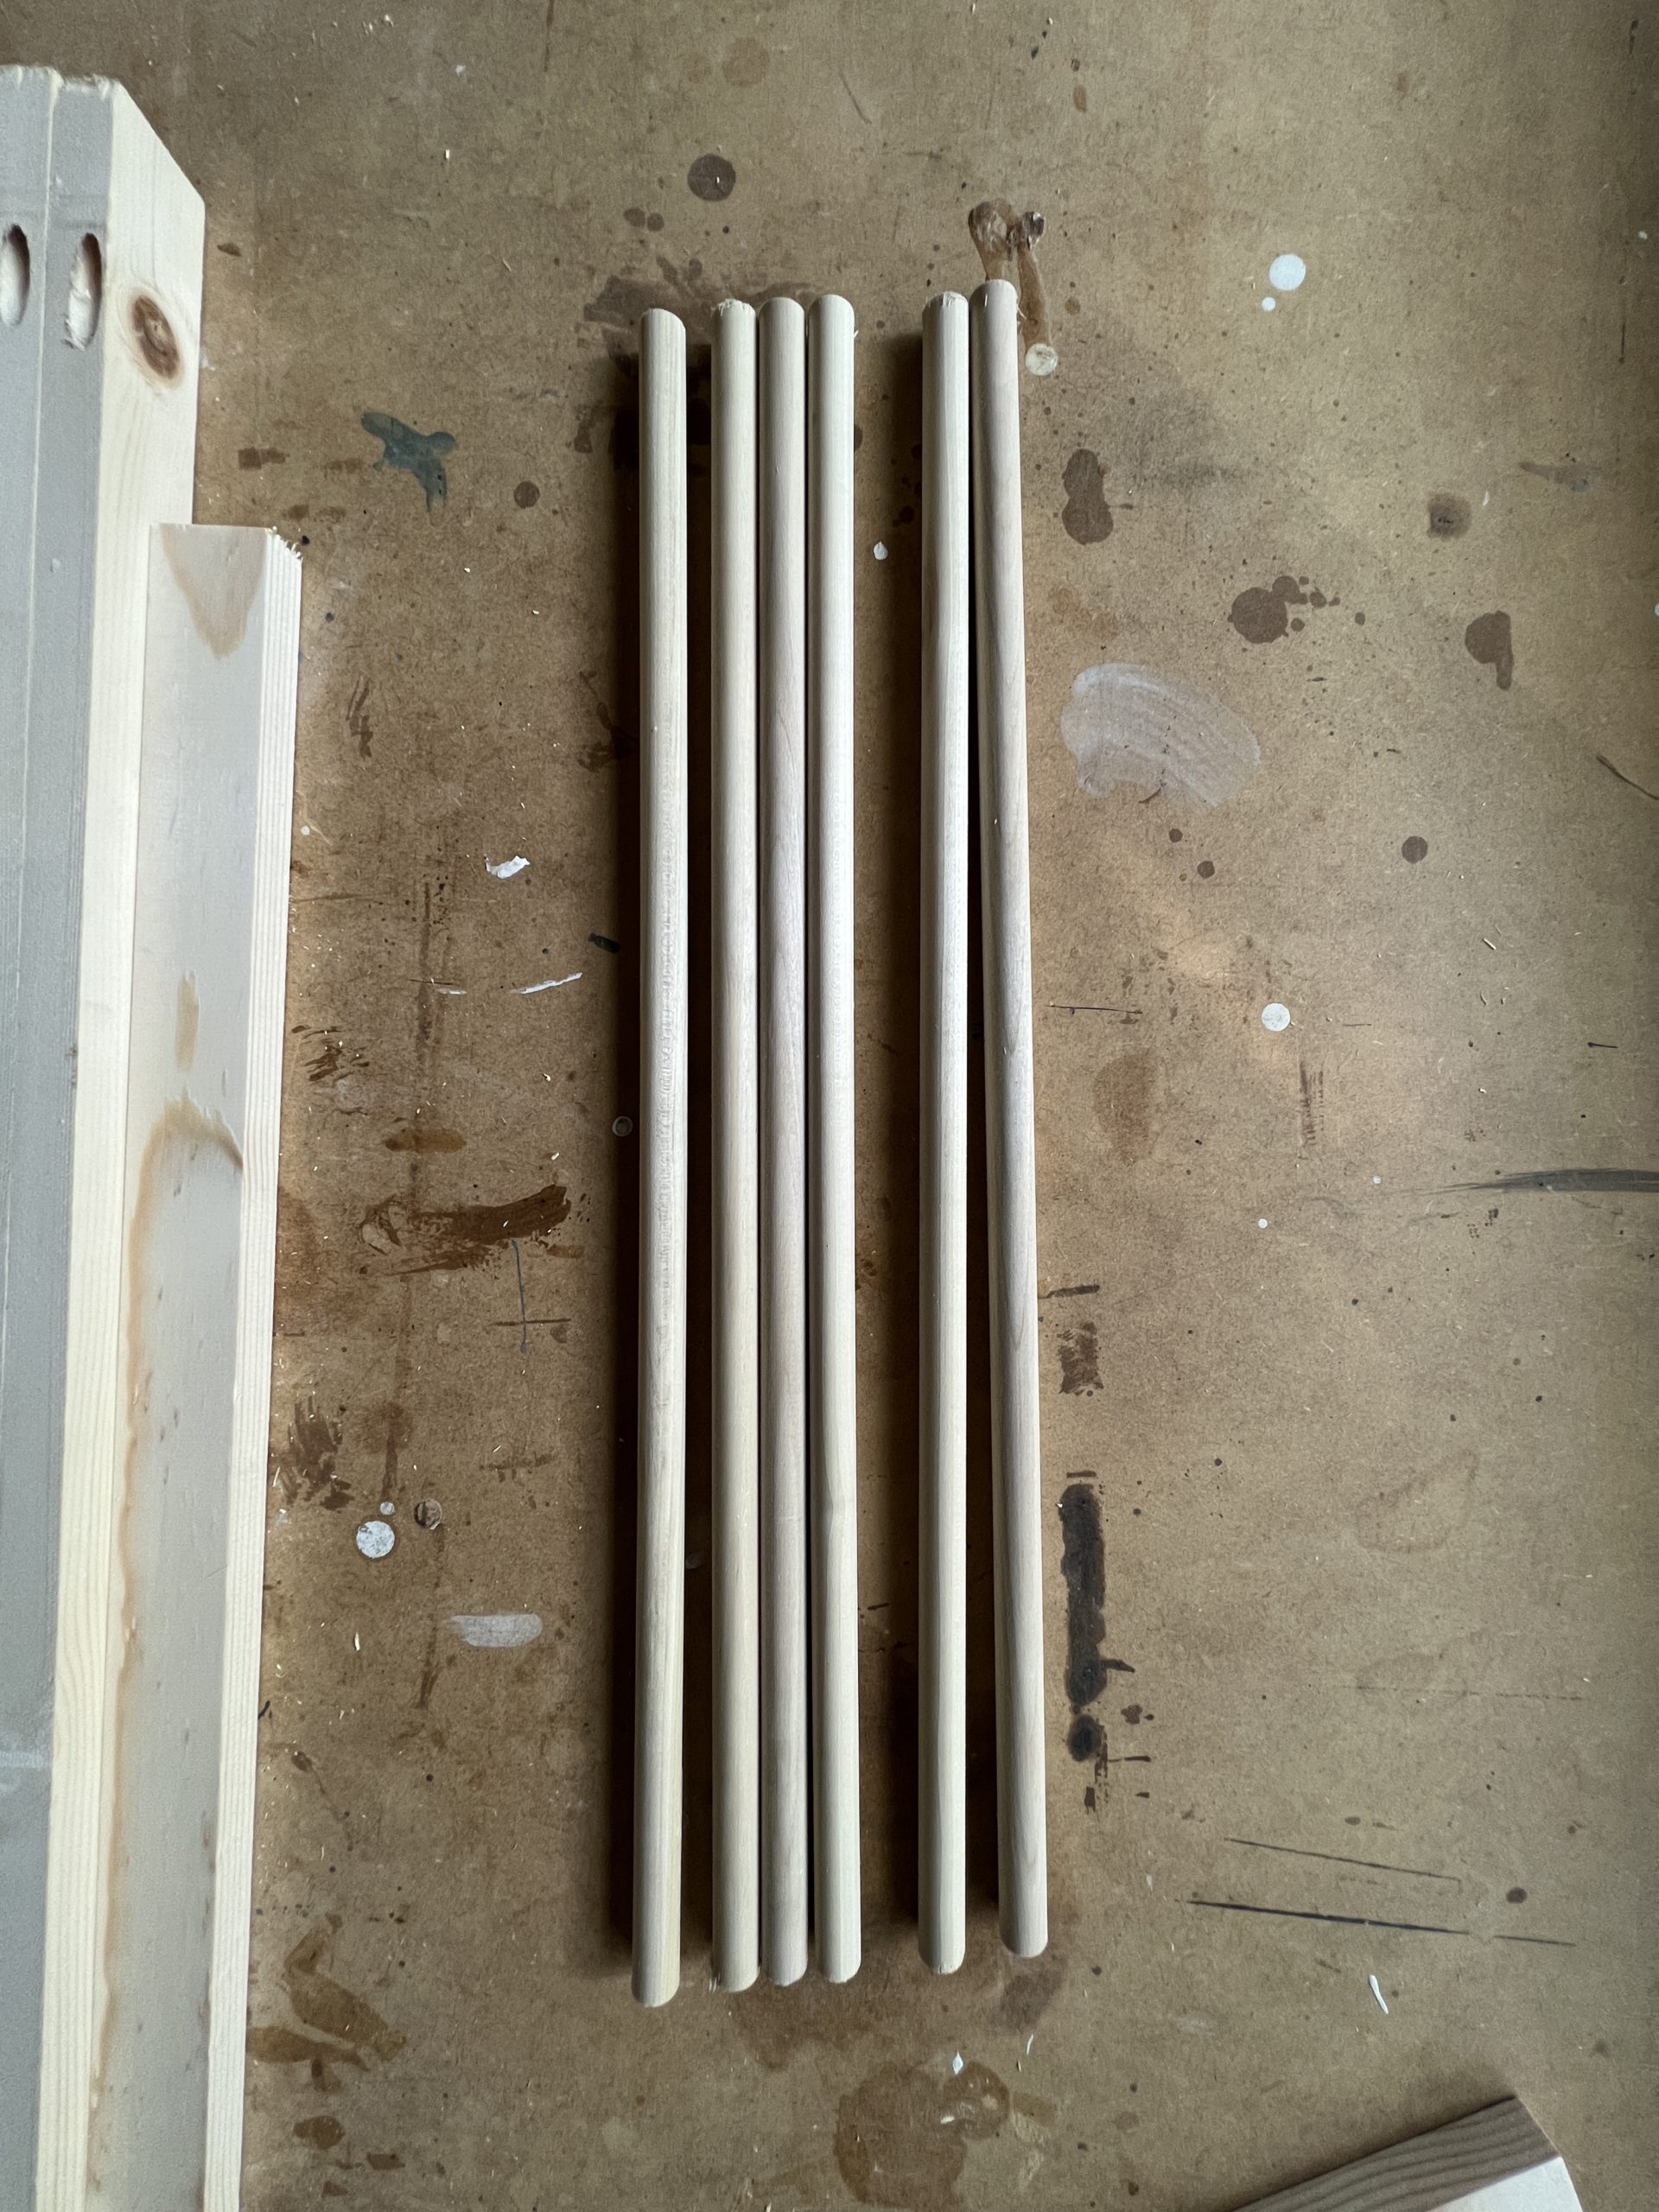
- Dowels- 6- 22.5″ (I waited to paint my dowels until step 8, but it was hard to cut around them once they were already installed. You can go ahead and paint them after you cut them, if you prefer)
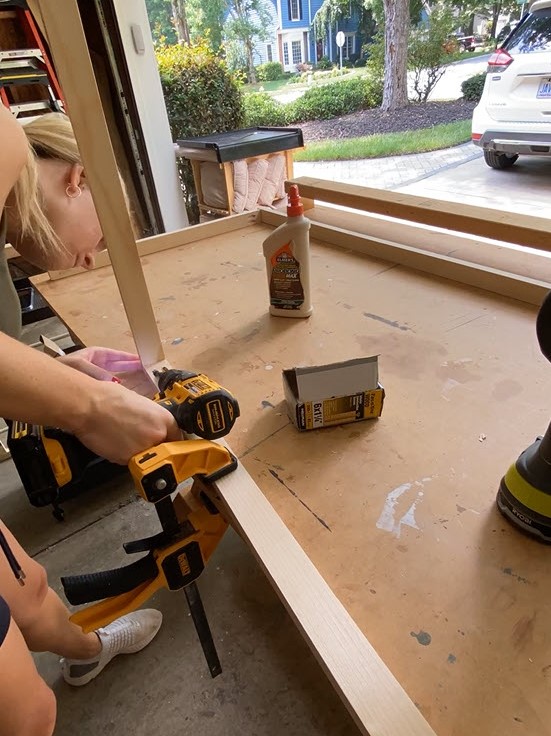
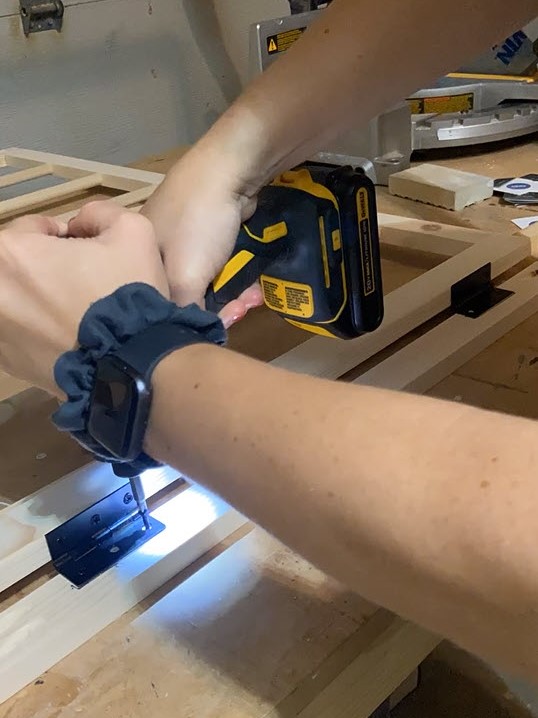
STEP 2: Assemble the outer frame

The outer frame is designed to be deeper than the inner frame, so when assembling the 1×2’s stand them on their narrow edge. Assemble the outer frame out of 2- 38″ and 2- 25″ boards. Make sure to assemble so that the 38″ boards are the entire length and the 25″ boards fit inside of them, to give you the full 38″ x 26.5″ total dimension.
To secure the board together, use glue and pocket hole screws. Pocket hole screws can be tricky to insert while keeping the board correctly placed (even with clamps) so feel free to shoot a single 18g nail into the joint before putting the screws in. Just make sure not to nail through the pocket hole or you won’t be able to use it!

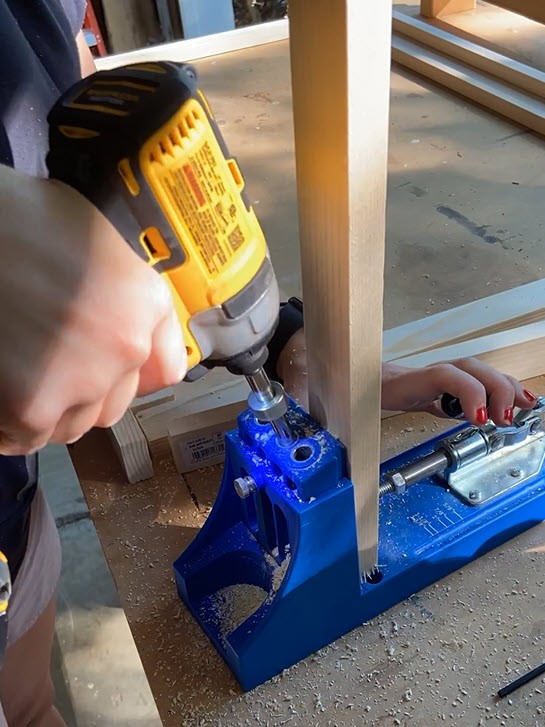
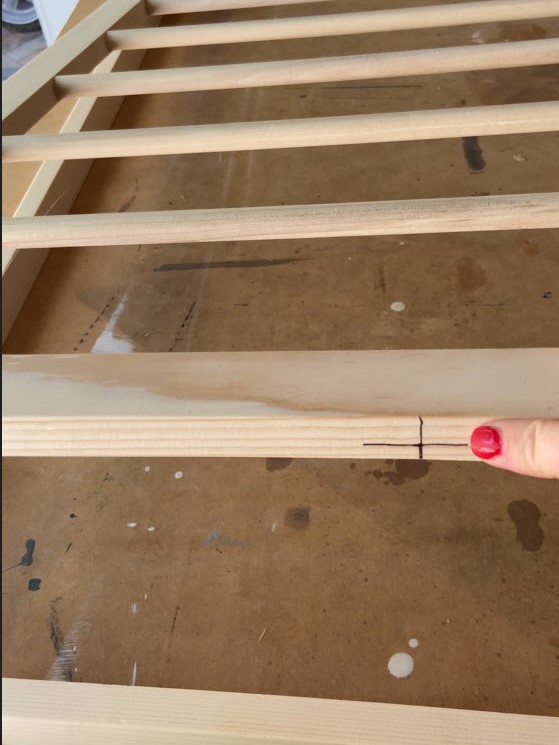
STEP 3: Drill holes for dowels
On the 33.25″ pieces of wood, drill holes for your dowels to fit into the narrow edge of the wood- opposite the side you put your pocket holes. You’ll want a 5/8″ wood boring drill bit to match the size of the dowels. The wood is 1.5″ deep so mark your drill bit with tape around 0.5″ down so you’ll know when to stop drilling.
Mark your board, on center, every 4.75″ for the entire length. With 6 dowels, your marks will be at 4.75″, 9.5″, 14.25″, 19″, 23.75″ and 28.5″.
Clamp your piece into place to ensure it doesn’t move while you’re drilling and drill your holes at the marked spots. Repeat for the second 33.25″ piece.

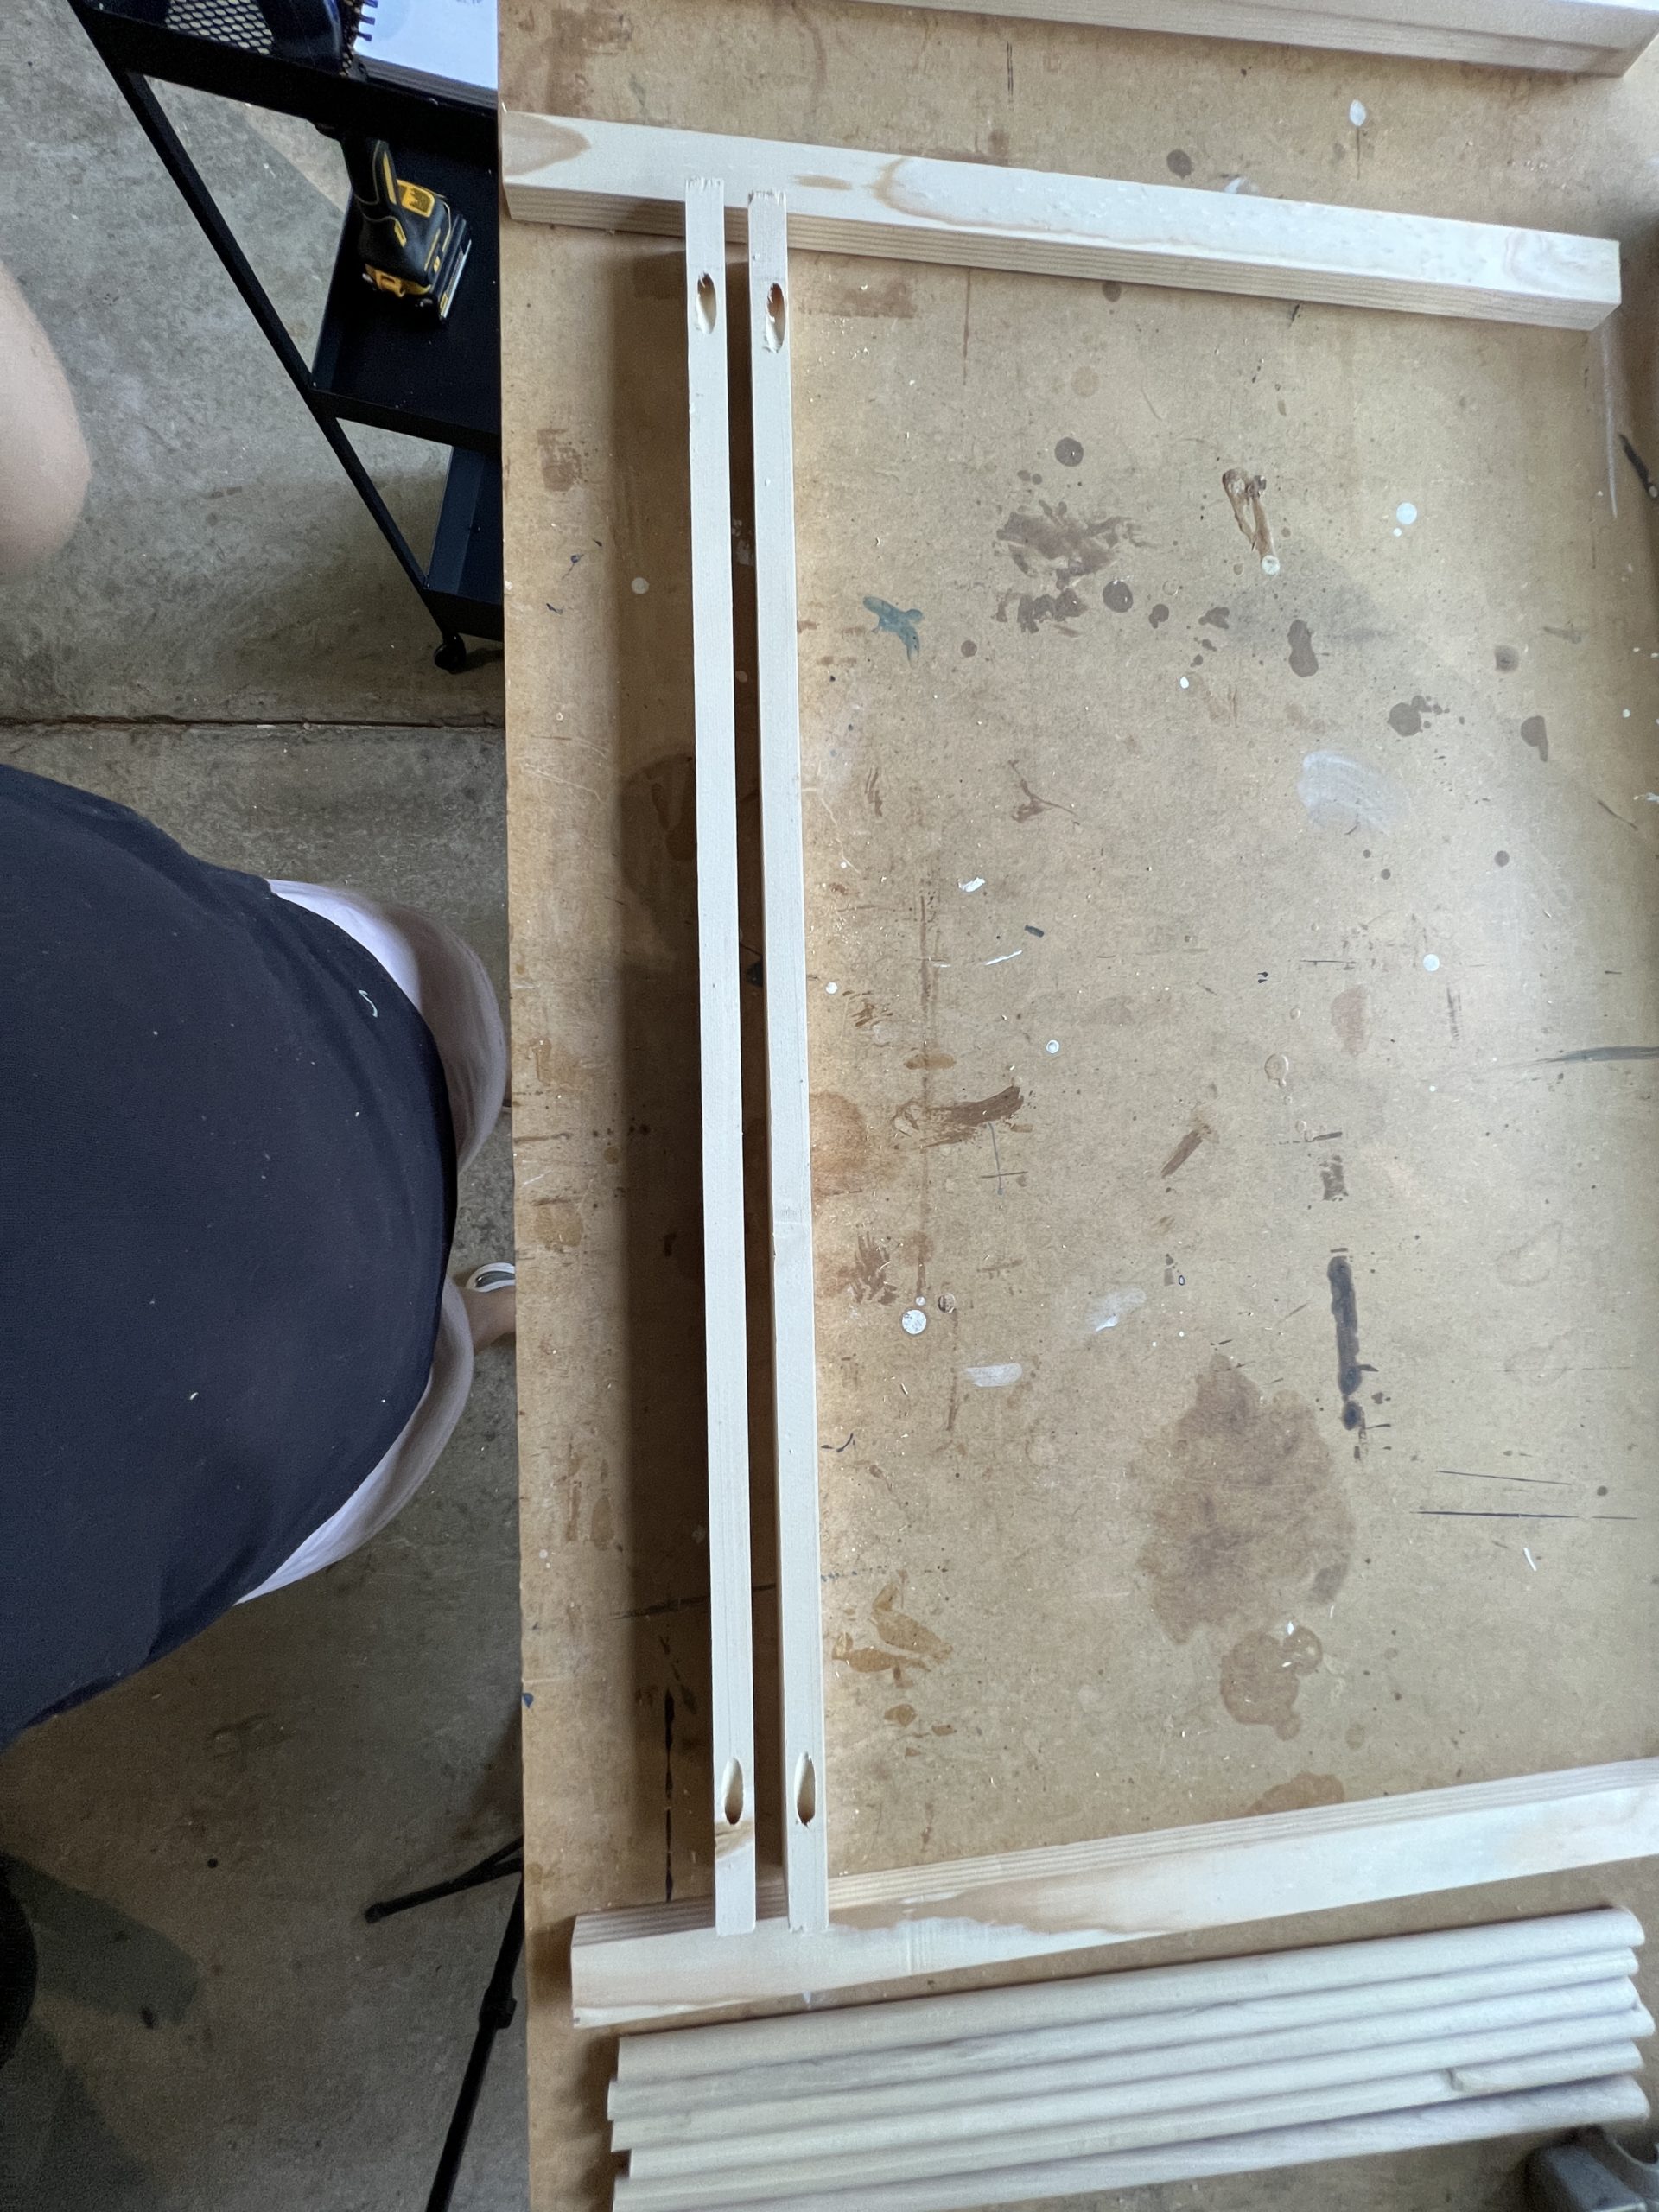
STEP 4: Assemble the inner frame

Join one of the 33.25″ boards to both of the 24.75″ boards using wood glue and pocket hole screws. Make sure the holes drilled for the dowels are facing in. Once you have 3 sides together, clamp the piece to the table and place a drop of glue in each of the holes and insert the dowels.
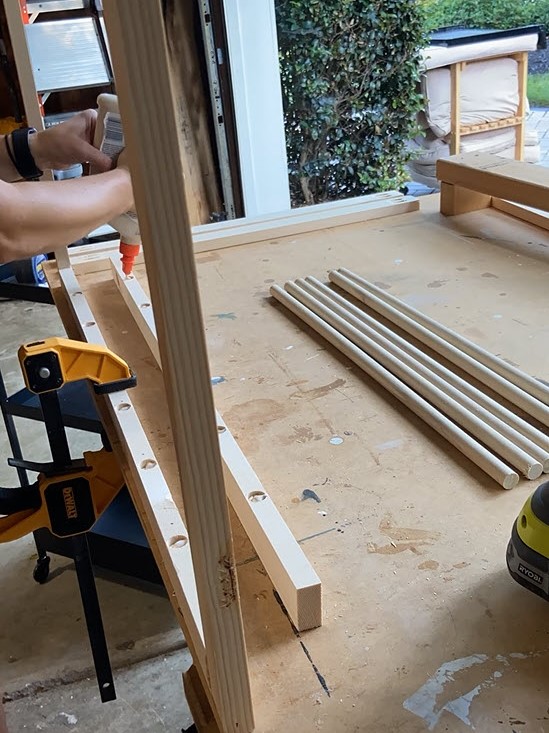
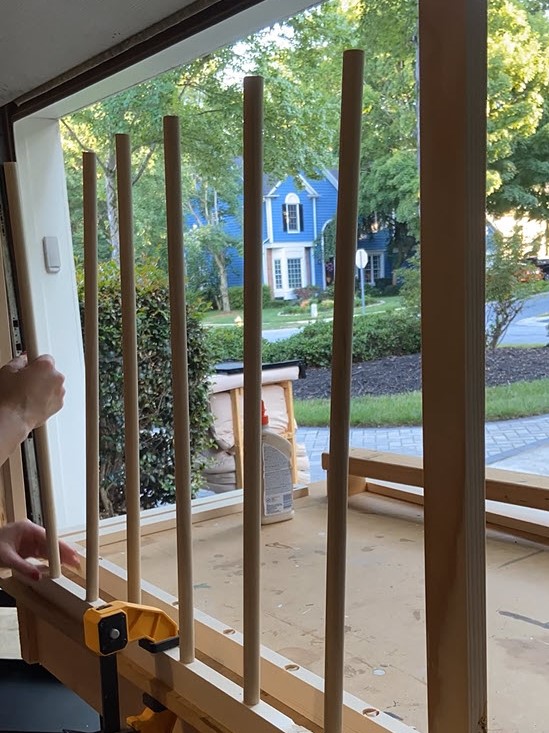
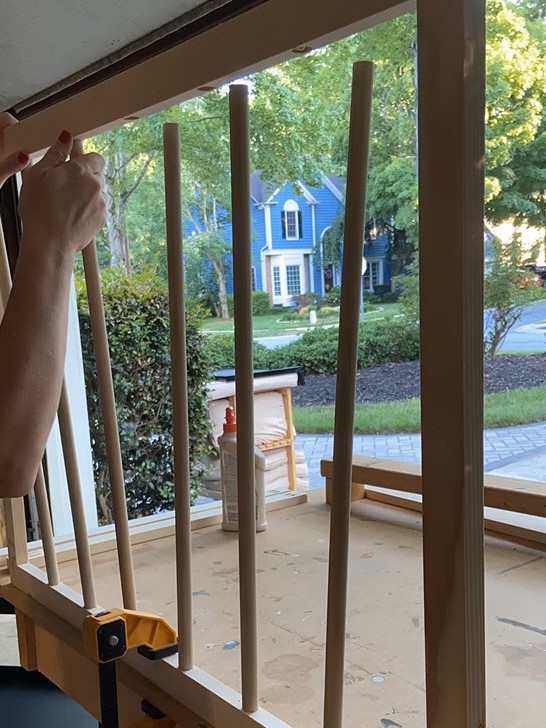

Once your dowels are mostly in and even, add glue to the holes in the other 33.25″ board and line the dowels up with the holes. Use the mallet to get them fully in place. Attach the second 1×2″ with wood glue and pocket hole screws.

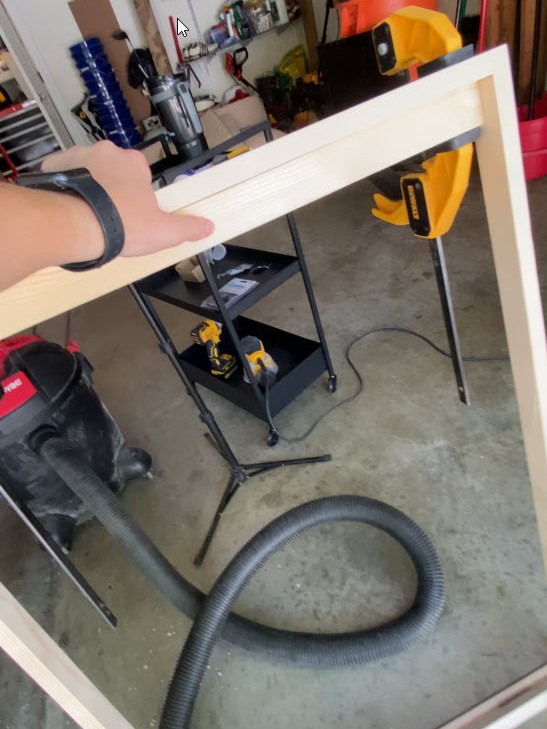
STEP 5: Attach Hinges
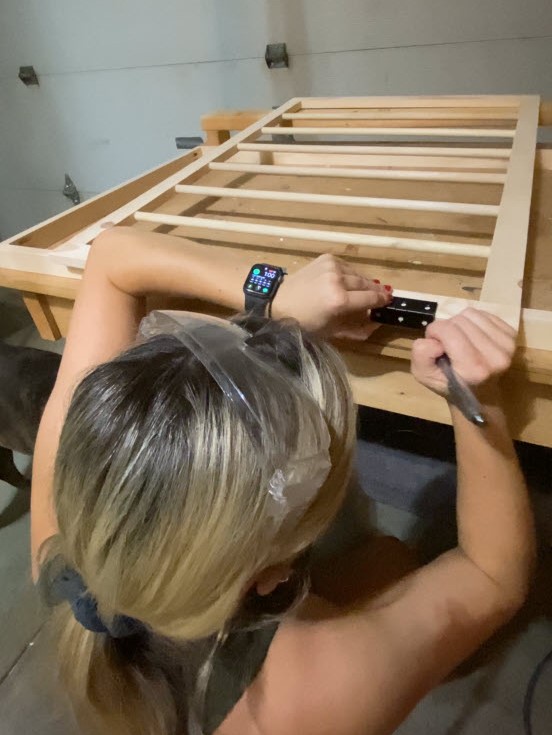
Start by attaching the hinges to the inner frame of the drying rack with the knuckle facing out.
To attach the hinges to the outer frame position your drying rack in the frame facing down. Place both frames on a scrap piece of wood to make sure the front of the two pieces are flush. Mark where the hinges are on the outside frame and attach the hinges to the outside frame.
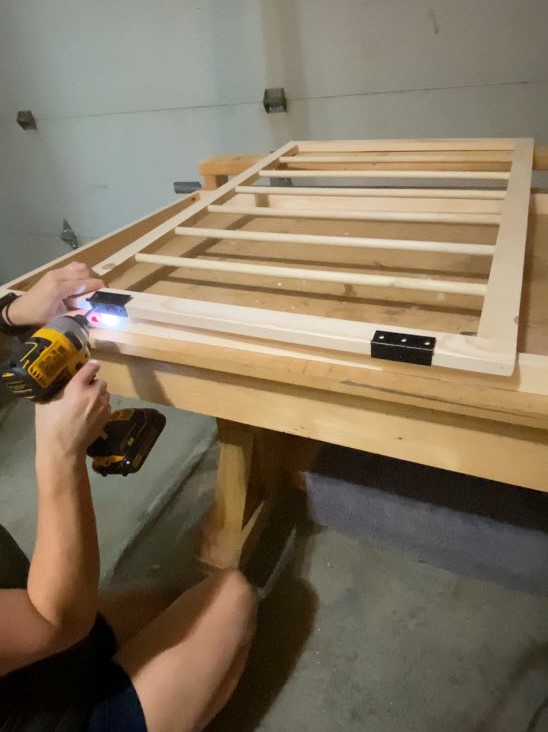
STEP 6: Add Cross Bars and Magnets
Remember when we cut out four 25″ boards but only used two (so far)? Grab those two pieces of wood because we’re going to add them to the inside of the outer frame with 18g nails. Half the width of the outer frame will be taken up with the inner frame, so these cross bar pieces will sit directly behind the inner frame and act as a back plate at the top and the bottom.
Go ahead and add the bottom cross bar but we need to add a magnet inside the top cross bar before we attach it to the frame. Mark the center of the top of the inner frame and the top cross bar then use a 1/8″ drill bit to drill out a cavity inside the wood to place a magnet inside.

Try to drill the cavity for the inner frame, closer to the back edge and for the top cross bar, closer to the front edge. This will decrease the amount of space between the magnets so that they still pull towards each other a decent amount. Add a dab of superglue into the holes and add your magnets.
Make sure that you put your magnets in the correct way so that they attract, not repel.


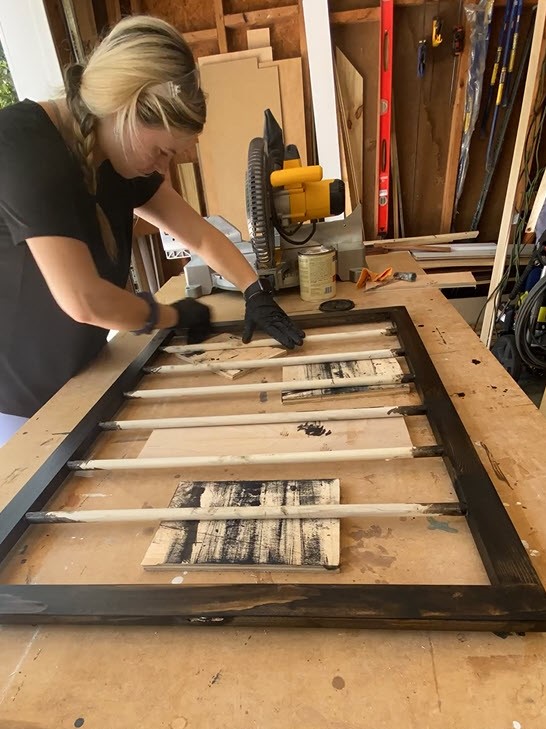
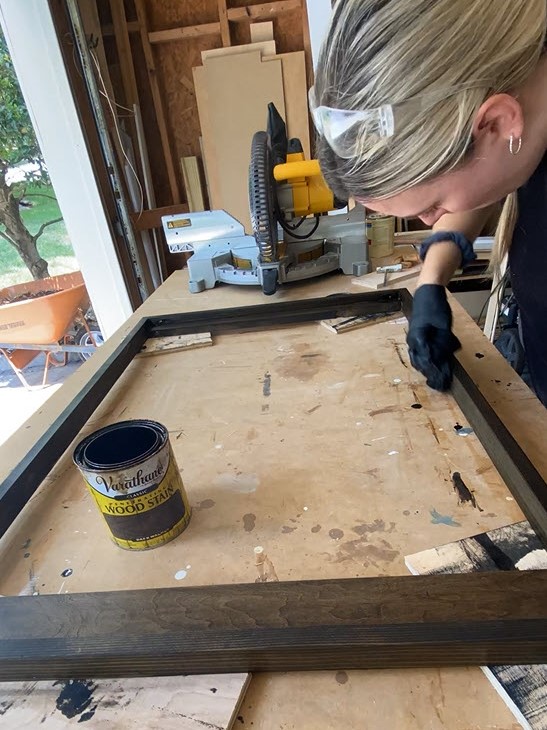
STEP 7: Sand and Stain
Take the hinges off and sand down the whole piece with 220 grit sandpaper. For the dowels that you can’t sand with a hand sander, using a 120 grit sanding sponge and wrap it around the dowels. You can fill the pocket holes with wood filler but I decided to leave mine open since the placement is pretty inconspicuous.
Vacuum after sanding then apply wood conditioner to the frames only so that the stain doesn’t turn out blotchy.
After the wood conditioner has absorbed for 5-10 minutes, apply your wood stain, then wipe down and allow it to dry. Repeat as necessary to achieve your desired shade.
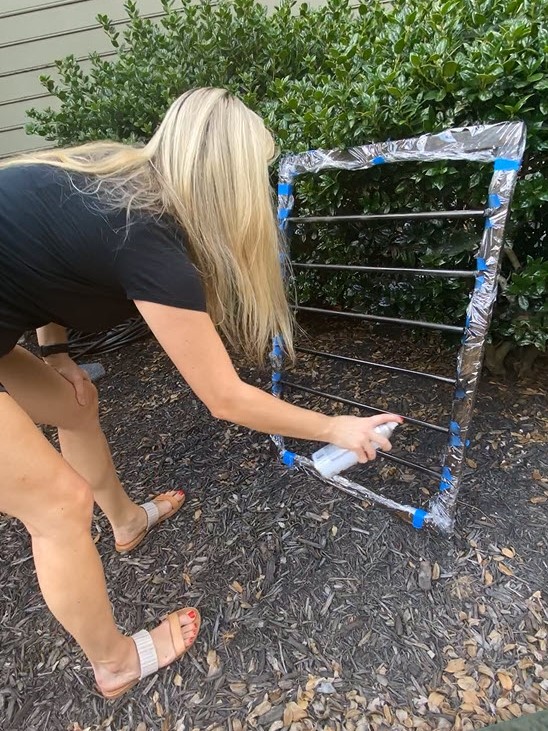
STEP 8: Spray Paint the Dowels
As I mentioned in the cut list notes, I waited to paint my dowels until this point, when they were already installed in the frame. It made it a little bit difficult to paint but I just covered the frame with saran wrap and used a lot of tape around the edges then spray painted the dowels black. I needed to add a little bit of touch up paint once I removed the saran wrap but it wasn’t too bad.

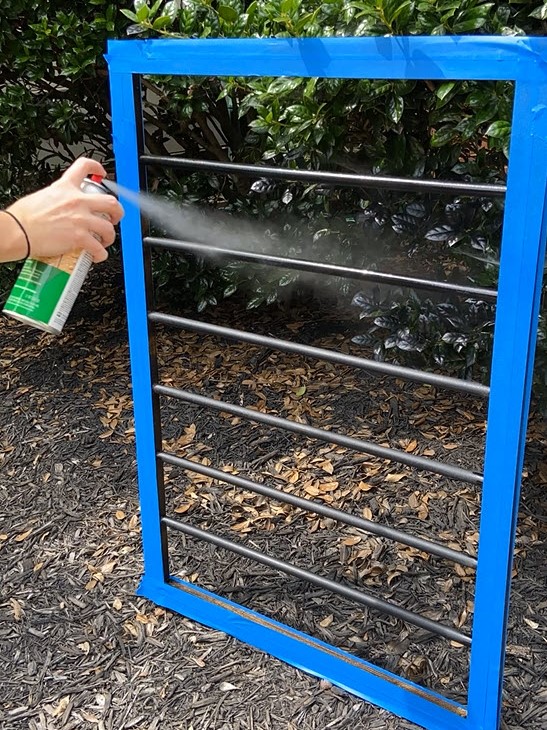
STEP 9: Waterproof Inner Frame & Dowels
Since the purpose for this build is to hold wet clothes, you want to make sure the wood is protected from water. I used this Olympic Water Guard Sealer Spray on the dowels and the inner frame. I wasn’t sure how the spray would affect the look of the wood so I was careful to cover the outside wood part of the frame with painters tape. It didn’t seem to change the look of the wood at all but, better safe than sorry!

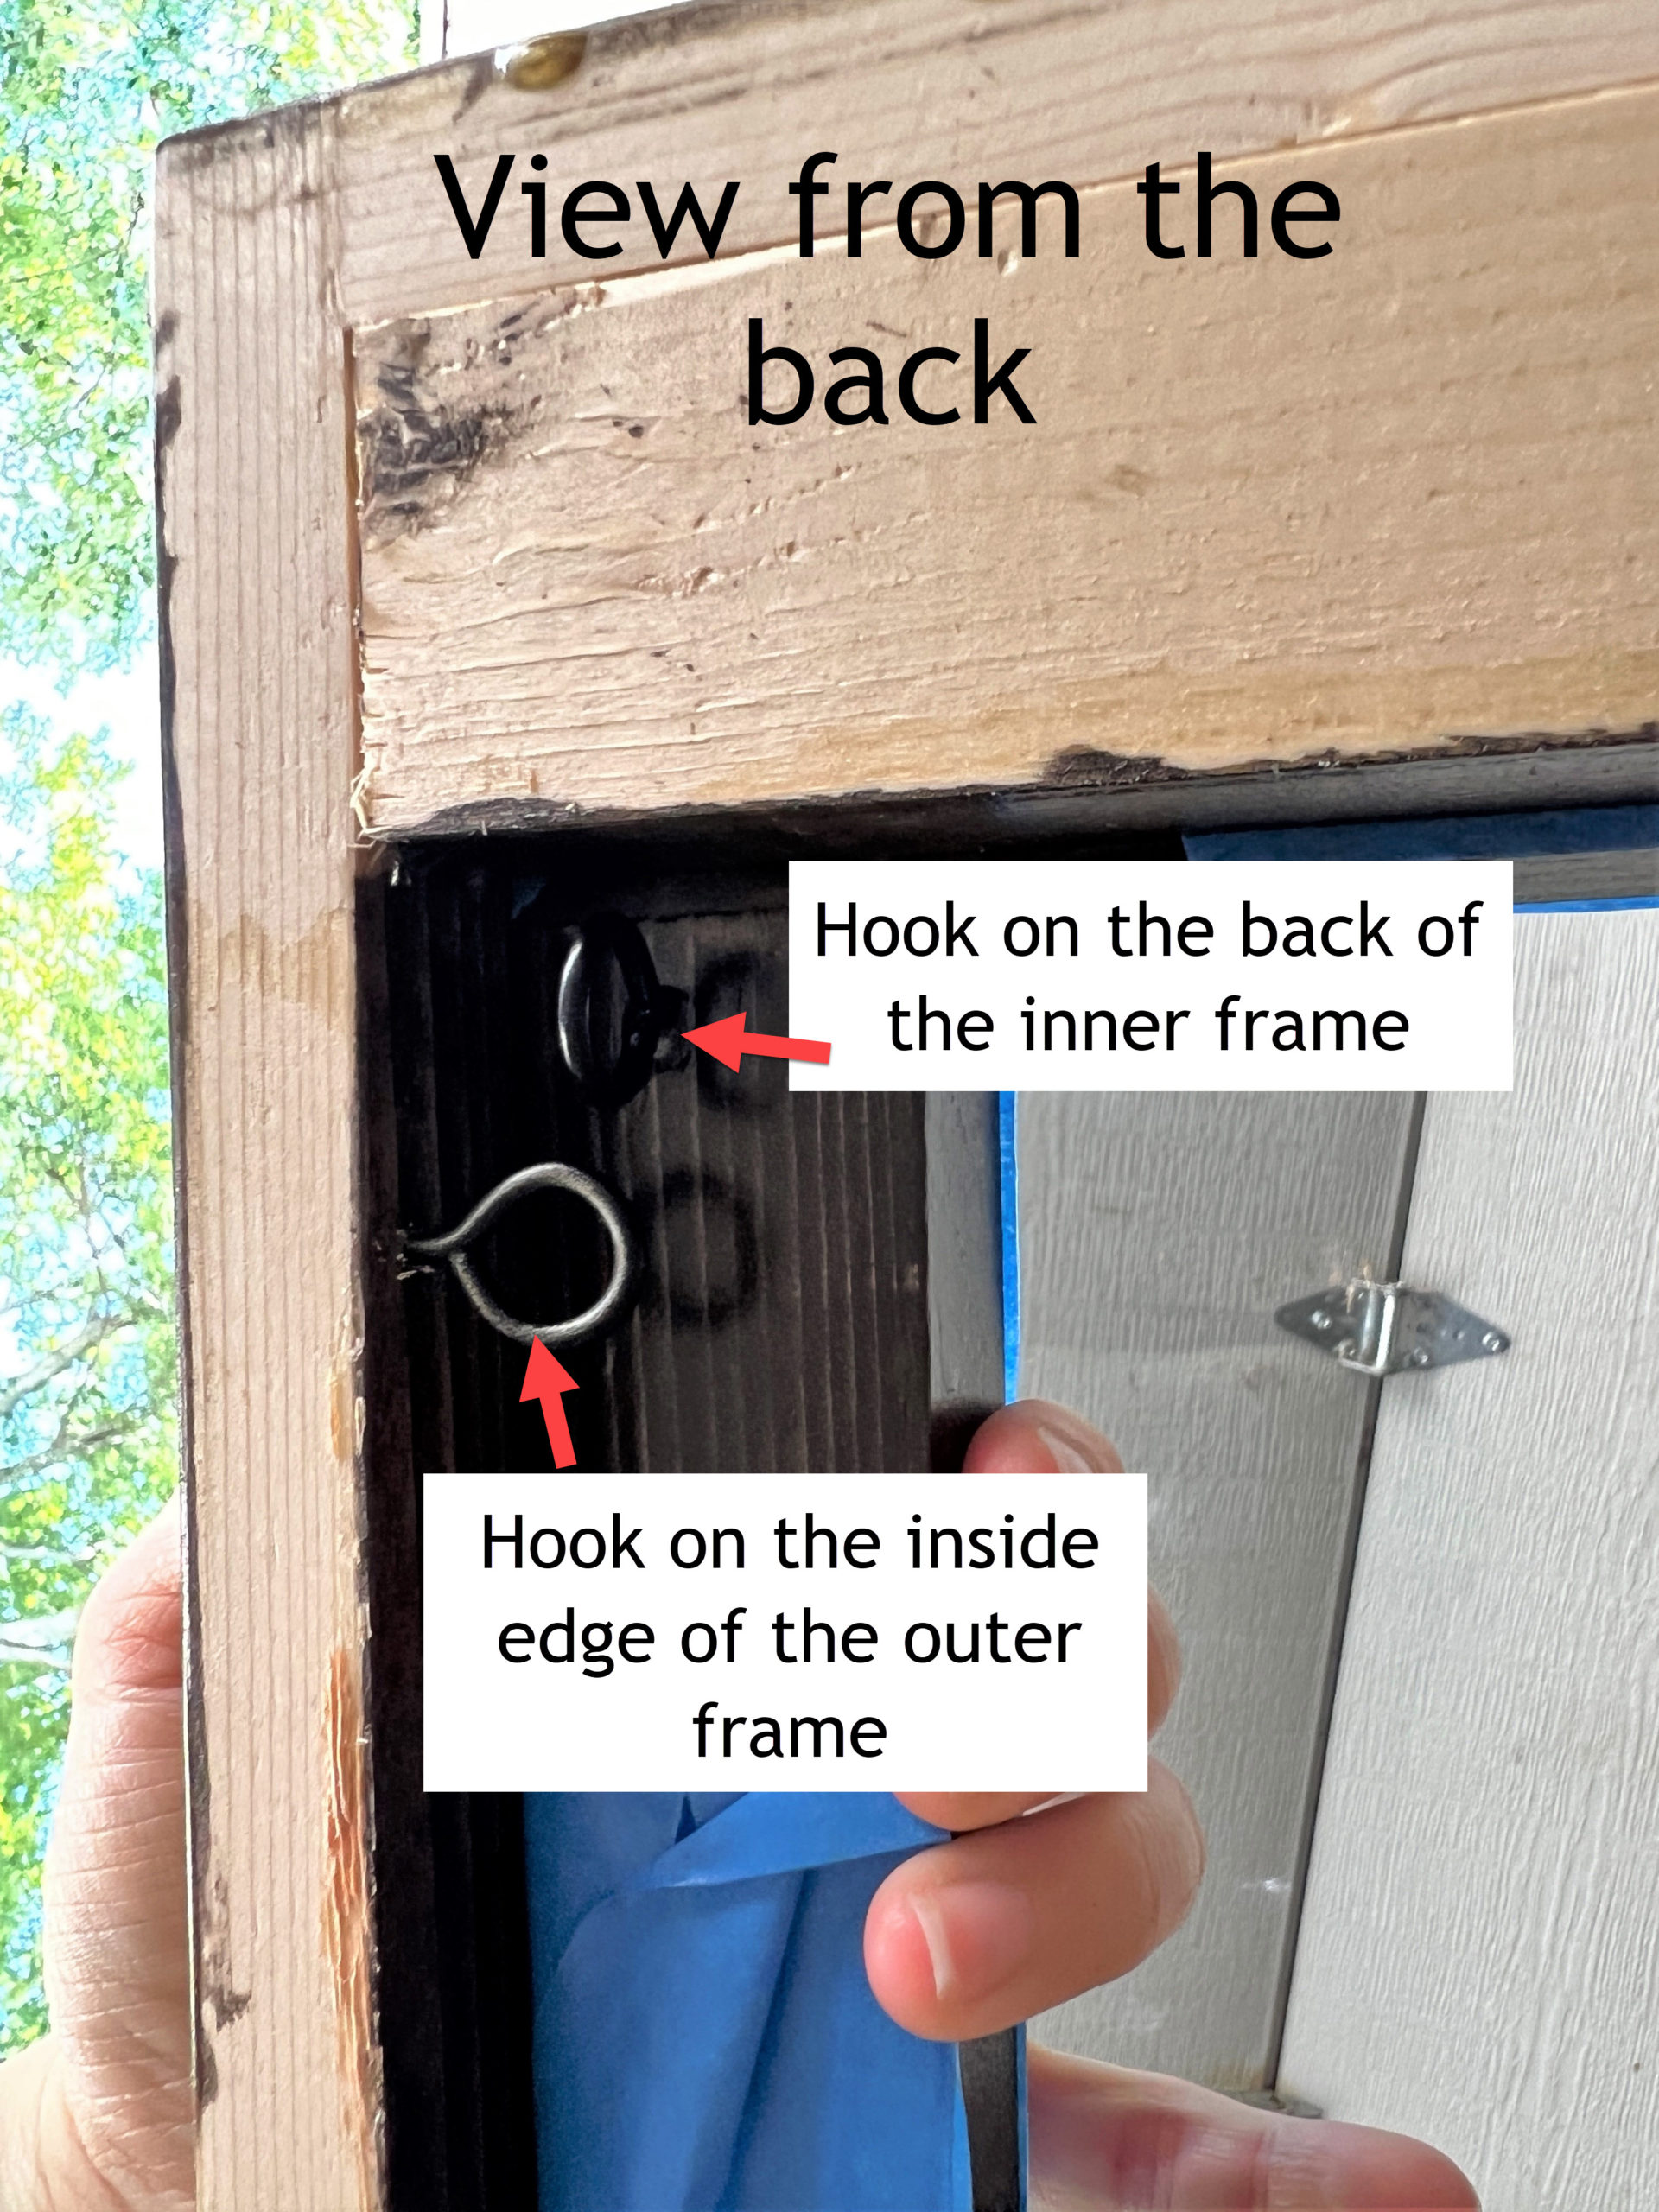
STEP 10: Add Eye Hooks + Chain
Add eye hooks to the back of the inner frame and the inside edges of the outer frame in the locations shown in the picture. When you shut the drying rack, the eye hooks should be close, but not touching. Add a dab of super glue to the threads of the eye hooks before screwing them into the wood to give them some additional support.
For the chain, open up one of the loops with a small pair of pliers and attach it onto the eye hook on the frame. Then open your drying rack to your desired position.


Cut the chain, open up the last link with your pliers, and secure it around your eye hook. Make sure the link it fully closed again. Repeat for the second side, matching the number of links from the first side.

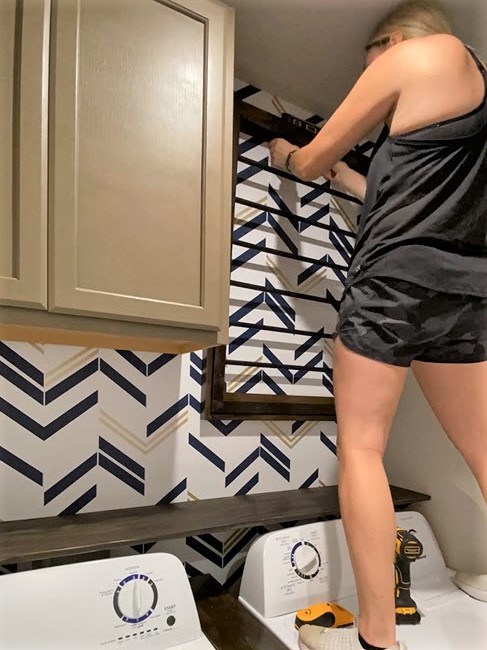
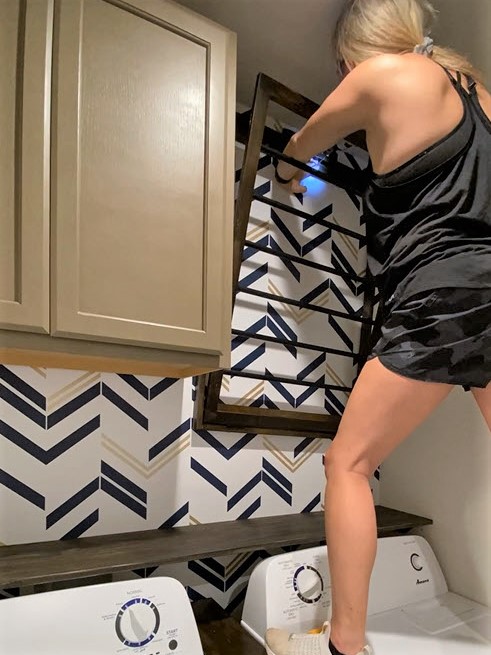
STEP 11: Mount your Drying Rack
To hang the drying rack, find the studs in the wall and screw through both the top and bottom crossbars into those studs. Don’t stress about the screws being centered on the drying rack, it’s more important for you to hit studs! Plus, once the drying rack is closed, the screws will be covered by the inner frame. Make sure to add two screws to each crossbar, with at least one hitting a stud.

DIY Drying Rack Total Cost:
4- 1 x 2 Pine Boards– $22
3- 5/8″ Dowel– $15
Wood Conditioner– $8
Olympic Water Guard Sealer– $8
Hardware: Hinges, Eye Hooks, Chain, Magnet– $32
Total Cost- $98

Now clean your bedroom and put away the laundry that’s been sitting on your bed for 3 days! Click here to see Diff’s full laundry makeover blog!
If you have any additional questions about the DIY Drying Rack, leave me a comment below!
Want to keep up with my newest projects? Come hang out on Instagram and TikTok!
3 Replies to “DIY Wall Mounted Laundry Drying Rack”