How to Install Transitional Picture Frame Molding
(This post contains affiliate links which means I receive a small compensation at no cost to you. As an Amazon Associate I earn from qualifying purchases. You can read more about it here. Thank you for supporting my blog!)
If you’ve been following along, I’ve been working on updating the formal dining room in our 90’s builder home. Last week, I shared the Dining Room Mood Board with all the plans for the space.
My goal is to have better flow with our home style, but also to make this room a more elevated space. I want it to feel Moody and Sophisticated with Traditional elements, but overall more Transitional. I don’t want the room to feel like it only gets used for a few holiday dinners out of the year. A tall order? Maybe not…
So far, all of my home projects have been pretty casual and based off necessity. They’ve been things we needed to update to make our lives easier- better function. This dining room is the first real passion project where I felt I had the opportunity to play around a little more, guide myself by the style that I wanted our home to become.
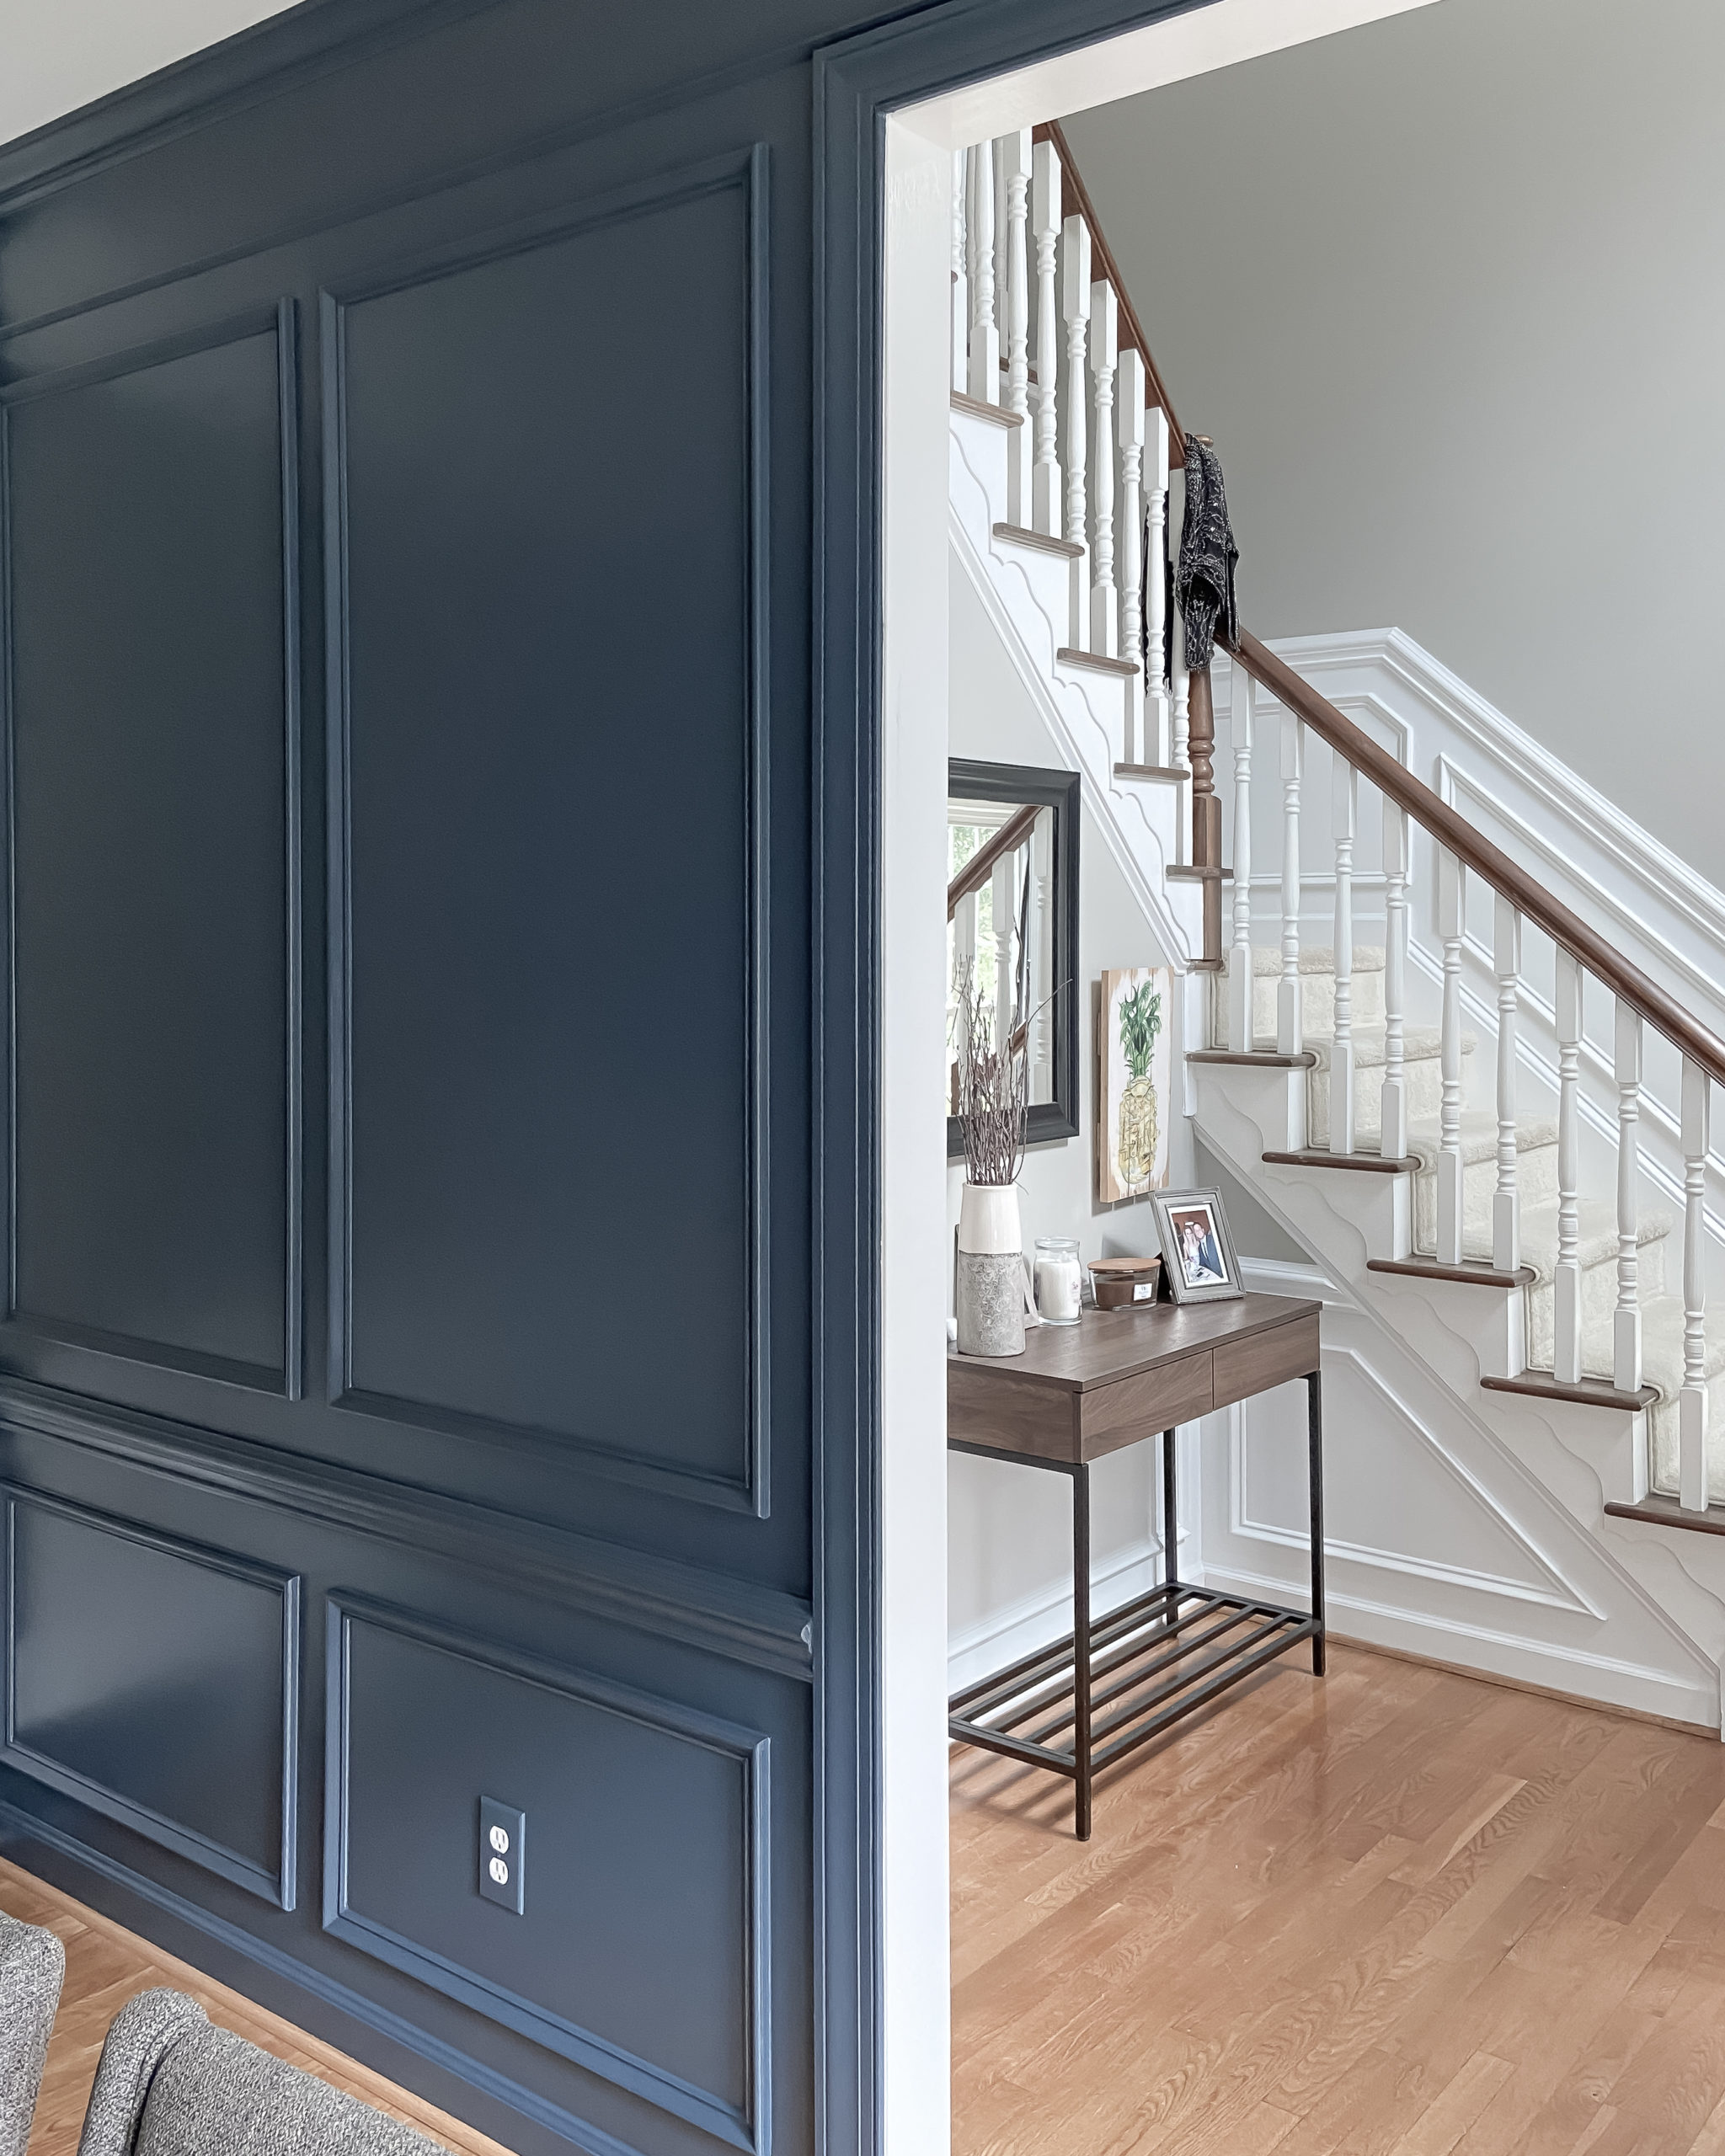
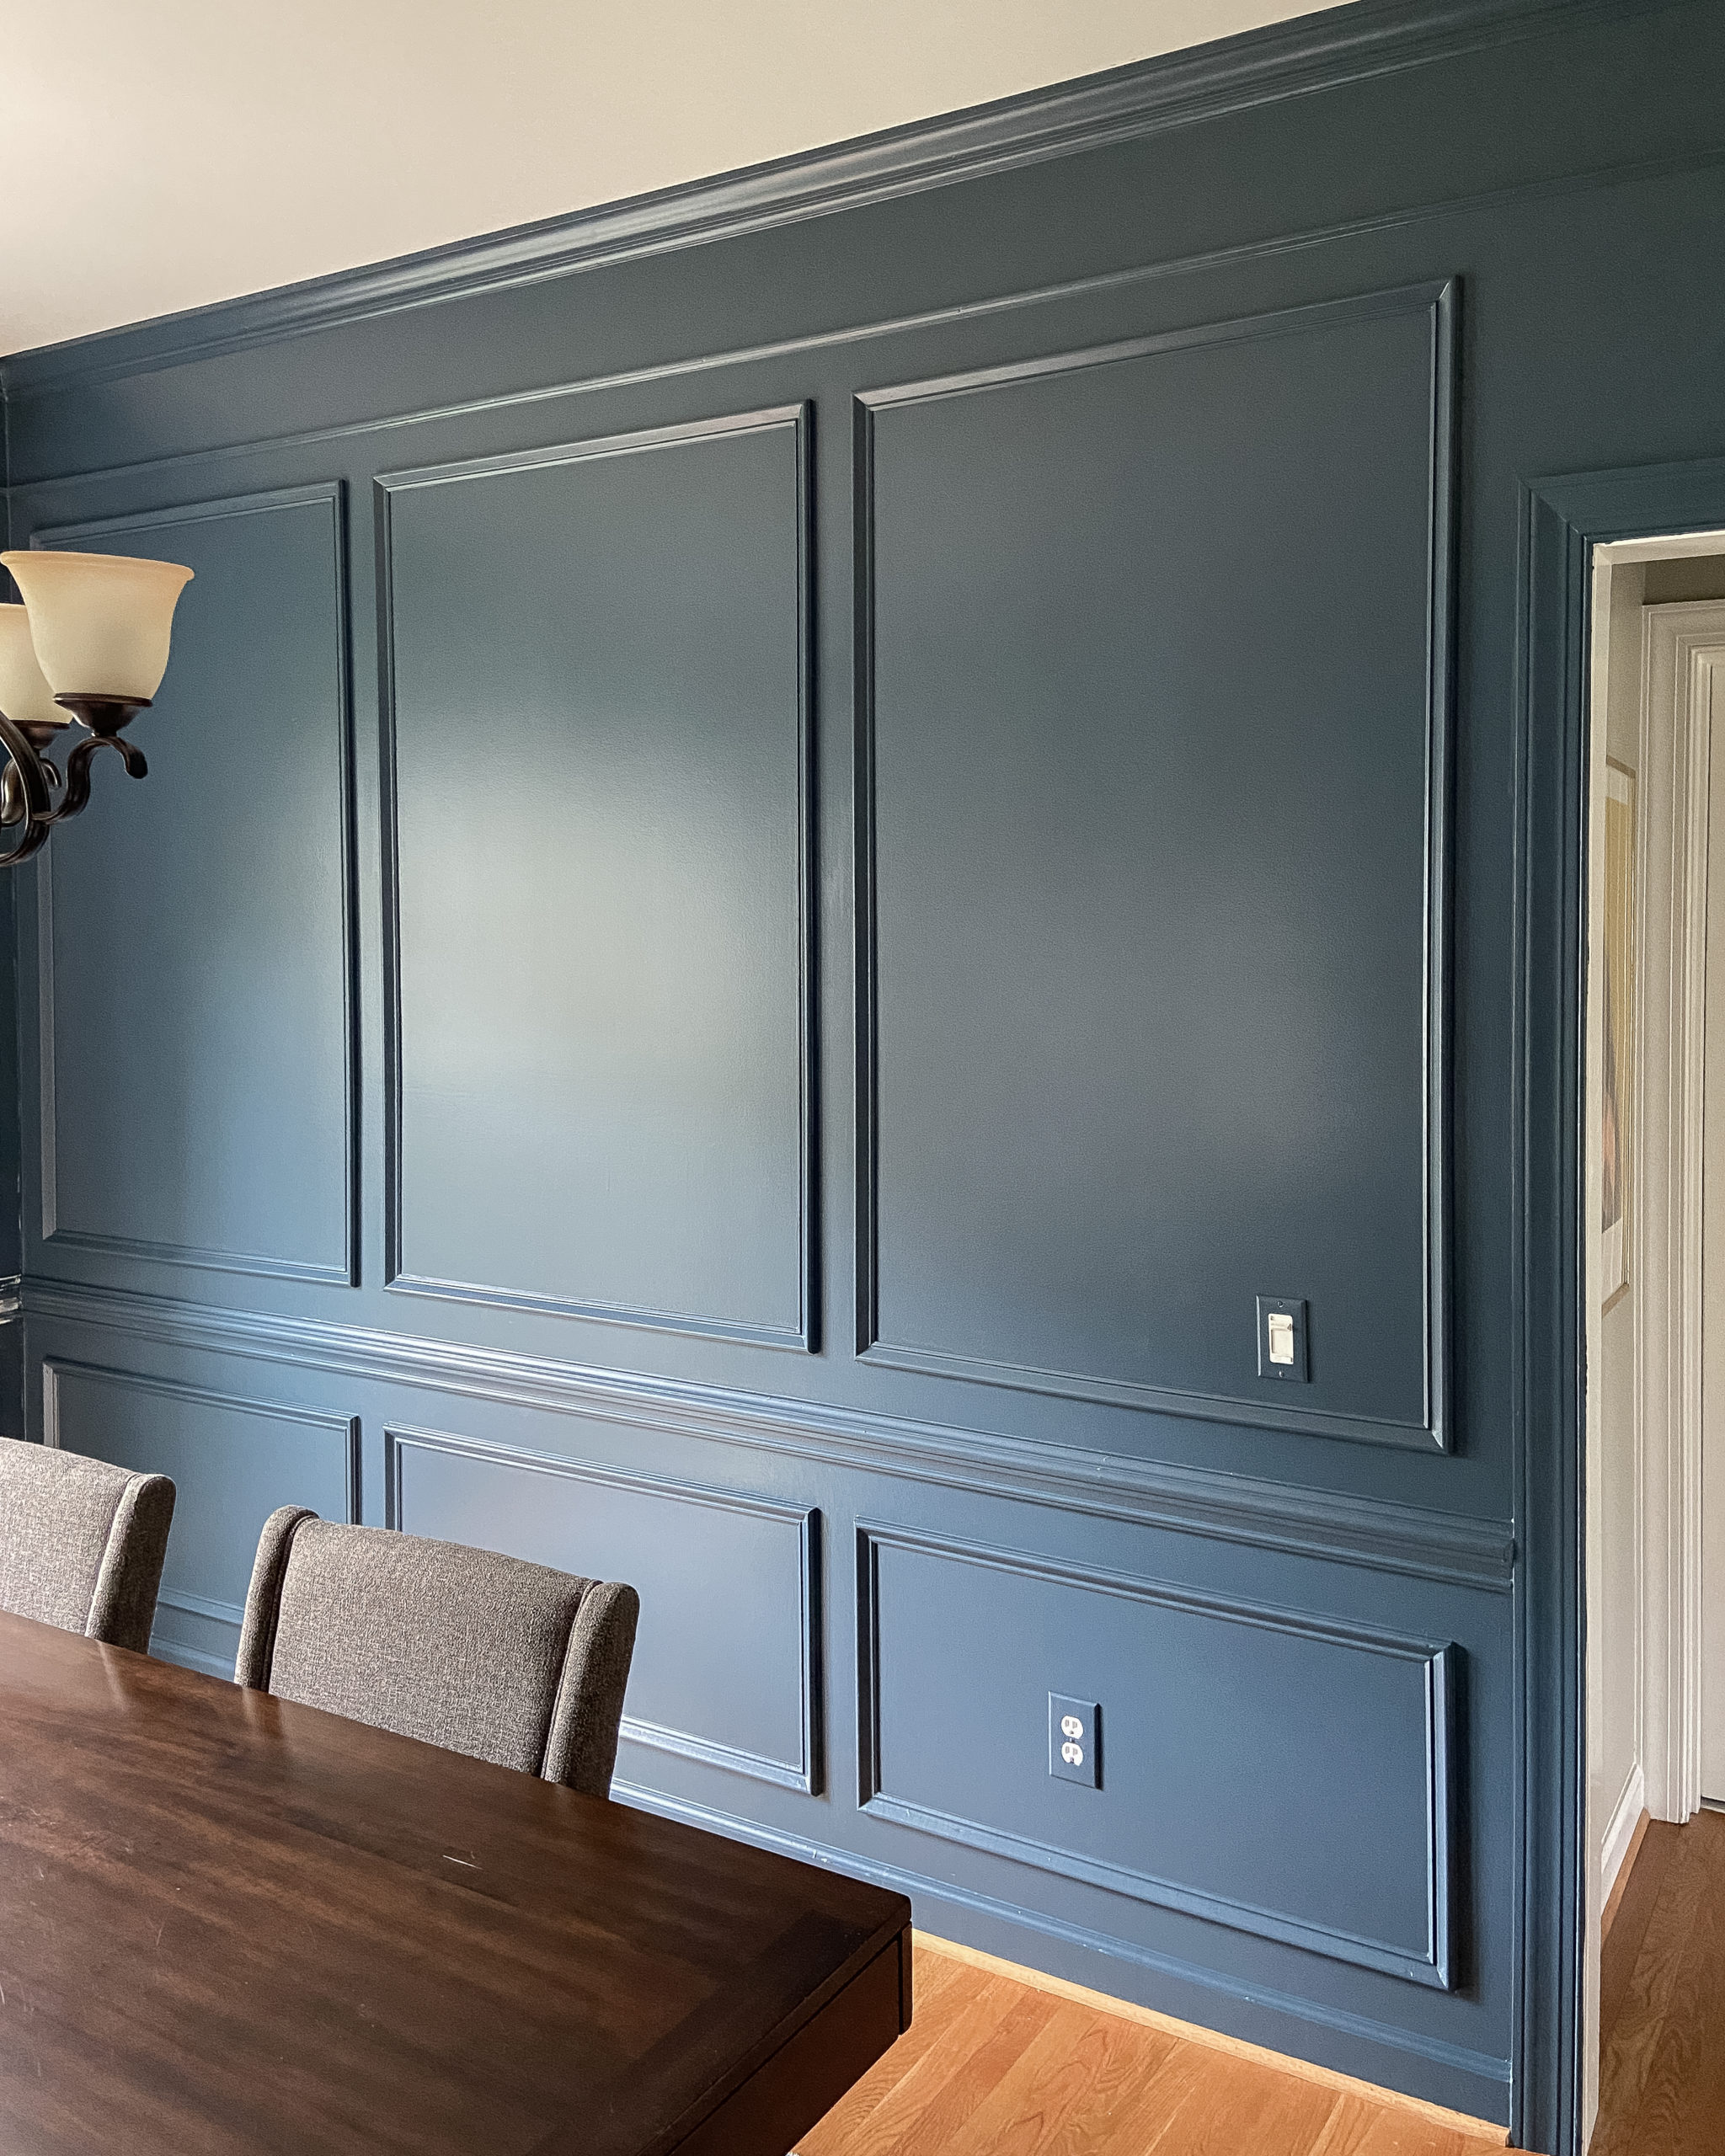
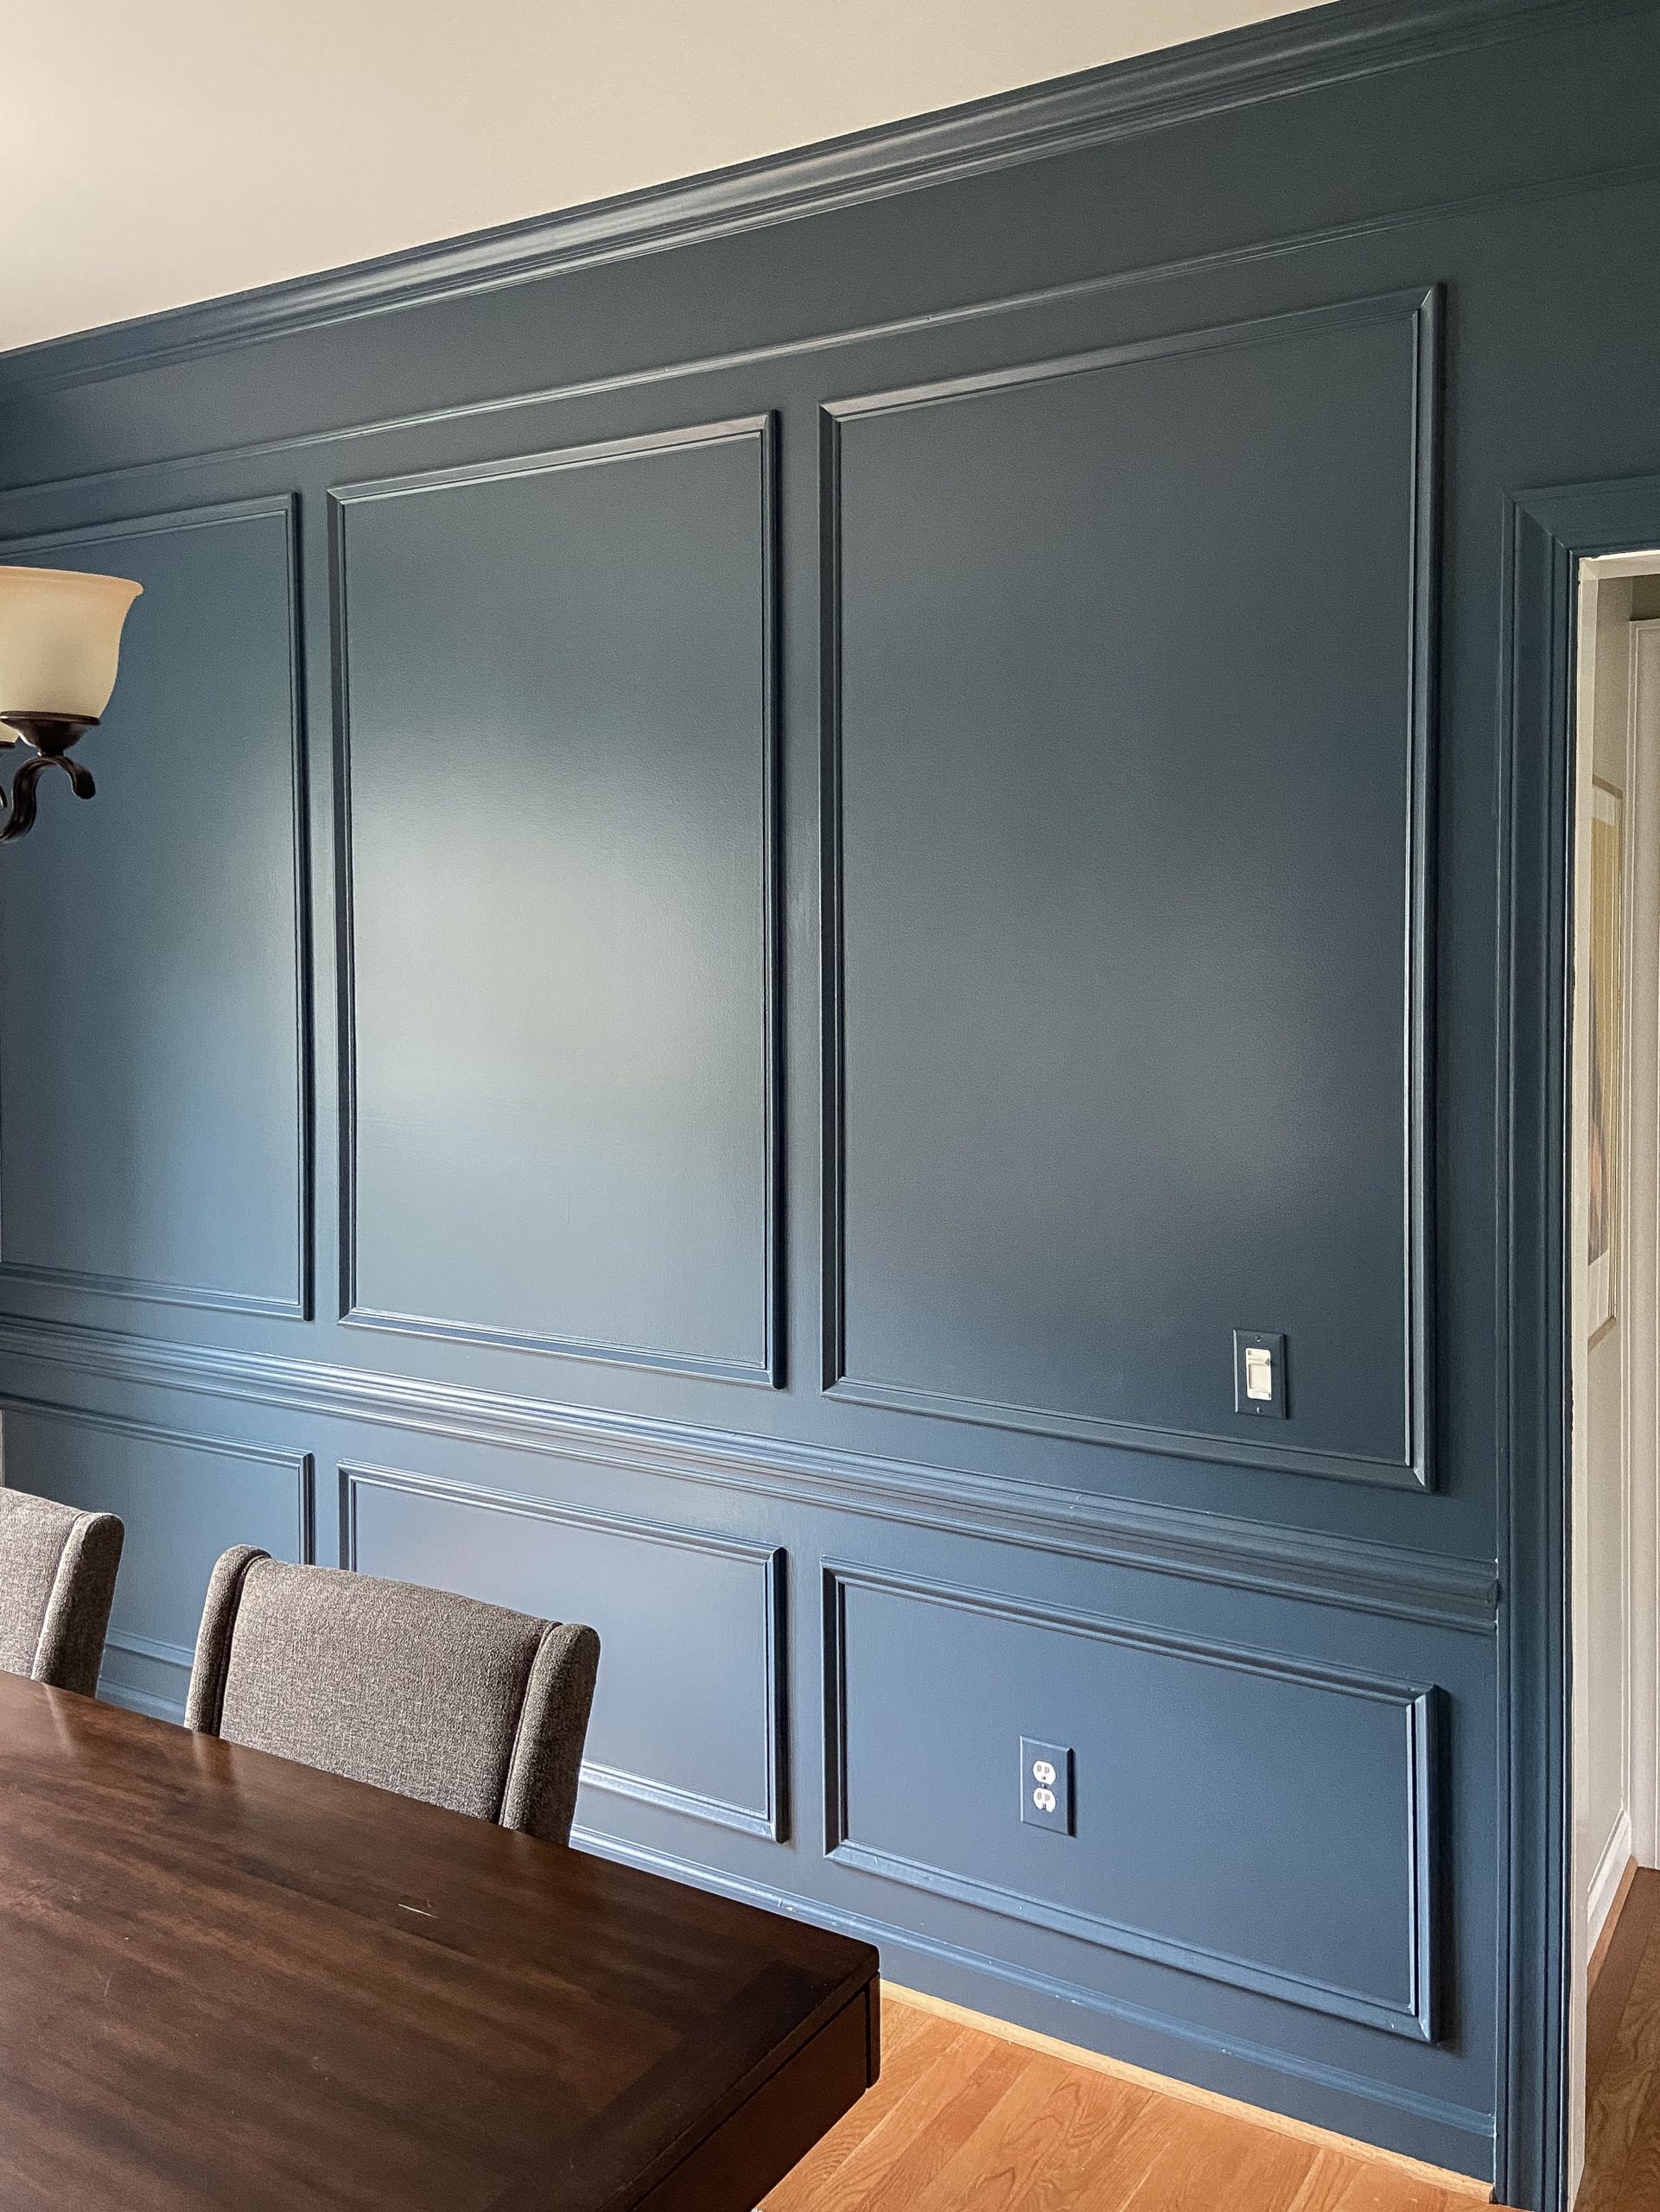
Lately, there’s been a huge uptick in full wall picture frame molding on social media and I’m here for it. But it’s not just a trend- this is a timeless look that has been used in homes in all different ways since the 1600’s. It’s a staple in Traditional style and helps elevate a room by creating charm and interest without making it too busy. By working in some more modern elements- like clean-lined furniture, a matte black light fixture and light curtains it’s the perfect formula for a sophisticated and updated Transitional style that I model my home after.
If you (or your home) has been craving a little additional texture and a more formal, elevated look in any room, this picture frame molding might be just the ticket!
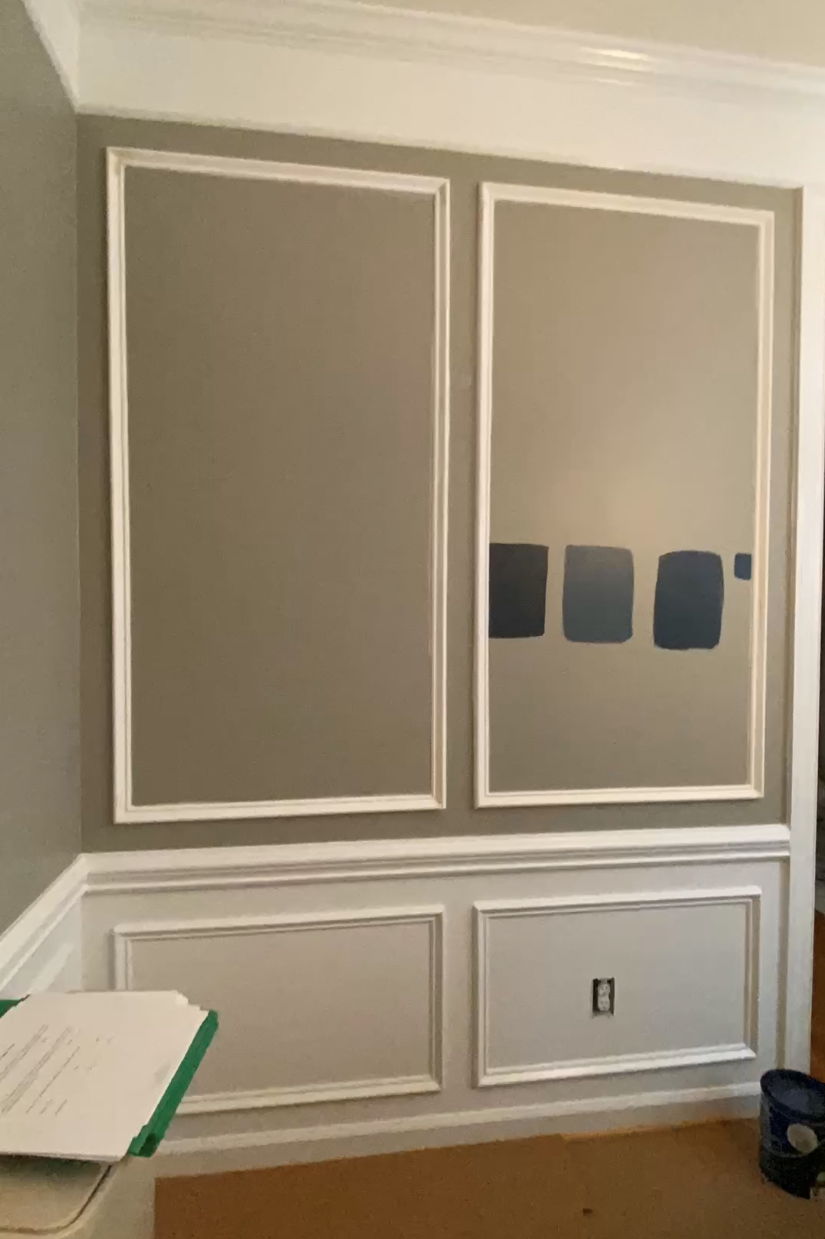
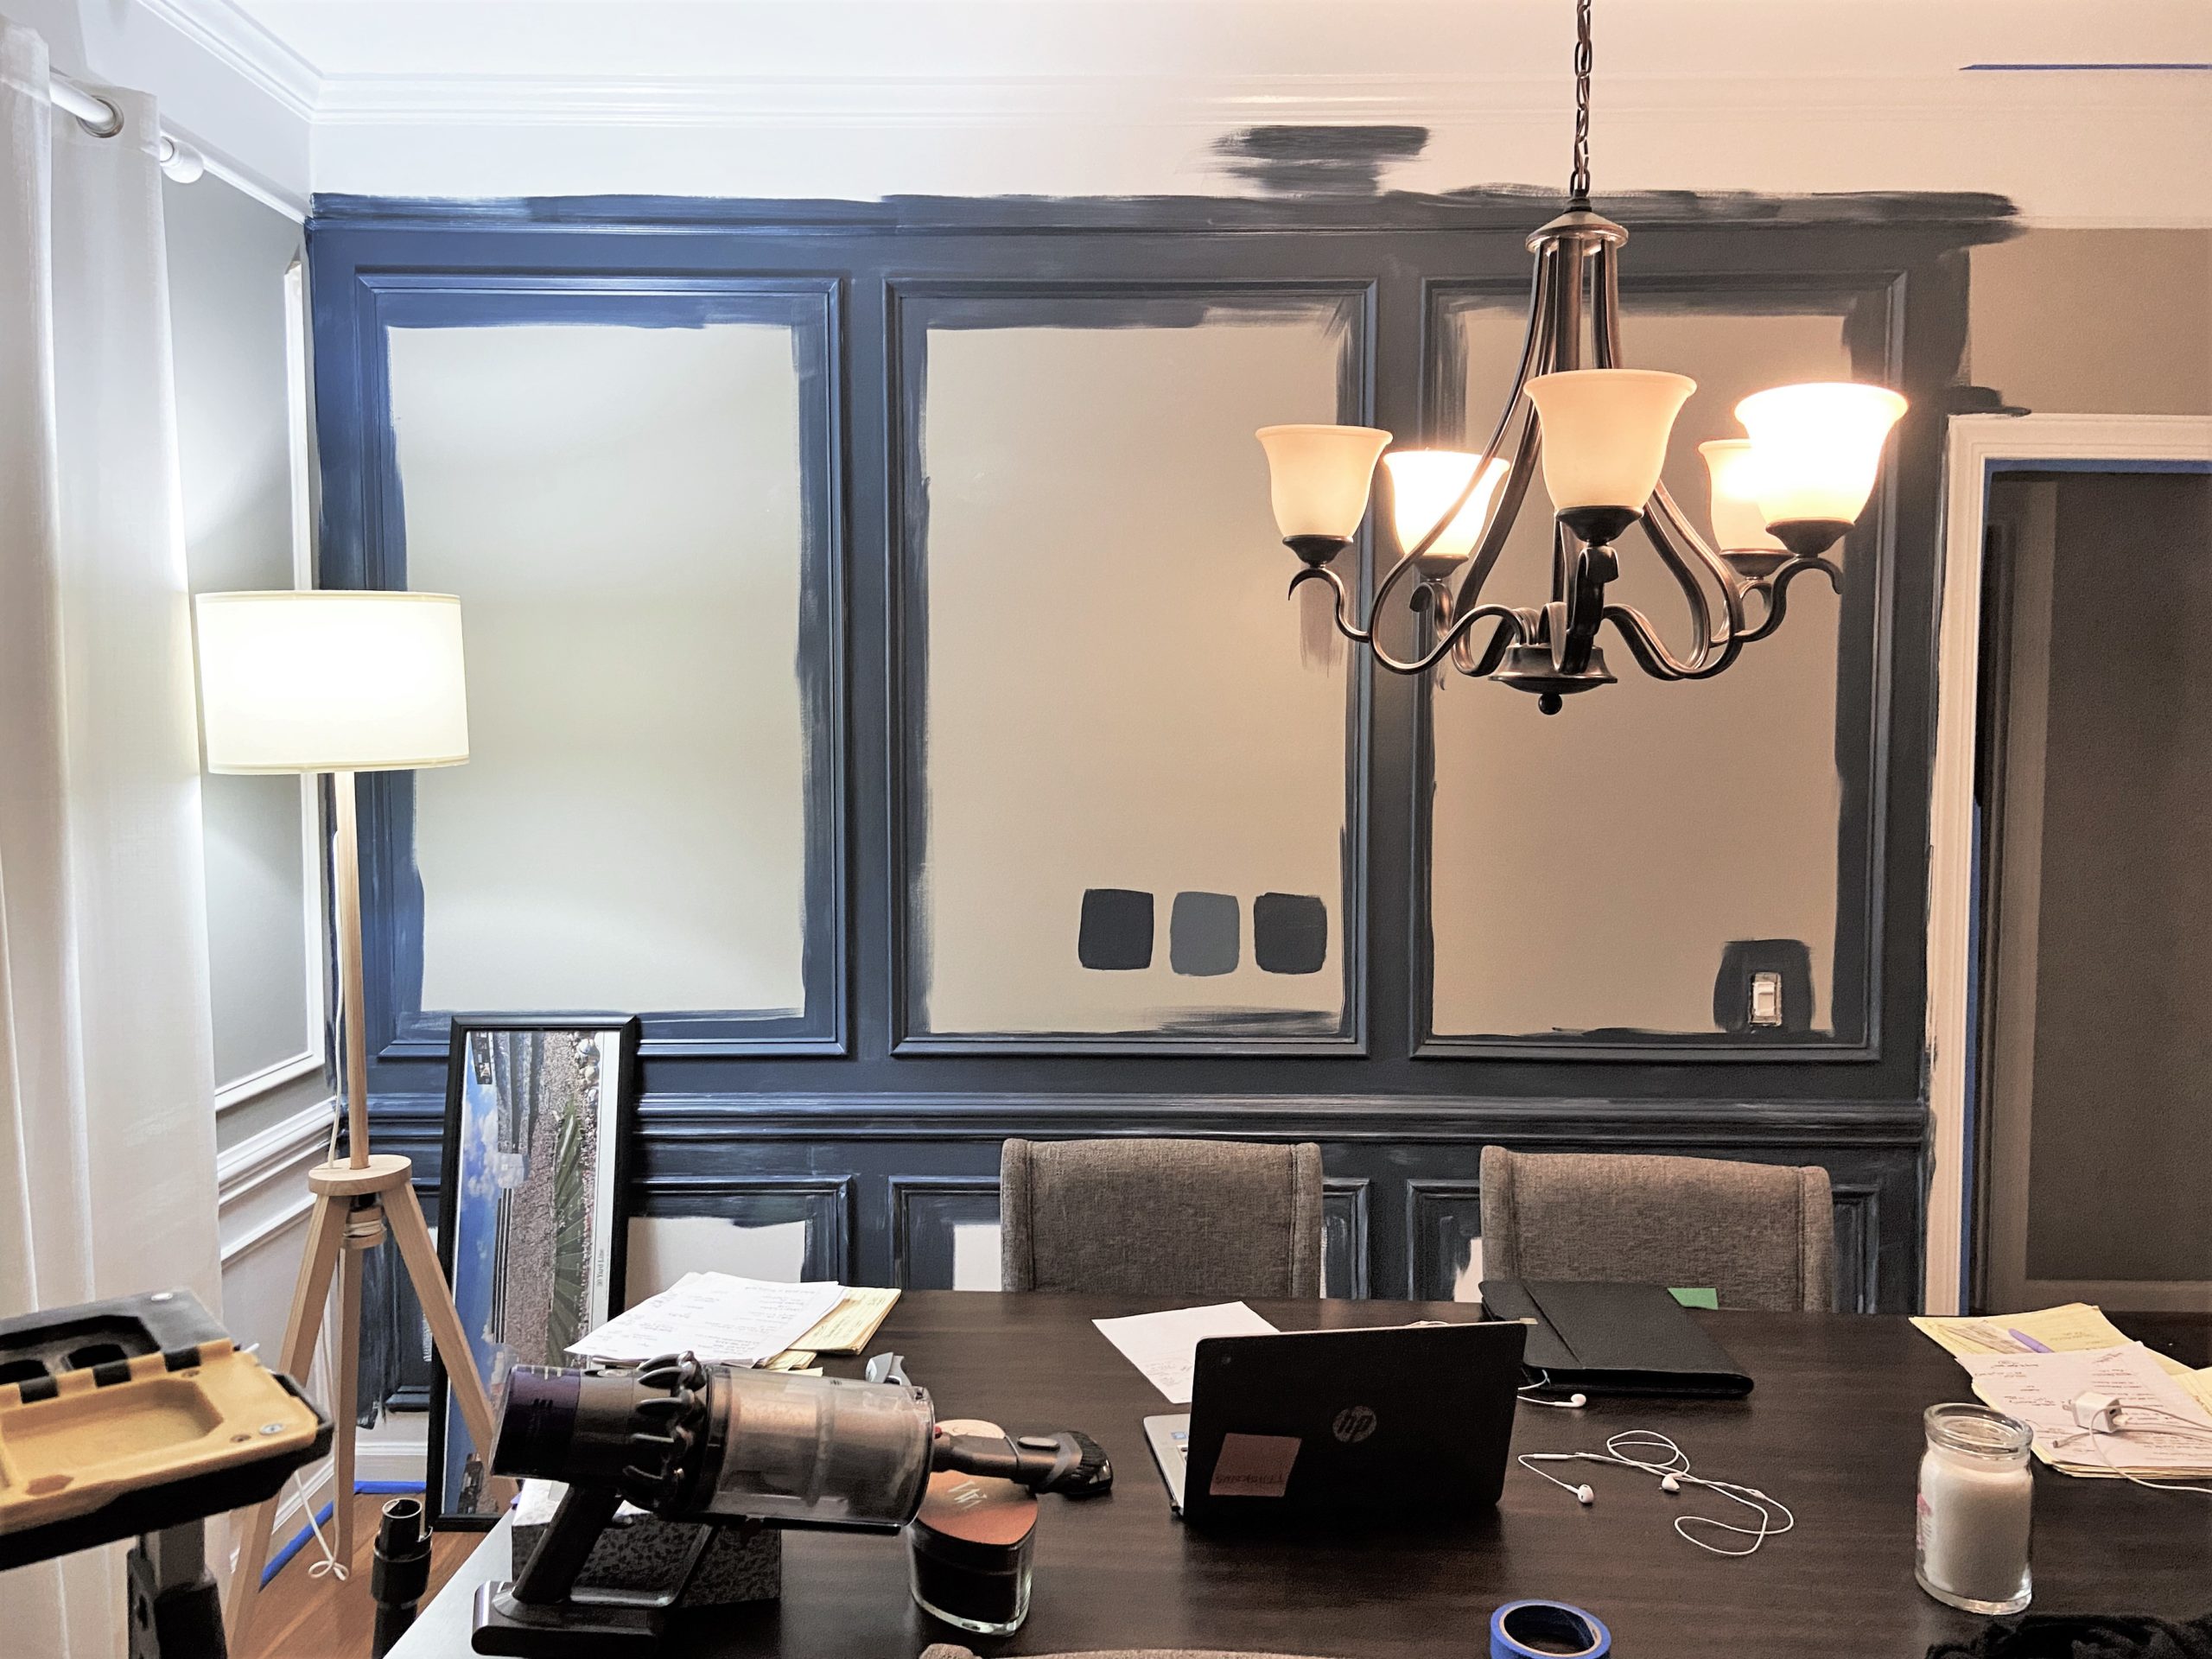
Here’s a look at what our room looked like when we purchased the house:
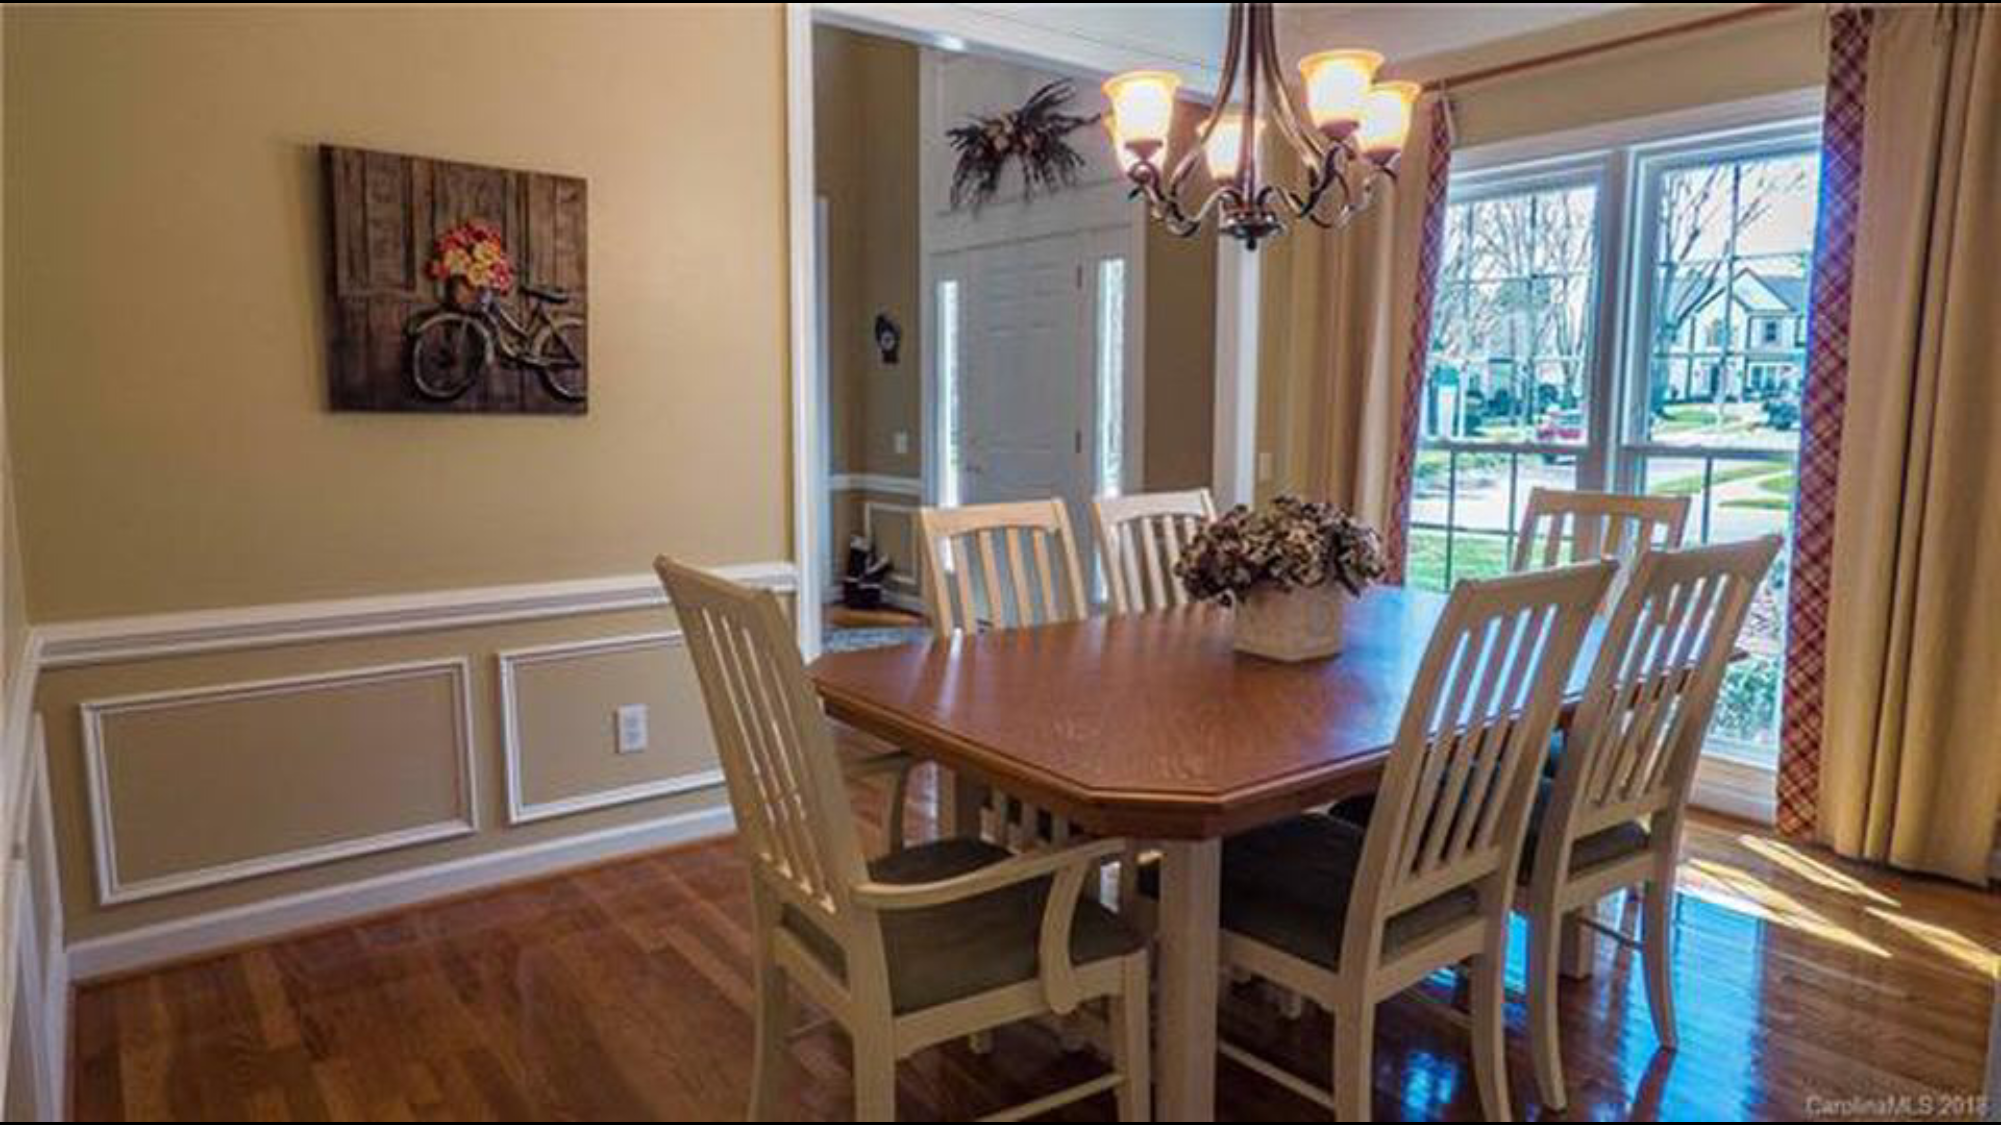
The chair rail and picture frame molding on the bottom half of the wall is already there, but the two tone, yellow/beige paint hasn’t been an acceptable wall color since the early 90’s (if ever?)
How to DIY your own Picture Frame Molding
MATERIALS:
Pre-primed Molding
3/8″ Paint Roller Cover (3-pack)
Paint Roller 3′ Extension Pole
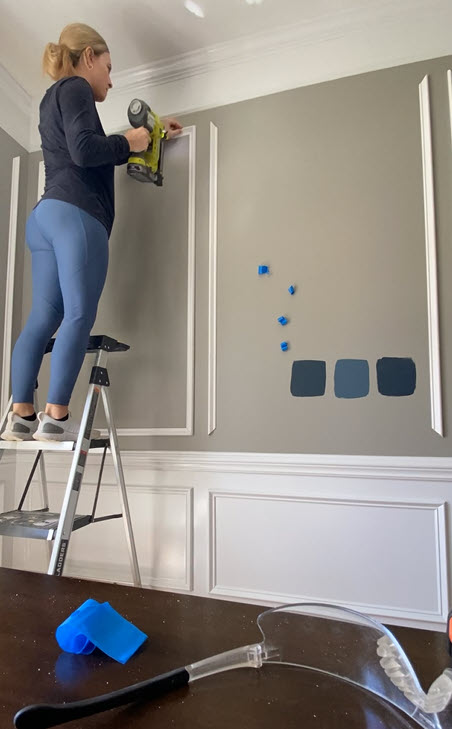
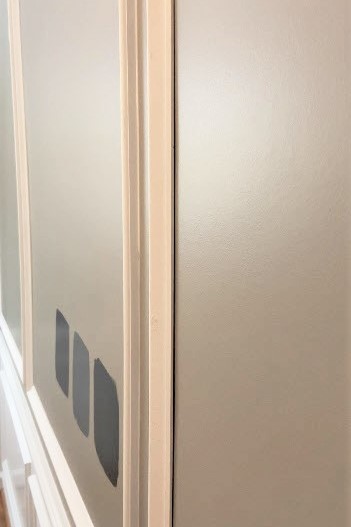
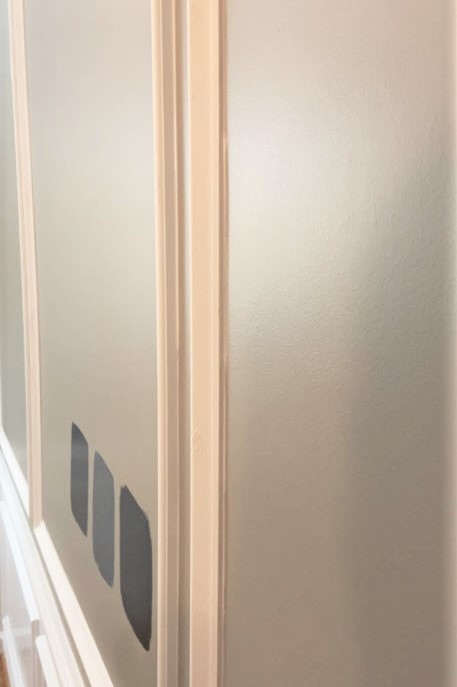
Satin Paint (I used Behr S470-7 Undersea)
TOOLS:
Miter Saw (miter box or miter shears works too!)
1.25″ Brad Nails
Hand Sander (220 grit paper)
Wood Filler and Paintable Caulk
Tape Measure
Painting Supplies (Brushes, Roller, tape)
STEP 1: Calculate your box sizes
This part was easy for me, since I just mirrored the box trim from the bottom half of the wall. Each space between the boxes is 3.5″ which is pretty standard in a room this size (10′ x 13′) but you can make them whatever size you’d like. There is a large cased opening on one of my walls, so those boxes are each 32″. The other wall has a smaller doorway on the left, so the box in the center is 38″ wide, and the two flanking boxes are 34″.

If you are starting from scratch- start by obtaining the total measurements of the walls. Measure from the top of the floor molding to the bottom of the ceiling molding. Play around with size by taping off several different sizes of boxes until you find the look that you like. All your boxes don’t have to be the same size, but they should be symmetrical.
STEP 2: Pick your trim
All your big box hardware stores have plenty of options for trim. If you’re not sure about the style you want, look for inspiration pictures on Pinterest to narrow down your options. From there, you can browse the selection at your store of choice and find a good fit. The picture frame detail becomes the focus of the room just by being installed, the actual trim piece doesn’t need to be intricate or especially detailed. Don’t overthink it.

I found a match for my existing trim at Home Depot and it was available to buy by the linear foot. This way, I was able to get the trim cut to the exact length I needed and eliminated a lot of scrap.
STEP 3: Cut Trim to Size
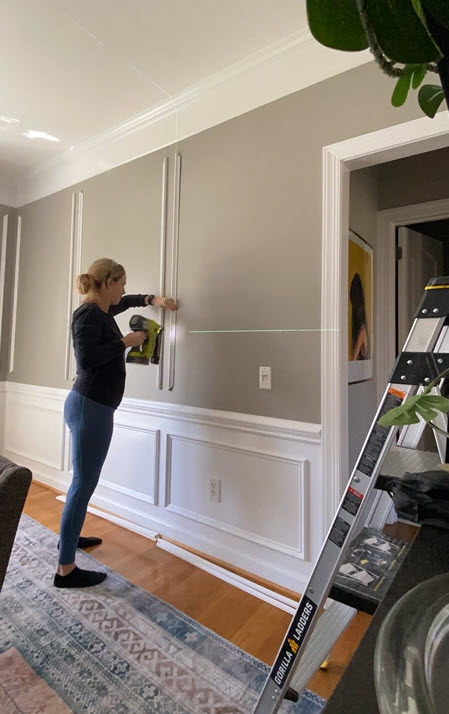
Mark a single dimension on the wall for each box using the ceiling or a wall corner for reference. Then, use a laser level to mark the rest of the corners. Don’t measure all your dimensions from the existing walls because walls are wonky and your boxes won’t be level. It’s much less noticeable if the boxes aren’t parallel with the walls/ceiling than if you’re trim isn’t level.
Cut your trim to your desired length at a 45-degree angle (miter cut). Once joined together, they’ll form a perfect right angle. I used a miter saw but you can use a miter box and a hand saw. If you’re just beginning with DIY and you’re not ready for saws, use a thin wood or PVC trim and you can use miter shears .

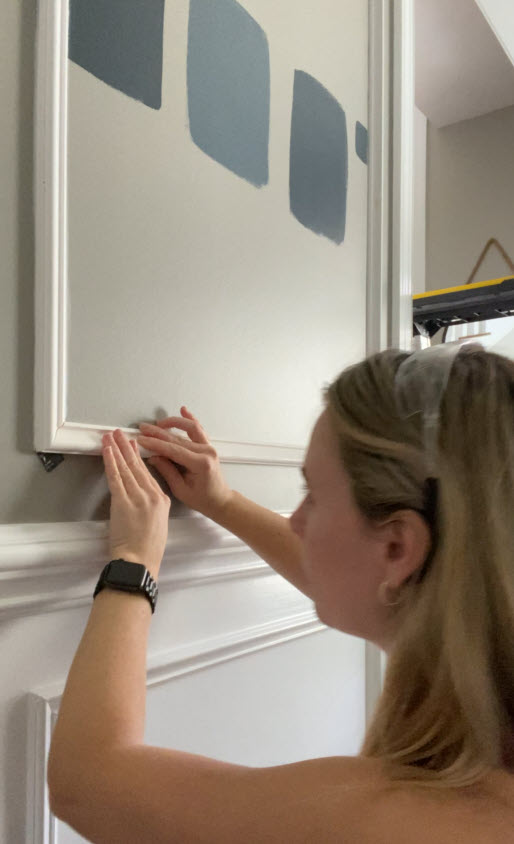
STEP 4: Nail Trim to Wall
Use painters tape to hold the trim in place while you confirm your measurements are correct (check that your trim meets the marked corners on the wall). Use a brad nailer and 18g brad nails through the trim, into the wall- alternating the direction of each nail. This ensures that the trim can’t be pulled out of the wall easily. You can use construction glue, but if you ever decide to remove the trim, you’ll likely need to repair drywall. I like nails only and once it’s caulked, the trim is very secure.


Attach all the vertical trim pieces first, then connect them with the horizontal pieces. Working this way, keeps your boxes consistent and you don’t have to move your laser level as much.
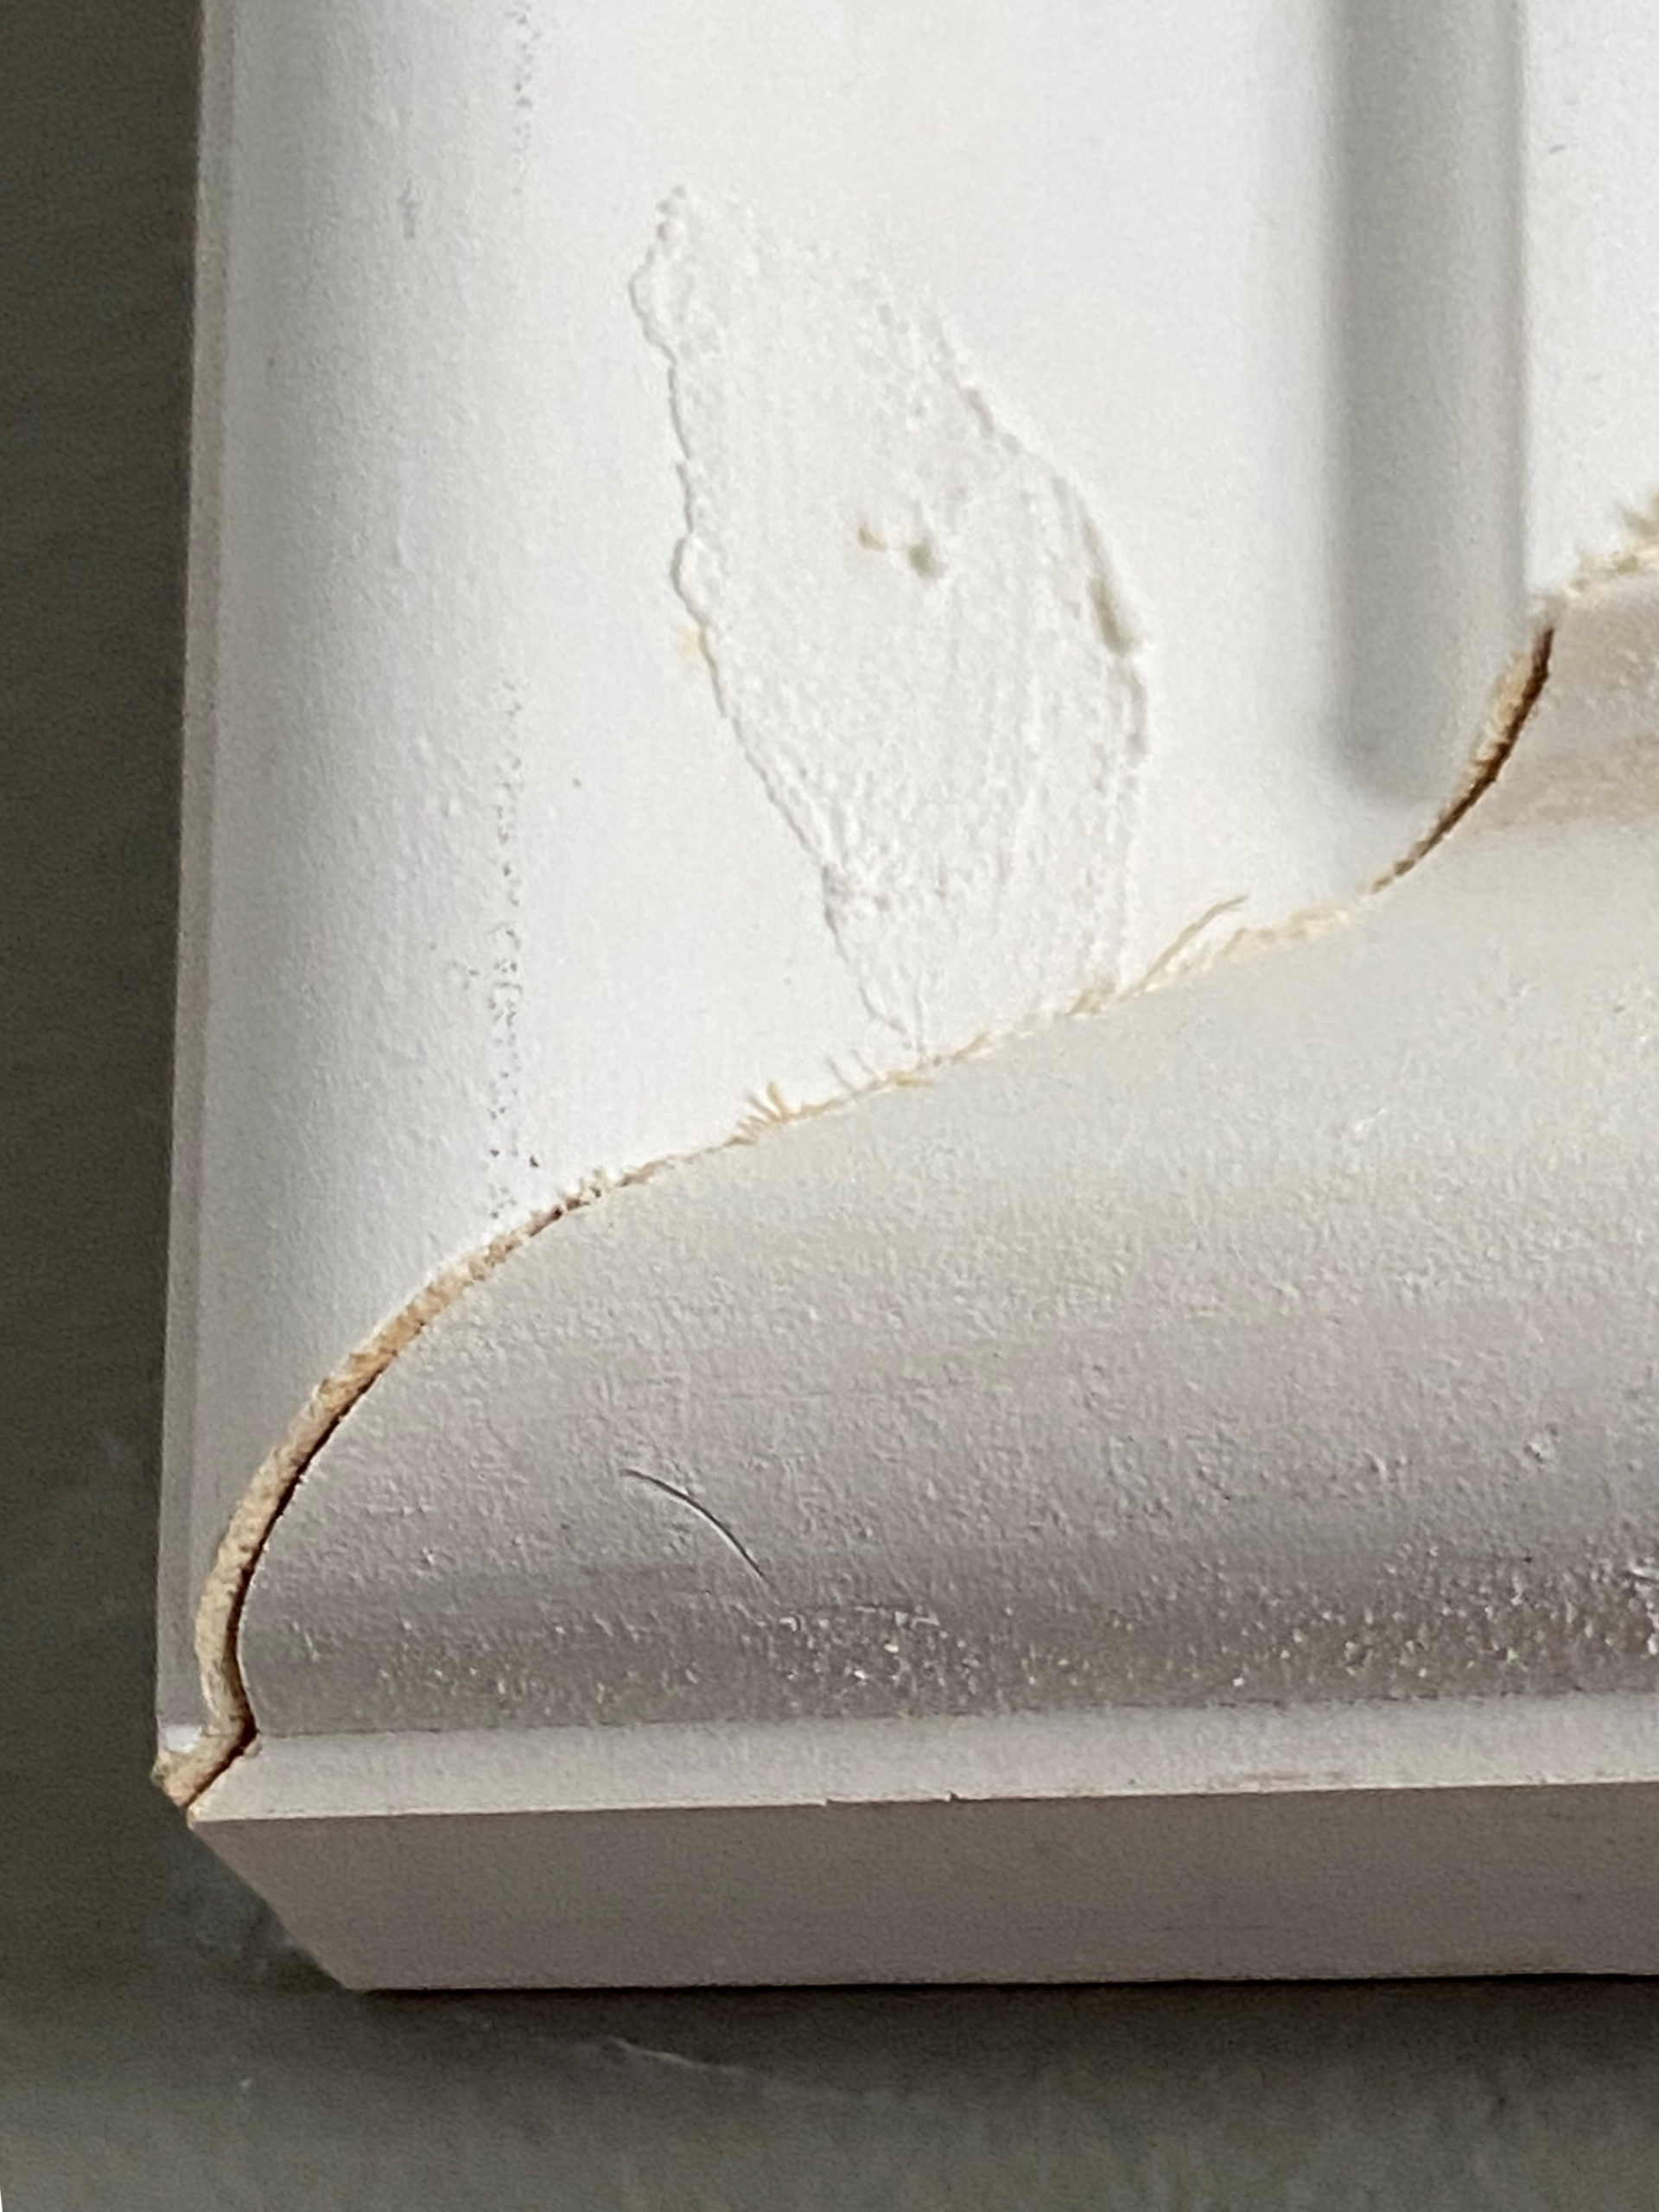
STEP 5: Use Shims for Uneven Boards
The goal of mitered corners are to make it look like your two boards are actually the same board. You don’t want to be able to see the seam. In some cases, two pieces of trim don’t match up exactly, even if your miter angles are exact. In this case, you can use a shim to bring up the lower piece to match the higher piece.

If the difference is 1/4″ or more, you can use wood shims but for this trim, the difference is usually much smaller- less than 1/8″. You can use a playing card, or a business card as a shim to help bring the pieces flush. Just place the card under the lower piece, add a second card if the pieces still aren’t flush. Then nail the trim with the shim still underneath and cut the excess card with a box cutter.
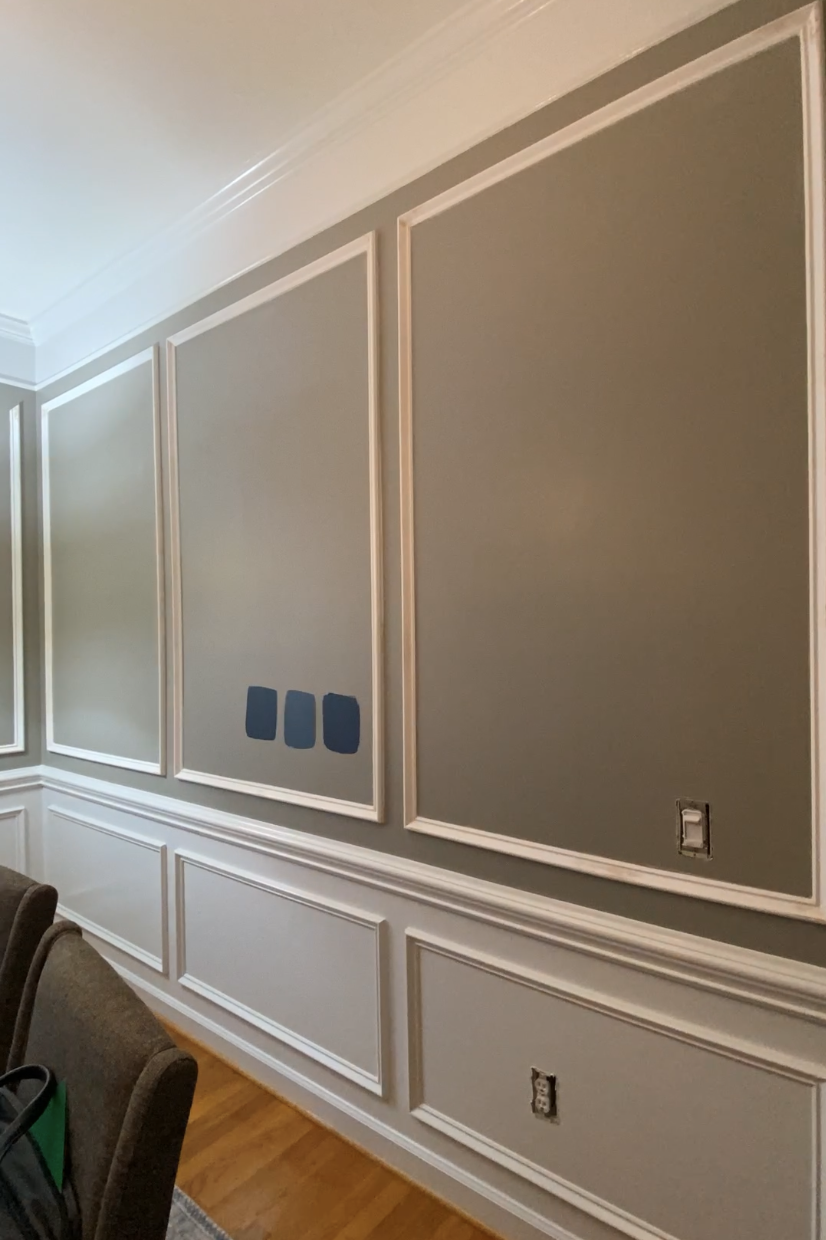
See the difference in the before and after below:

STEP 6: Wood Fill Corners and Nail Holes
Use wood filler to fill all your nail holes and the corners of your pieces where the miter meets. I like to do 2 coats of wood filler, the first coat is thicker to fill in the hole. I wipe that coat with a baby wipe then apply a second, much thinner coat. Once the second coat is dry, I hand sand it to get a smooth and flush finish with the wood.


STEP 7: Caulk Edges
Use paintable caulk to seal all the edges of your trim. I like this DAP version that has 600% stretch so that your trim edges are less likely to crack over time.

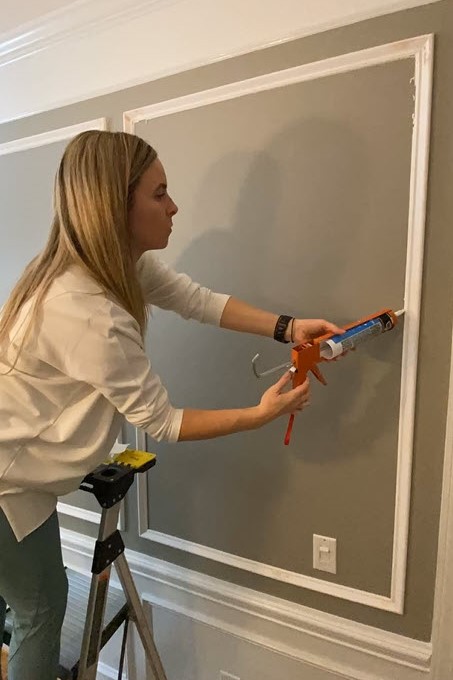
The power of caulk:
Now you’re ready for Paint!
It always looks scary in the in-between, but don’t worry, it gets better!
Regardless, if you’ve been craving a little additional texture and a more formal, elevated look in any room of your home, this picture frame moulding might be just the ticket!
Want to keep up with my newest projects? Come hang out on Instagram and TikTok!
Hi Rachel. I am updating my dining room from Tuscan to more sophisticated with what I gave. My furniture is dark wood and I am not getting rid my of furniture. I spoke to a designer and thinks to make the wood less heavy I should paint the room a dark moody color- like Charcoal Blue by SW. What color is your dining room? I was thinking of blue and golds with the wood.
What did you go with? Farrow & Ball Hague Blue is beautiful in our dining room.
When you paint the walls and molding, do you use a semi-gloss? or matte
I used a satin paint on the entire wall- including the molding!