How to Refinish a Wood Deck
(This post contains affiliate links which means I receive a small compensation at no cost to you. As an Amazon Associate I earn from qualifying purchases. You can read more about it here. Thank you for supporting my blog!)

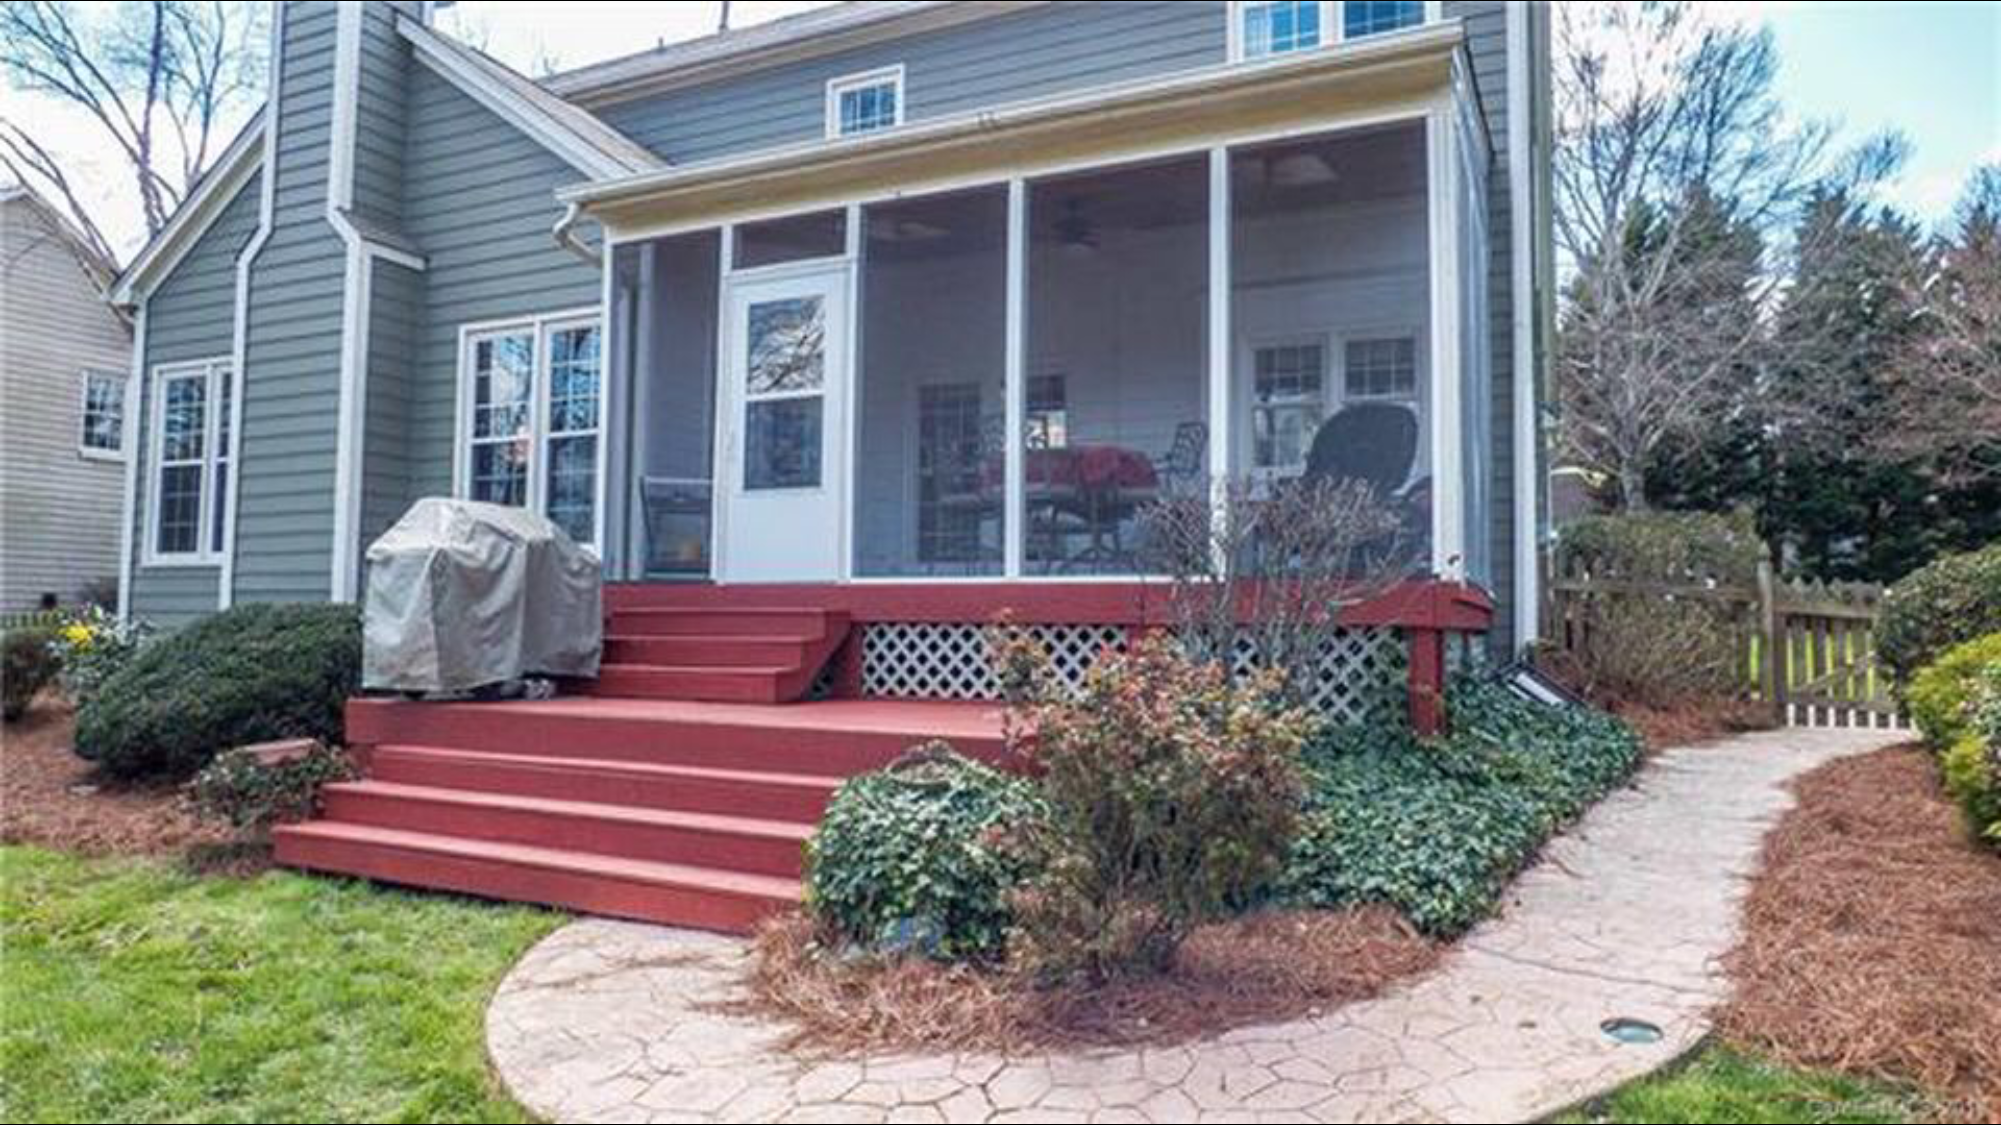
We have a covered porch off the back of our house and also a small deck that transitions into the backyard. Both deck areas have the same wood flooring and were painted bright RED when we bought the house. I hated it, especially with our house being a dusty green, it just felt too much like Christmas.
Here are the listing photos:

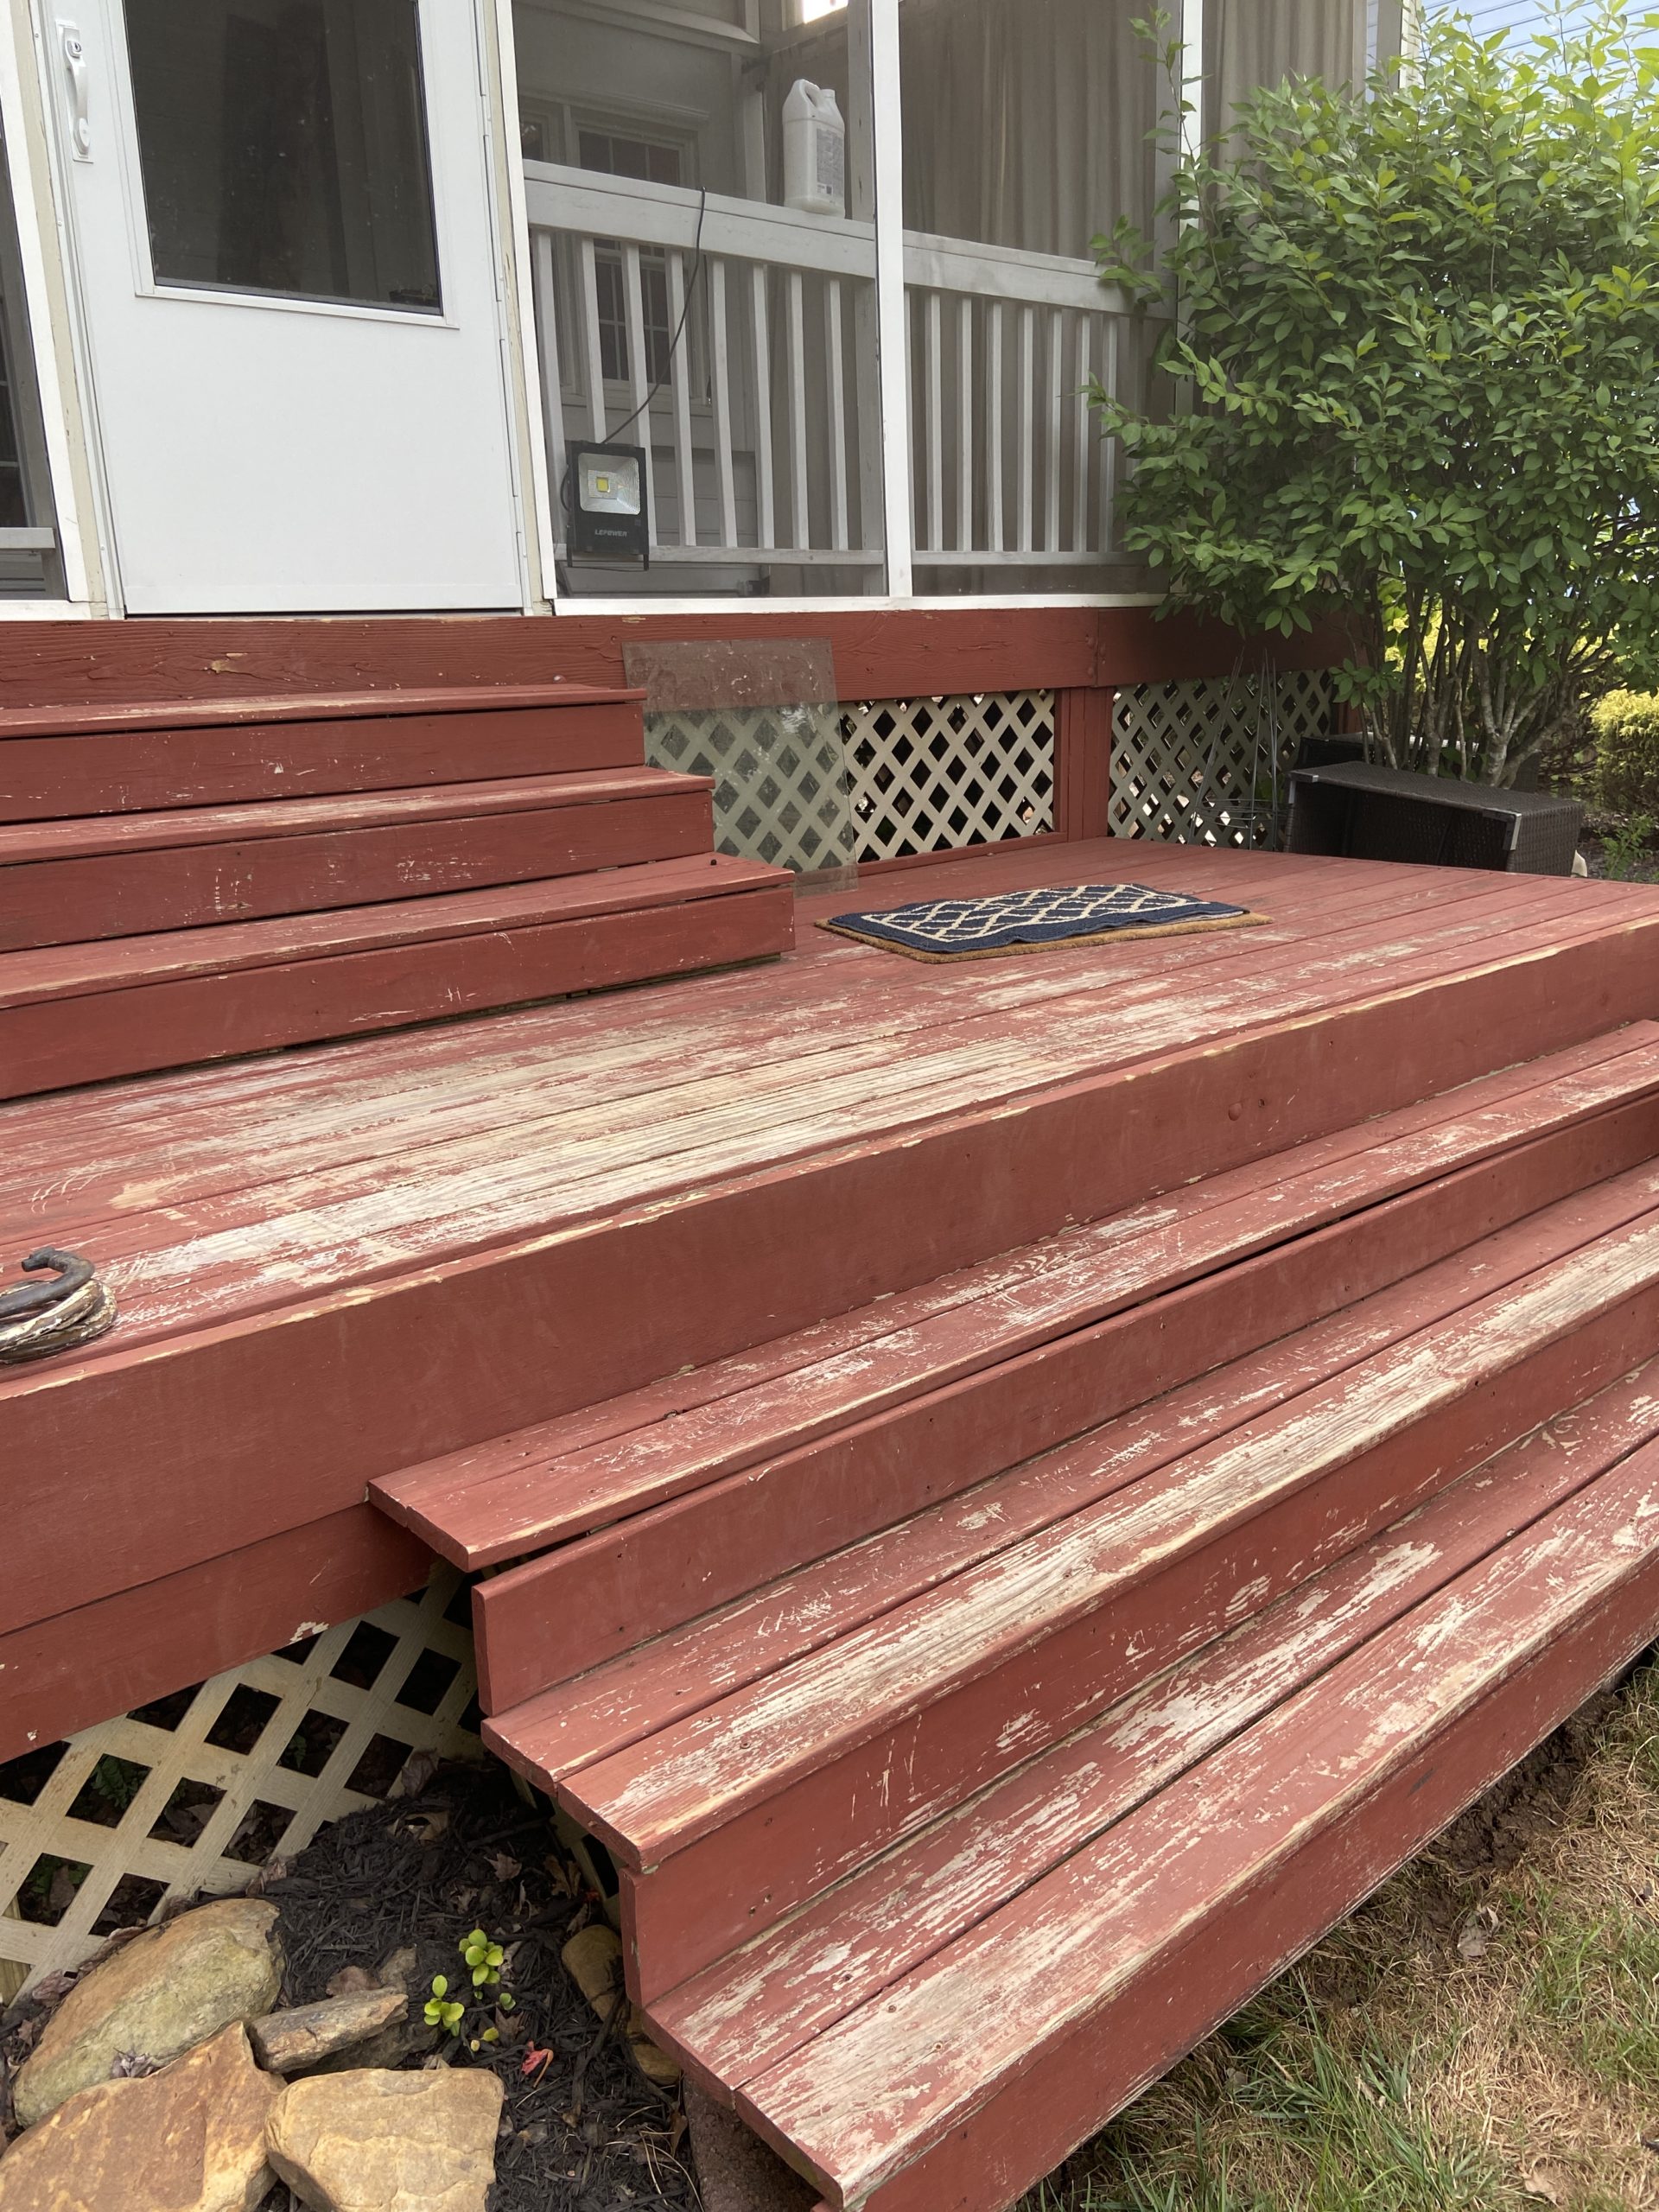
Over the past 5 years, we left the porch alone because it was functional and the red deck was really just an aesthetic issue and was not a priority at all. Fast forward 5 years, and you’ll quickly see that our deck became a priority:
If you’ve never been to North Carolina, you should know that we still have 4 seasons down here. Summer, Fall, Winter and “Pollen Season”. Our winters are mild but our springs are a yellow dust storm that lead to intensely hot and humid summers. I don’t mind our seasons- I love the heat and I don’t even mind the pollen [that] much. But the warmer seasons take a toll on our homes and exterior structures.
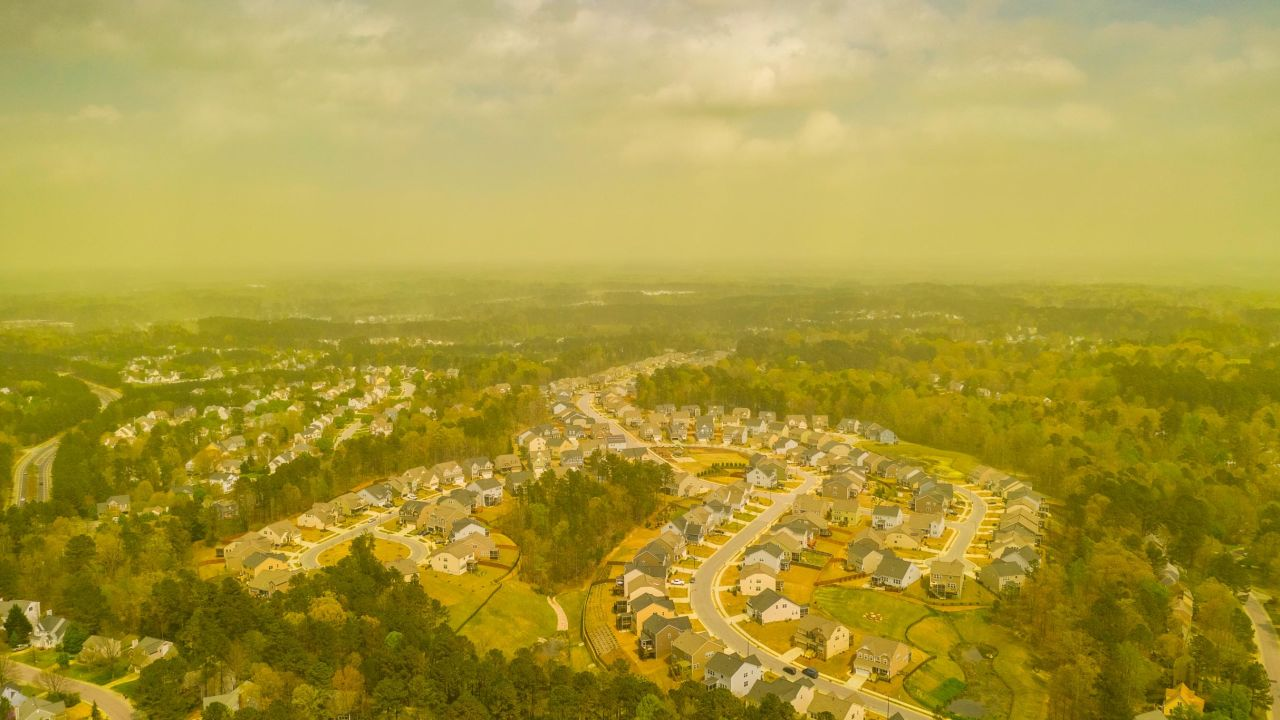
You might think that I’m going to start pointing fingers at the heat and humidity for ruining my deck in the first place, but to be clear, I’M BLAMING YOU, POLLEN. The shear amount of pollen that we get here every year is enough to corrode your car’s paint, as well as the paint on your home’s exterior. Overtime, it can even do structural harm to wood, vinyl, etc. Not only that, but if you don’t adequately clean the pollen before summer, it will increase the damage that heat and humidity cause. Mildew, mold, rot, and decay- you name it! If you own a house in the south, you have to stay on top of this!
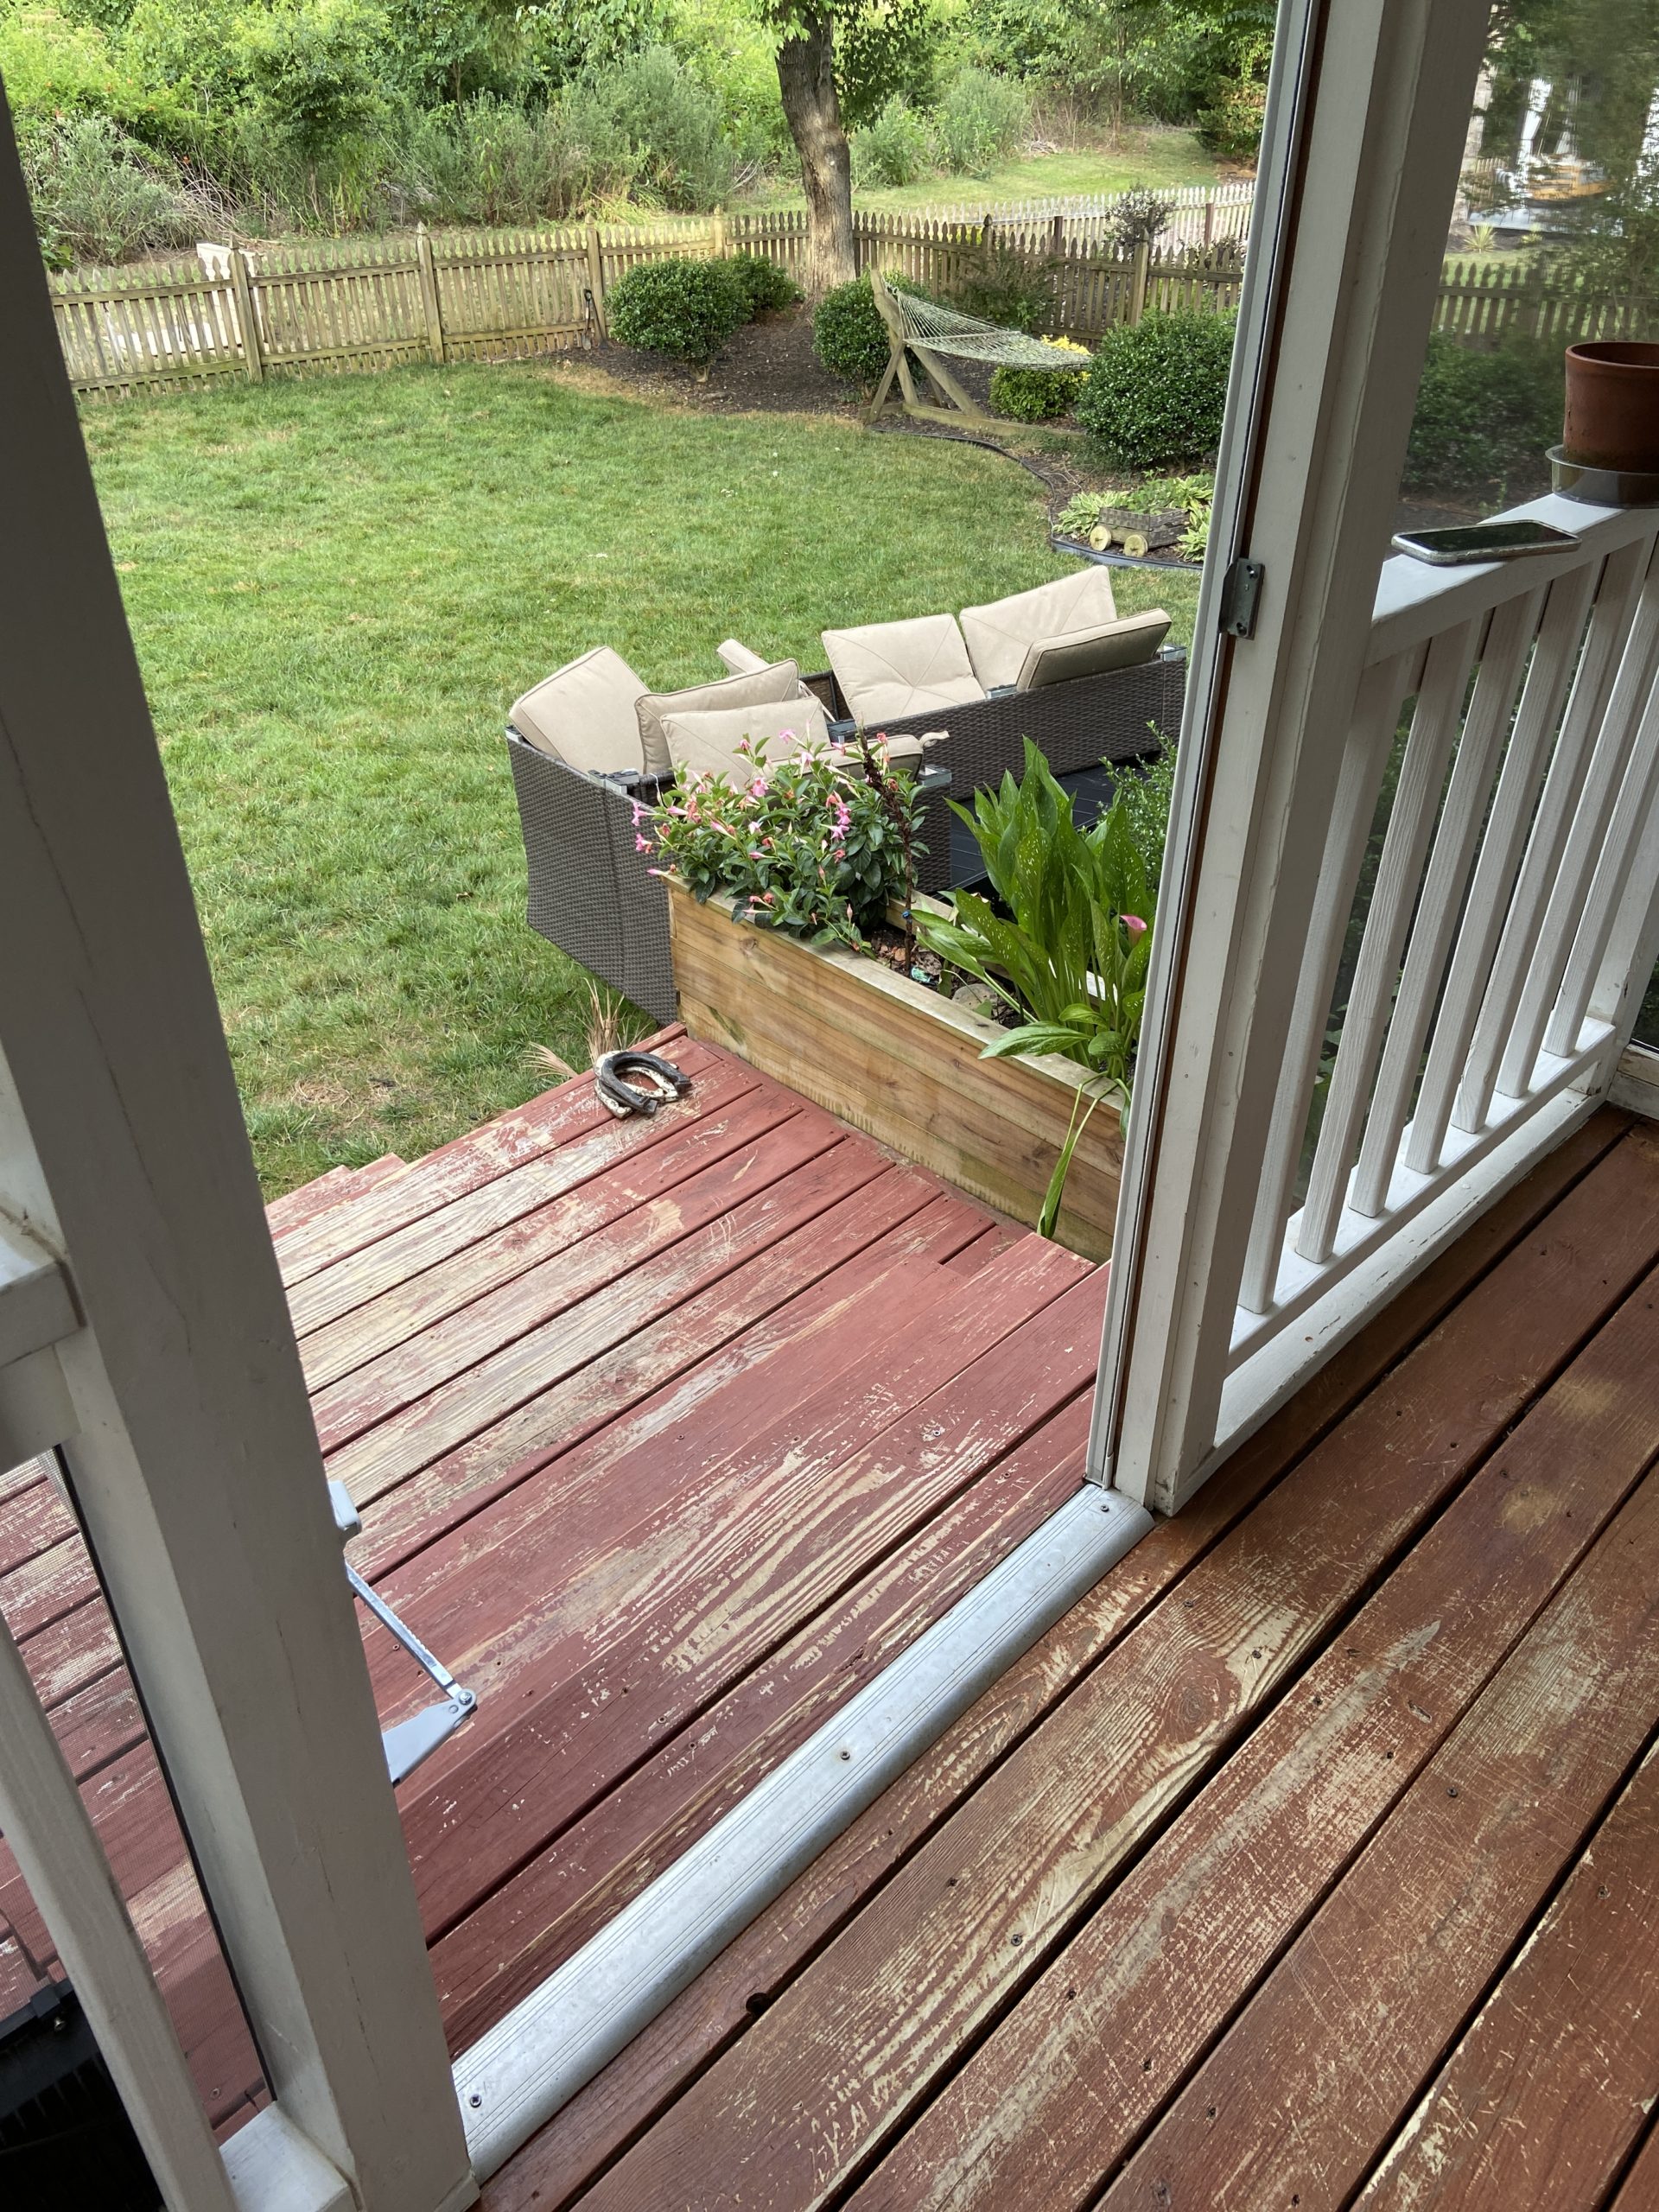
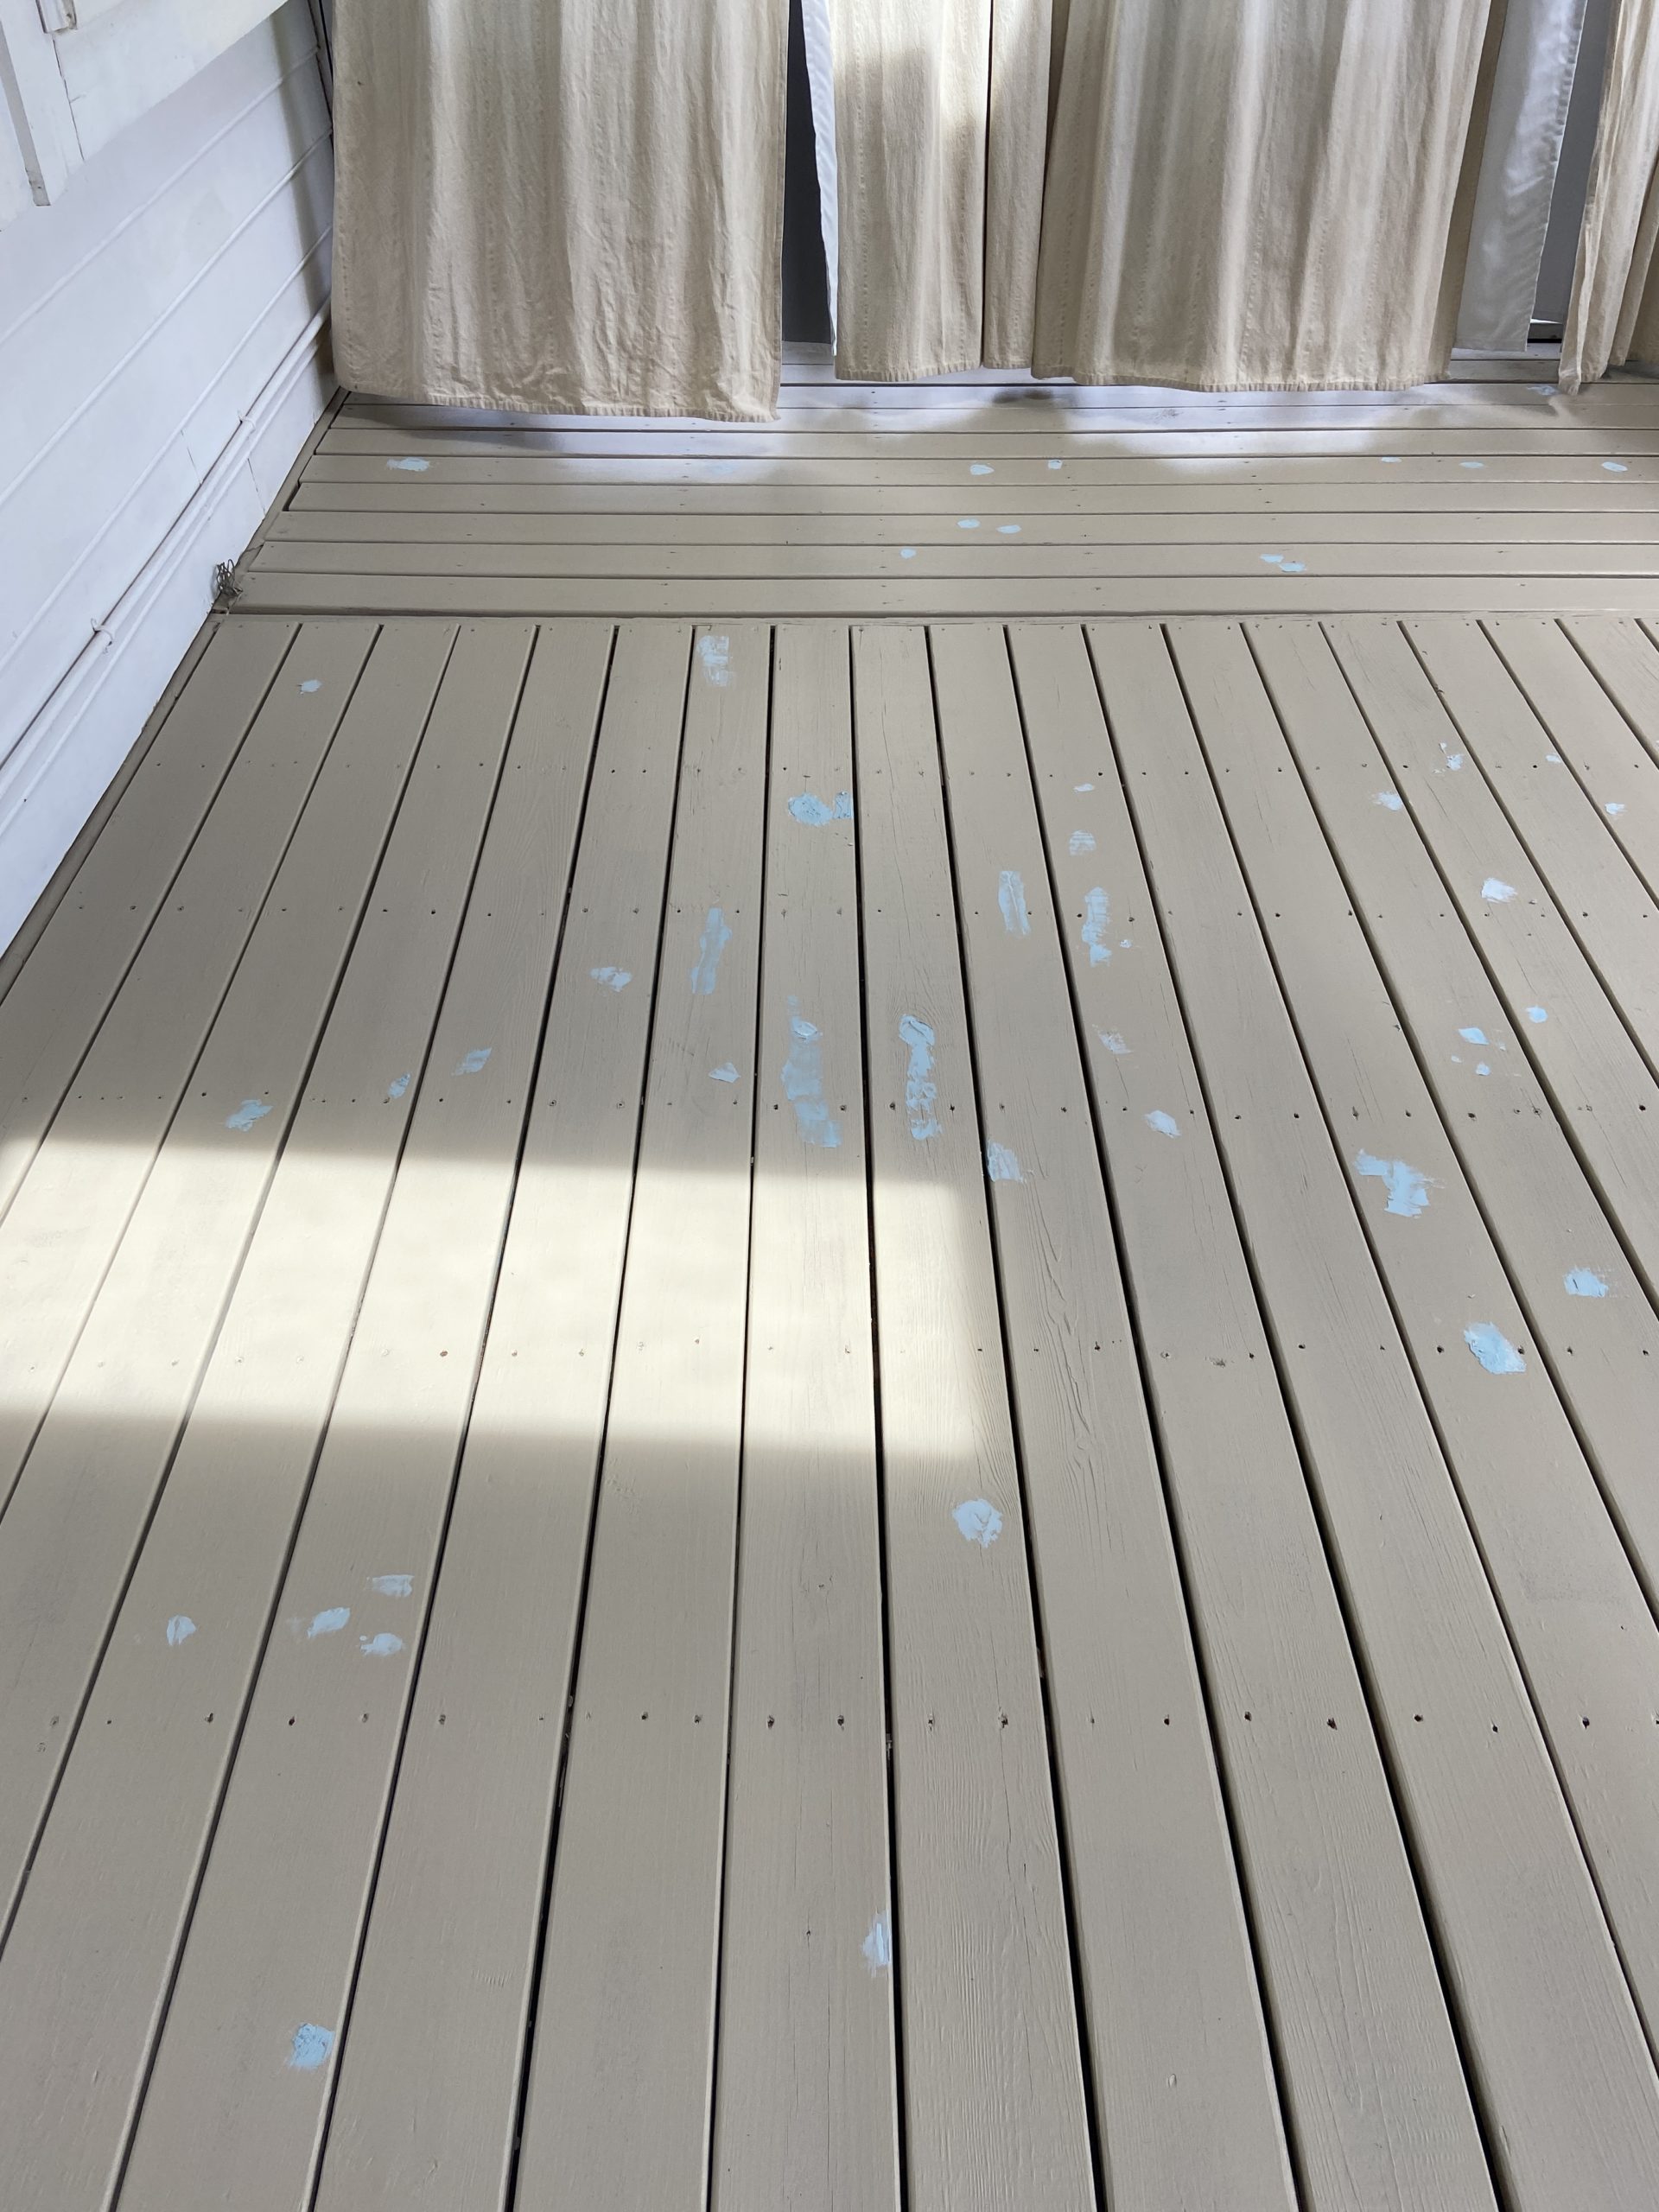
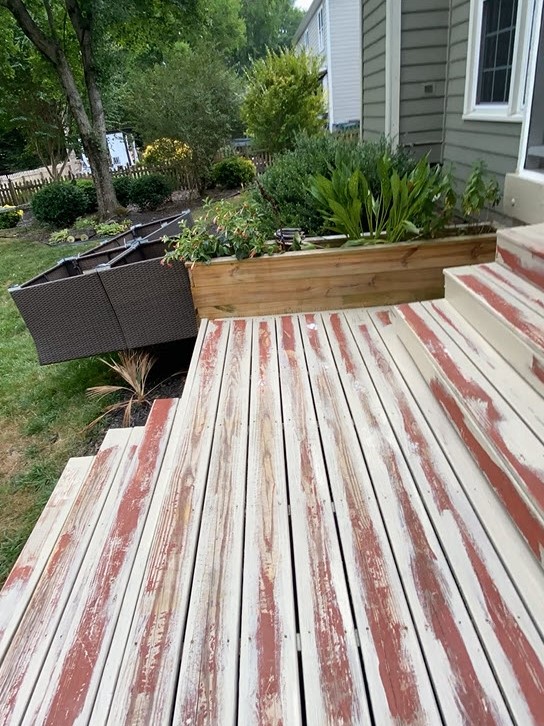
Needless to say, after 5 years of not staying on top of cleaning the pollen off our deck- combined with our boxers, Mosley and Conway absolutely abusing the deck with their nails- the deck looked like this (below) and now we HAVE to address it.


How to Refinish Your Wood Deck
Our deck looked really bad, but the majority of the damage was aesthetic- dirt and mildew, scratched off and minor chipping paint. We didn’t have any broken or rotting deck boards so we were able to refinish it with a good clean and paint. If your deck has large amounts of structural damage, you should have a professional look at it to determine if partial or full replacement is needed. If your deck looks like mine (or better!), complete the following steps to give it a refresh!
Don’t forget to check out all the decor links, HERE!
MATERIALS:
TOOLS:
Ryobi Pressure Washer (optional)
Deck Brush (to apply cleaner)
Electric Sander (120 grit paper)
1/2″ Nap Roller Cover (3-pack)
Paint Roller 3′ Extension Pole
STEP 1: Remove all outdoor furniture, decor, potted plants etc.
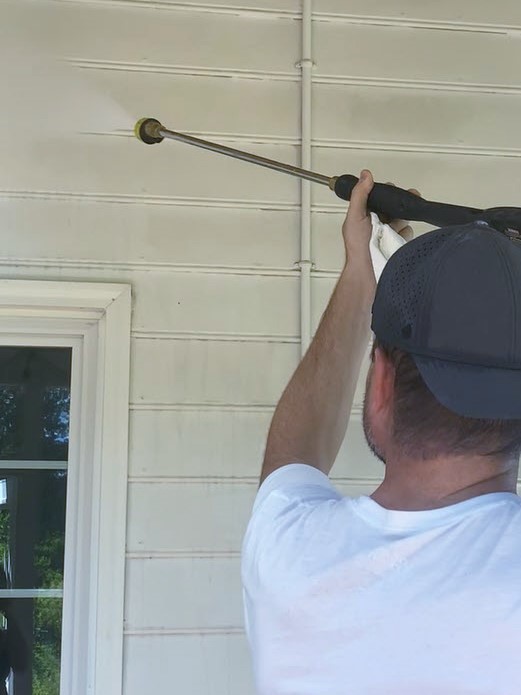
This project started with our annual spring cleaning of our porch to get the layer of pollen off of it. We power washed all our furniture as well as the rug and walls . If you follow me on Instagram, you saw that I even power washing my couch cushions. We let all the furniture air dry in the yard and got ready to clean to the deck boards.
STEP 2: Clean Deck Boards
I used Valspar Deck Cleaner to clean my deck boards. The active ingredient is Sodium Hypochlorite (aka Bleach) so it eats away at dirt and mildew and is super easy to use- you don’t need a power washer! Before using, take your hose and spray off any nearby plants so that if they get some of the cleaner on them, they won’t absorb as much of it and won’t be damaged.
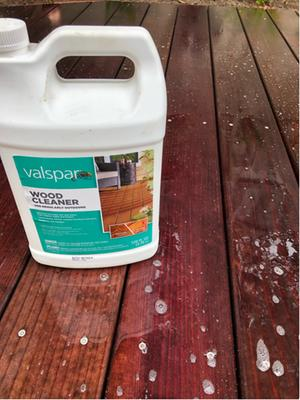
To use, liberally apply the full-strength cleaner with a handheld sprayer or brush and let it sit for 5-10 minutes! You can see the cleaner working in just a few minutes when spots turn white and sometimes even bubbles! Once it’s been on the deck for the full 10 minutes, you just take a normal hose and spray it off the deck. If you have a jet setting on your nozzle, this makes it really easy to get all the solution off, just start on one side and slowly work across the entire space.
STEP 3: Let the Deck Dry Completely
It’s really important to let everything fully dry after cleaning before you refinish the wood deck. Wood is porous and hydroscopic which means it easily absorbs water. Dry to the touch means the top layer of wood is dry and you want your deck to be completely dry all the way through before you paint. If you paint over wood that’s not fully dry you could see bubbles in your finish caused by paint trapping the water that’s trying to escape. Painting a deck protects it from weather and moisture as it keeps moisture out of the wood.
STEP 4: Wood Fill and Sand
Full Disclosure: I tried to skip this step- which is why the deck is already painted in these pictures. Learn from my mistake, if it might need the wood filler, use the wood filler!
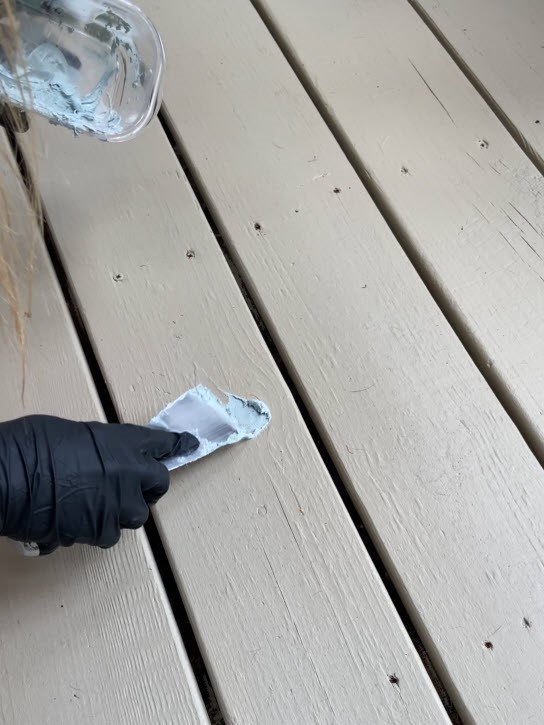
To refinish your wood deck correctly, you must address problem areas so they don’t rear their ugly head later. If your deck has any large knots or cracks, fill those defects with an exterior rated wood filler. I did a little research and decided to use this Bondo Wood Filler. Bondo Wood Filler is slightly more difficult to use than normal wood filler but it’s worth it! Unlike solvent-based wood fillers that cure slowly by evaporation, Bondo uses a chemical reaction that cures fast, and provides a more durable repair.

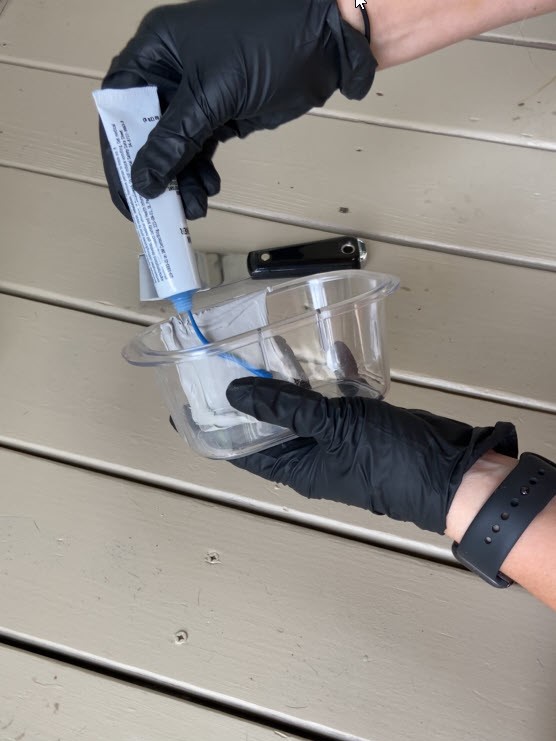
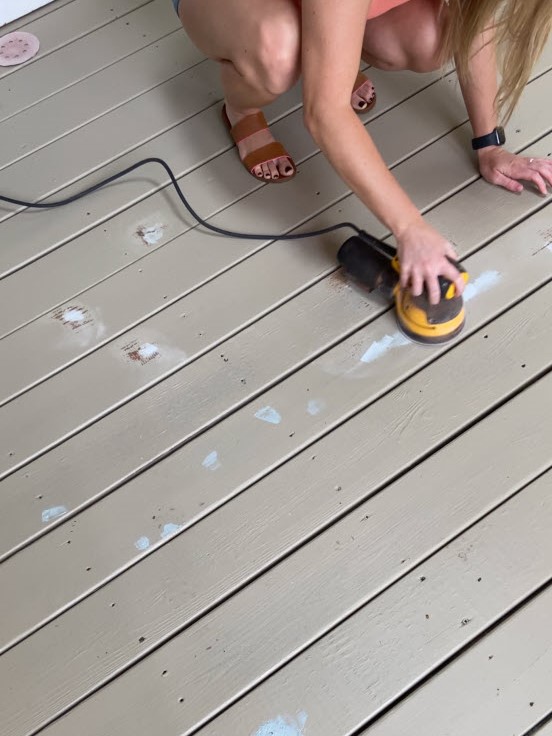
I watched this YouTube video to learn how to correctly mix the putty and the activator. Apply the wood filler with a putty knife) and let it dry completely (only 15 min!). Once dry, sand off the excess with 120 grit so that it’s smooth and then vacuum the space really well. No dust!

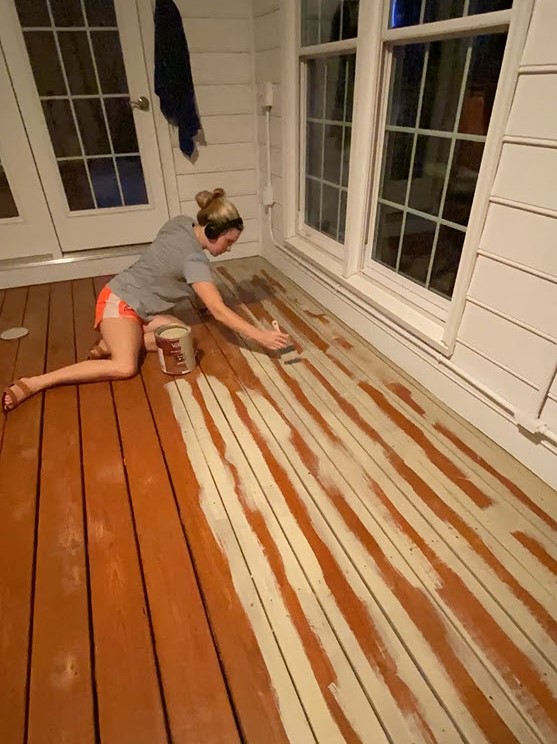
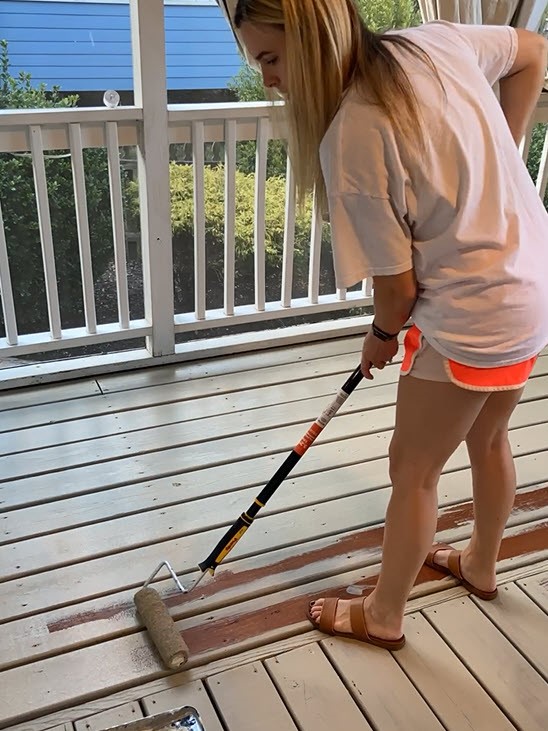
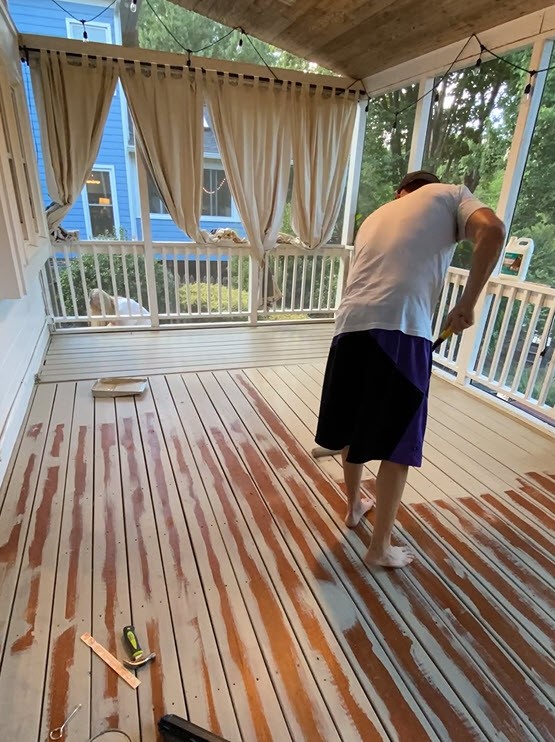
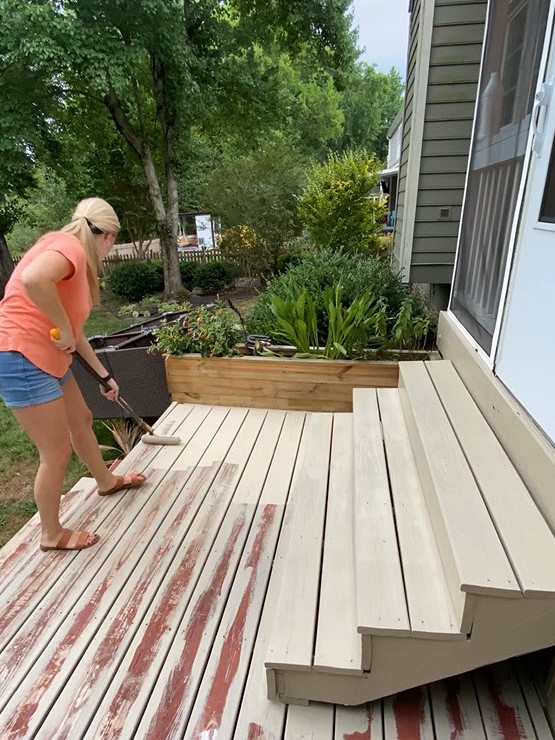
STEP 5: Stain or Paint
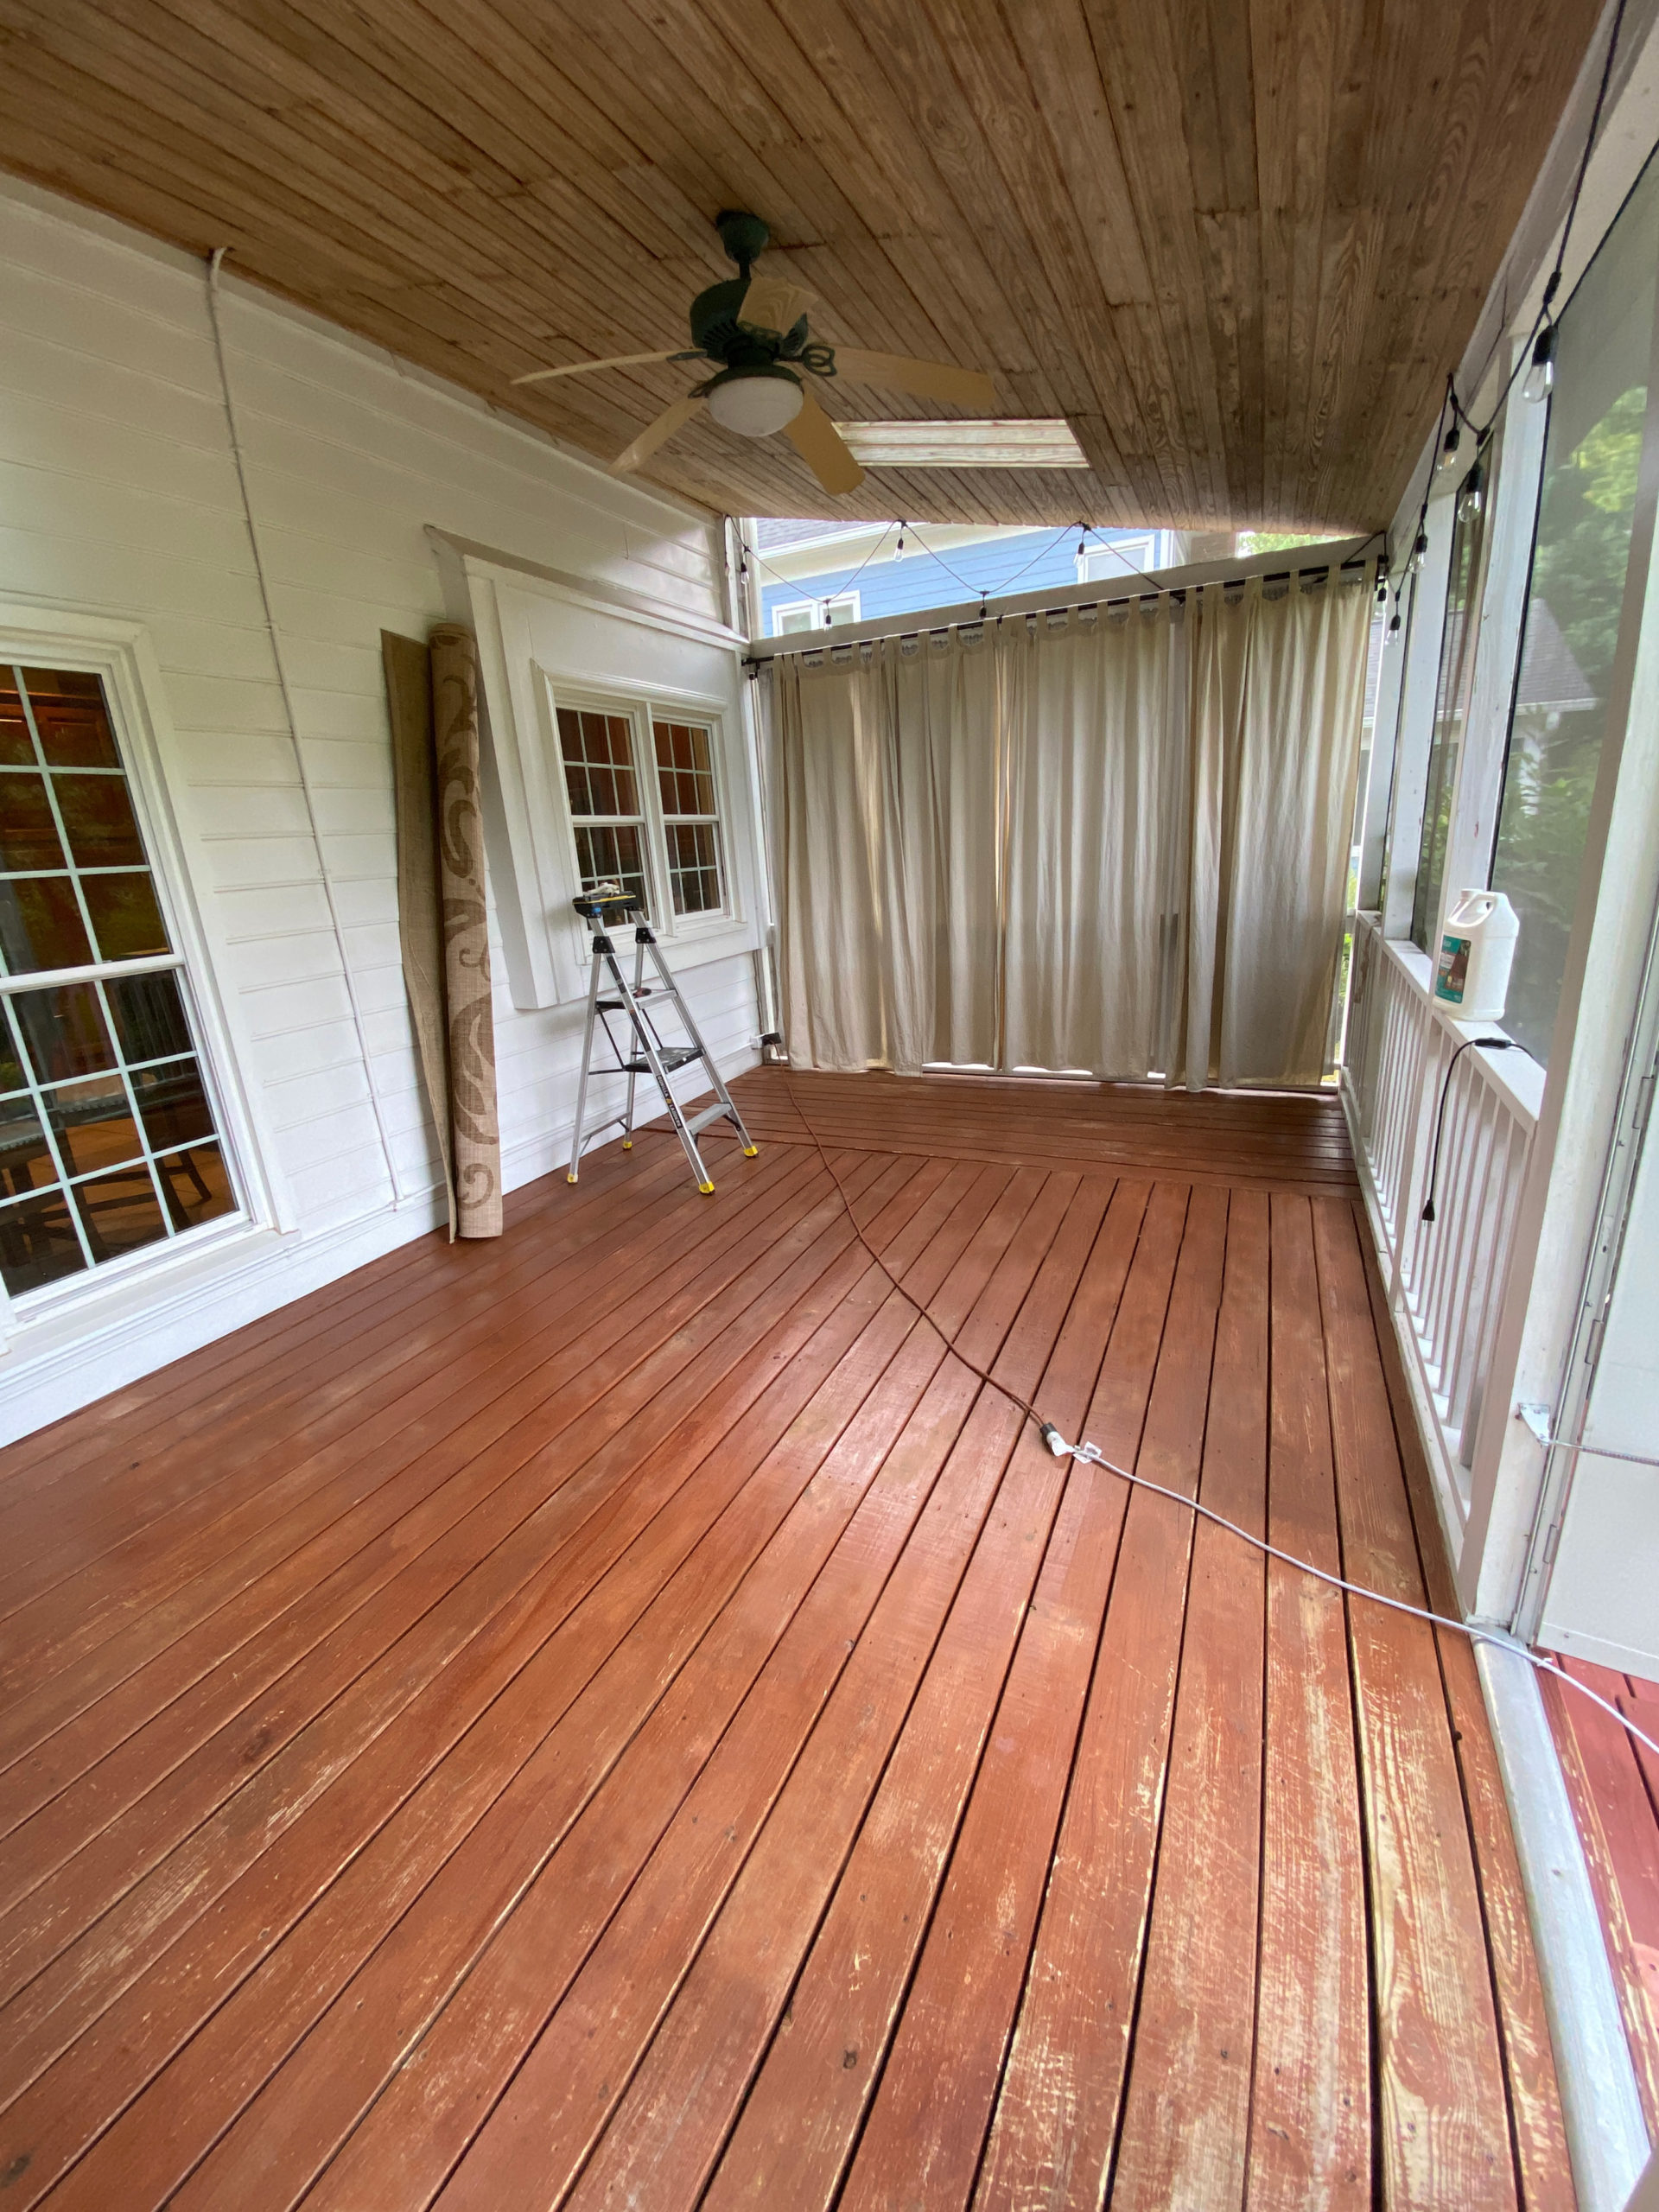
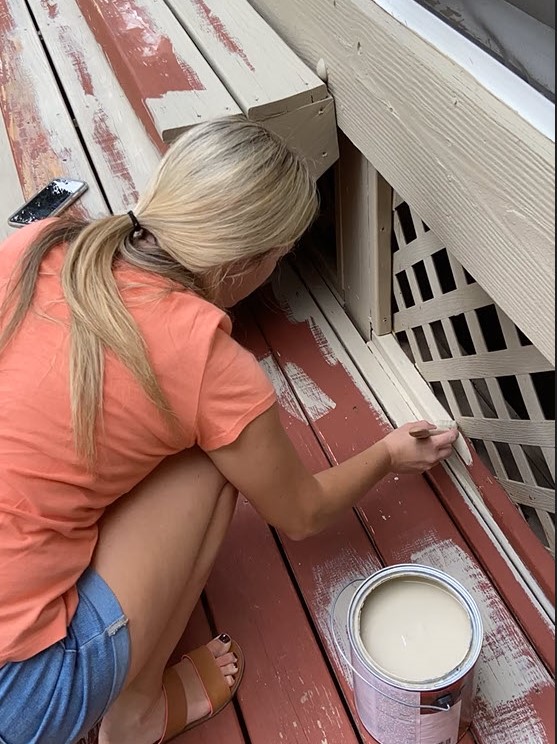
Once everything is clean and dry start by cutting in along the edges of your deck and between all the individual boards. This part will be pretty tedious but it is so important. Throw on your favorite podcast or audiobook and get out there paint both sides of all the cracks! Luckily this only needs to be done once, so do it and do it right.
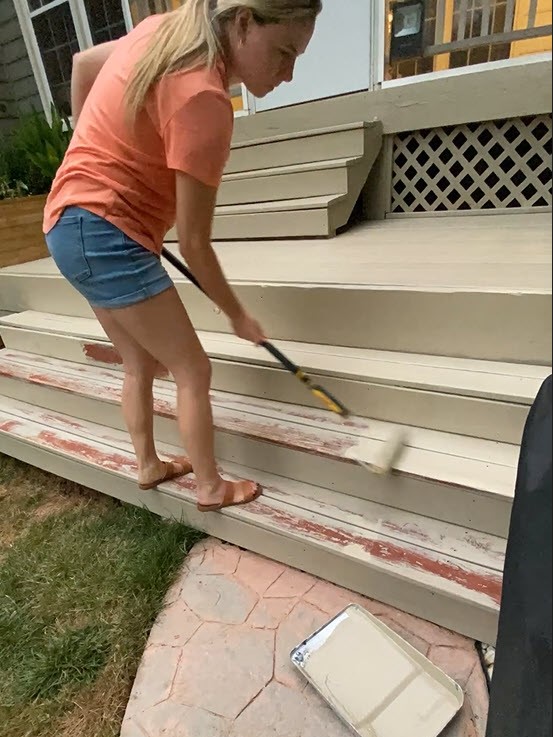
Outside, I had stairs and vertical edges that needed to be painted, so it was a little bit more tedious. I got through because you could actually start to see how much better the deck was starting to look. This area was the worst looking so it was the one I was most motivated to fix up.

At this point, you have a peek at what the final look will be, but don’t rush! Allow the paint to dry for at least 2-4 hours (or whatever your paint can says). It was starting to get too hot out, so we let our edging dry for a full 24 hours.
When you’re ready to roll, grab a 1/2″ nap roller for semi smooth to rough surfaces and get rolling. I used one of my favorite painting accessories that I discovered during the dining room makeover, this 3′ Paint Roller Extension Pole. Screw the extension into this 9″ Paint Roller Frame and you can paint faster and without breaking your back! Mark approved!
That’s it!
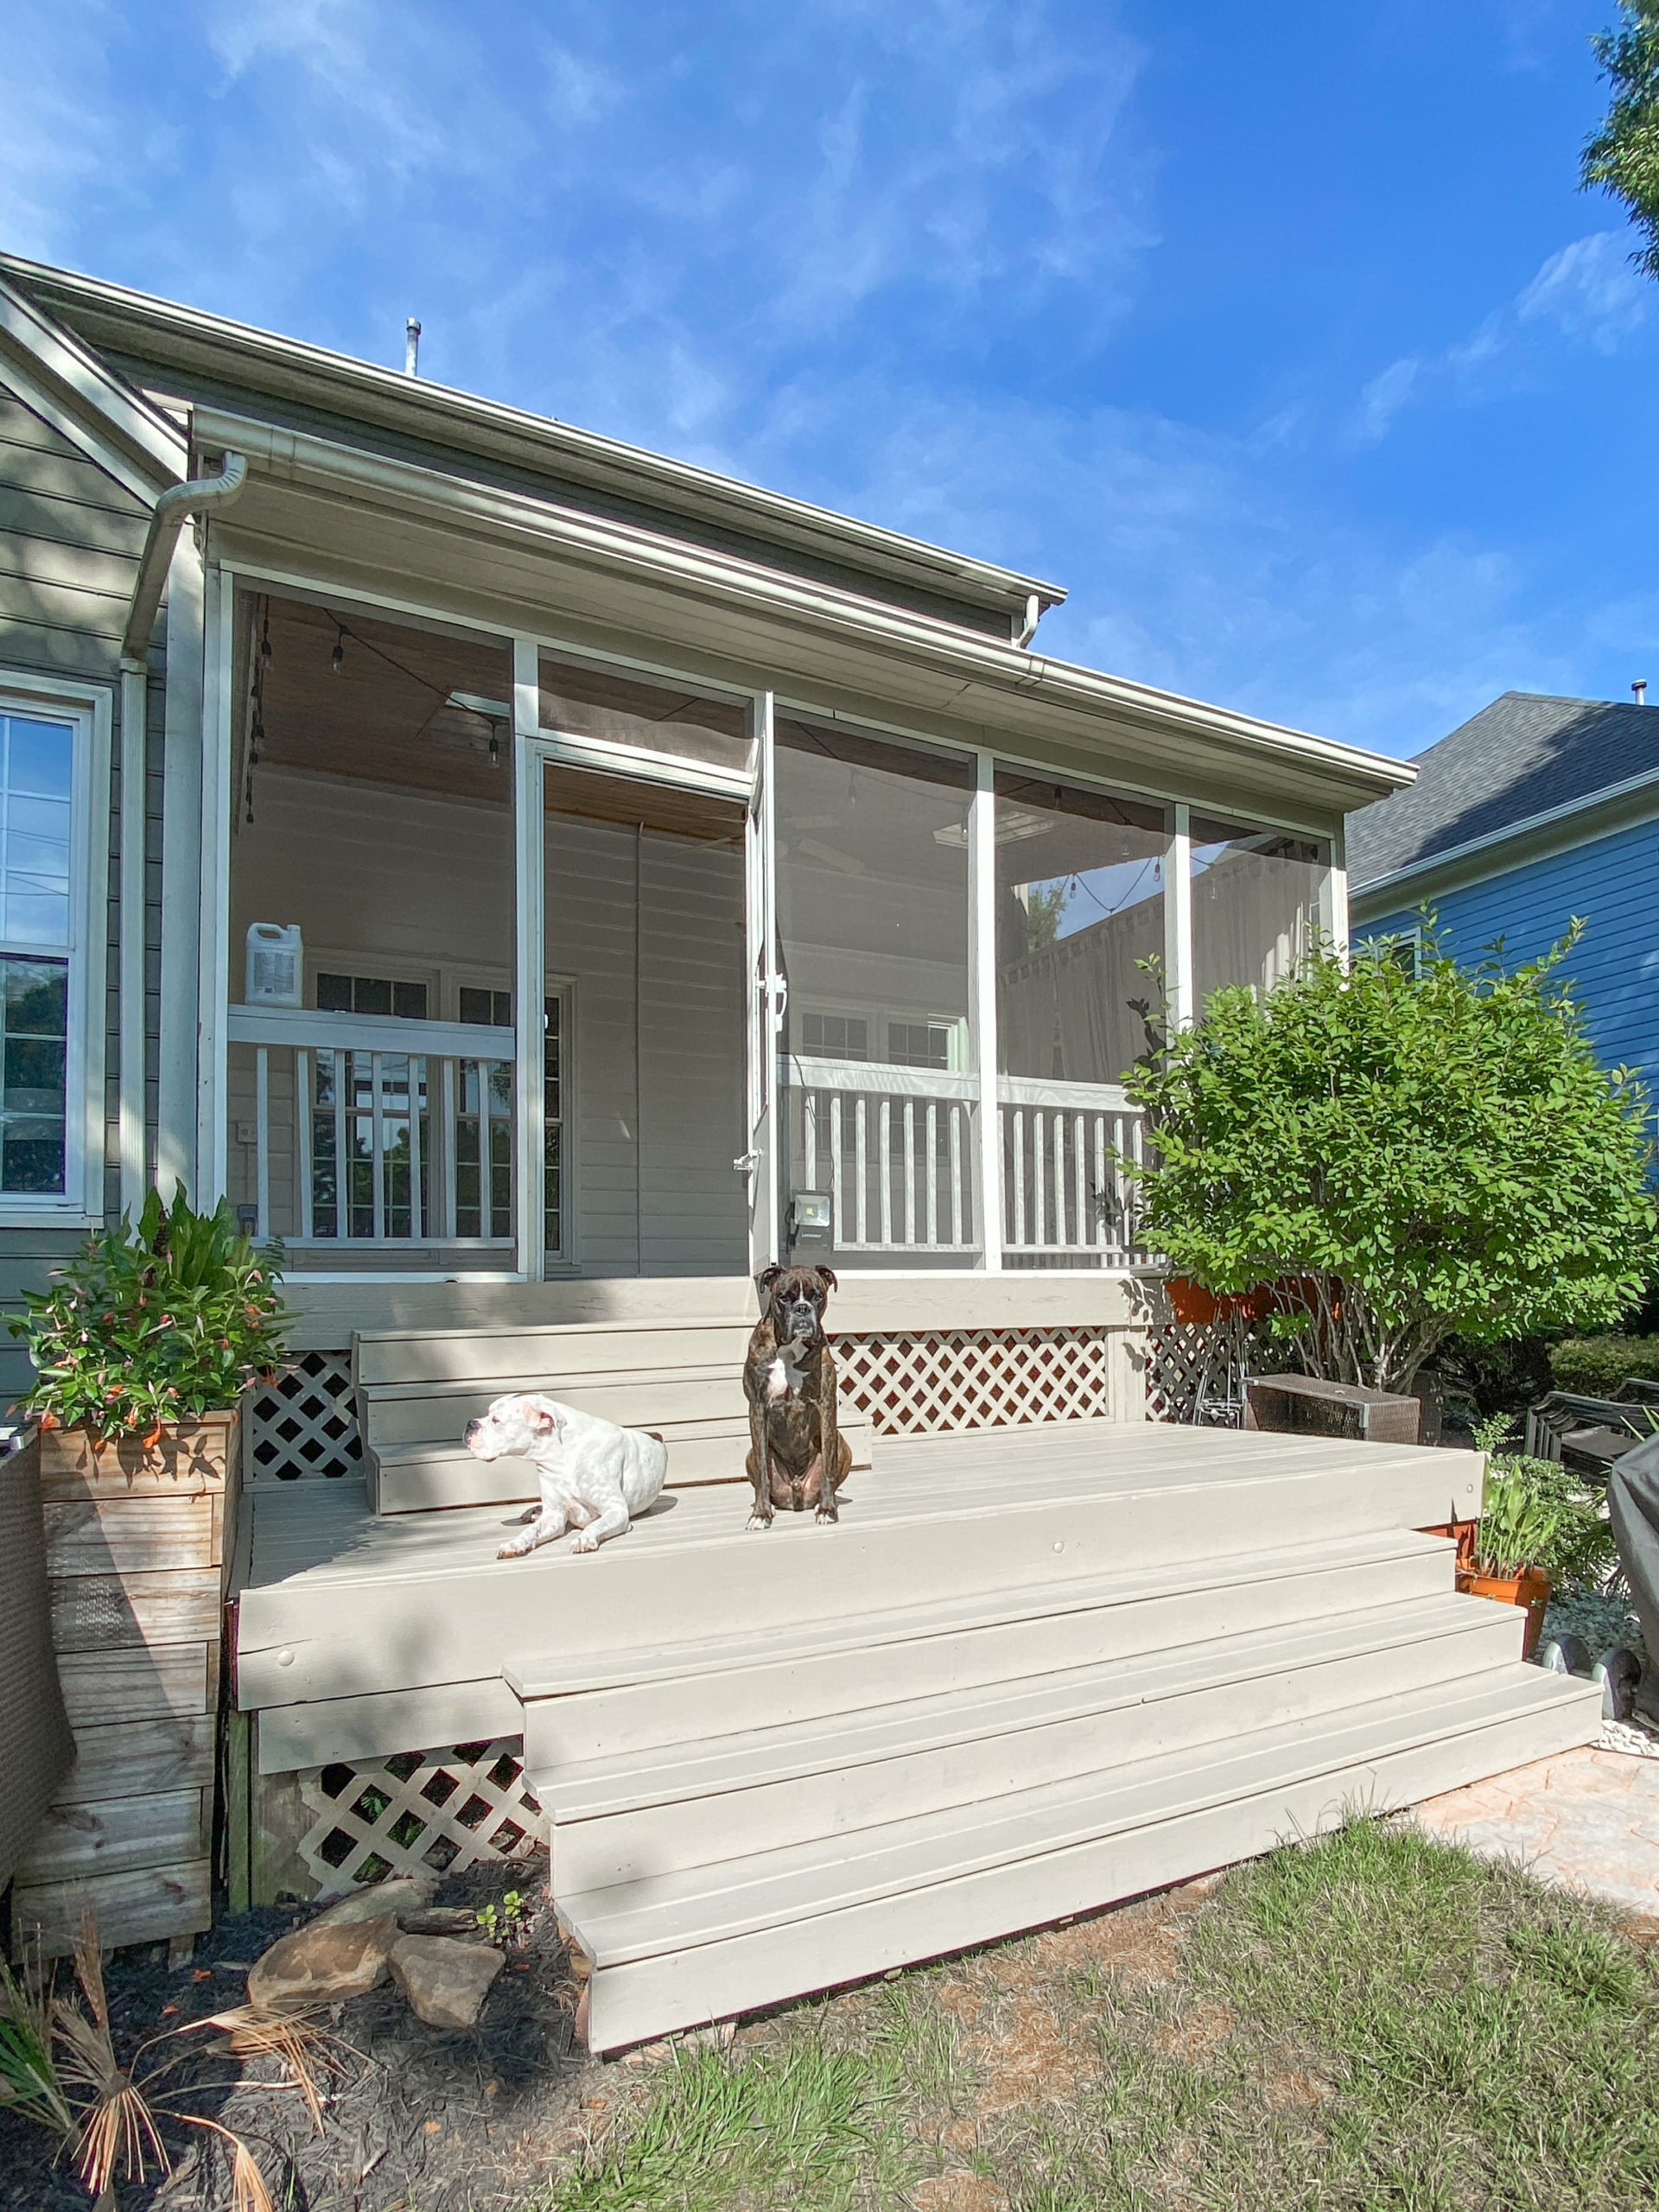
Wait 4 hours before walking on it, and 24 hours before placing rugs, furniture and decor back on it. Since we decided to tackle this project in the middle of a Southern heat wave, we left the porch for a few days before putting it back together.
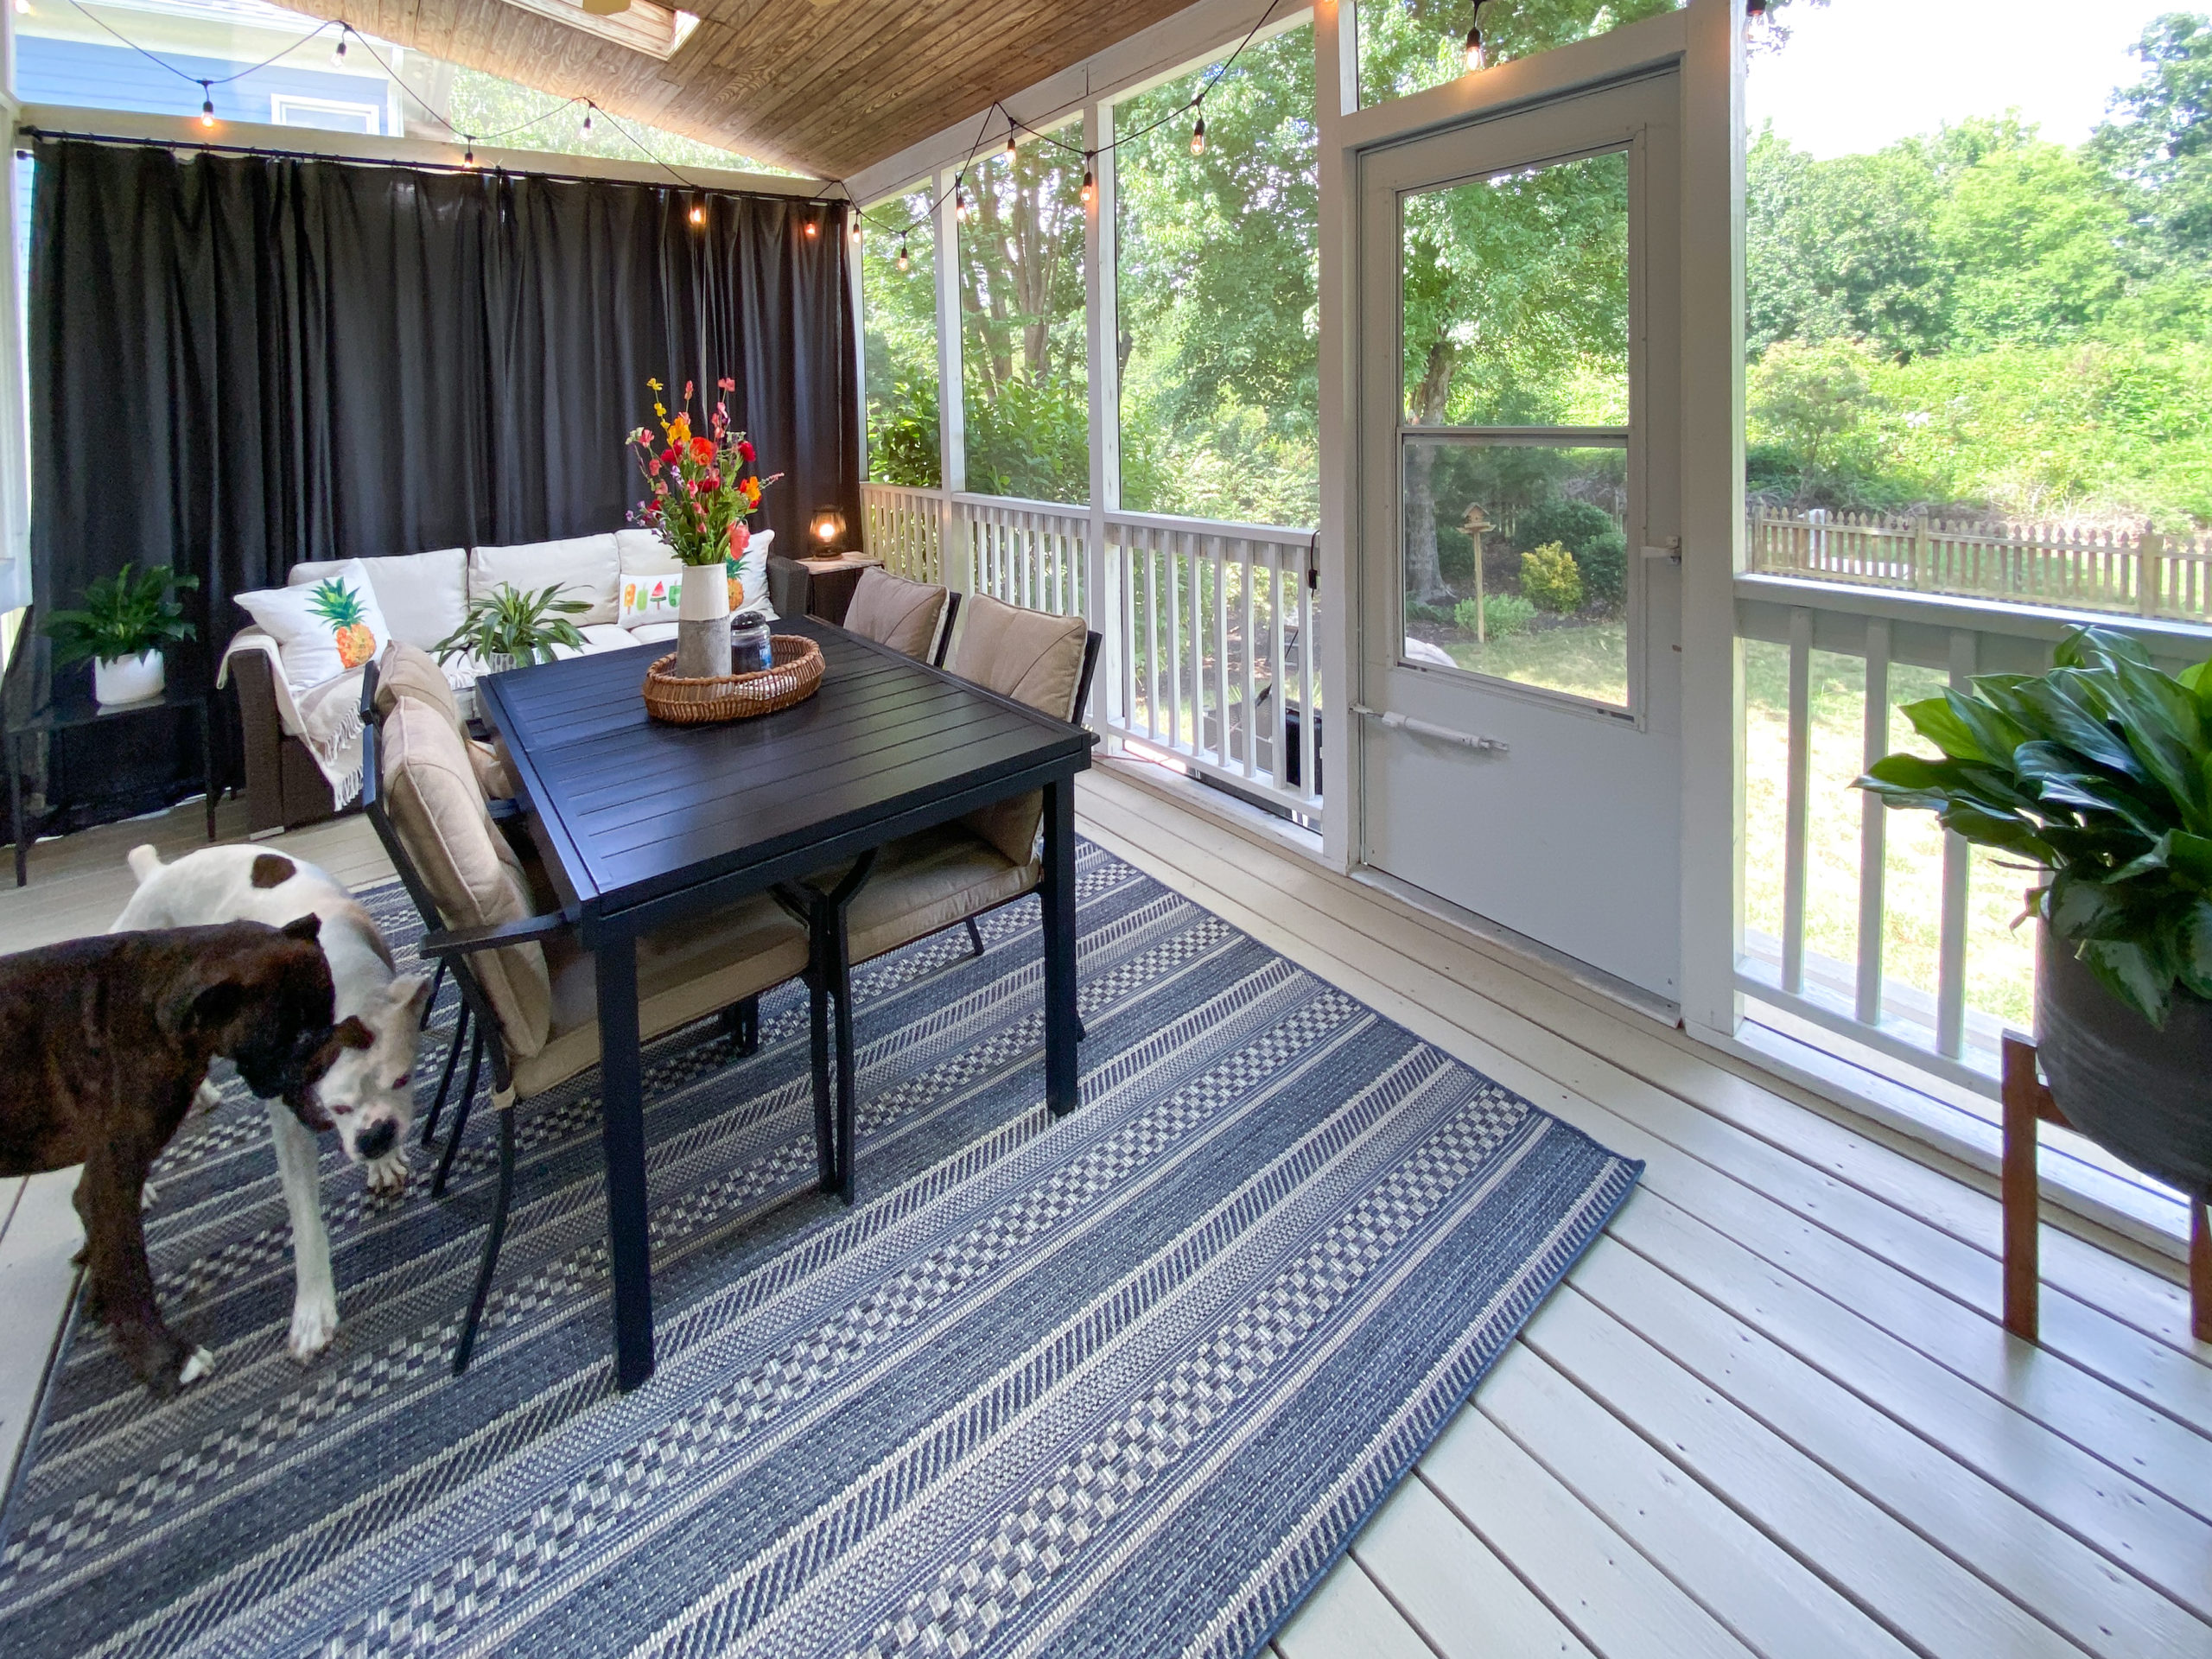
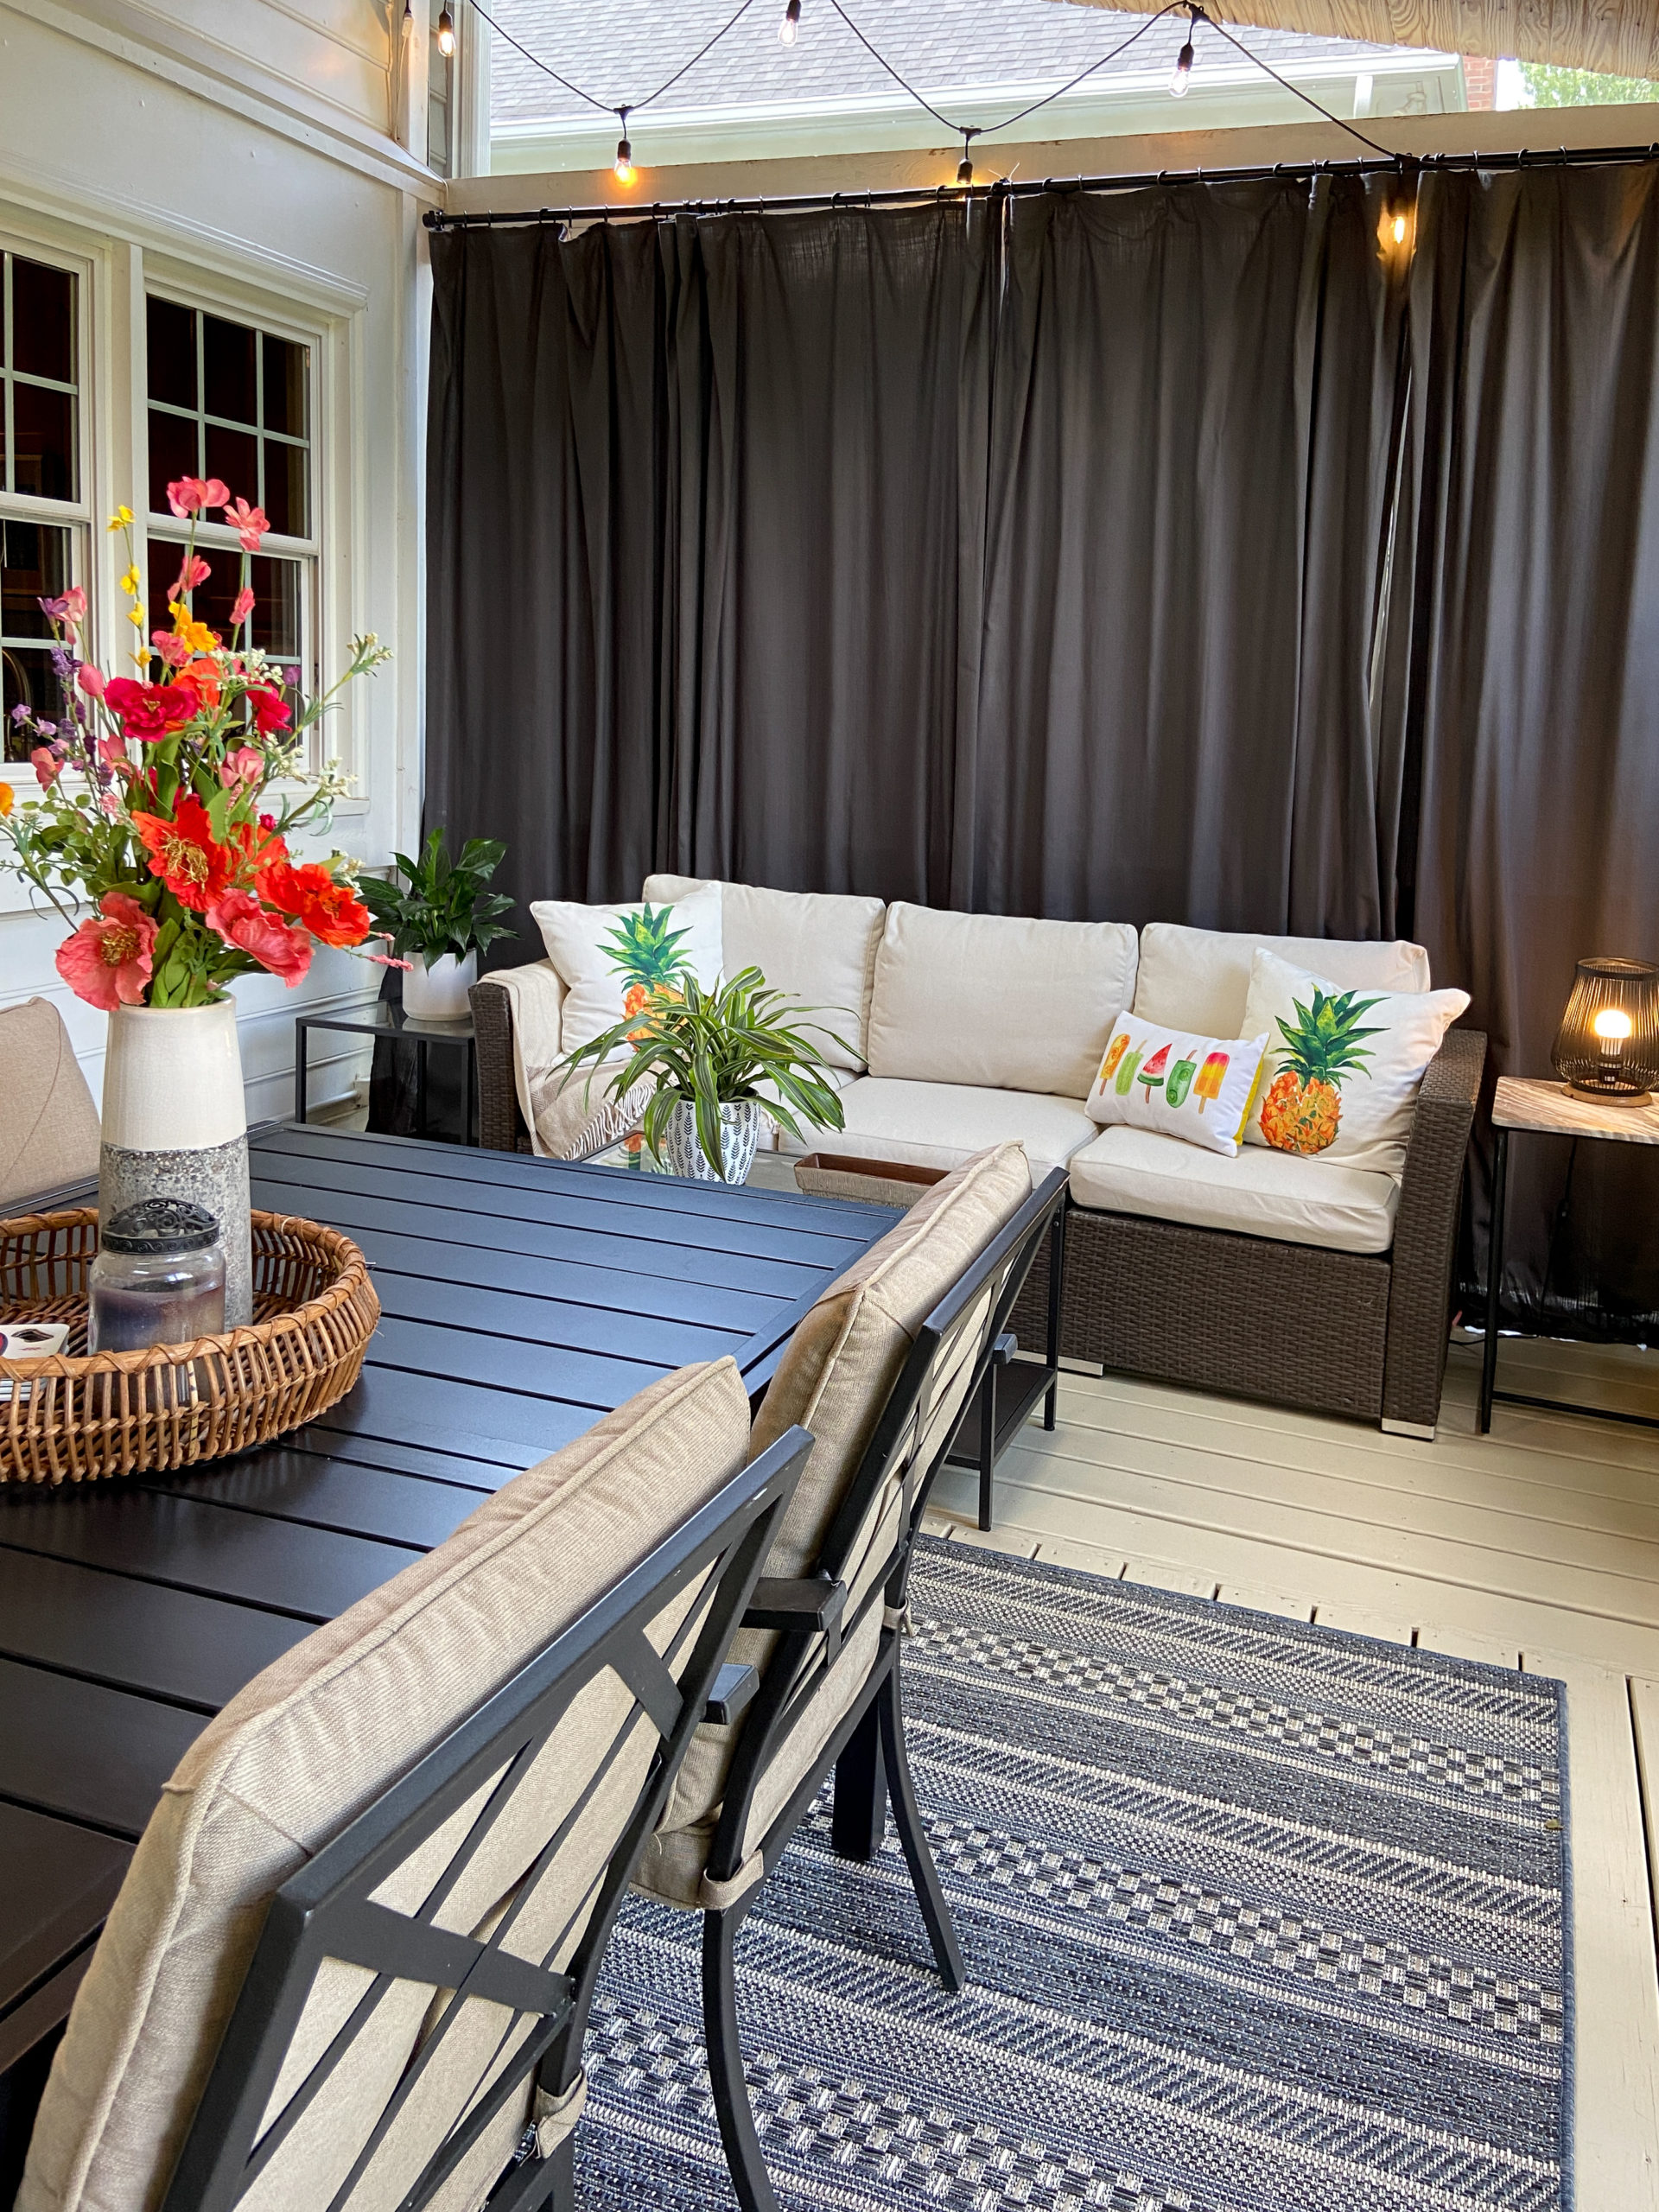
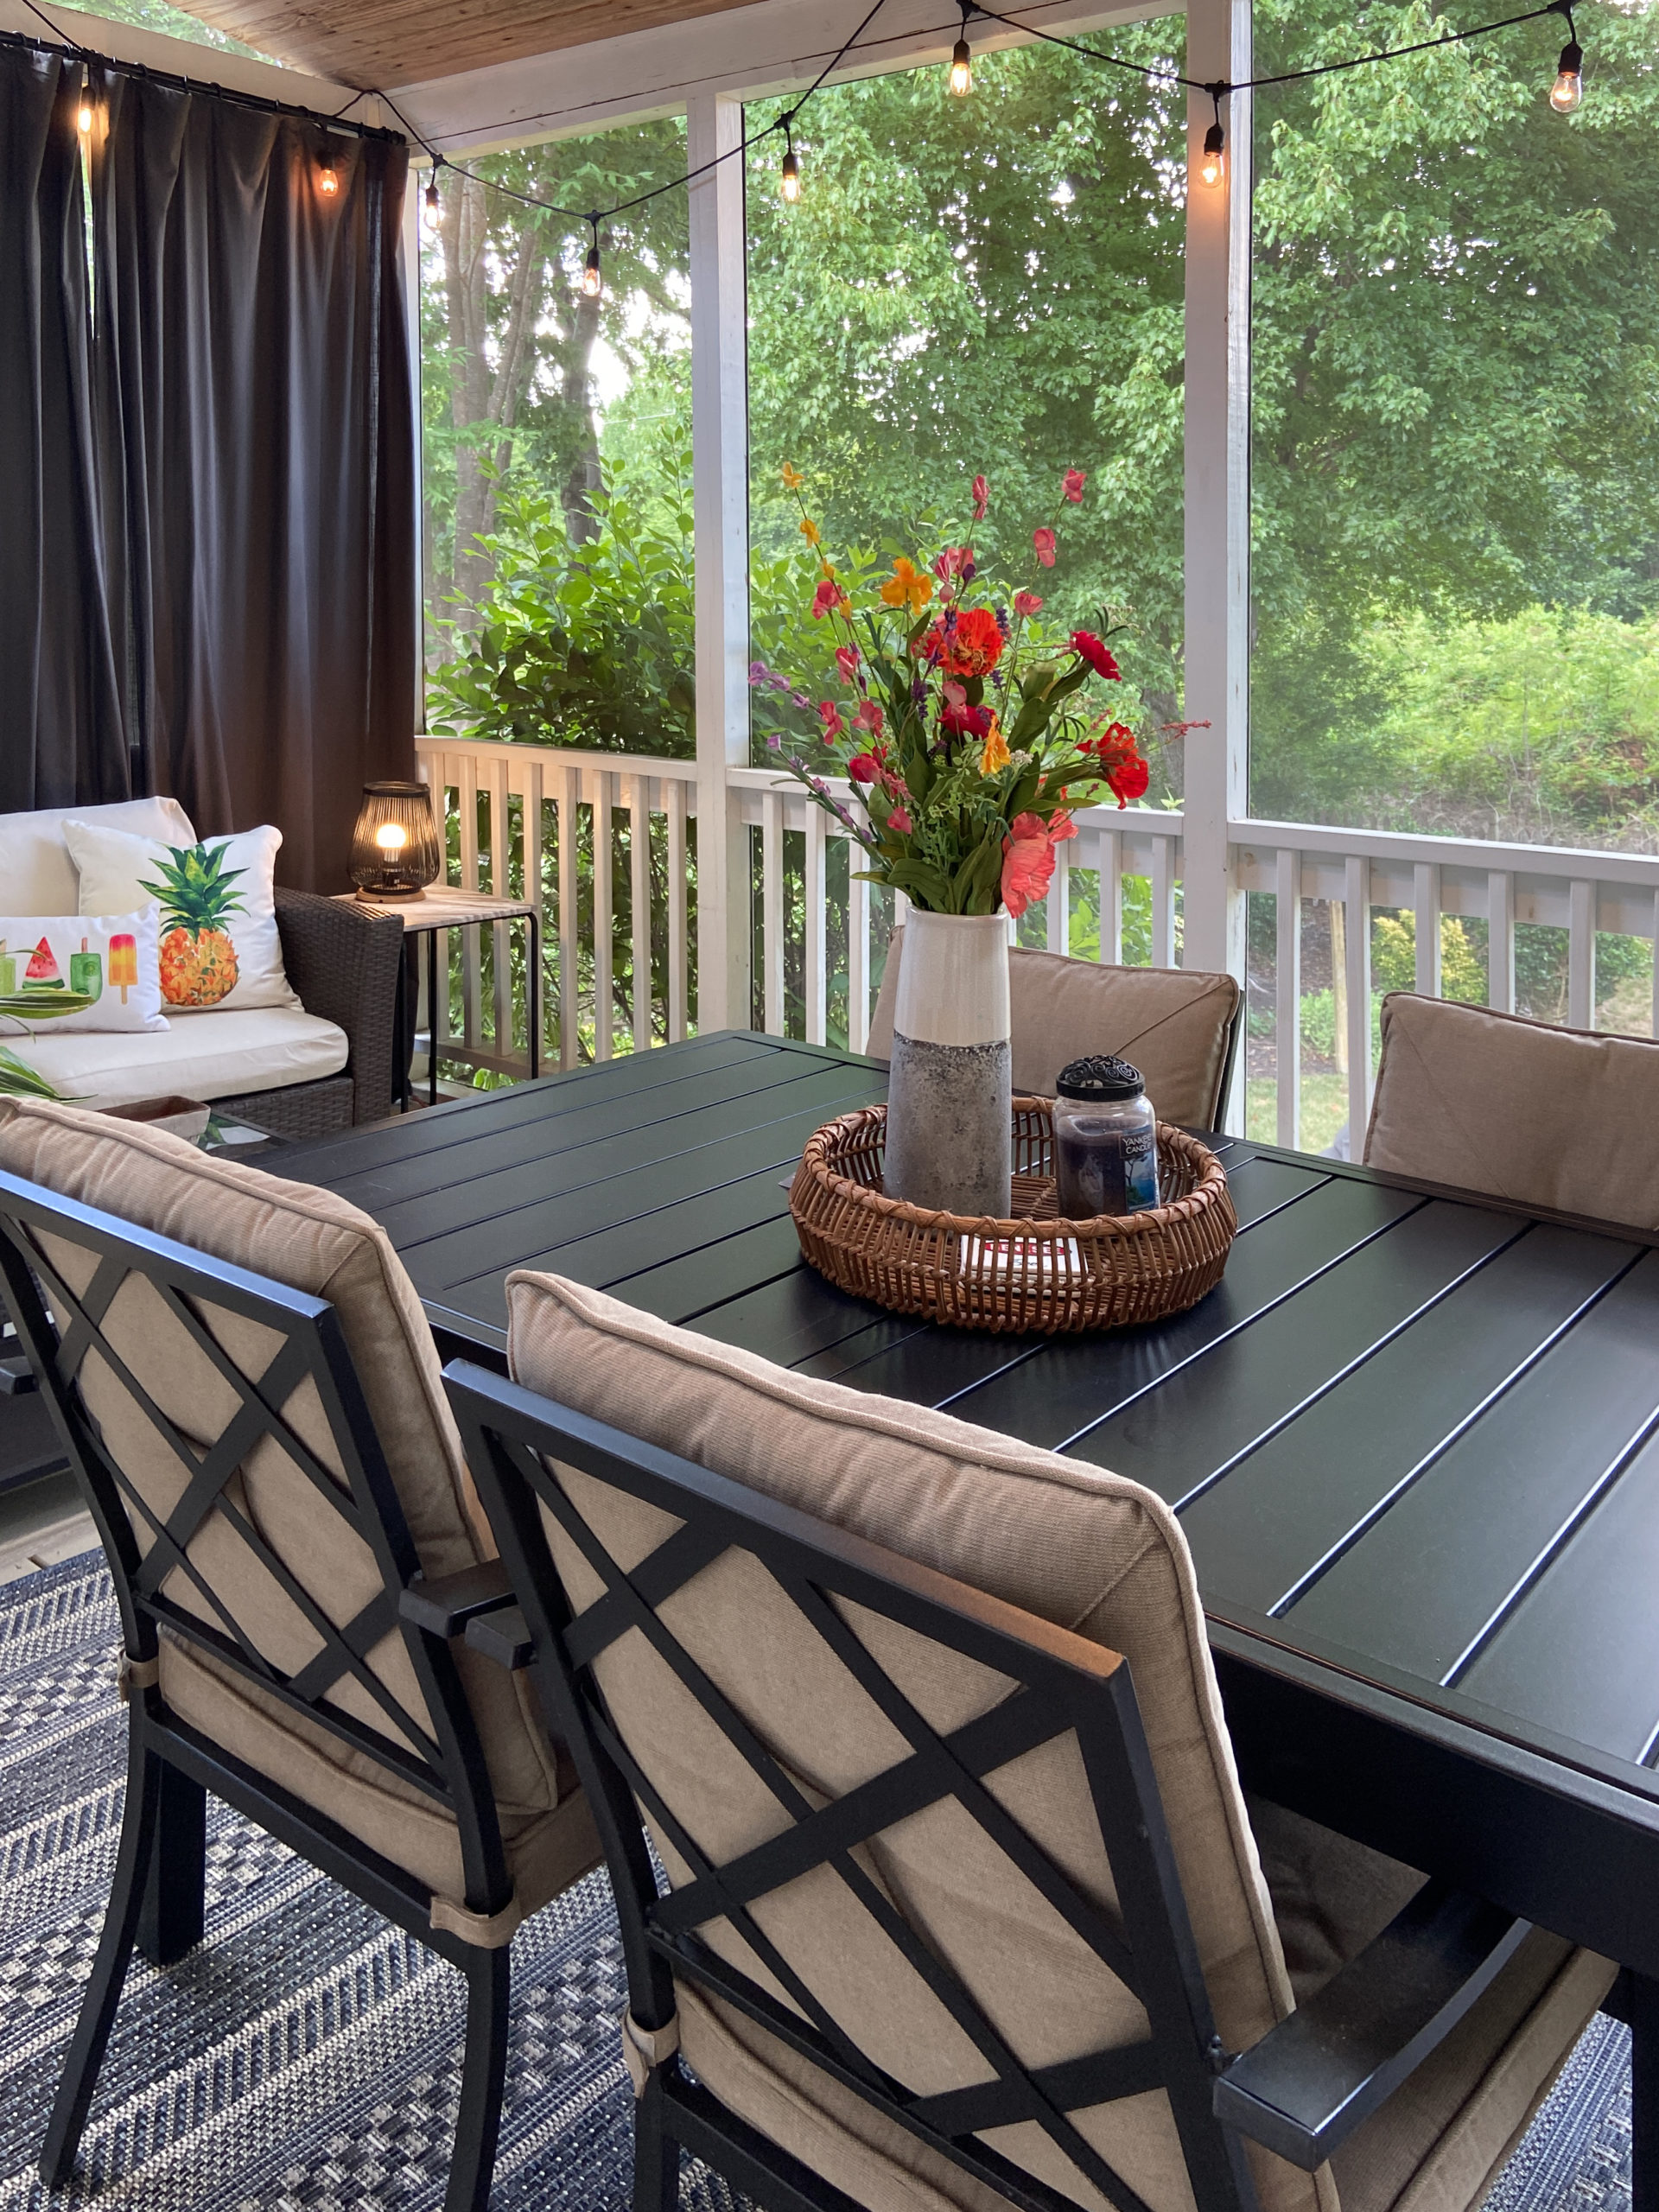
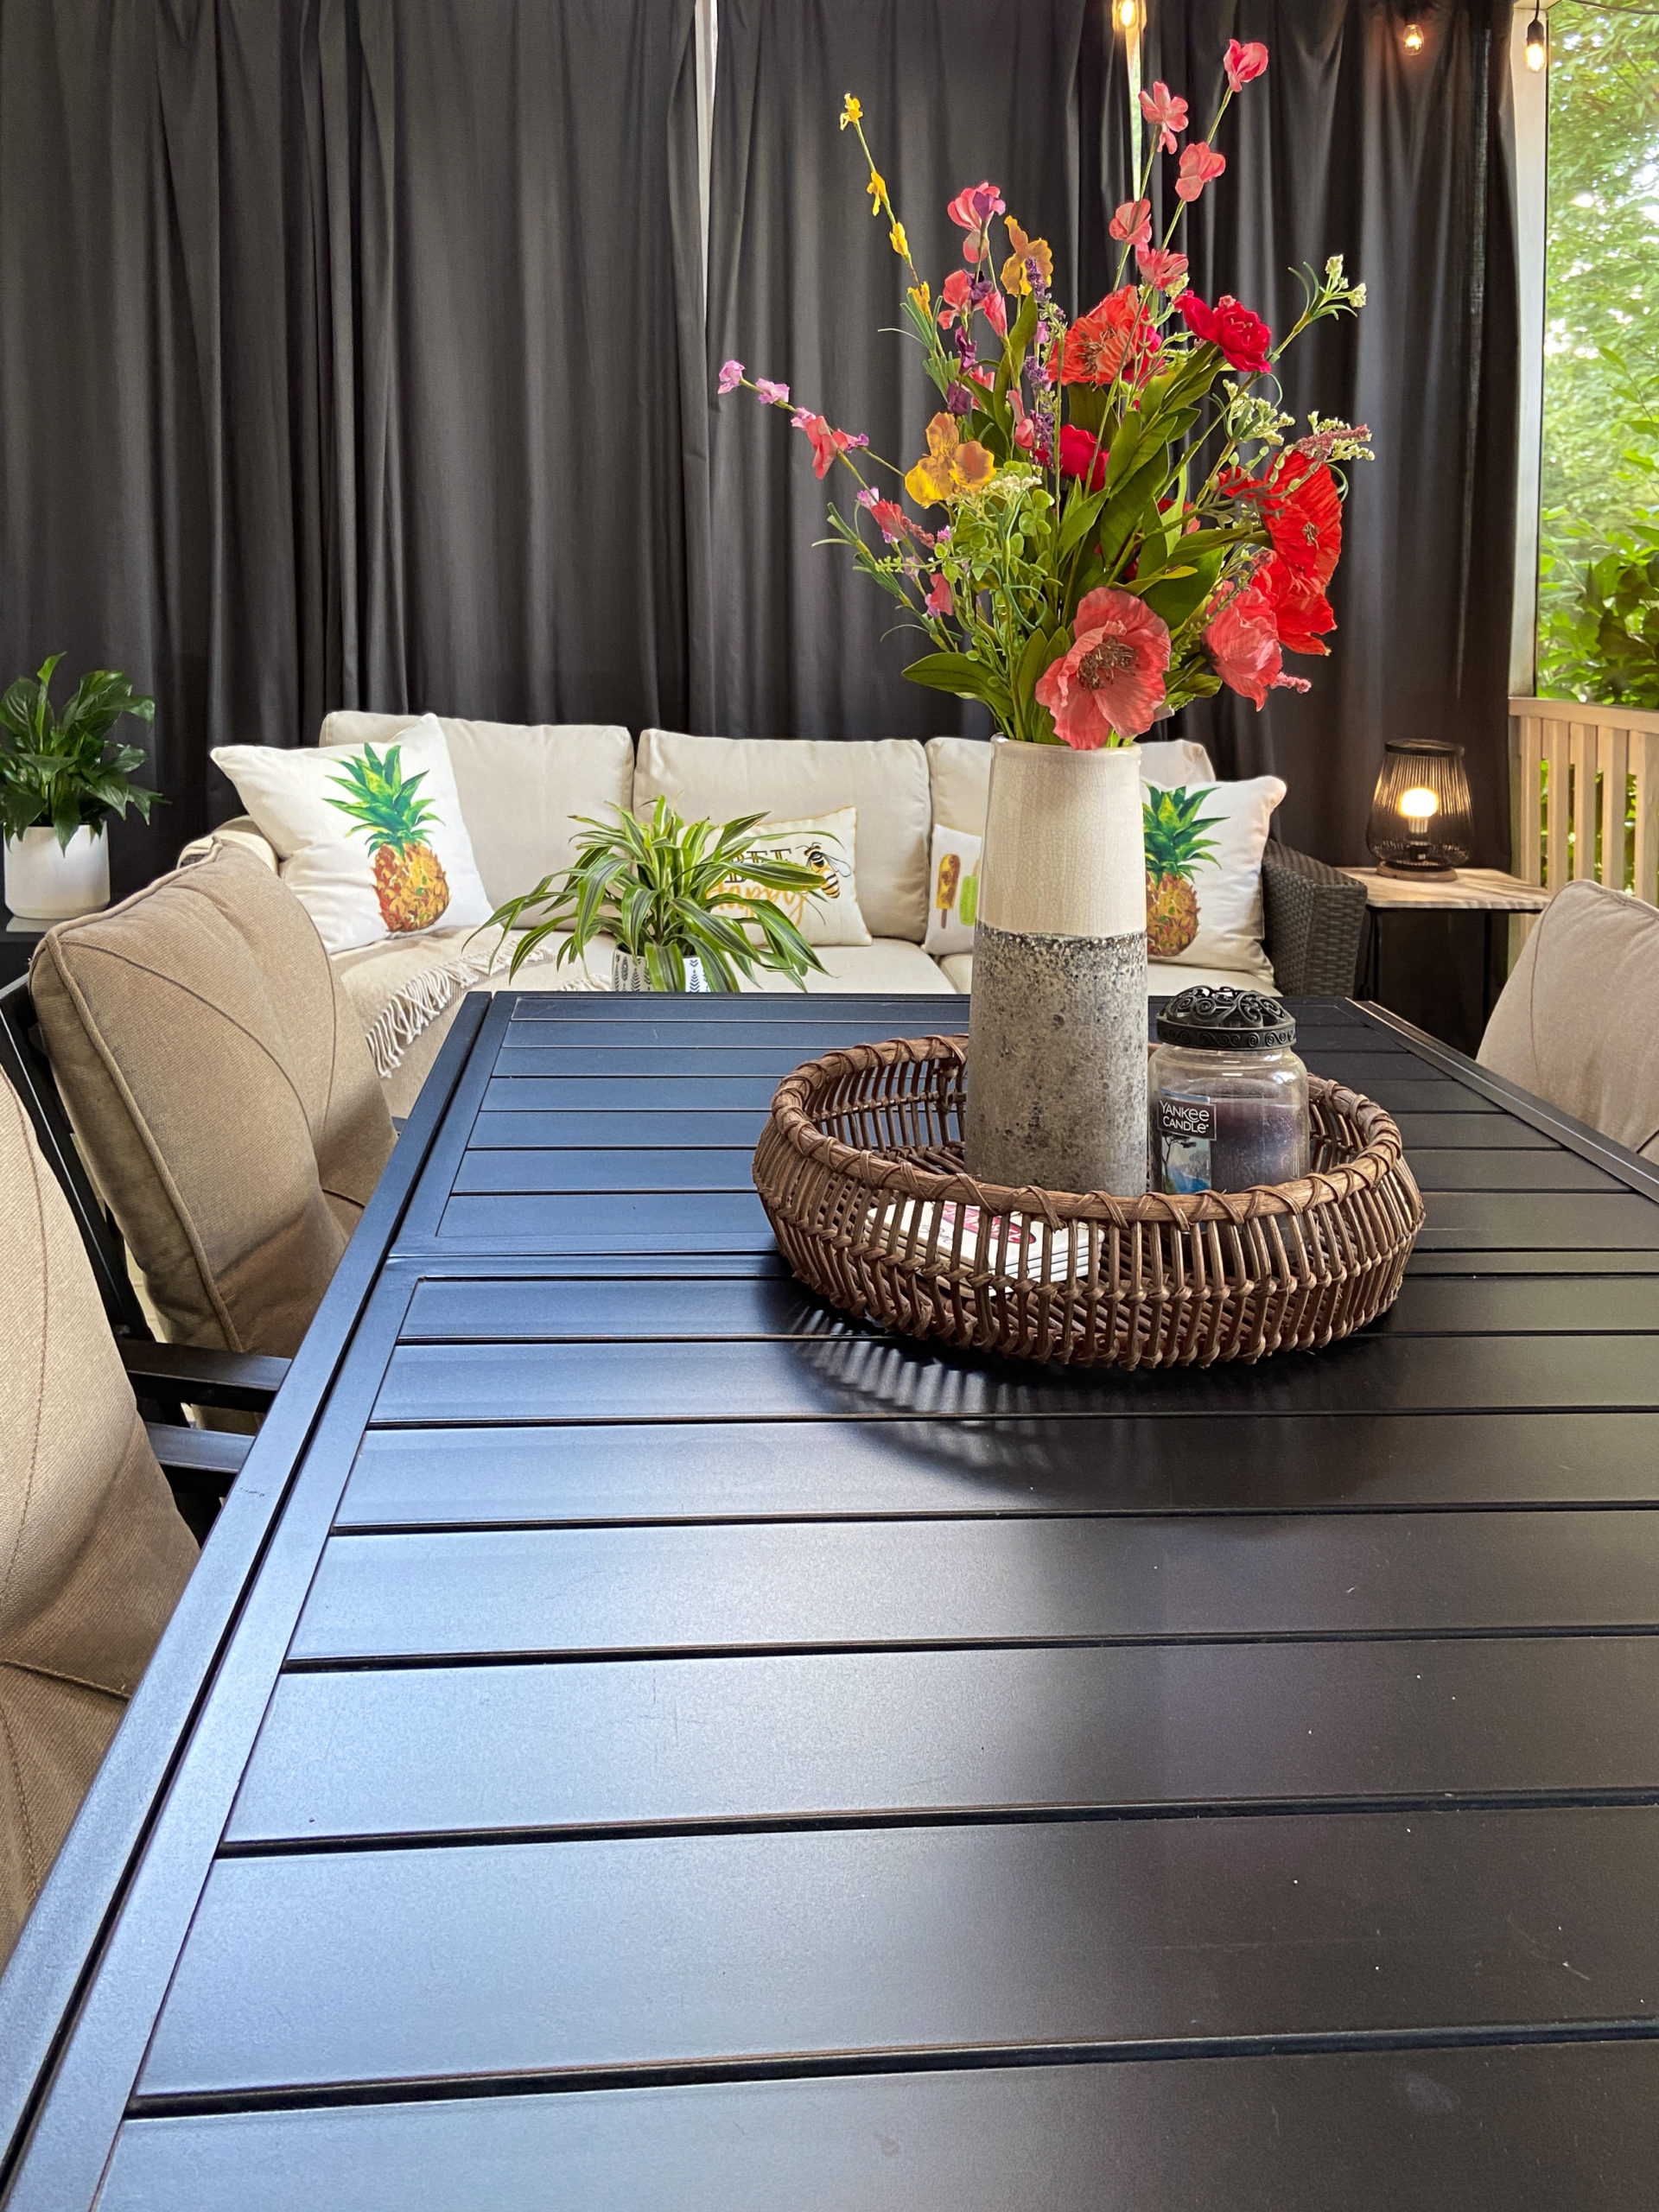
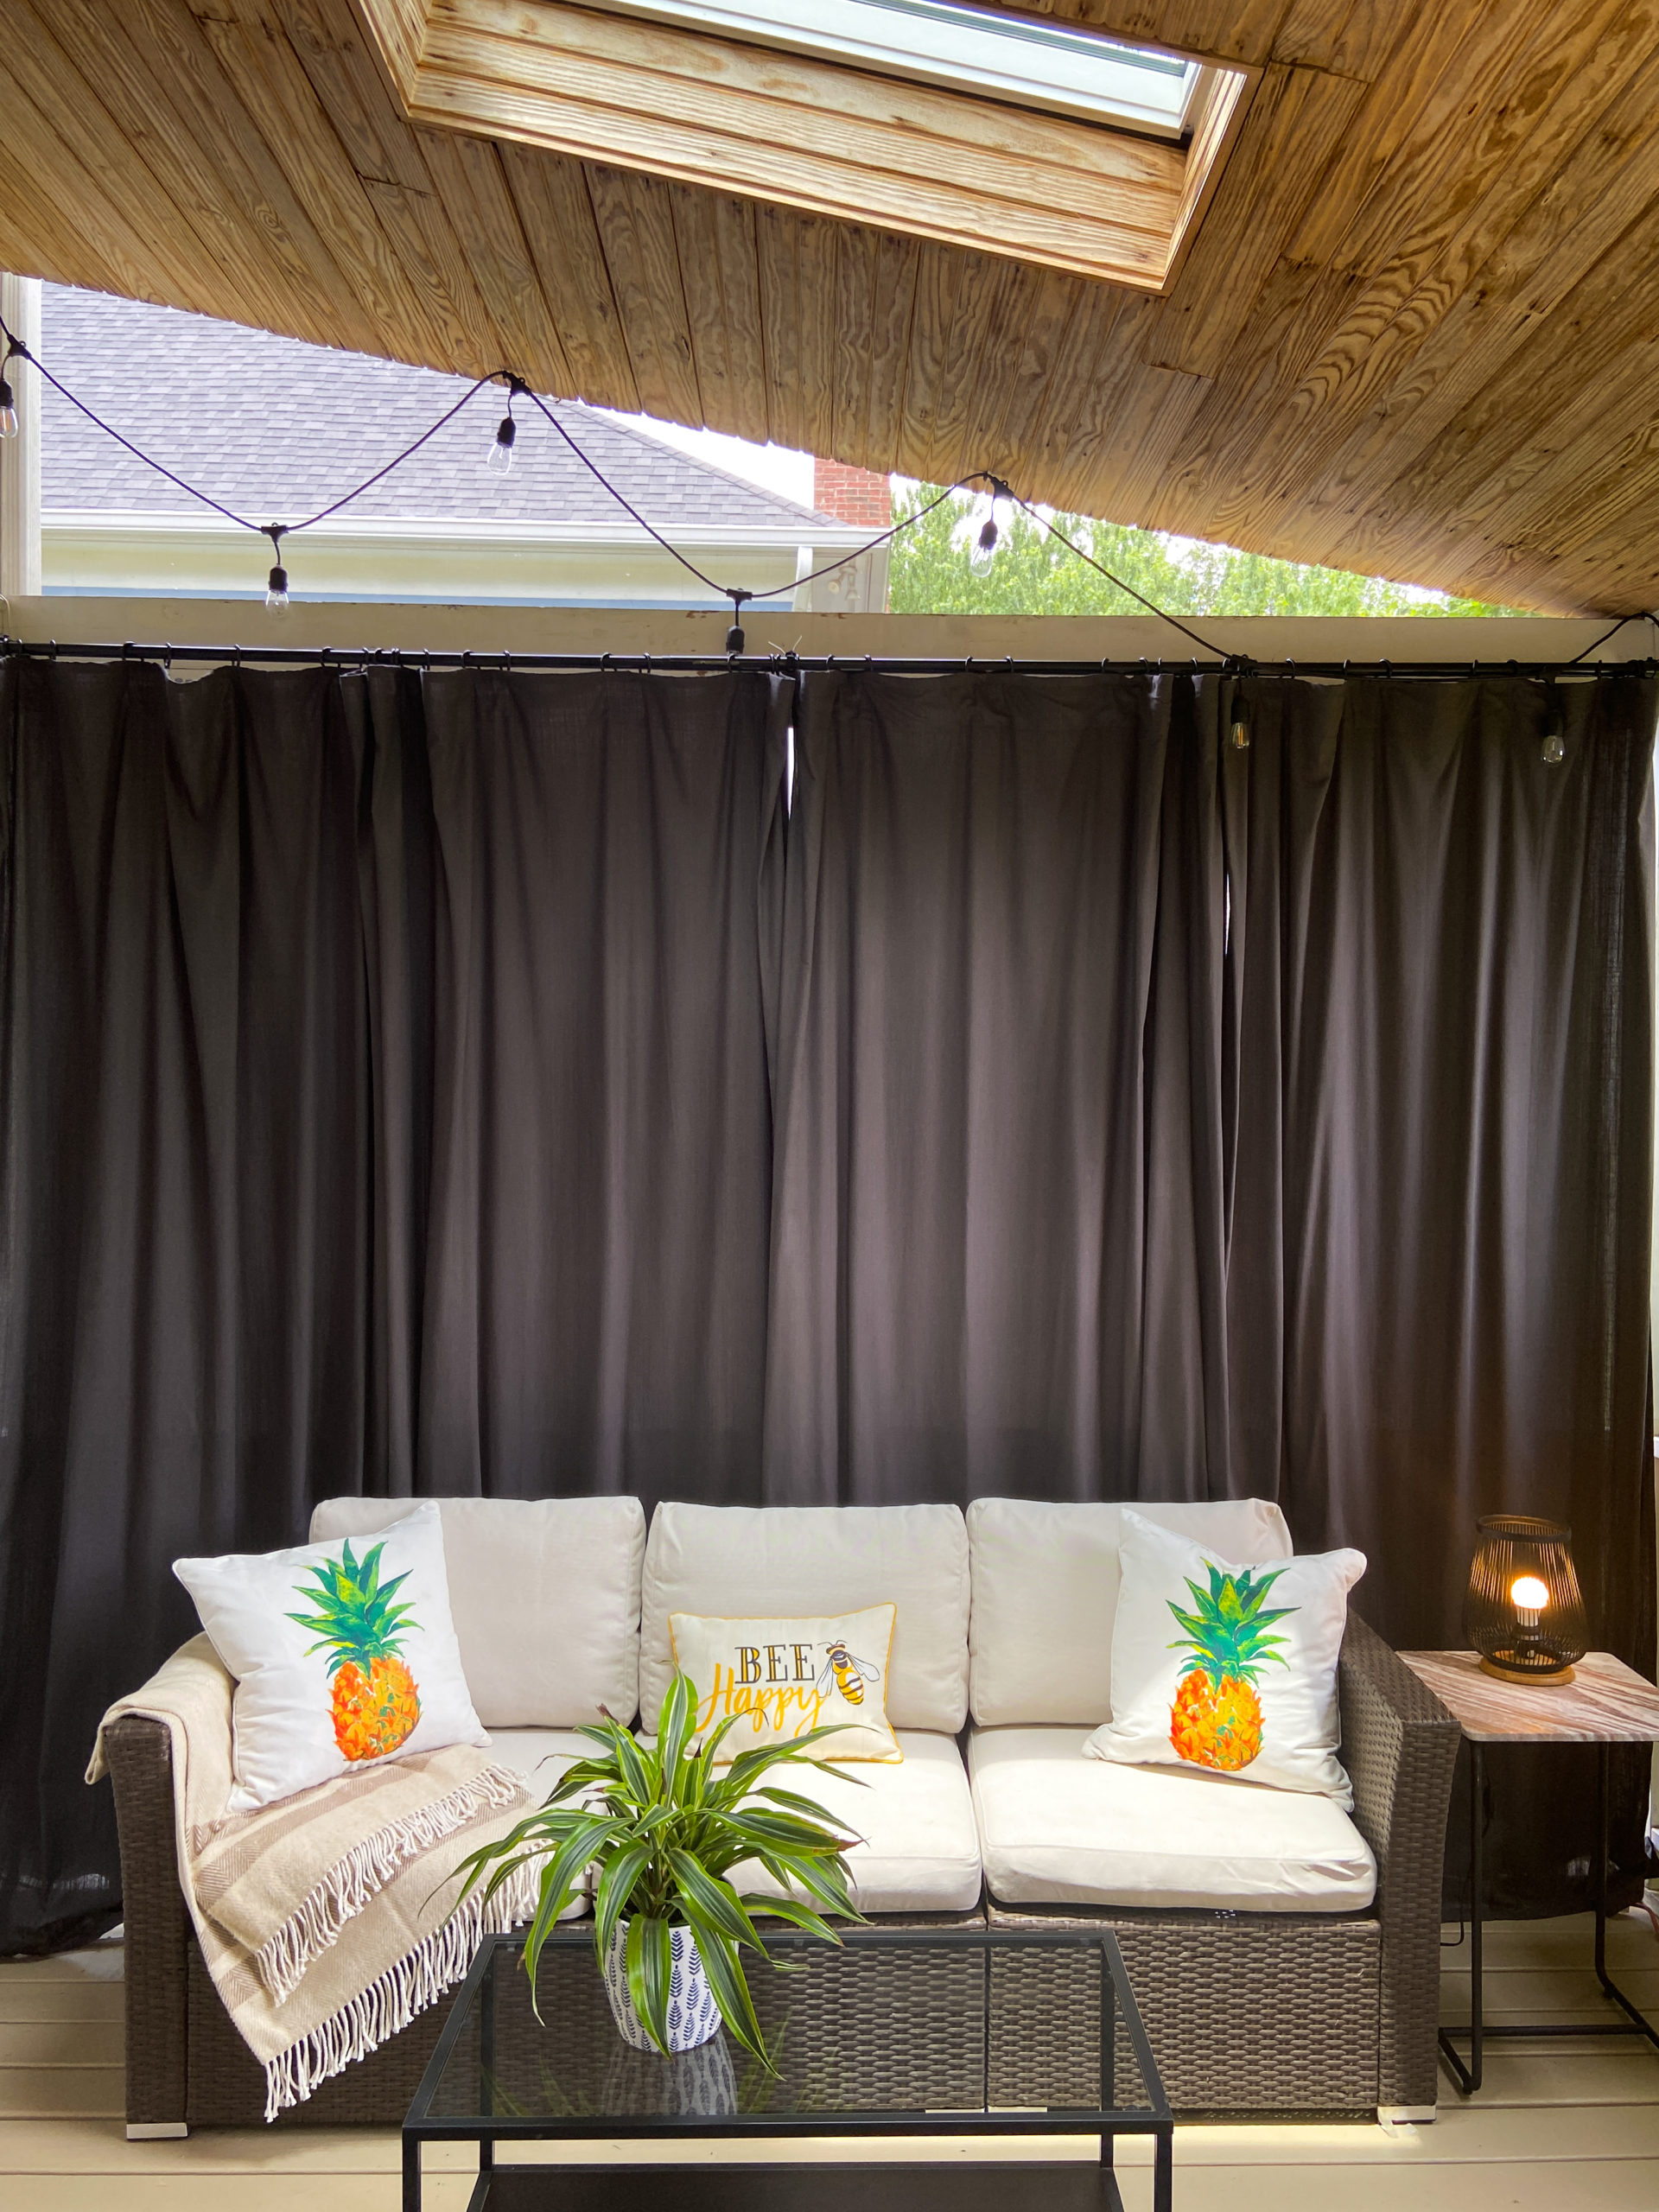
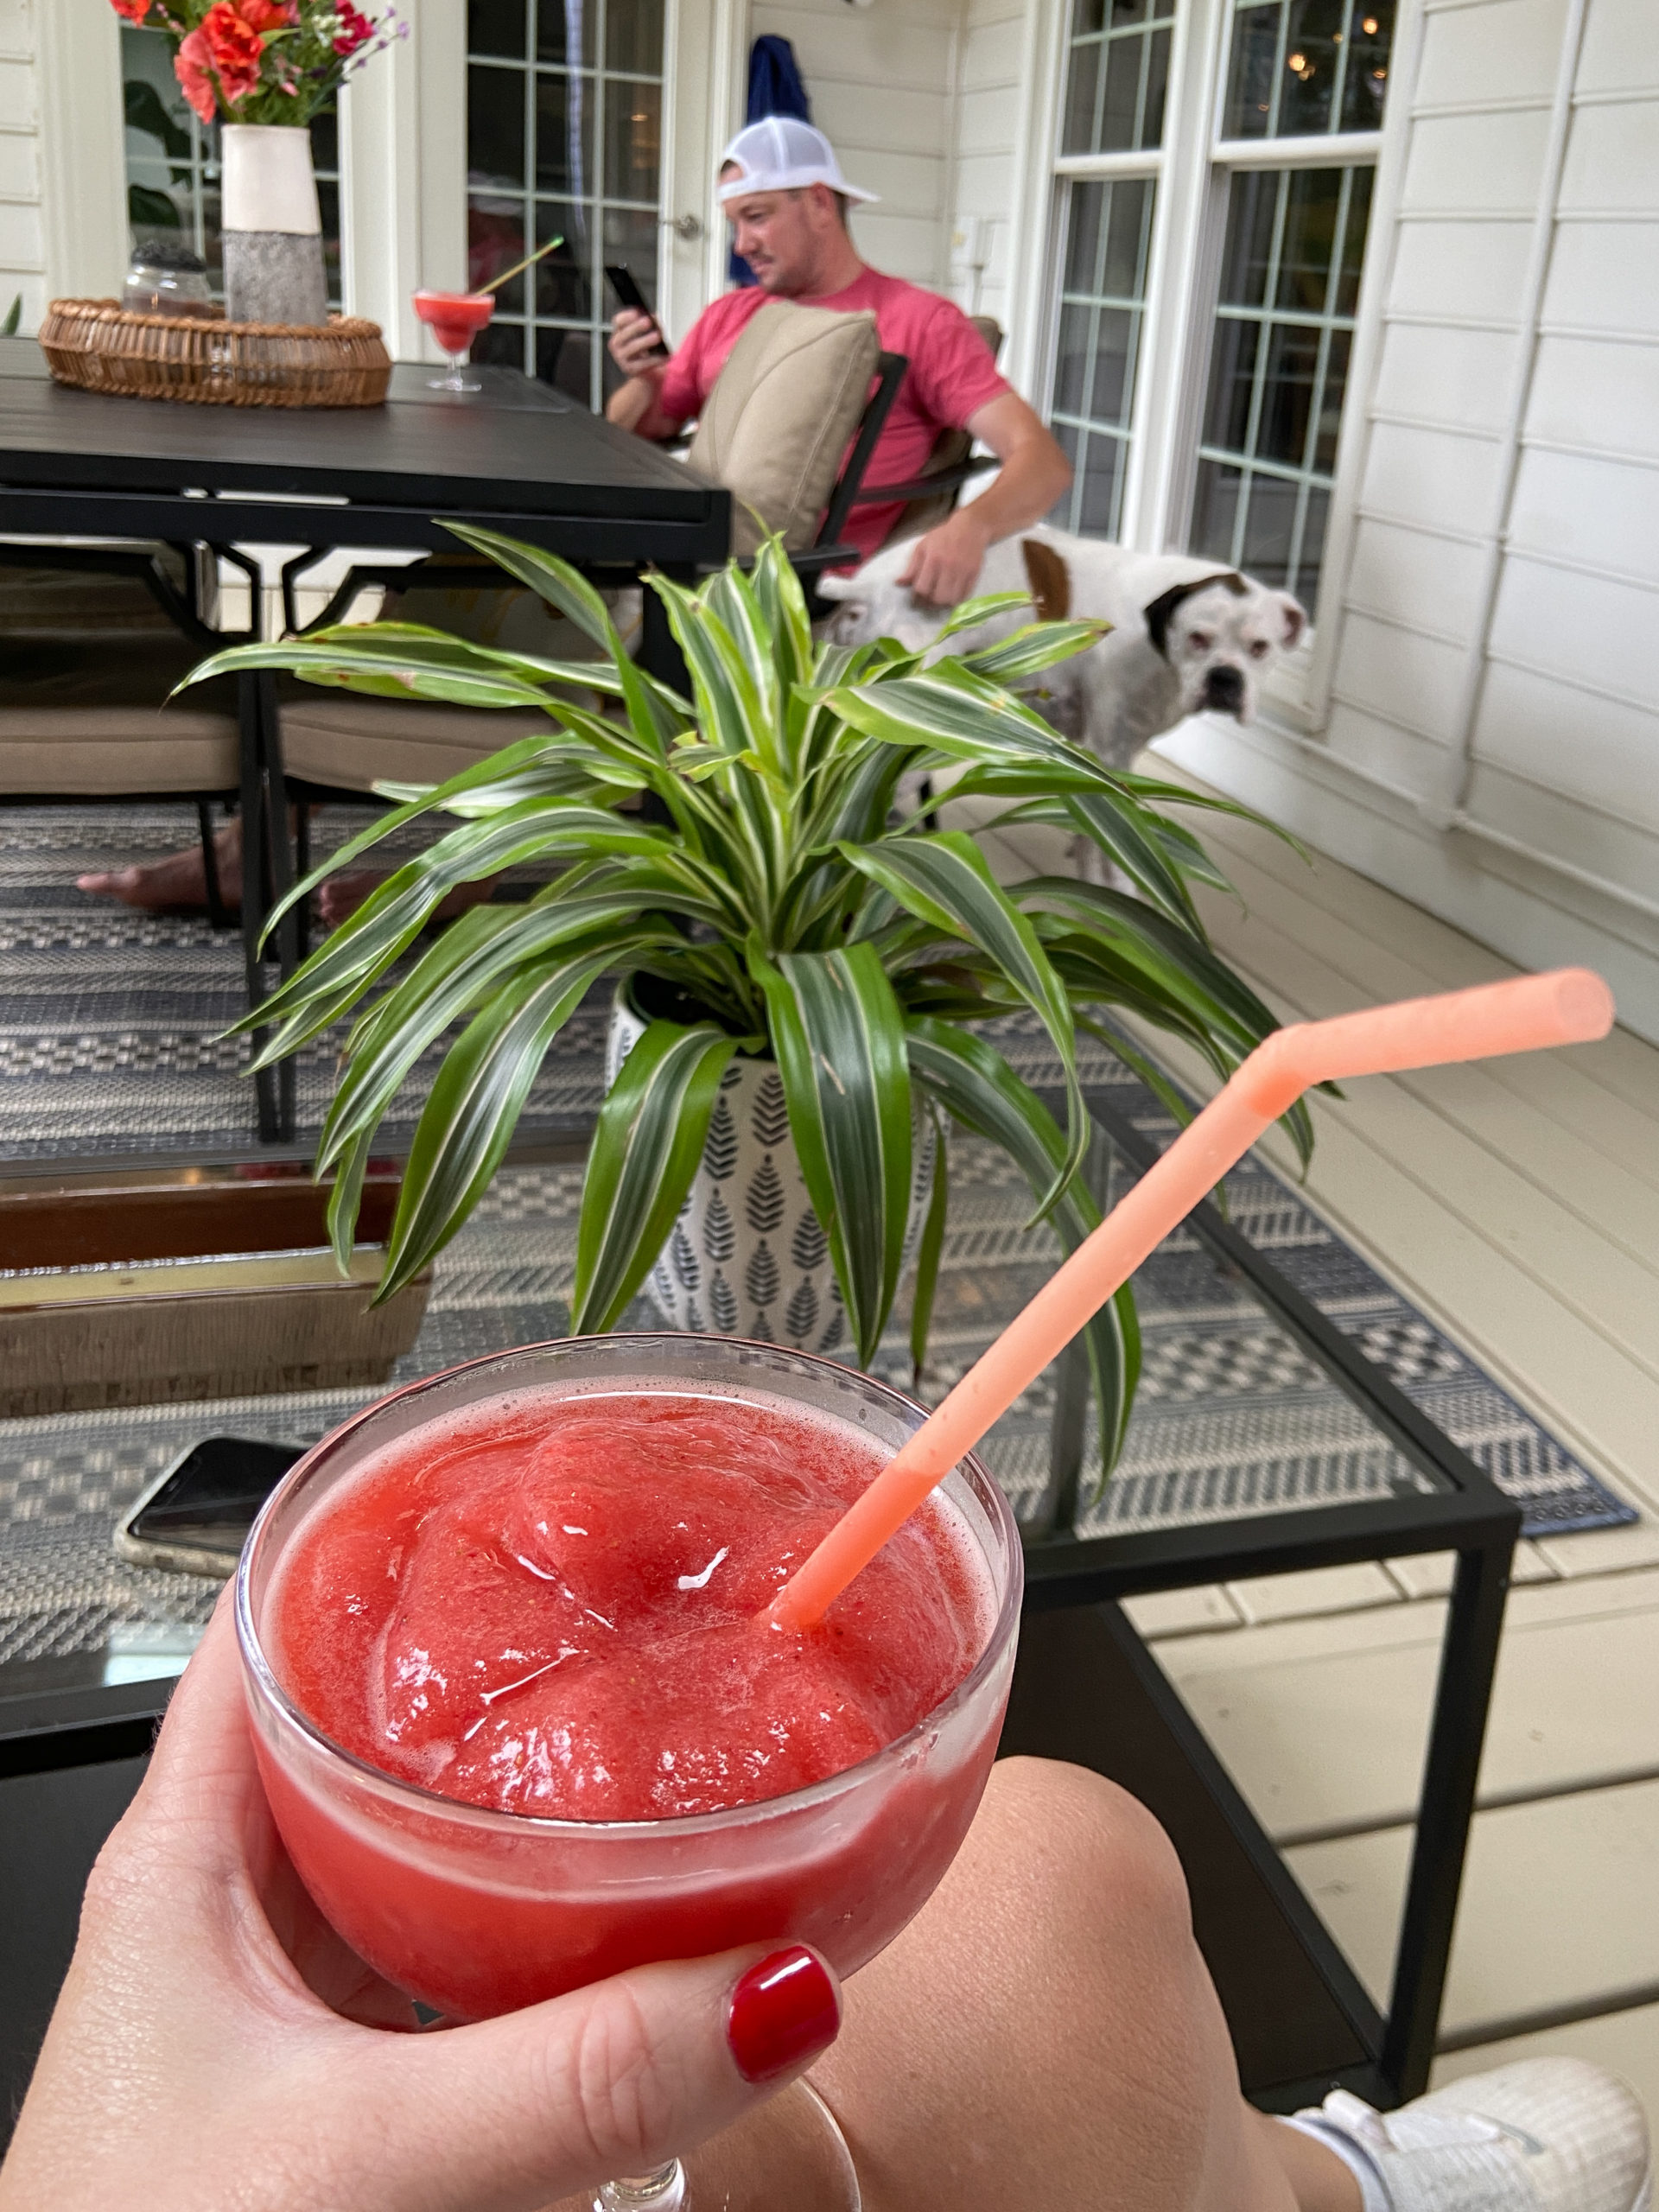
Before and After: the dogs are loving their new deck!


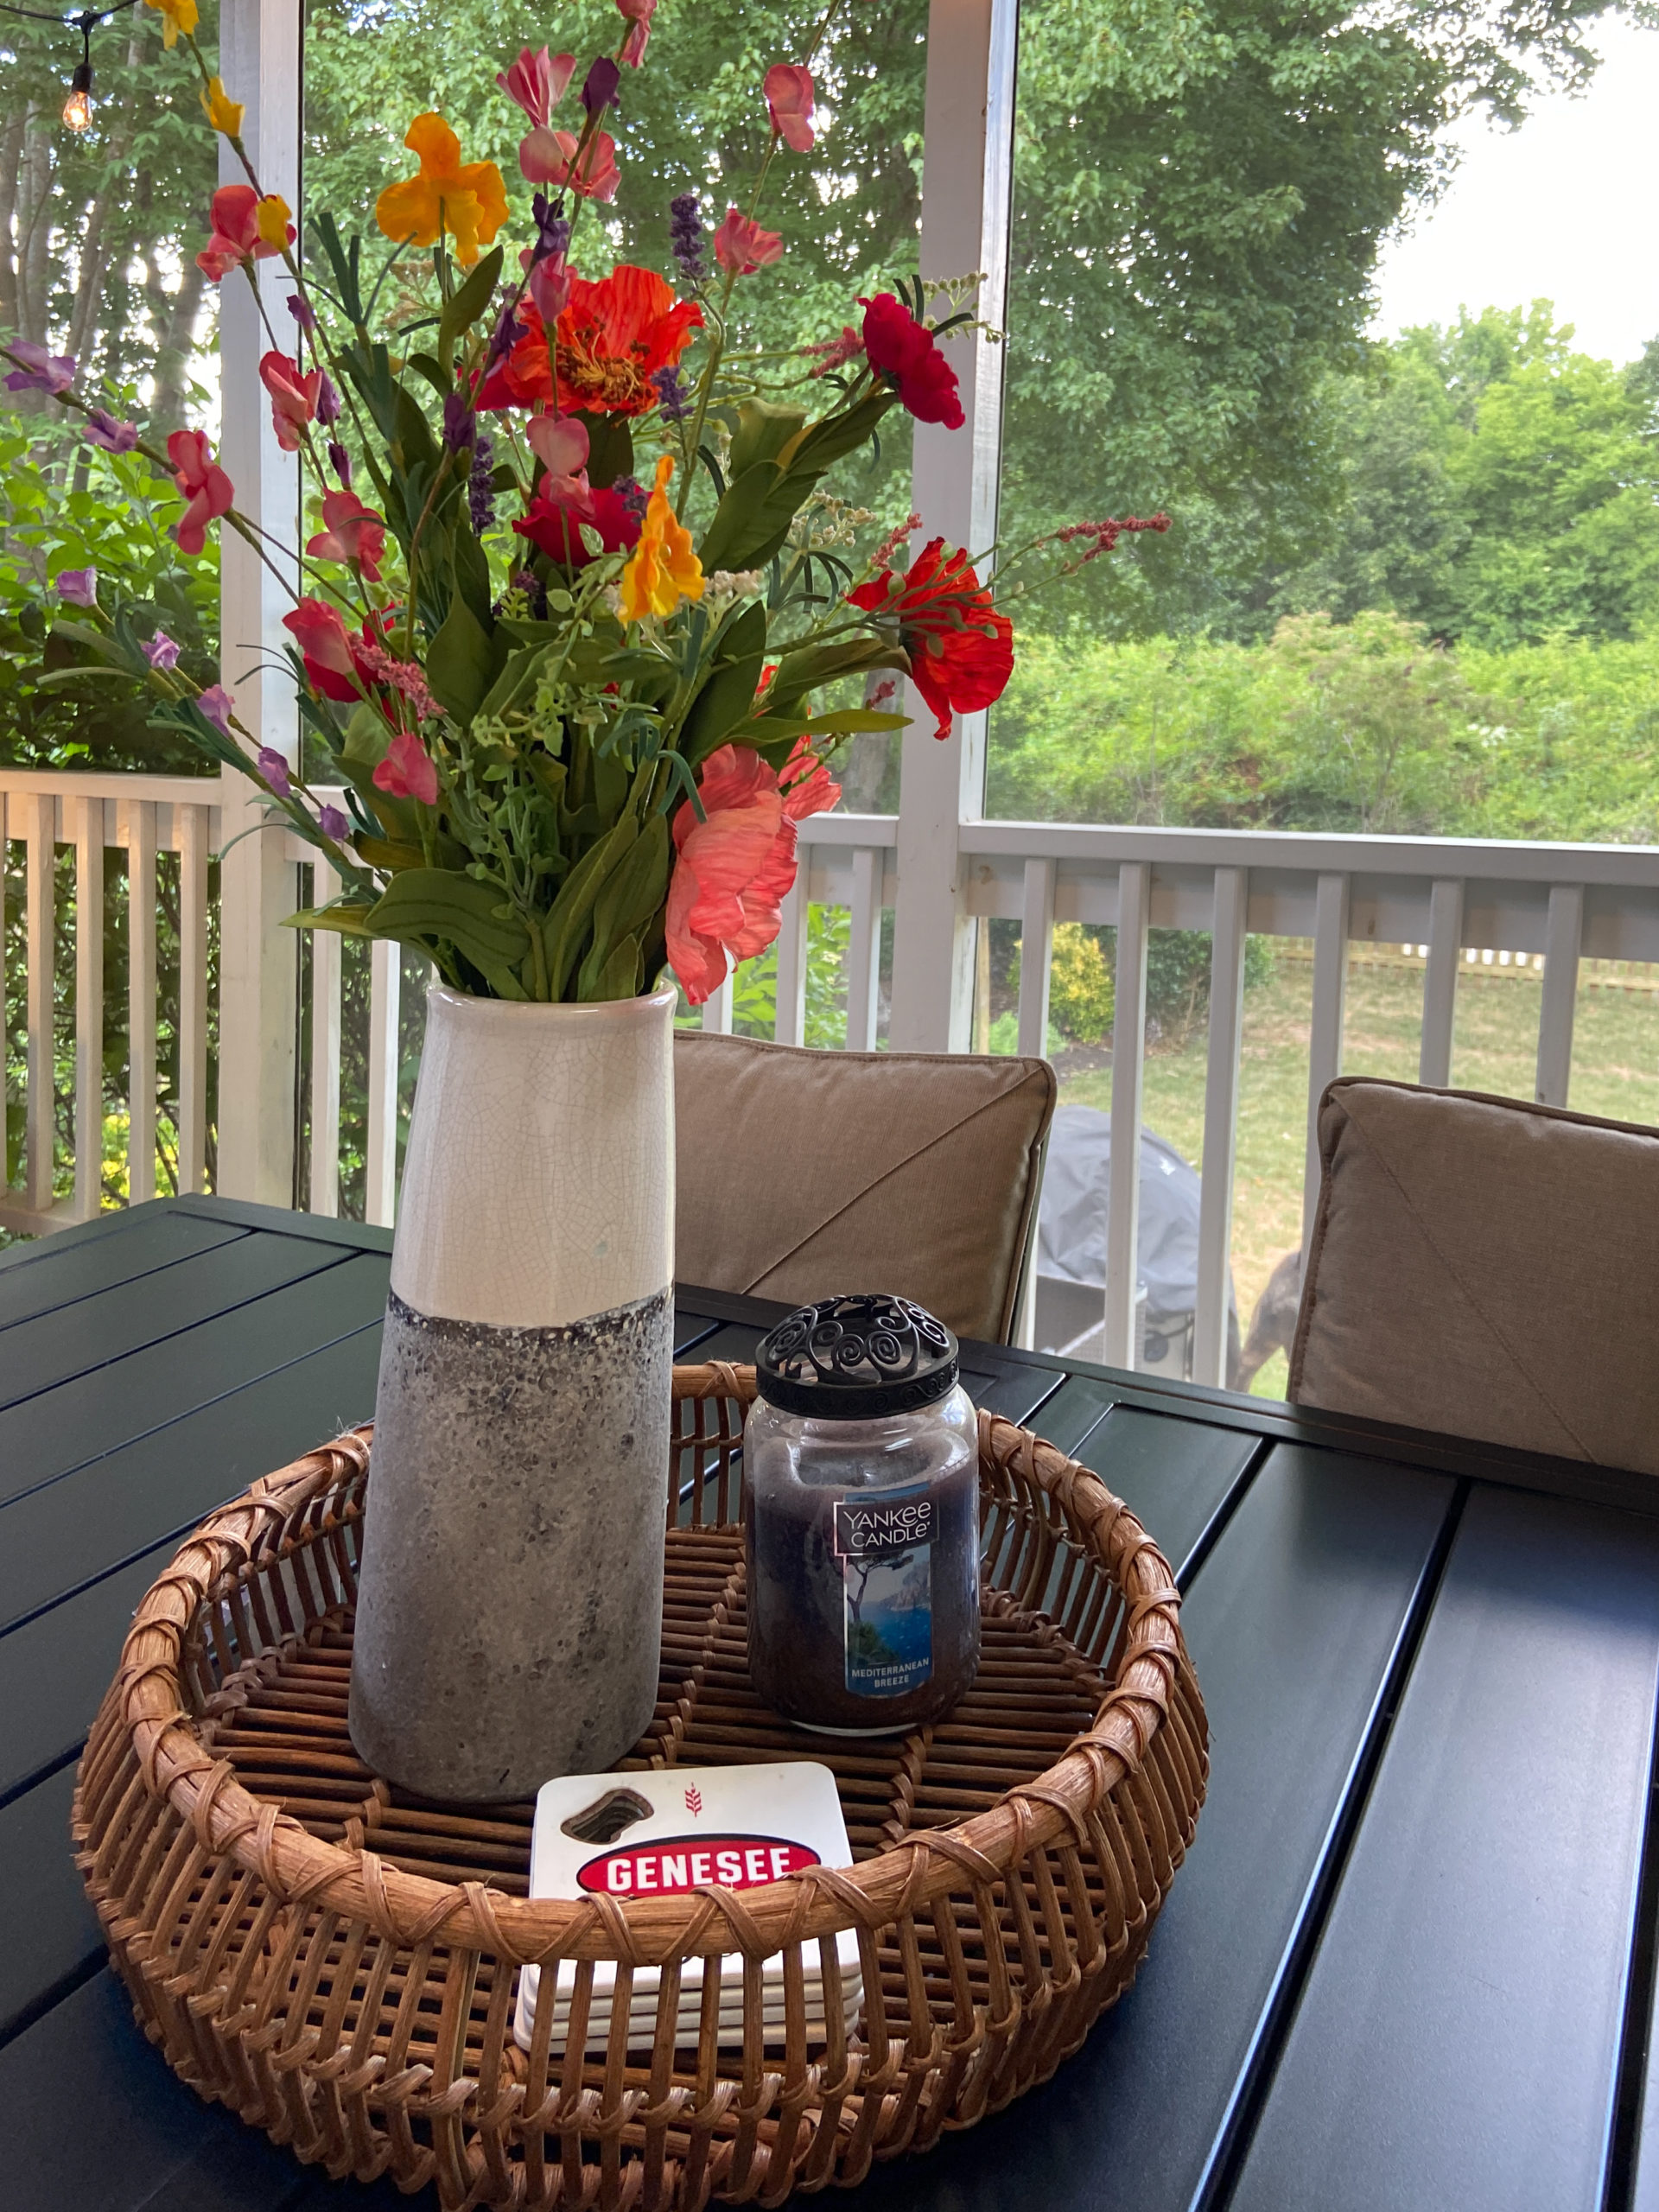
You can’t just refinish a wood deck without decorating after! I reused a lot of the stuff that we already had out there, as well as things from around the house! Repurposing decor and furniture is one of my favorite things to do. I always start feeling like I have nothing to use but slowly, ideas come to me and I’m usually really happy with the end result! I only ended up buying a few little decor pieces from Home Goods and some new plants!
Decor Links:
Dining Table is old (similar)
Glass Coffee Table & Side Table
Marble Side Table old Target (similar)
Table Lamp is not online (similar)
Woven Round Tray (HomeGoods not online)
Vase (Old Hobby Lobby)
Curtains (and Curtain “liners”)


Want to keep up with my newest projects? Come hang out on Instagram!
One Reply to “How to Refinish a Wood Deck”