Transform your Dining Room with Full Cost Breakdown
Plus all the decor costs and links!
The Dining Room project has been my baby for the last 2 months and I’m finally getting to use it like I always wanted to! From the Mood Board, to the DIY Picture Frame Molding and Curtains to the wall we hired a contractor to knock out, it’s been a pretty intense project. After everything, I am so happy with how it turned out and the design decisions we made that I wouldn’t change a thing!
Dining Room Before:

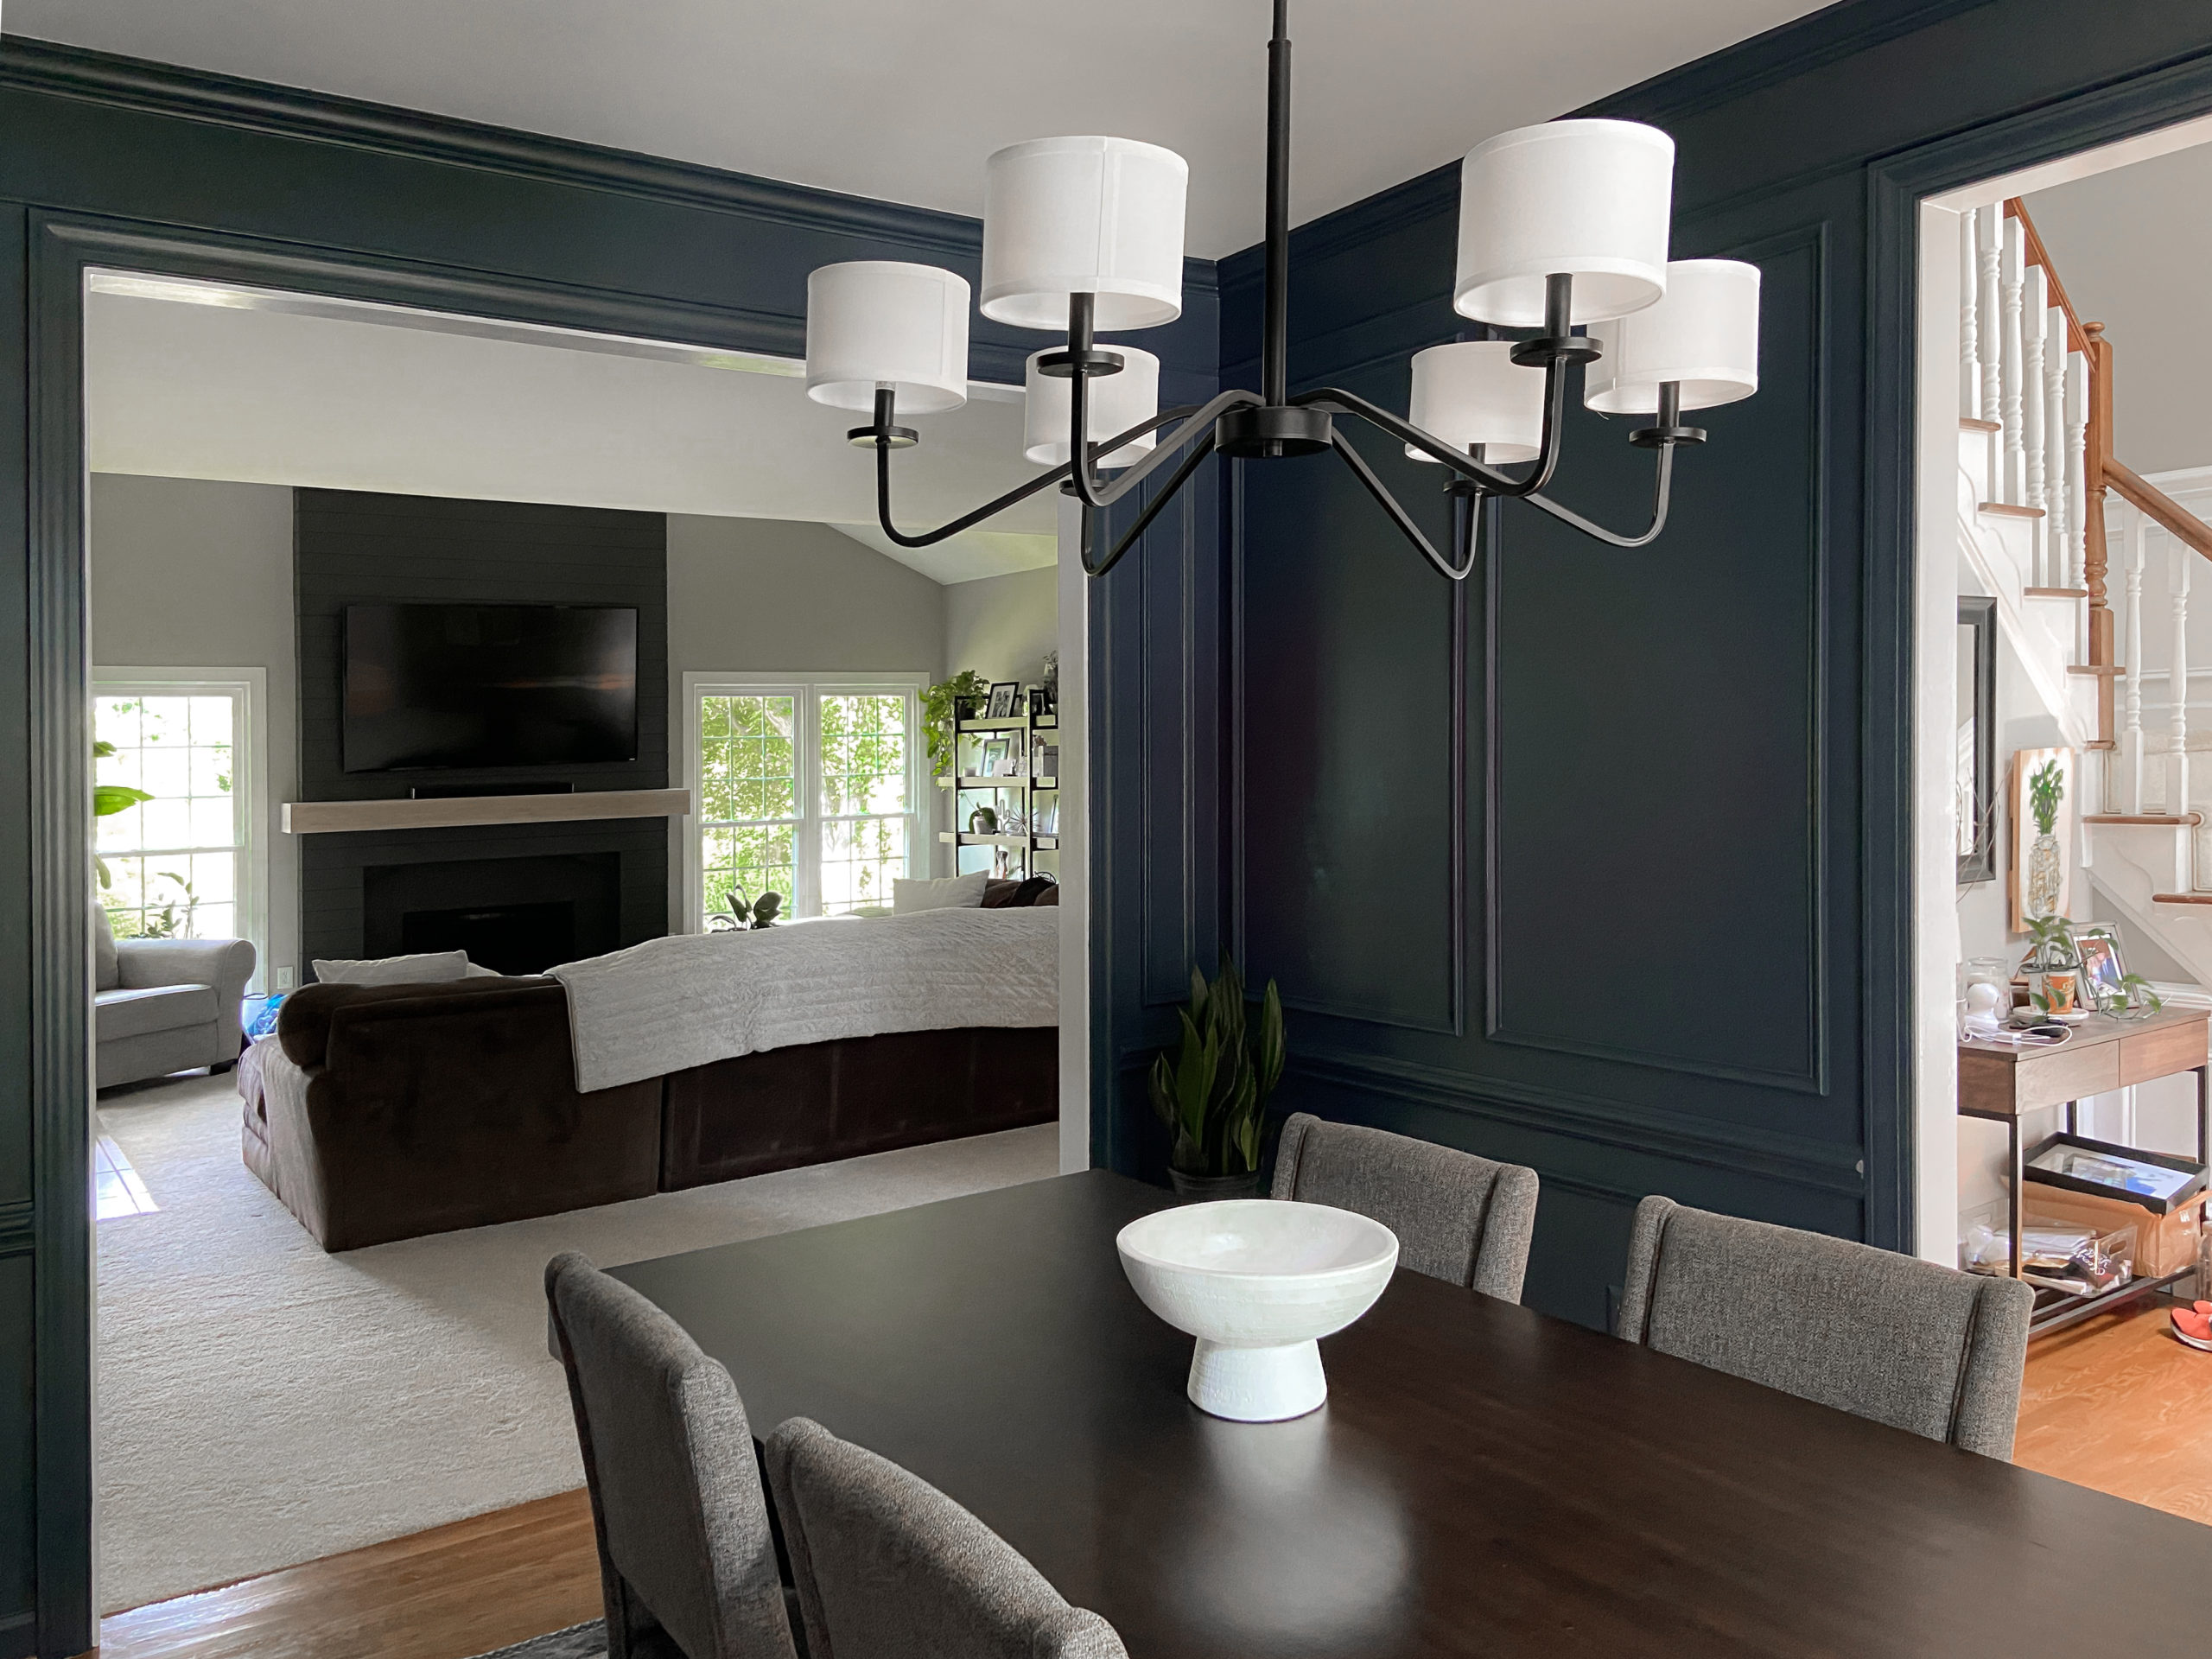
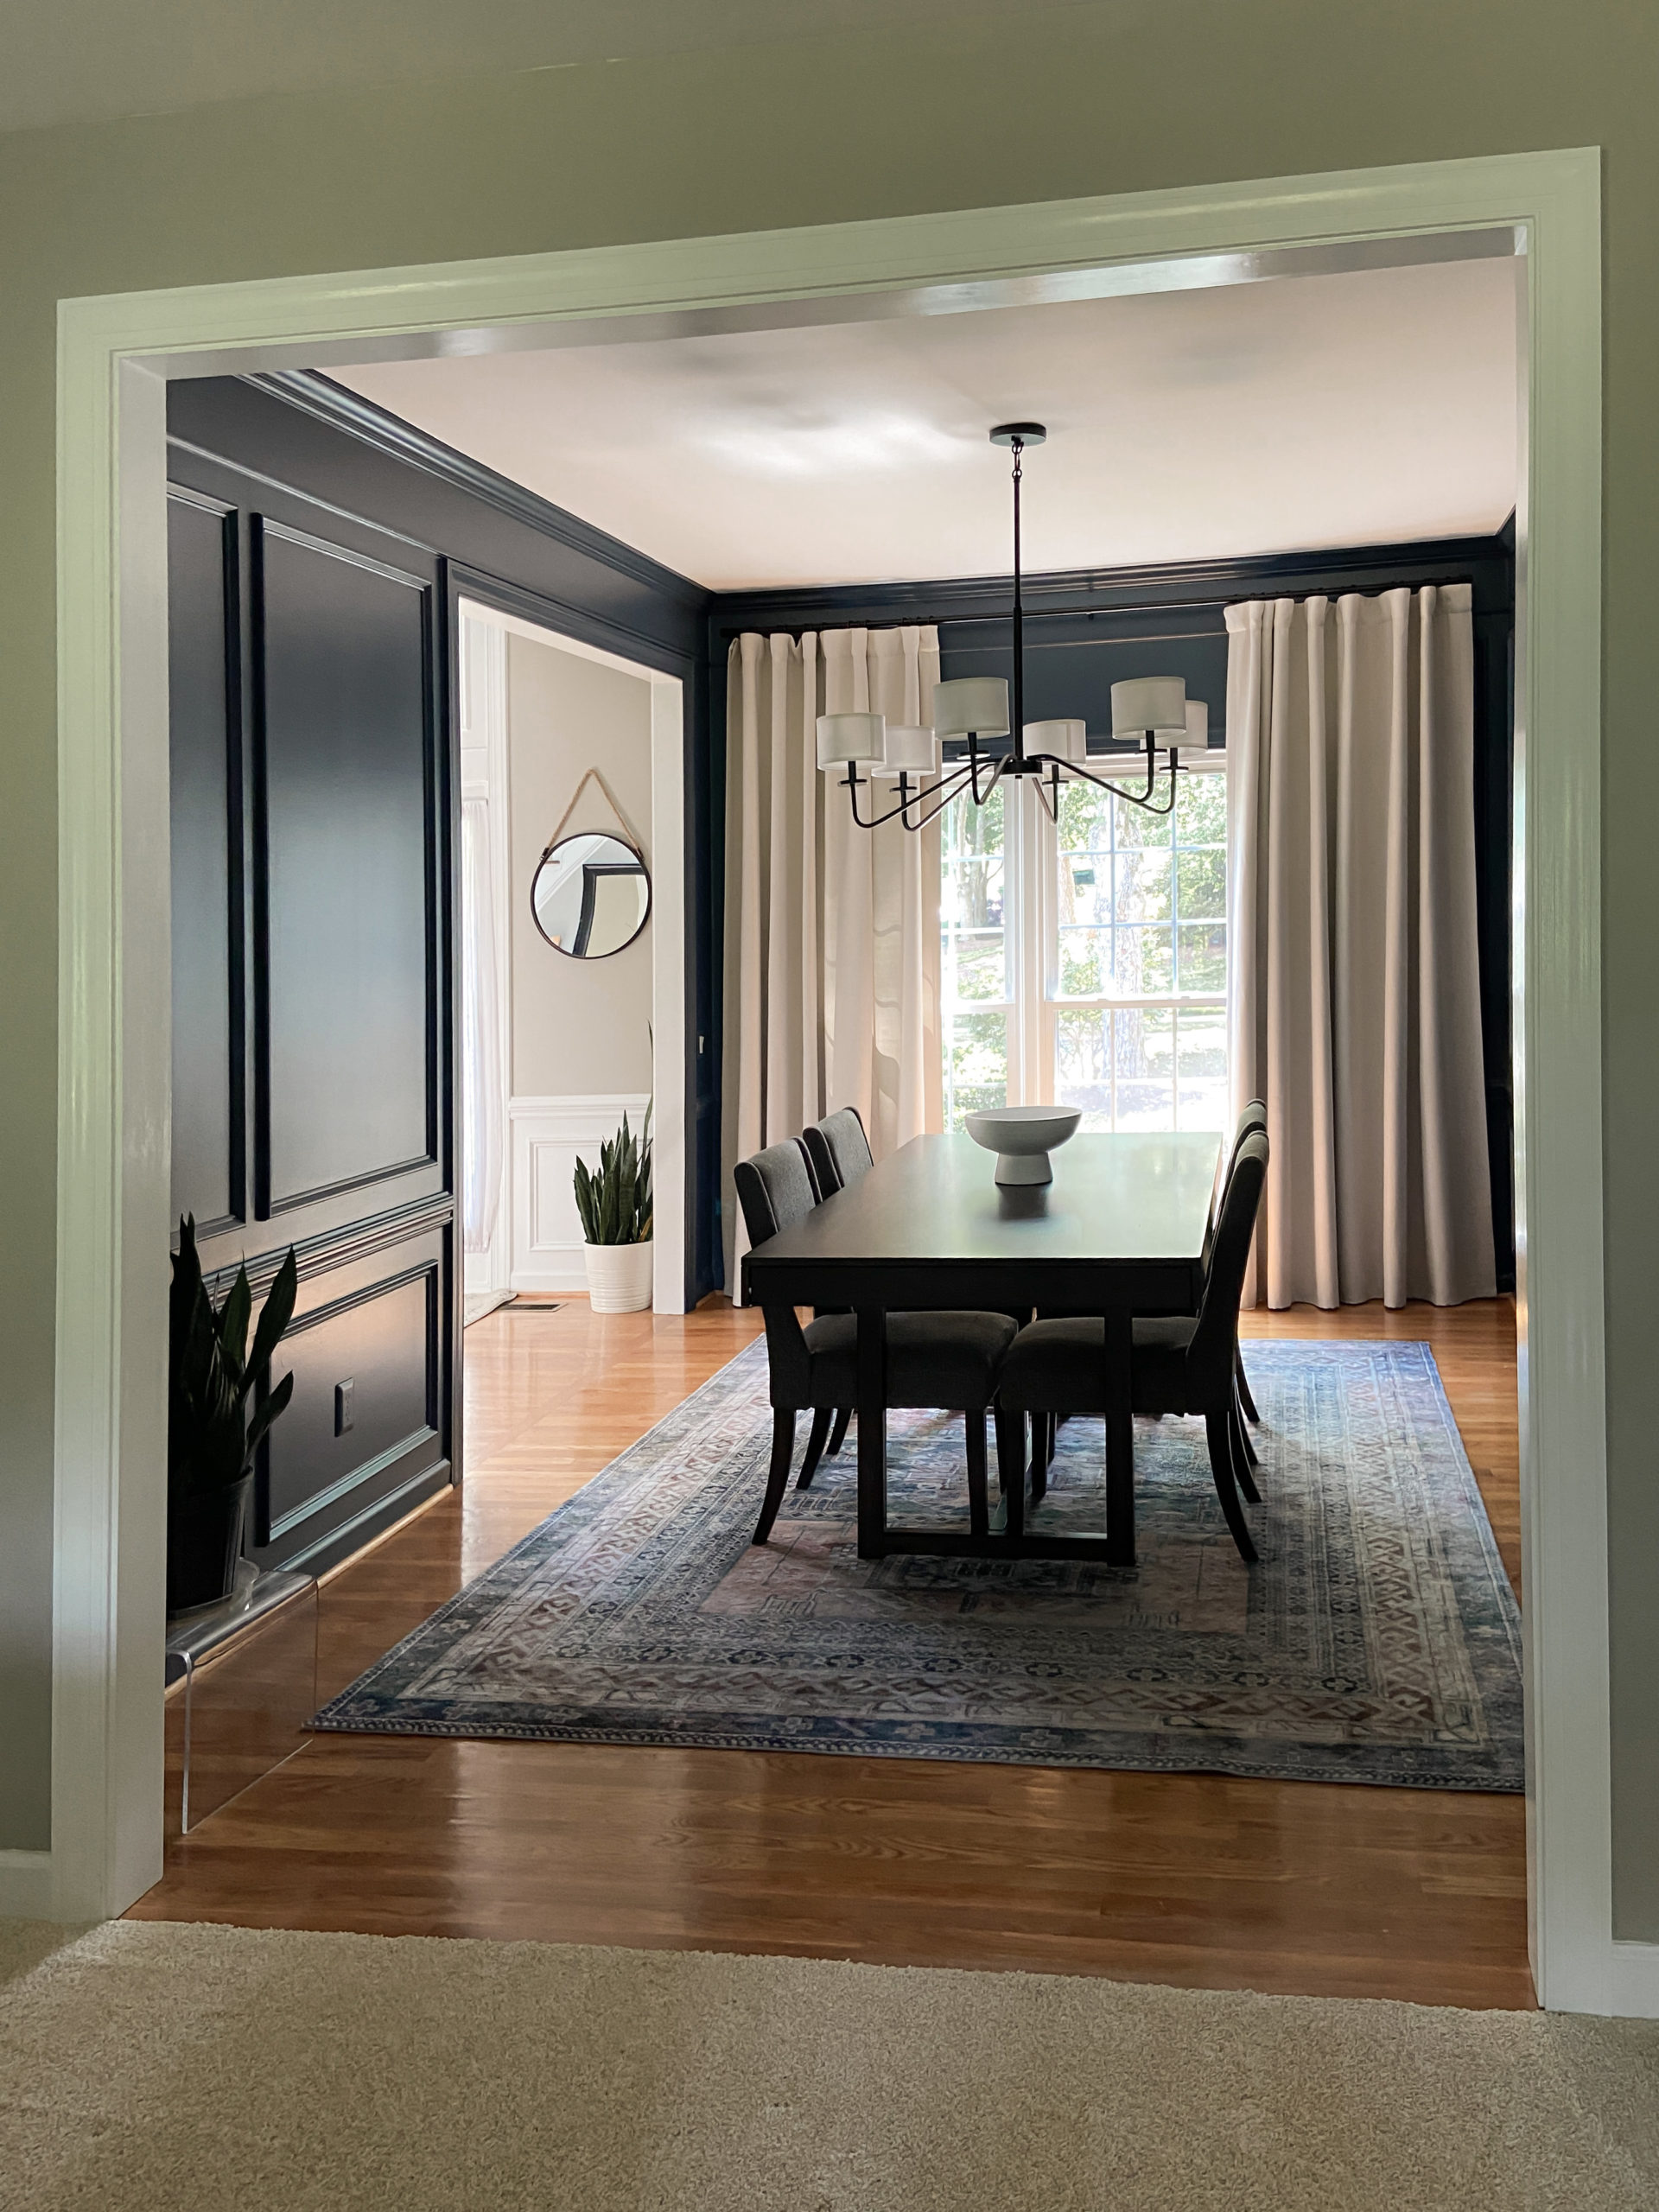
Dining Room After:

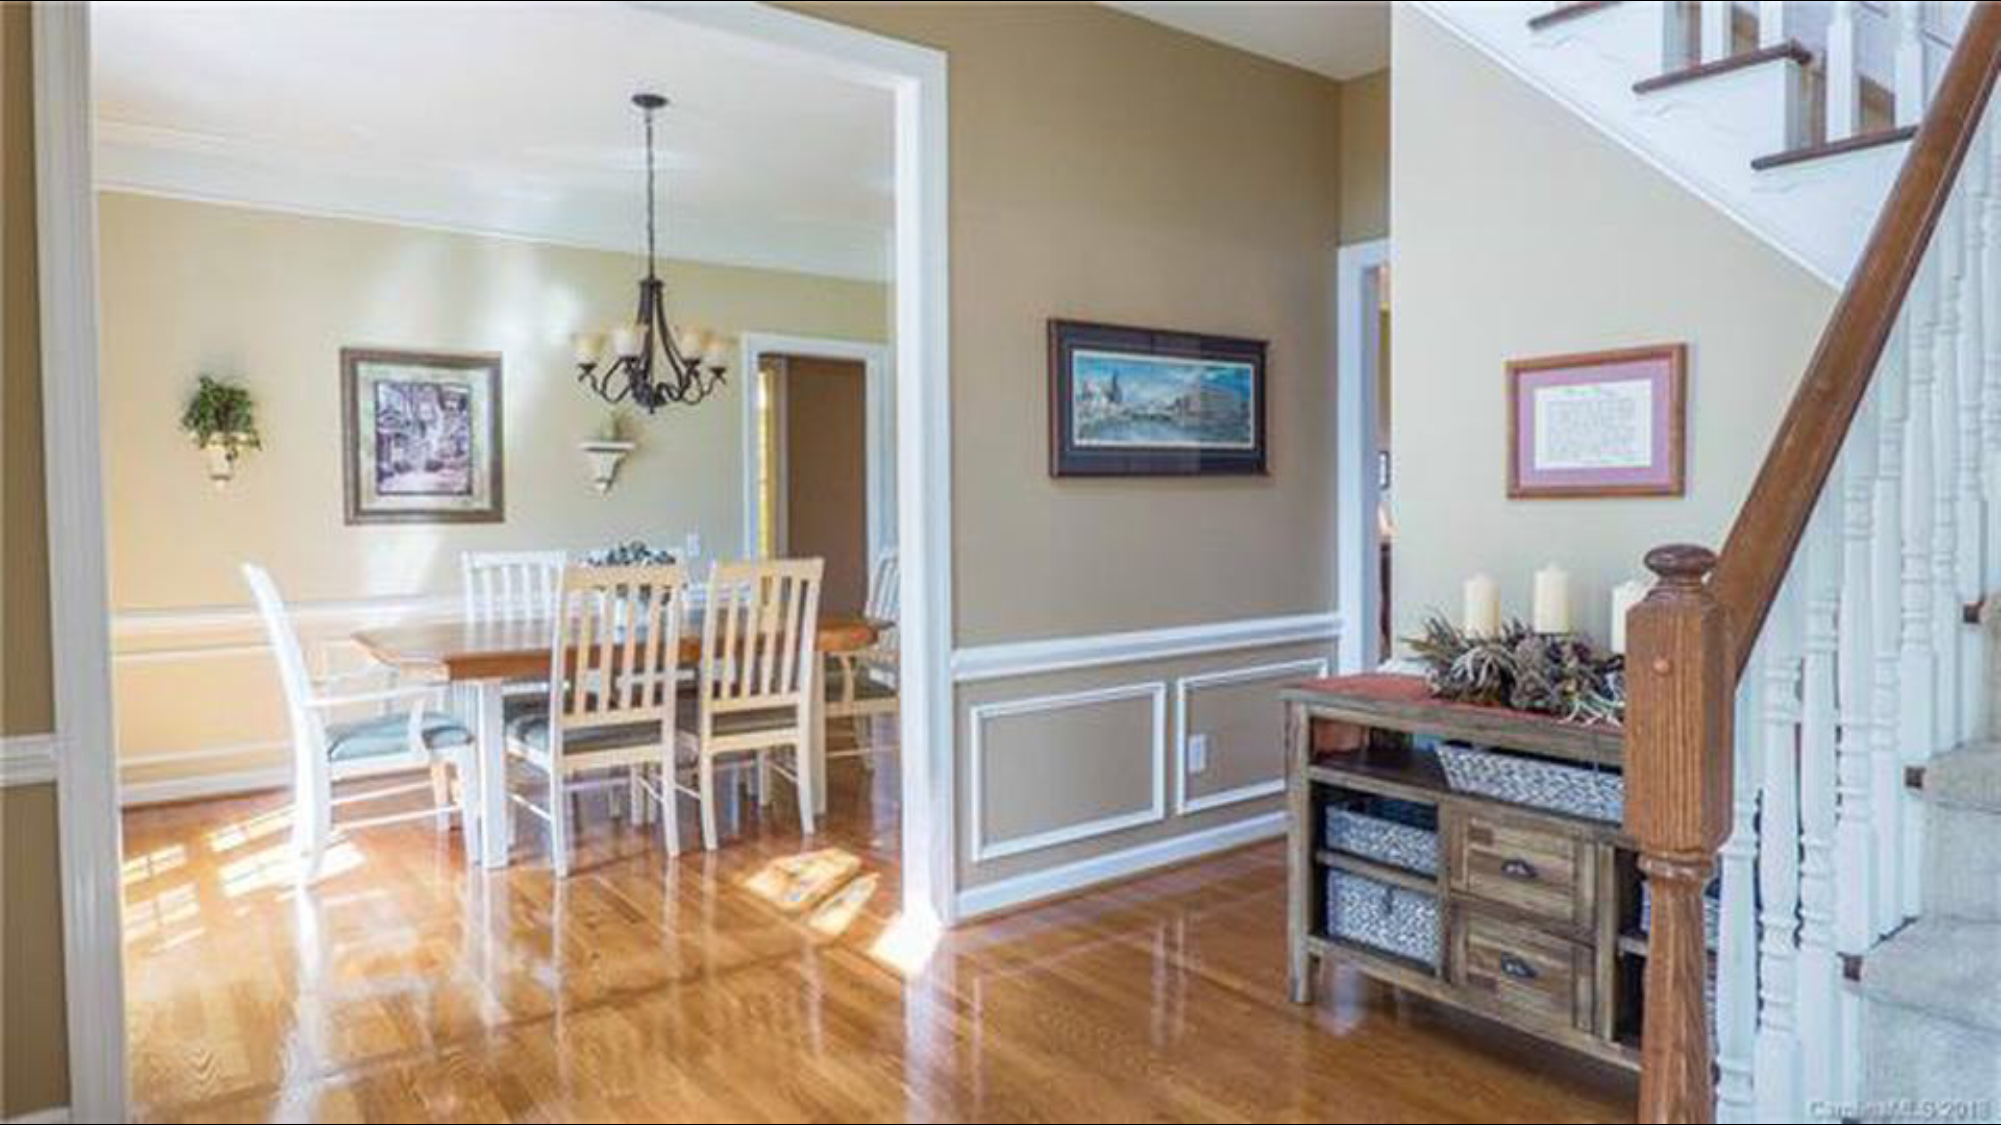
Before:
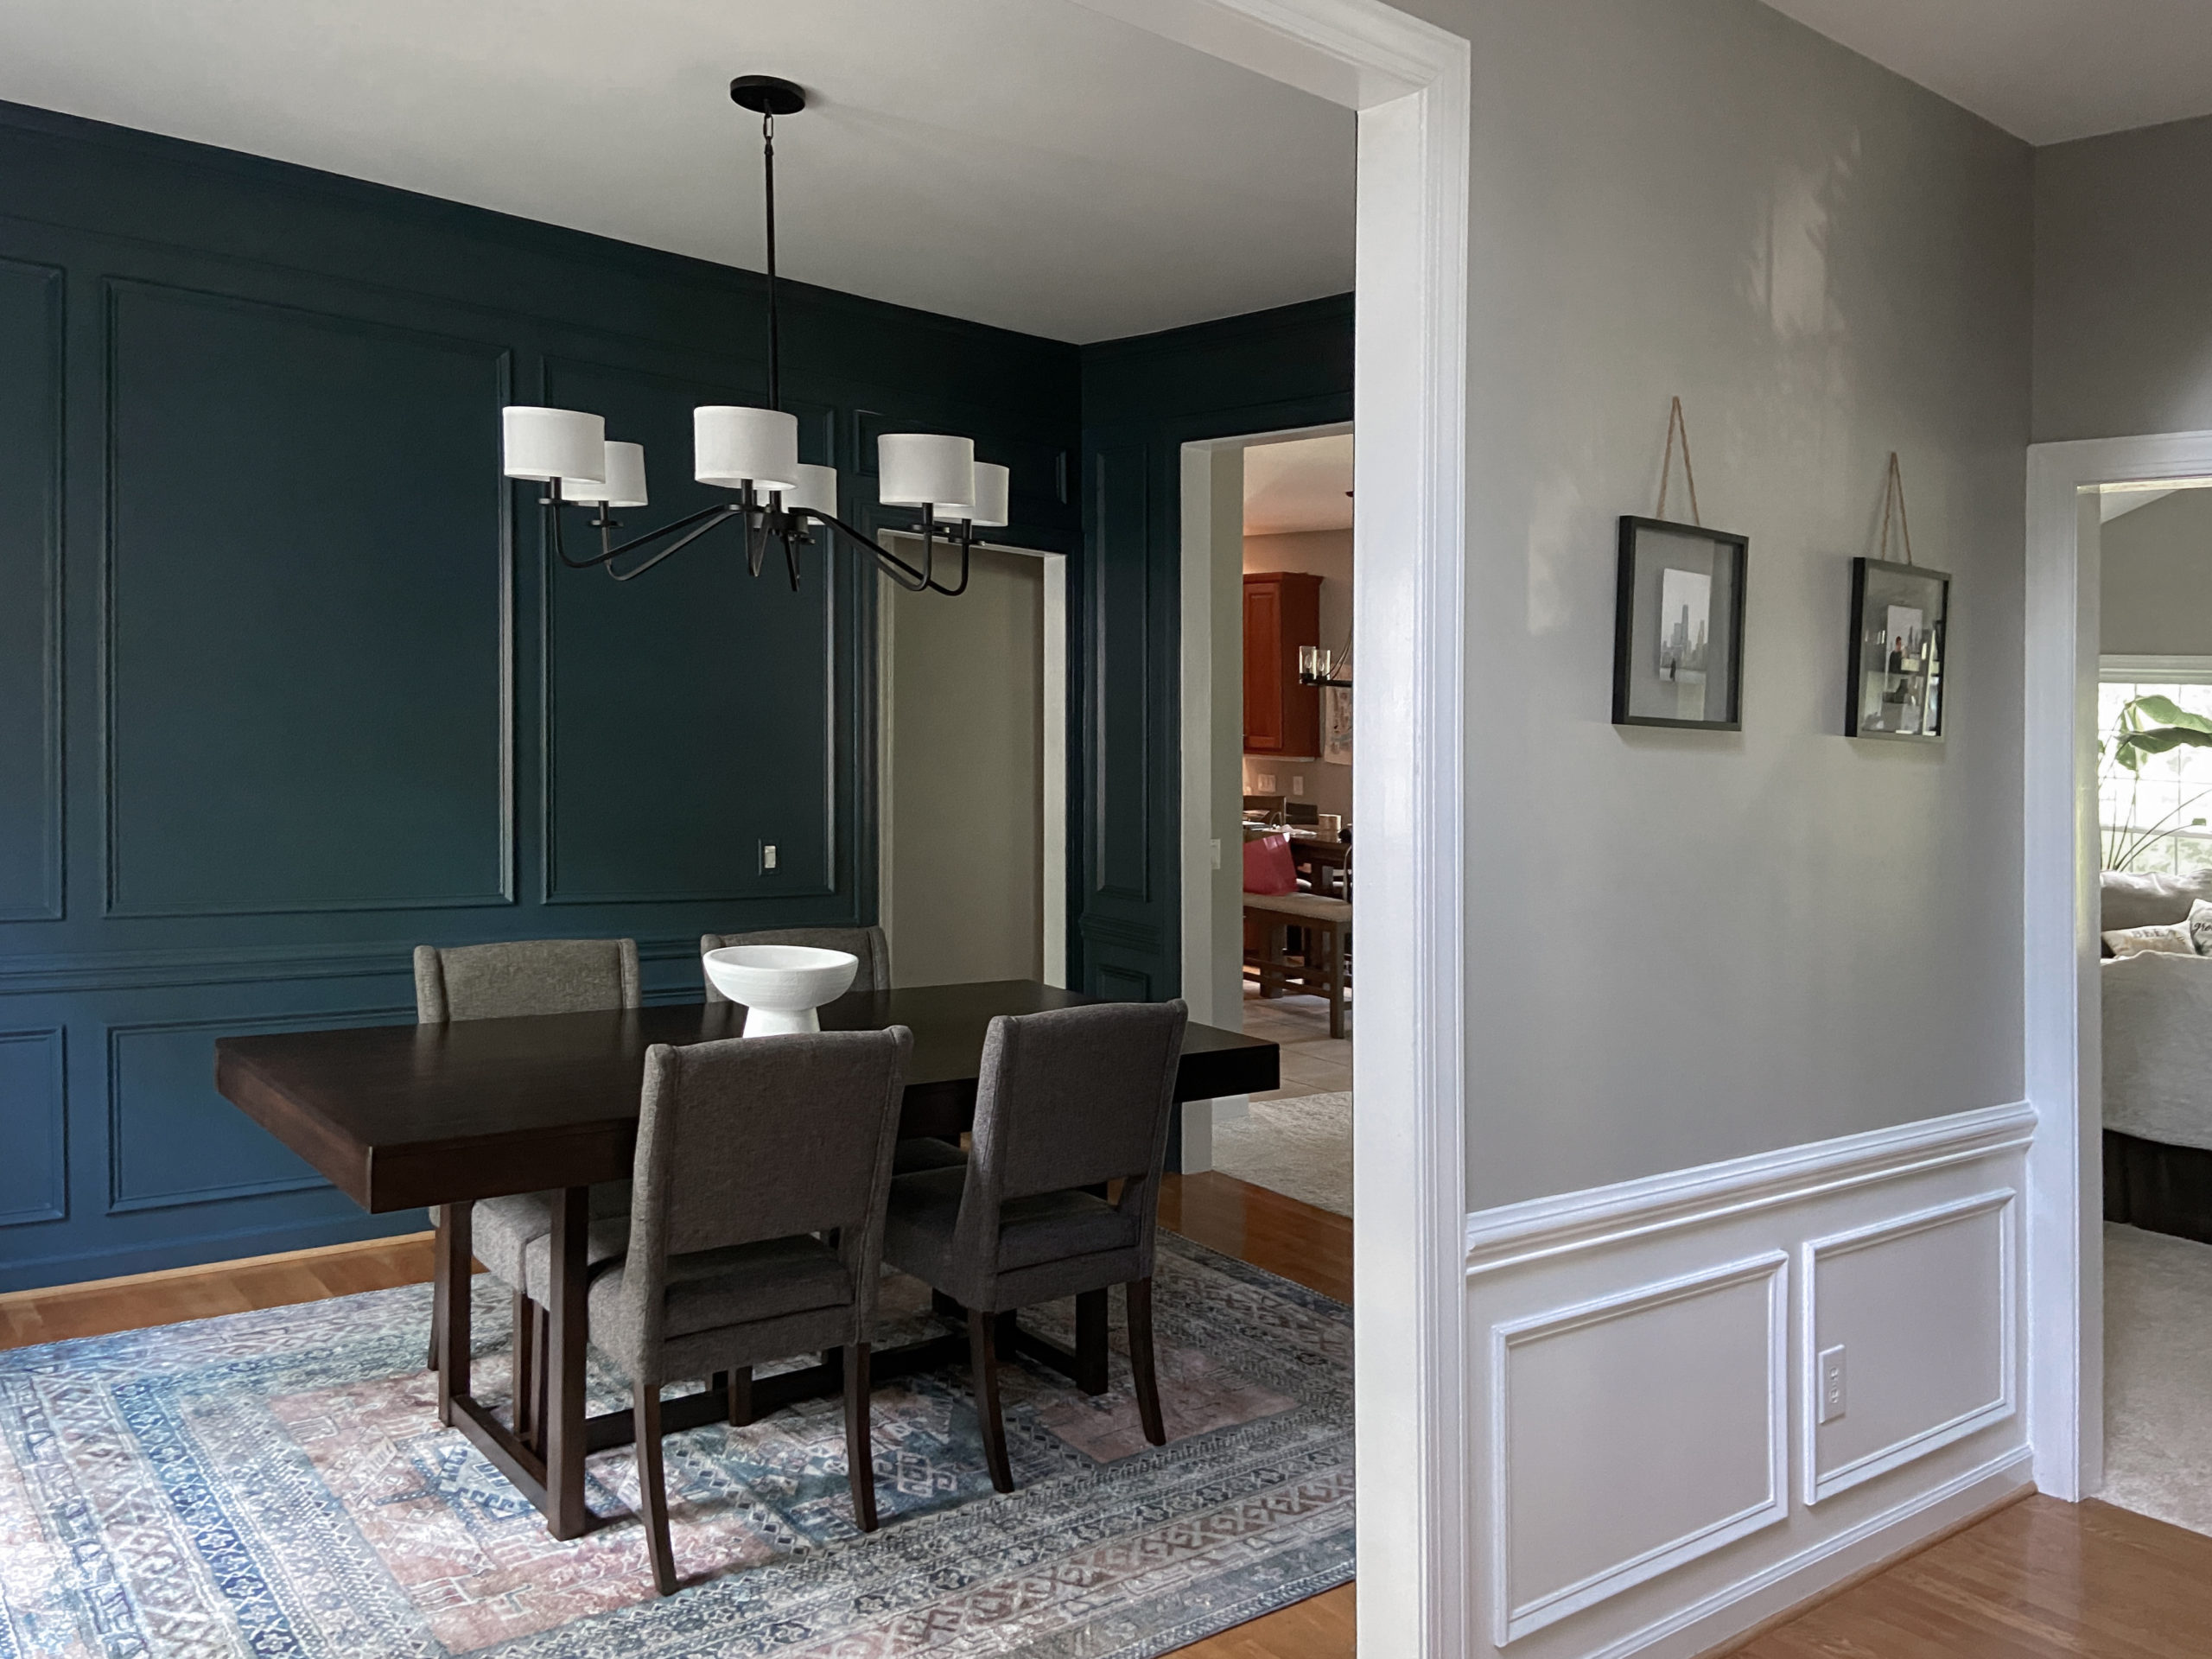
After:
The original dining room in our house was pretty bland. It was painted marigold, along with the rest of the house and it had white oak flooring (stained “classic oak” aka orange). There were a few redeeming qualities of the original room- like the large opening it had to the entry. As well as the chair railing and the picture frame molding that were added to the bottom half of the wall.
Mark and I rarely used the dining room for the first two years we lived here, then lockdown happened and it turned into Mark’s temporary office. I honestly appreciated that time because it made me feel like we were finally using that room enough that it didn’t seem abandoned. It still wasn’t living it’s best life though and as soon as lockdown loosened up, I was ready to change that.
It clearly took a lot to get here so I wanted to round up all the phases as well as breakdown the full cost of the dining room makeover.
(This post contains affiliate links which means I receive a small compensation at no cost to you. As an Amazon Associate I earn from qualifying purchases. You can read more about it here. Thank you for supporting my blog!)
Part 1: Create A Mood Board
My process started with pinning inspiration photos of similar dining rooms and room features that I wanted to incorporate into my dining room. I chose the color Behr S470-7 Undersea because I knew that I wanted a moody, gemstone-like teal color. This one was really pretty, but also went well with the rug I already had and even better, it didn’t clash with the SW GreenBlack color of our shiplap fireplace. Then, I mocked up some picture frame molding in my mood board and chose the light fixture, furniture, rug and curtains for the style I wanted to achieve.
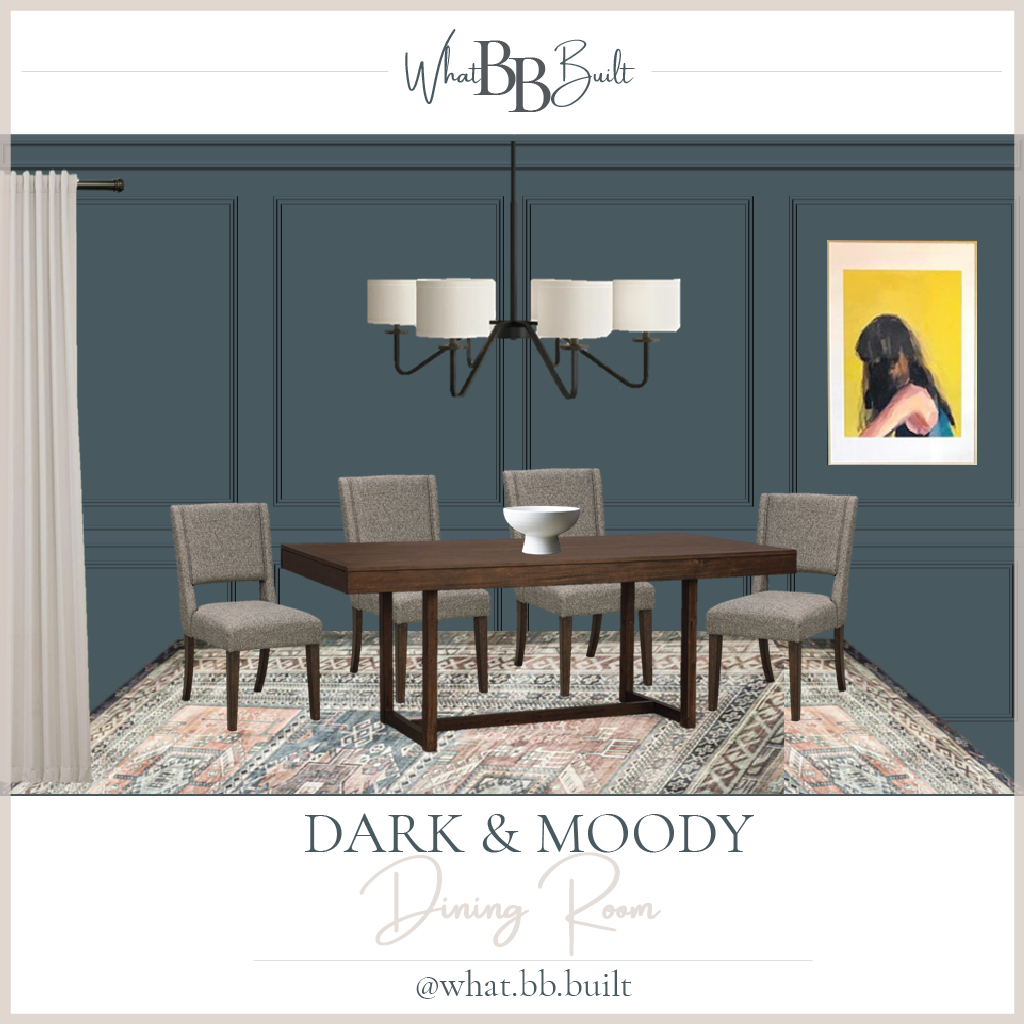
Many times, your actual design is different from your inspiration/mood board, because things look different on screens versus in real life, but everything I picked out ended up working so well together, it stayed exactly the same. I might eventually update to a more neutral rug, but for now, it’s great. Plus it’s super soft so the dogs love to lay on it!
I should note that I’ve left this room pretty bland of “decor”. I tend to burn out at the end of big projects and hate making rushed decisions into the decor pieces for a room. I’ll eventually add a tree in the back corner of the room as well as some artwork, but for now, this transformation is enough to keep me happy!
Part 2: DIY Picture Frame Molding
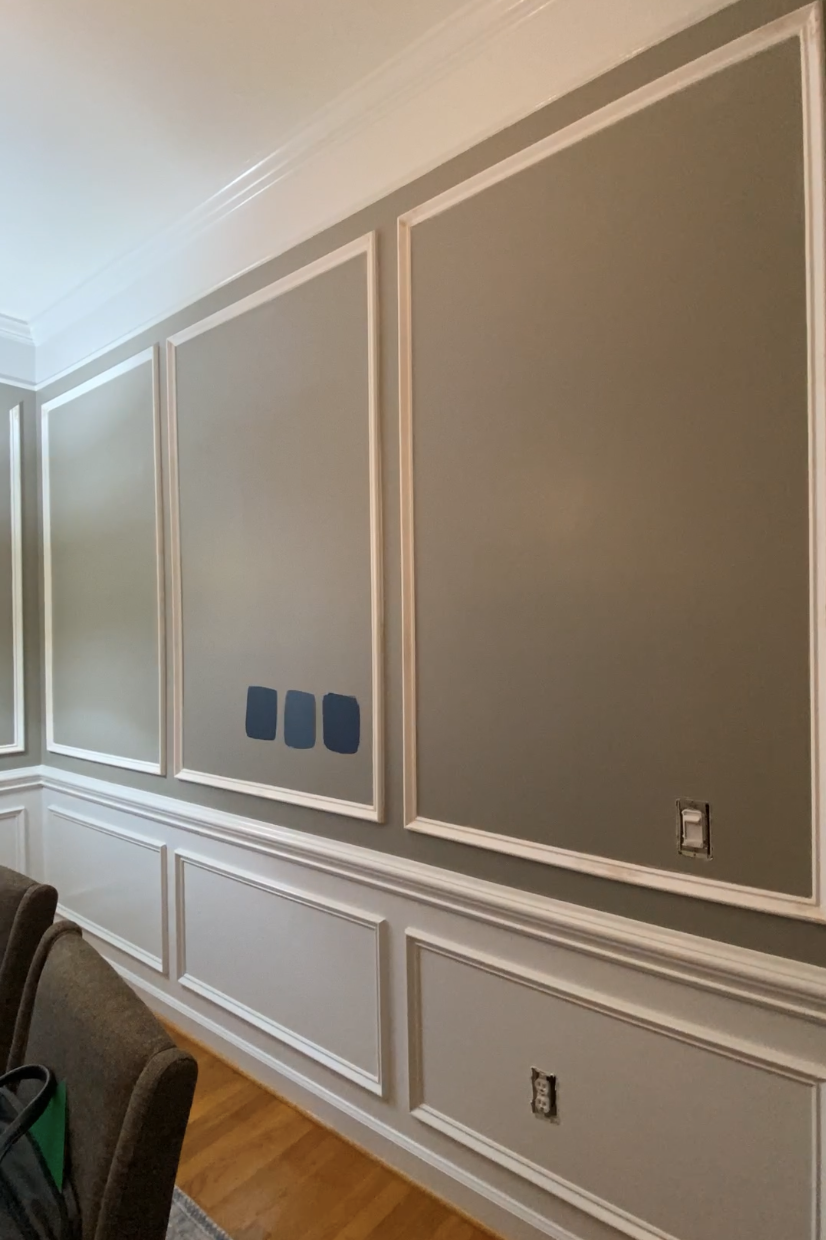
The first project I did in the dining room was the picture frame molding and paint. I bought a laser level and got to work adding molding to the top of my wall, matching the boxes that were already installed. I vastly underestimated how much time it would take me to add the picture frame molding to the wall. The detail work- filling, sanding, caulking takes forever to get a really good, professional finish. Once it was all installed, I painted the entire wall, trim, baseboards and all!
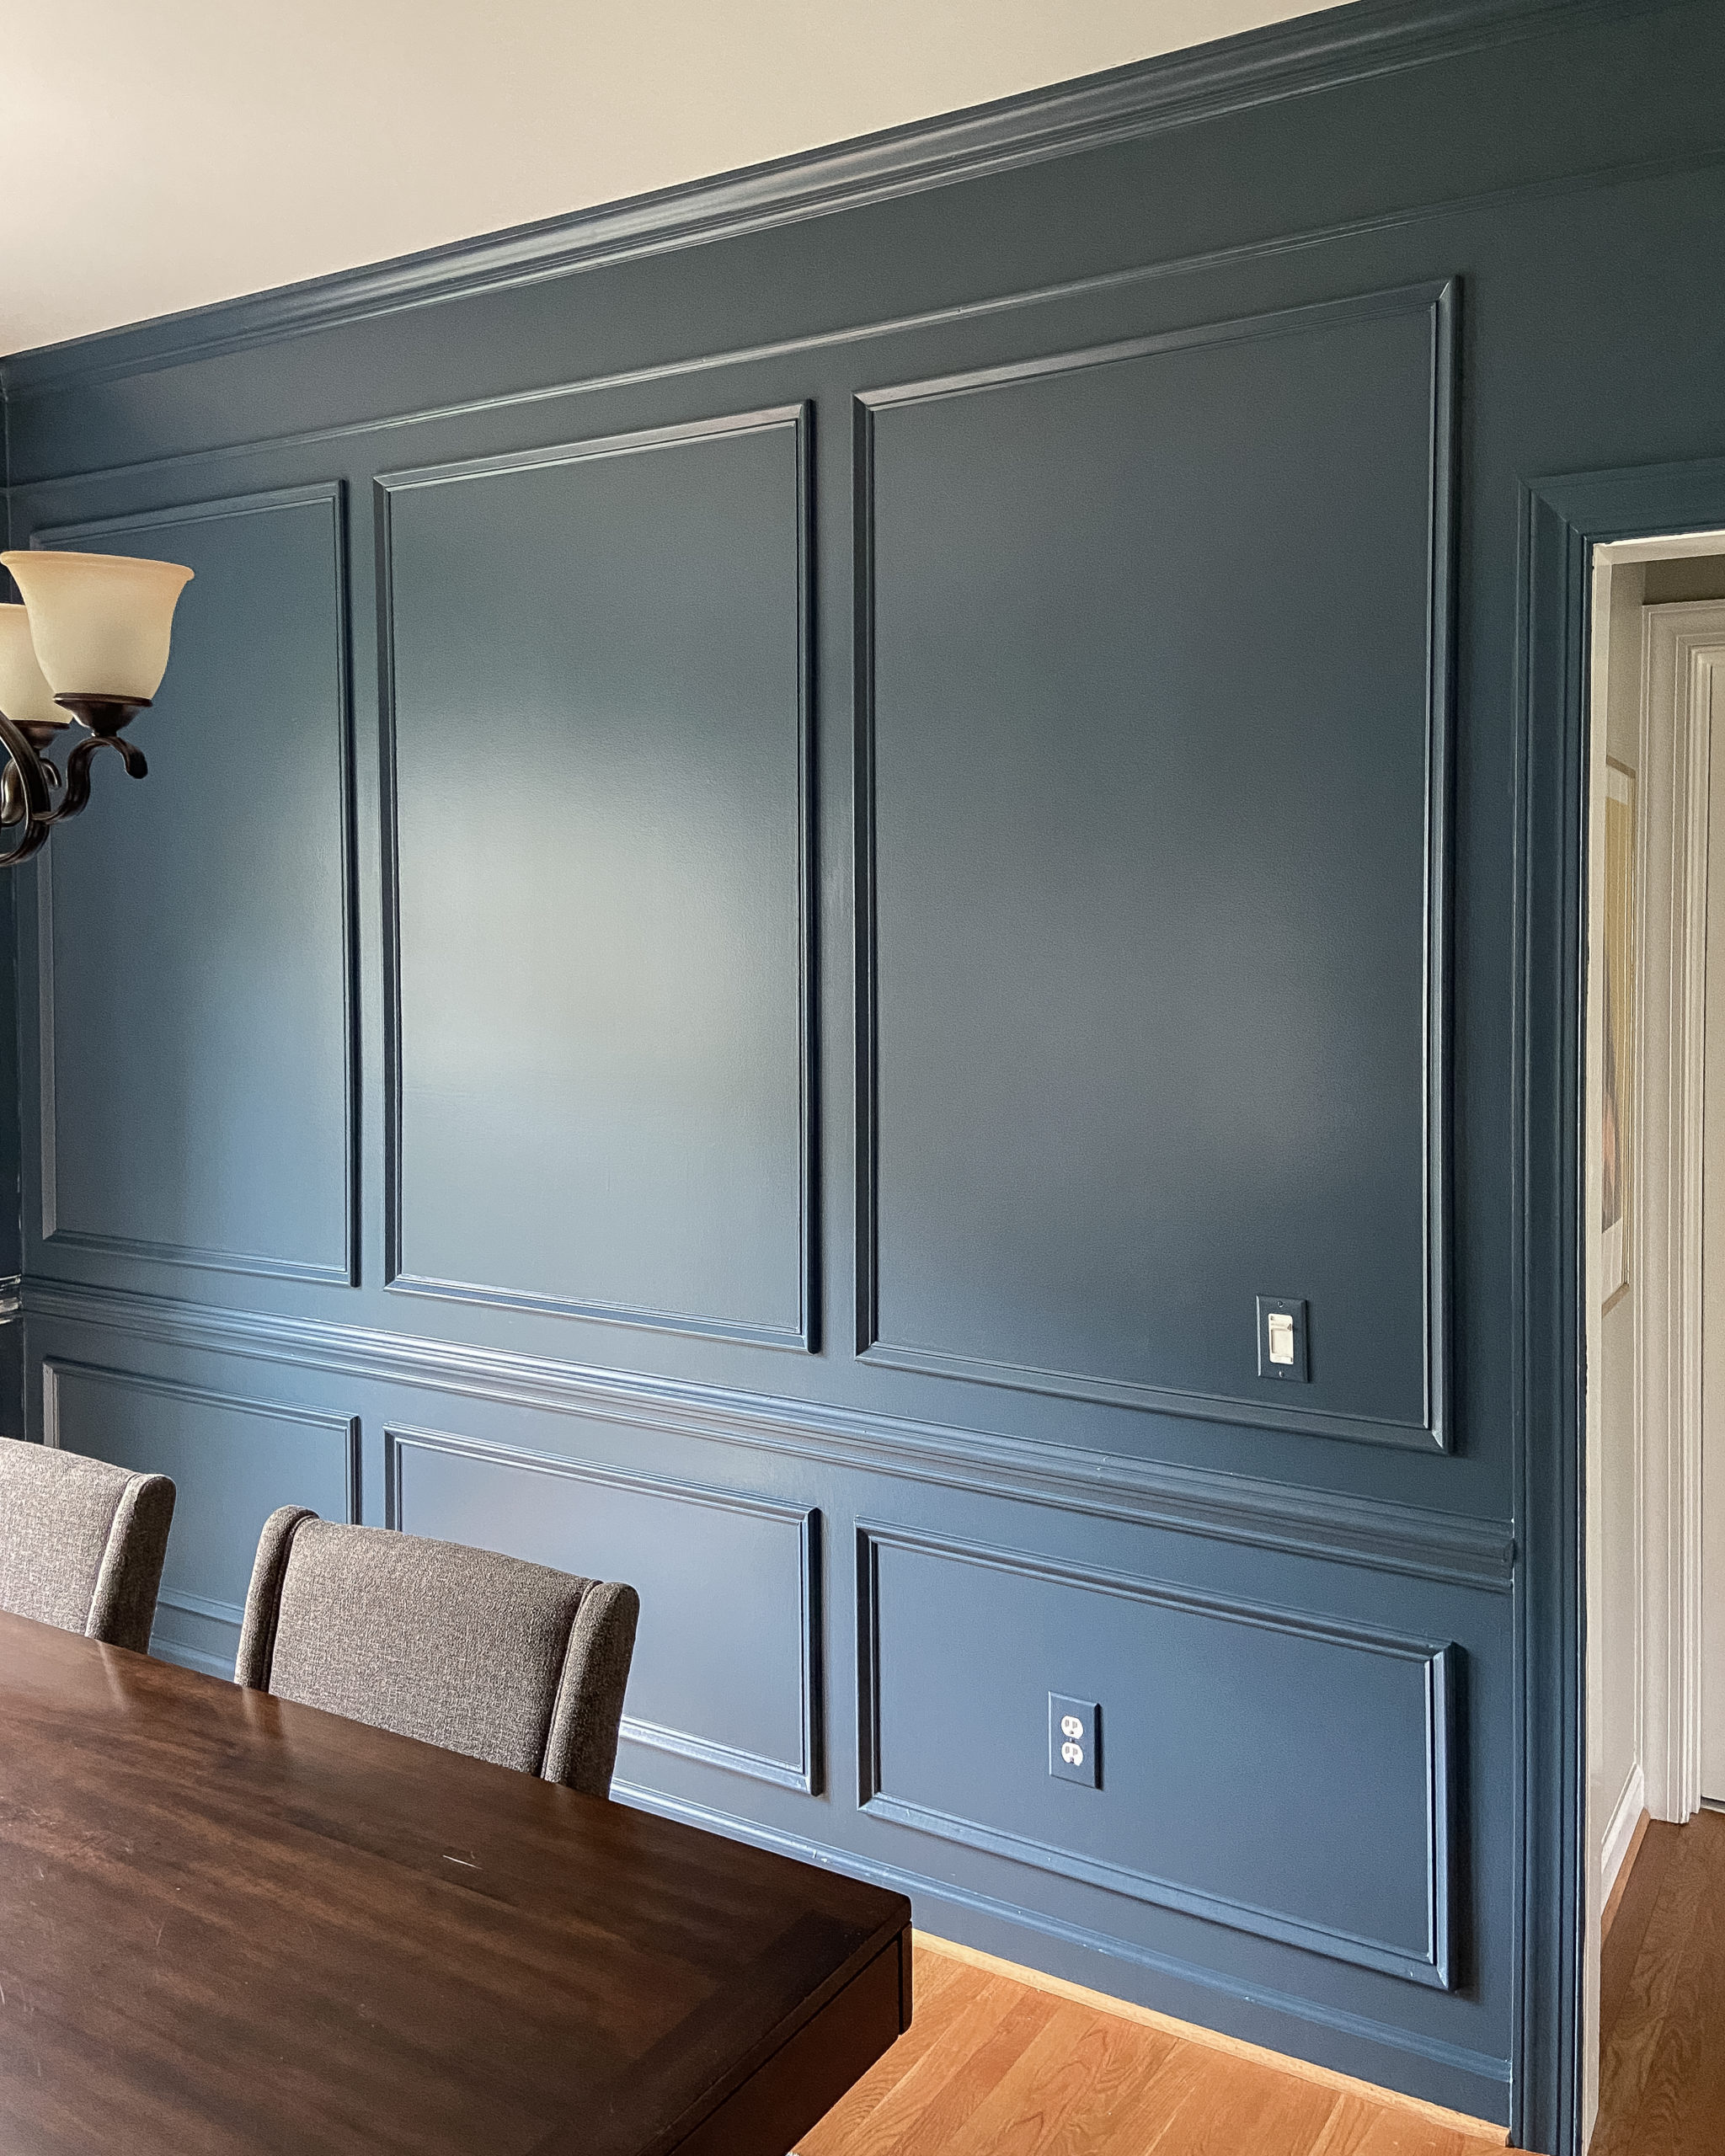
Our house was built in 1993 so while the layout and some of the materials are a little bit dated, the potential is there with wider door openings, decently tall 9′ ceilings (with no popcorn!). Adding this picture frame molding to the dining room really kickstarted the transitional style that I’m trying to achieve with my total house. Transitional is a mix of traditional elements, like full wall molding with modern details like bold colors, straight lined furniture and a mix of decor. It’s the perfect style for a 90’s home to make it look curated and updated without trying to force it to be something it’s not.
Part 3: Add Curtains
Once the walls were completed and painted, I added my favorite Amazon curtains. I opted to use the extra wide (100″) version because the window is large and the wall is even larger. I shared a good tip on my Instagram stories on how to even out a window that isn’t centered on your wall. When adding windows to structures, builders prioritize symmetry on the outside over the inside. As a result, windows often aren’t centered on interior walls.

This was the case with the window in the dining room so I used those extra wide curtains to hide the issue. When I move the curtains to the sides, you can see how unbalanced the window is, but when the curtains overhang the window, the issue is less noticeable. You can also cover more of the left side of the window to make the window appear even more centered. Most of the time, I open both sides up just inside the frame to let in maximum light.
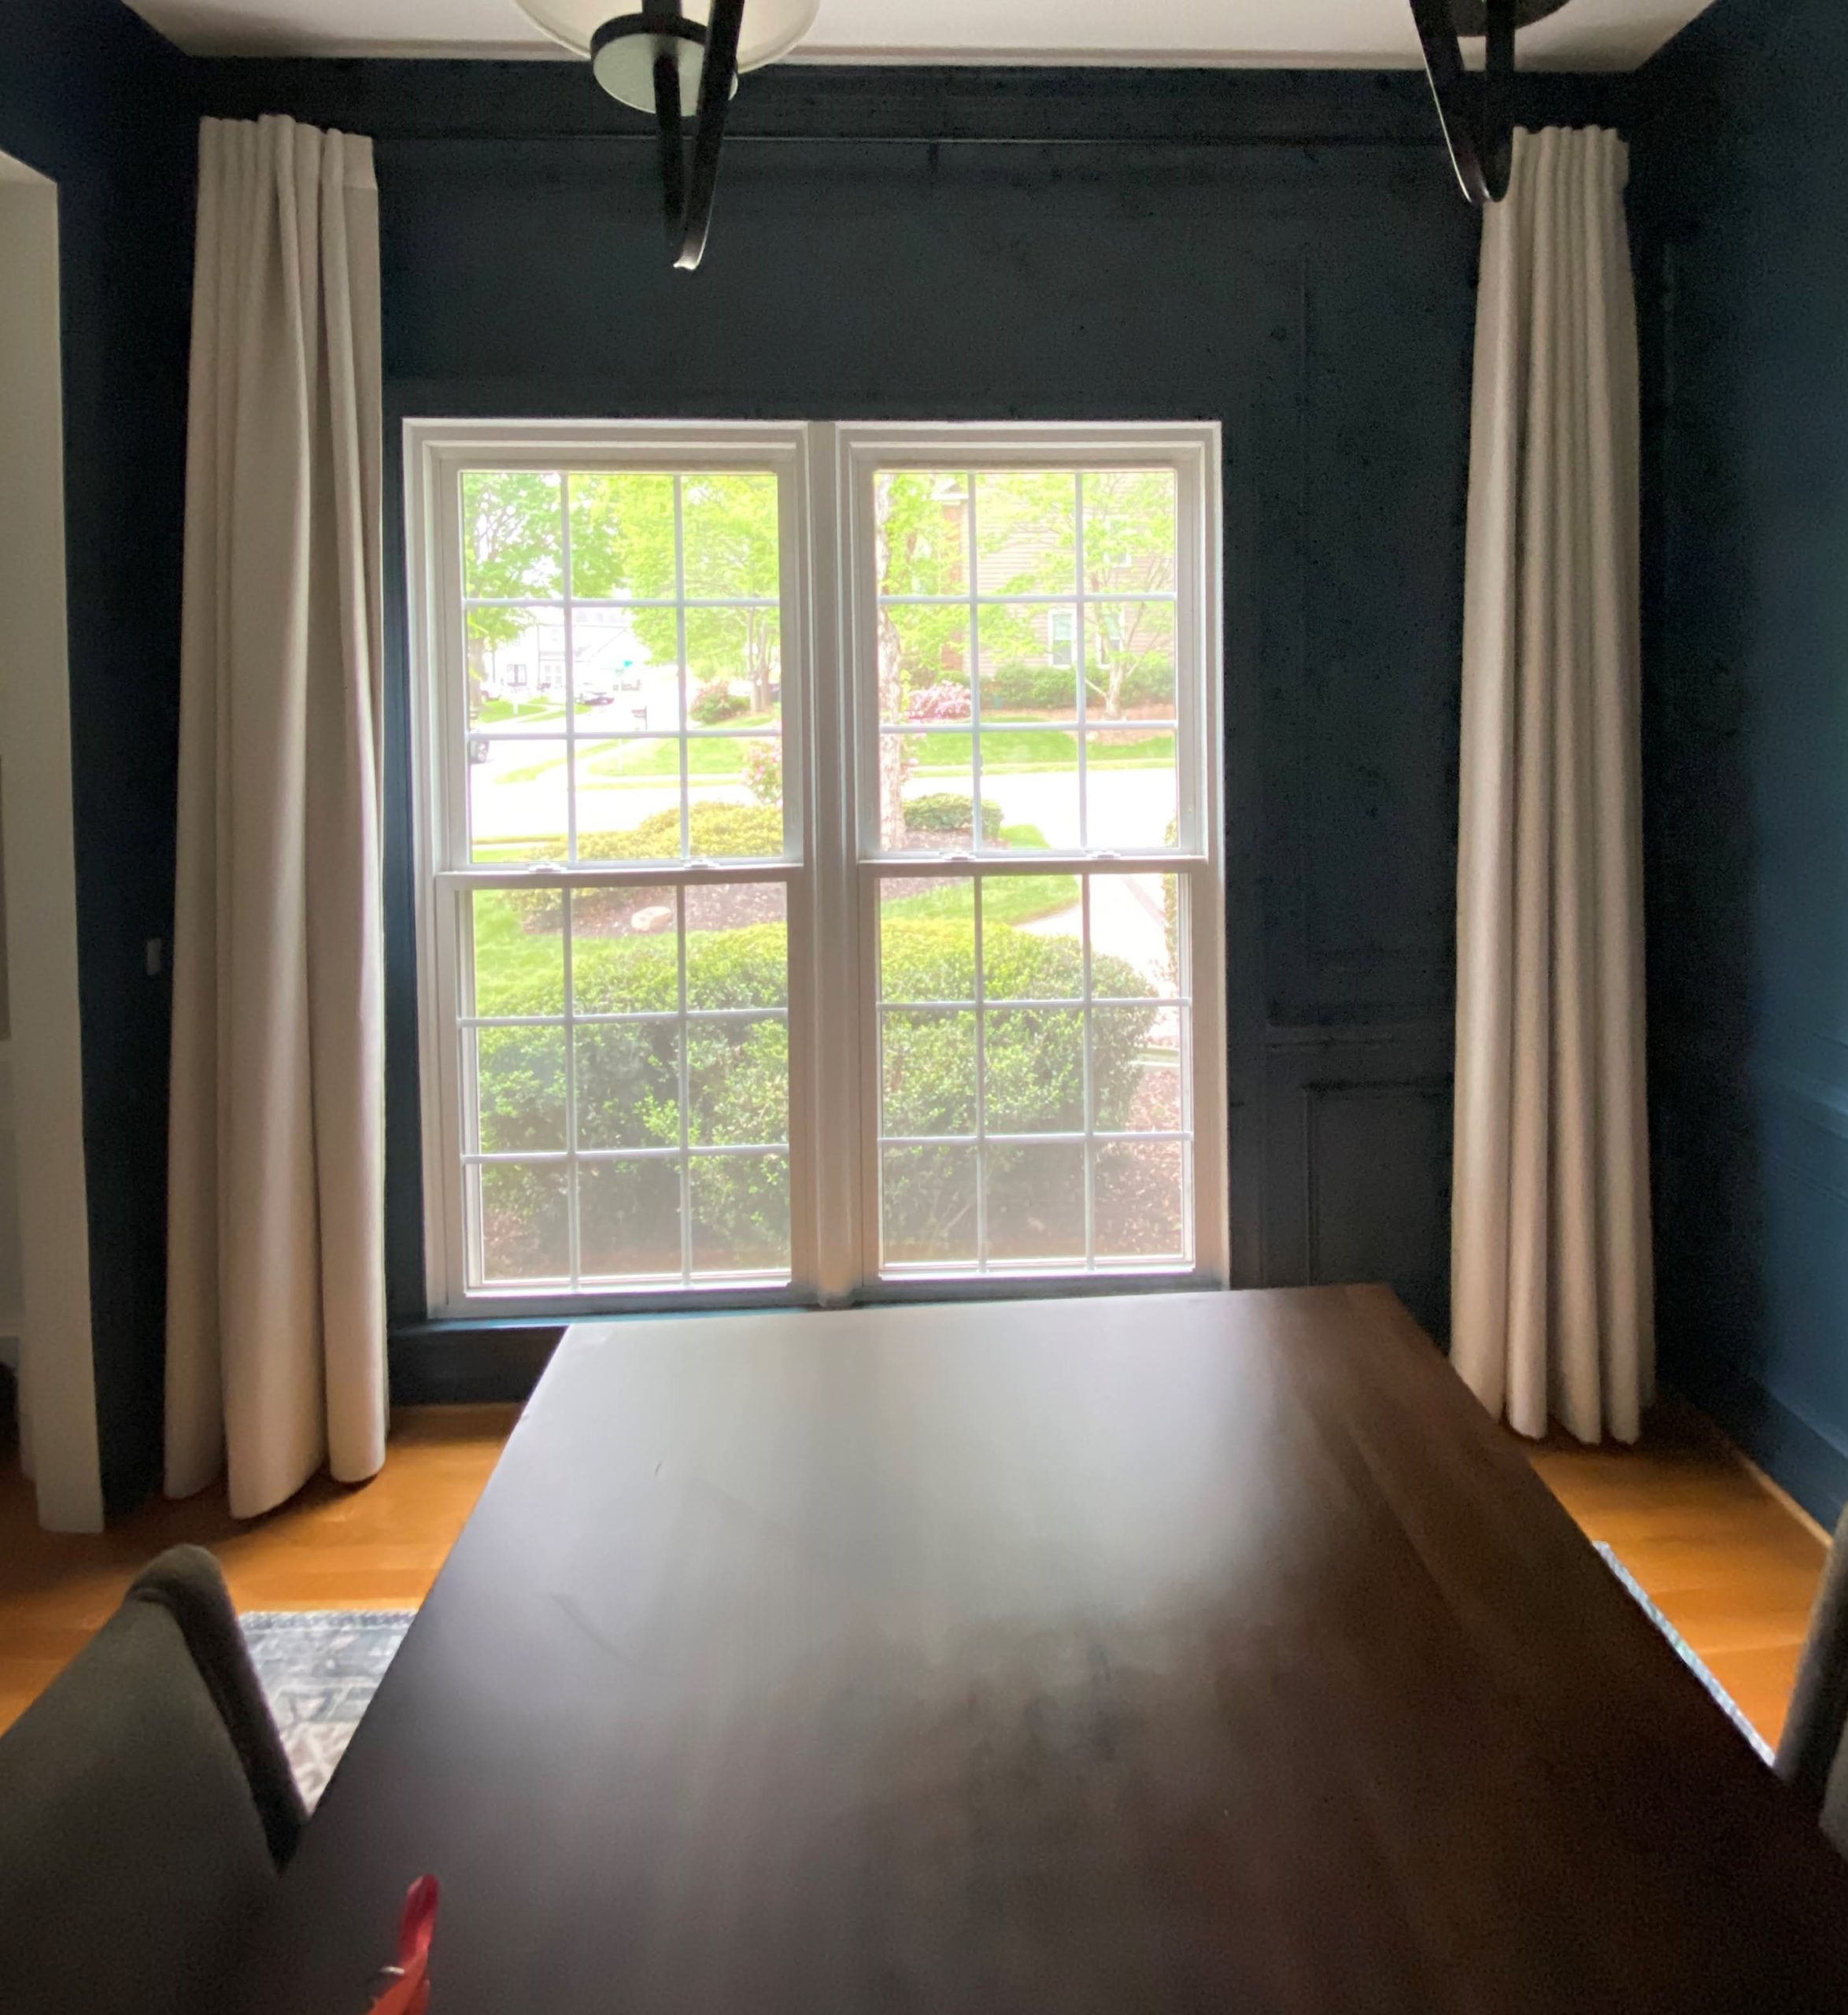
I opted for a high contrast, neutral faux-linen curtains to balance out the darkness of the room. The material also adds some literal and visual softness to the space. In order to make the curtains look super upscale and custom, I raised them high and hemmed them to just touch the floor. You can see how I hemmed them without sewing in this blog post, HERE.
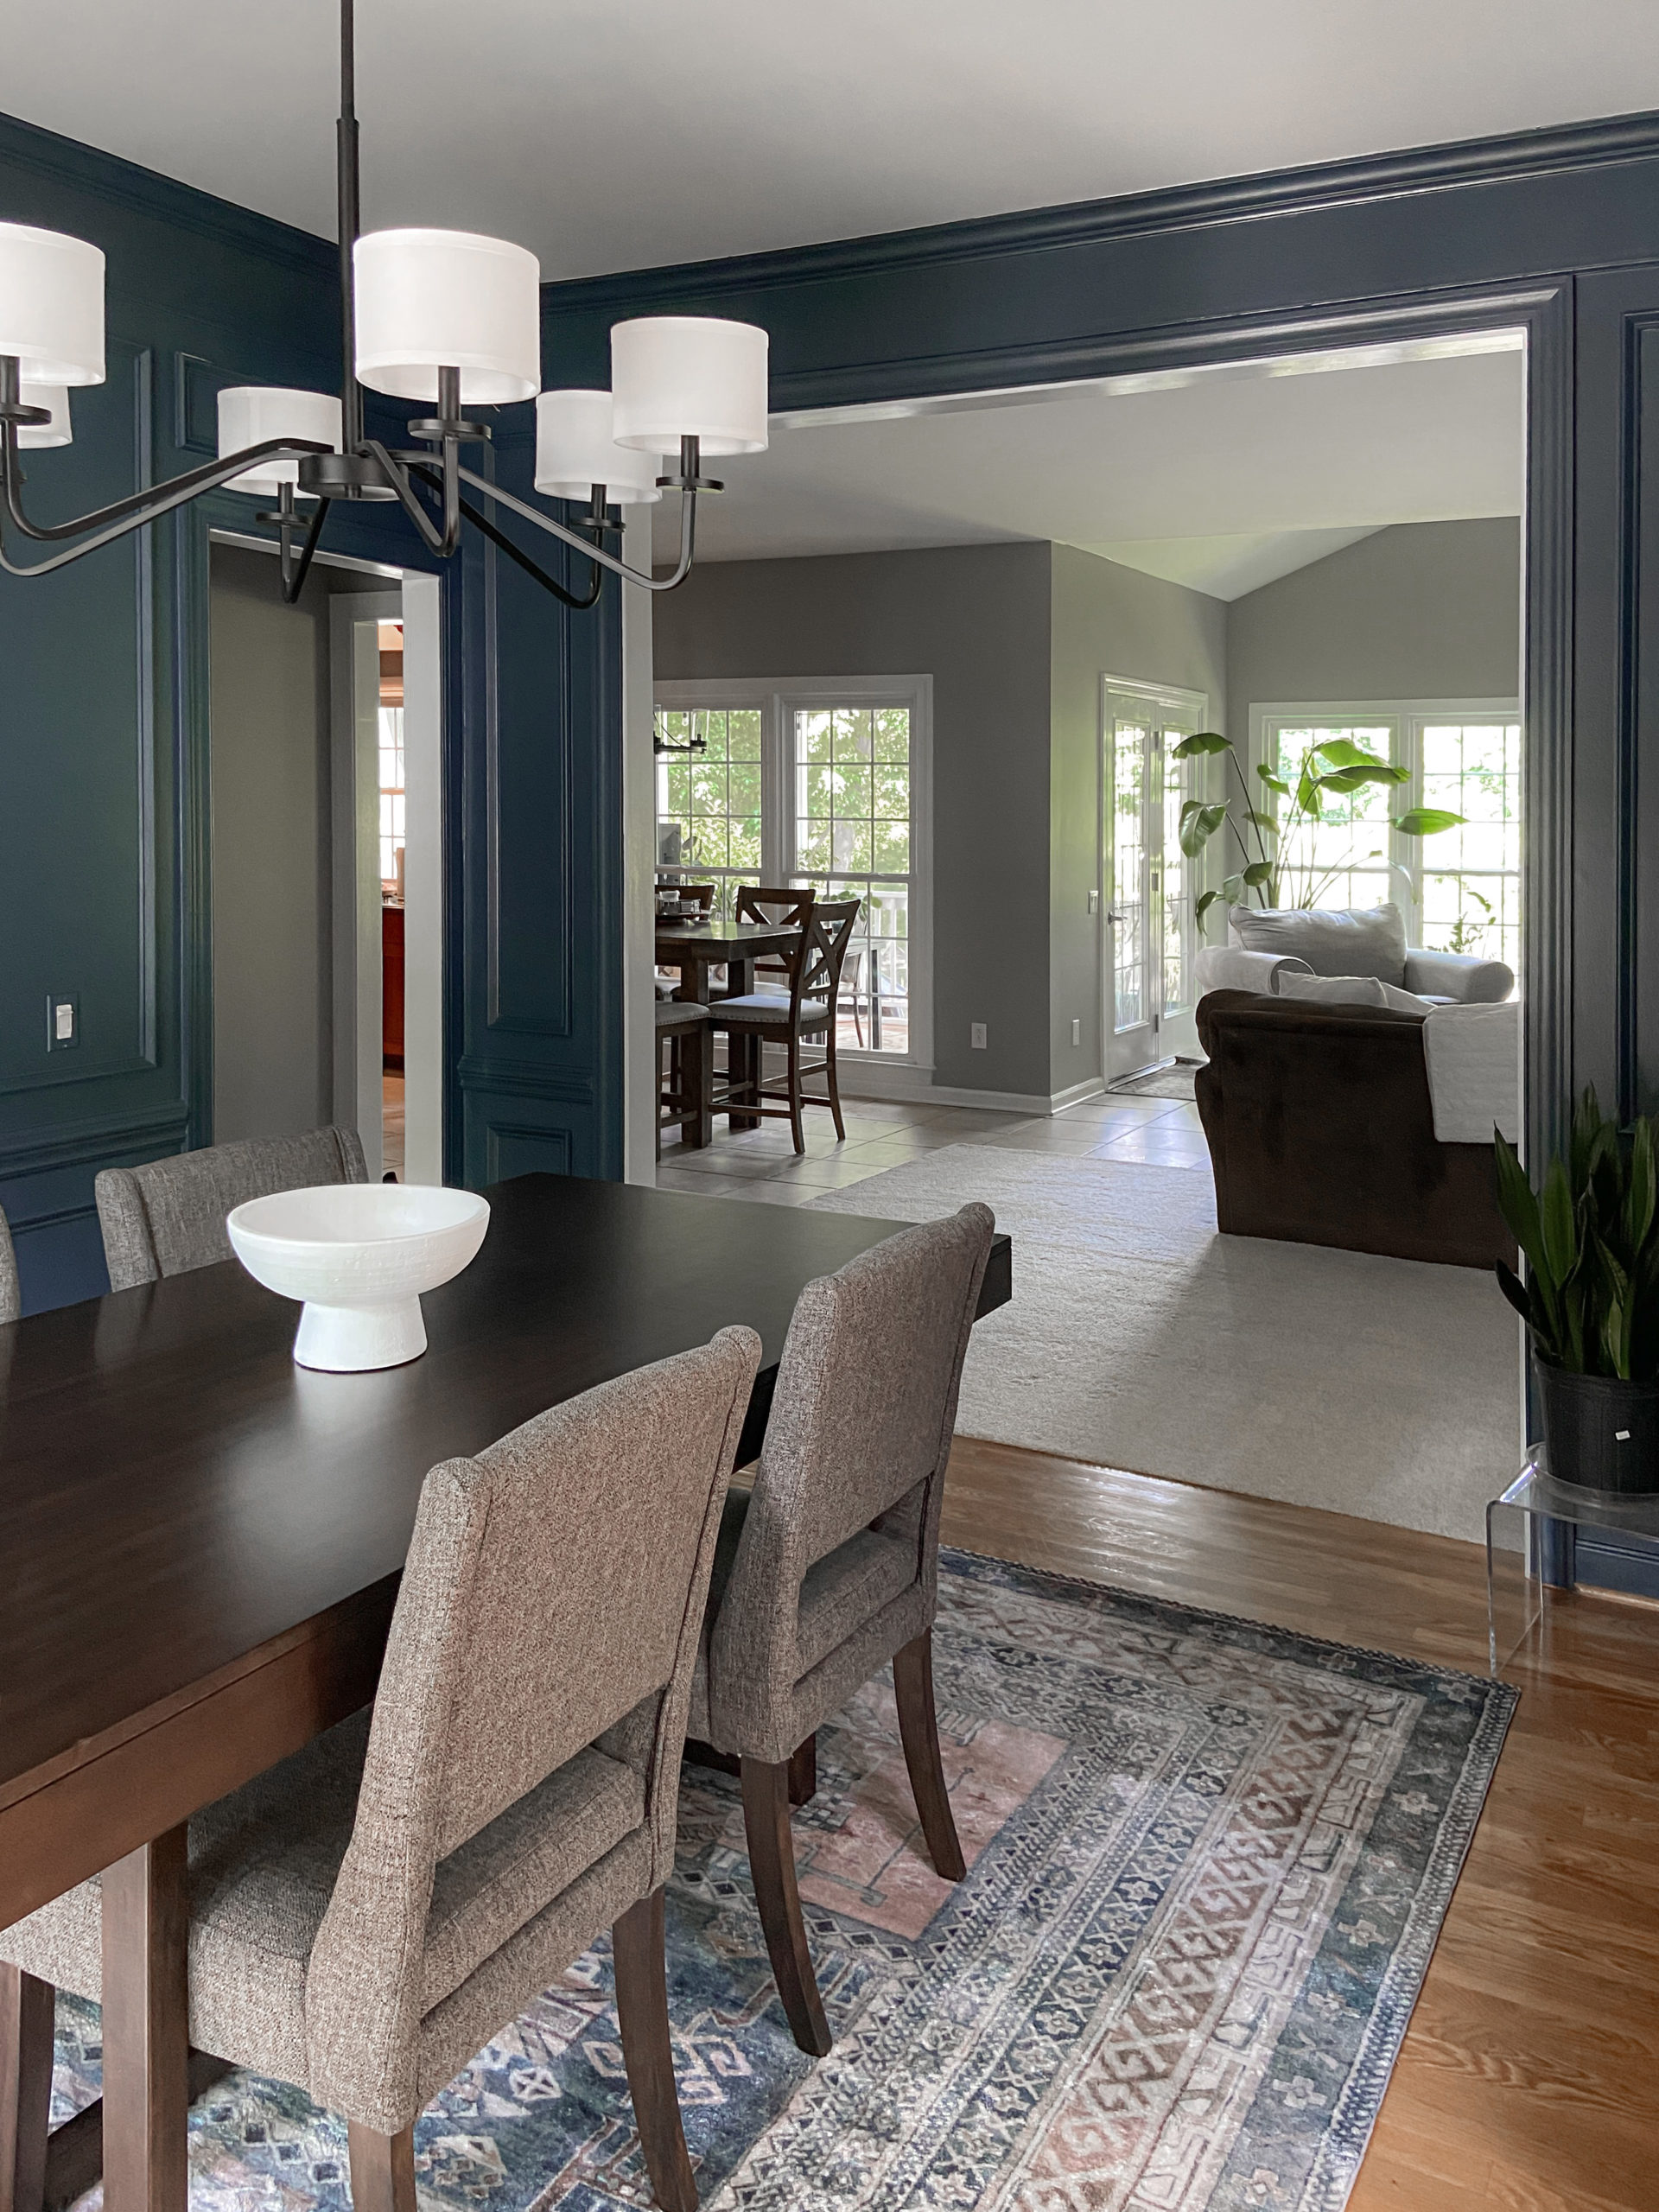
Part 4: Knocking Down the Dining Room Wall into the Living Room
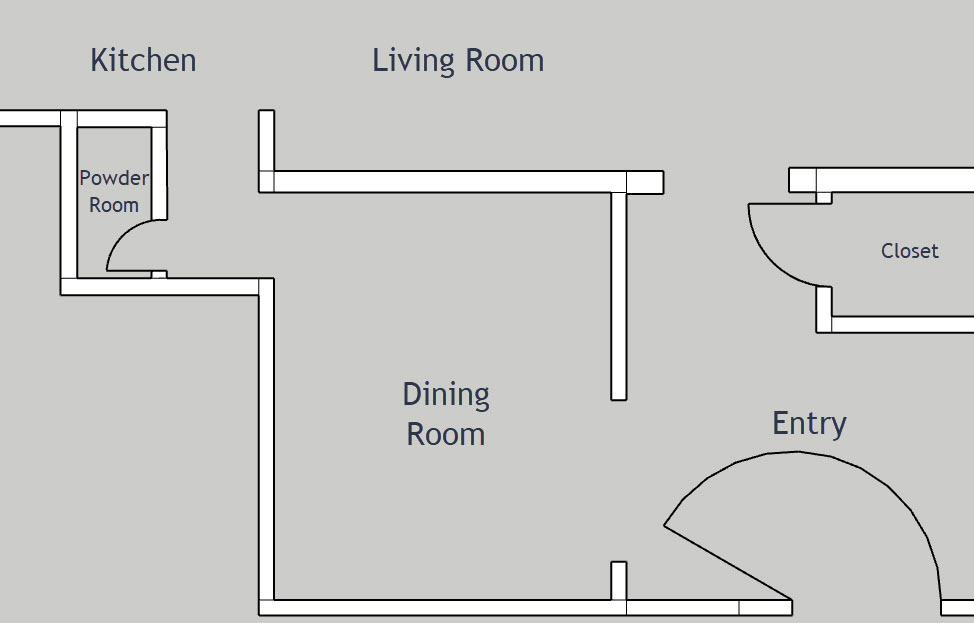
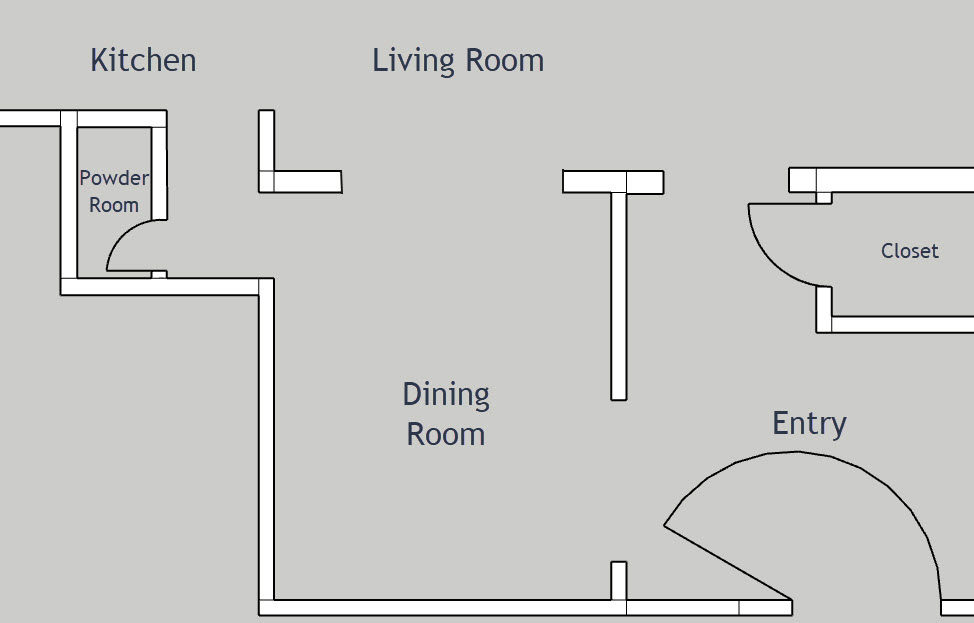
The last and most drastic part of this project wasn’t a DIY- we hired a contractor to remove a wall. Our dining room is pretty open to the entrance of the house, but largely closed to the main living spaces- only connected by a small closet/hallway that leads to the powder bathroom.
Floor Plan Before & After:
The first few years of living in our home, we realized how much we love having people over. Weekend parties, small get togethers, and of course, our Annual Ugly Sweater Party! During those gatherings, we discovered that we needed more sitting /dining space if we had more than 10 people over. We have a large table in our kitchen, but any amount of kitchen seating always seems to feel cramped.

We decided the solution would be to open up the wall that separated the dining and living rooms. The living room was already open to our kitchen so that would make the space even more convenient. Now that we had a plan, we just needed to find the time (and money) to complete the project- which came after we got married in September 2021. Best wedding present ever! (Thanks friends and fam!)
The contractor quoted us to take out the wall and place a large cased opening into the living room. The wall happened to be the main load bearing wall in our downstairs that lined up and supported our second story. We had a structural engineer come out and draw up plans for the beams that needed to be installed and our contractor just followed those plans. There was some electrical in the wall that needed to be moved and flooring that would need to be patched. This was all included in the quote.

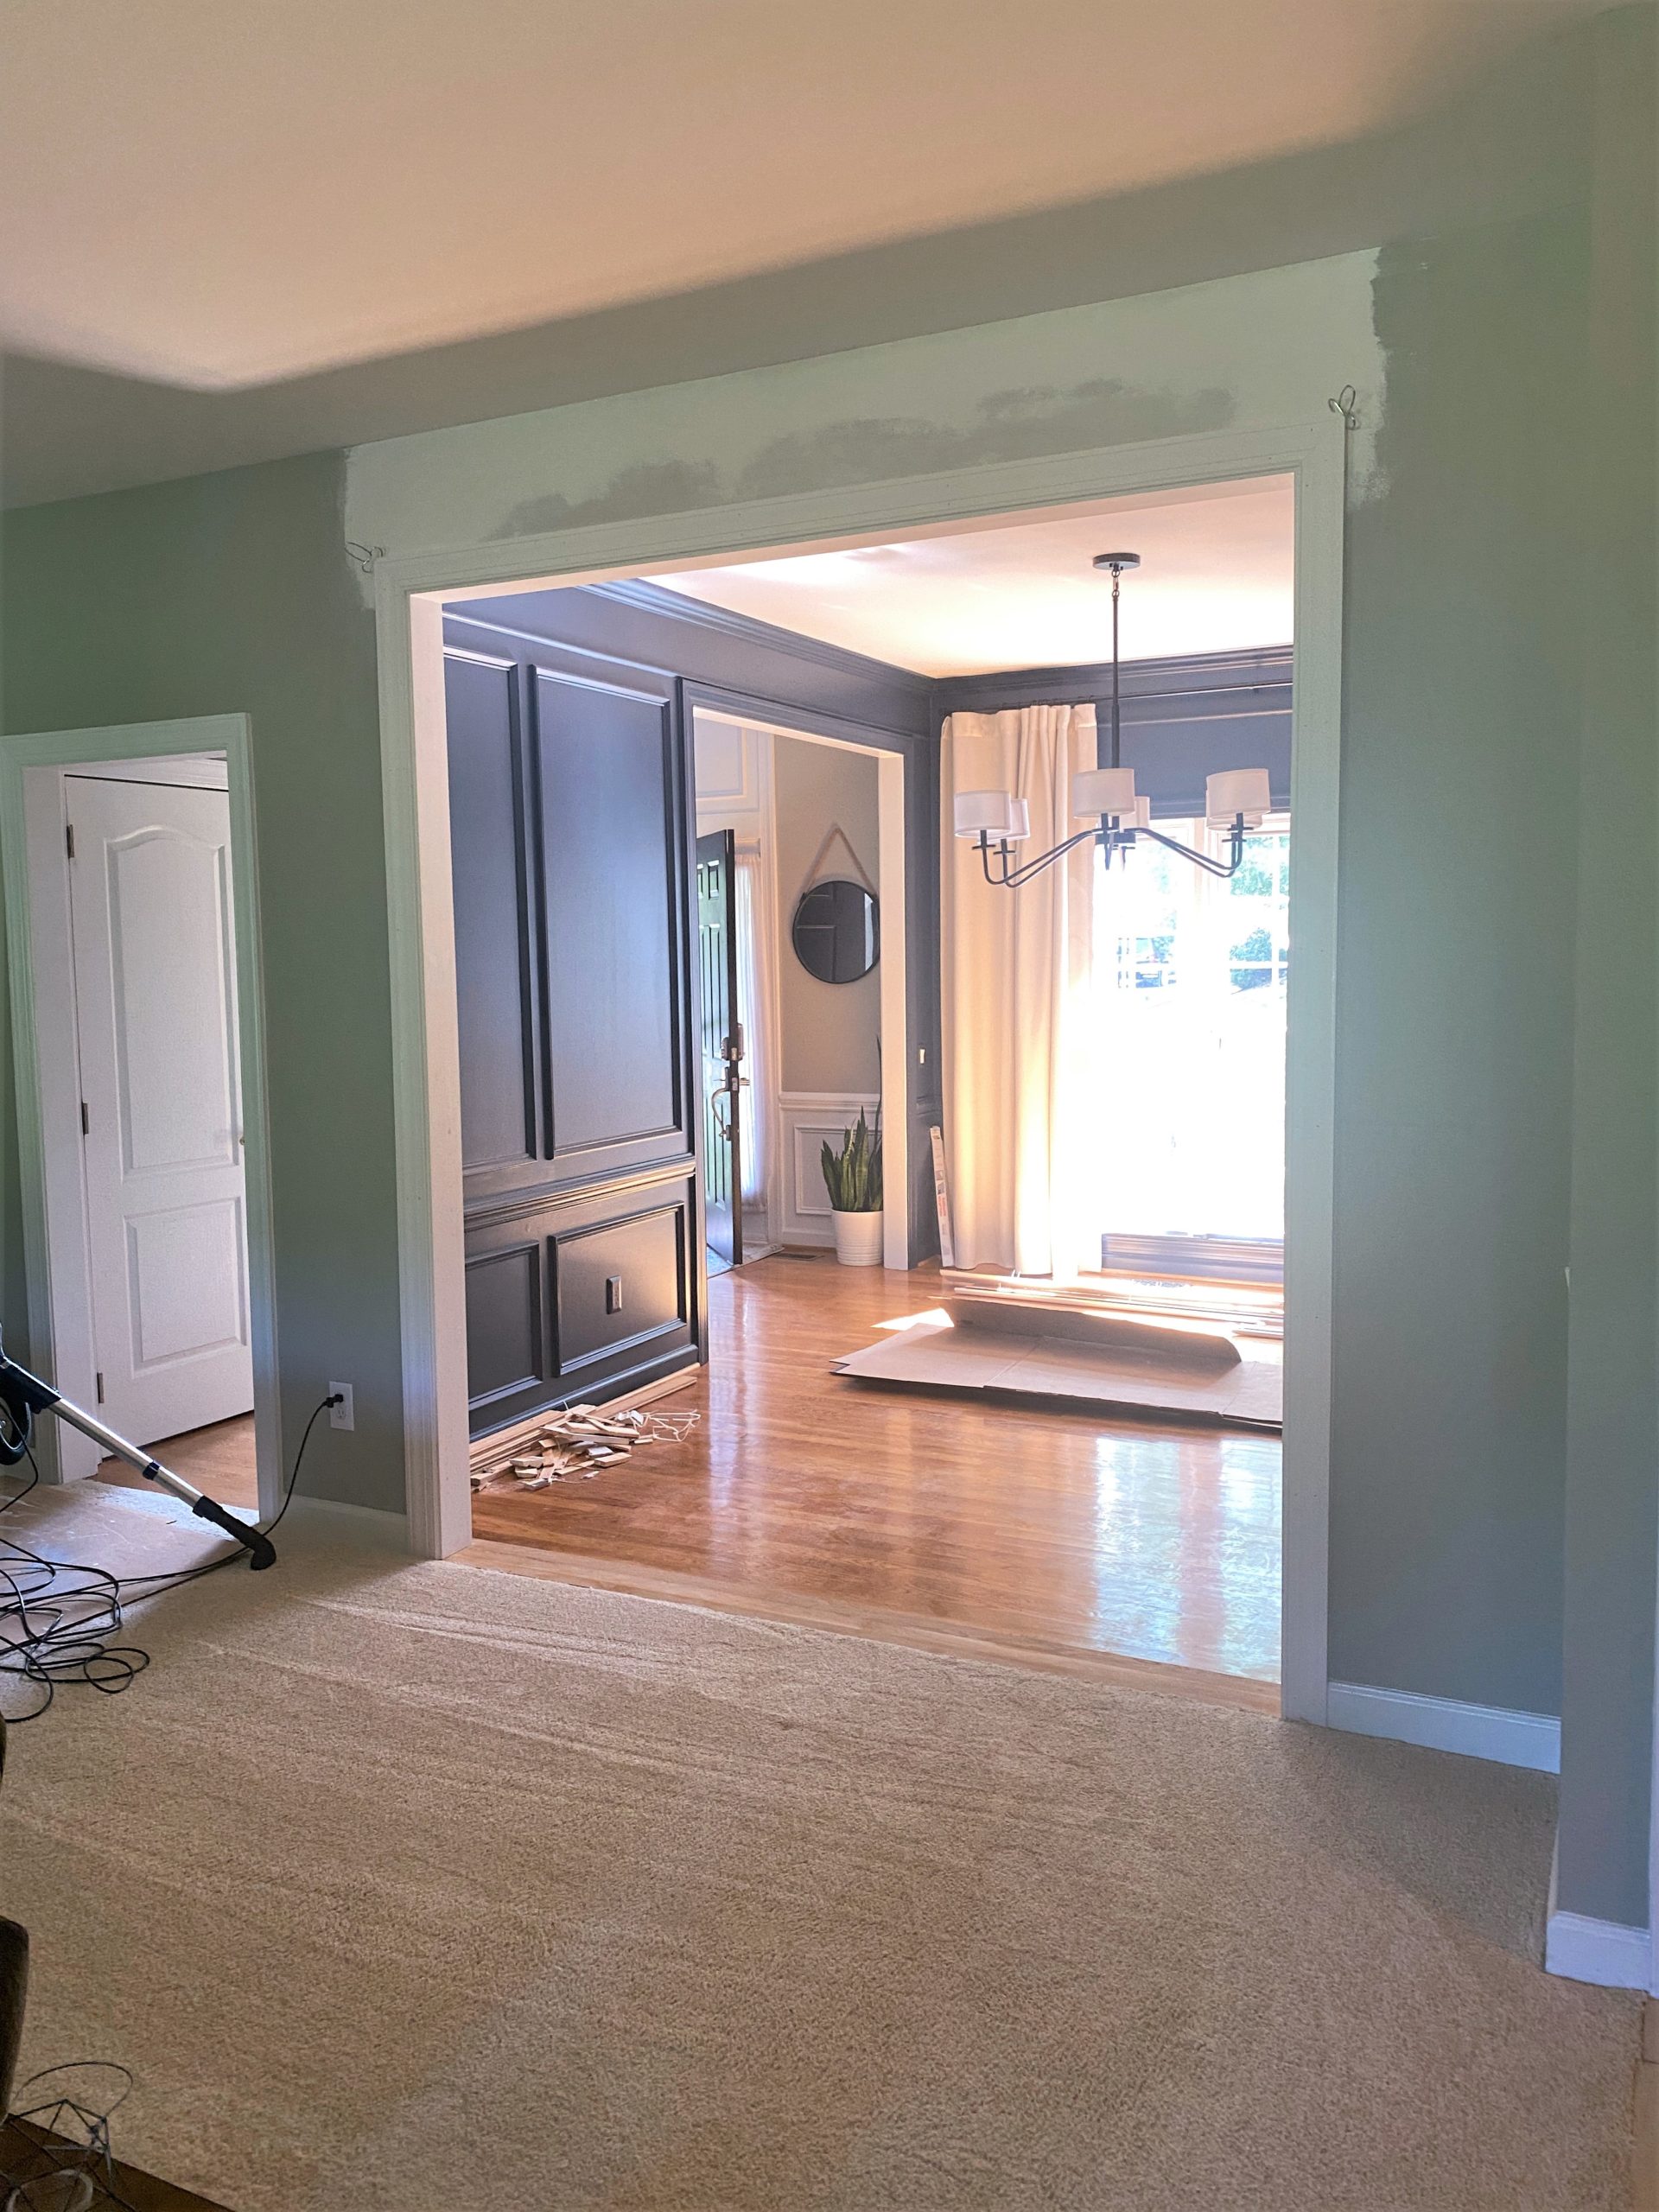
Finishing Touches
Since I like to DIY (and save money) I told the contractor that I could do the finish work. I was open to installing the opening casing and trim as well as finish the floor transition. Fortunately, his pricing was reasonable so we had him complete the trim. To save just a little bit on the dining room cost, I just painted and finished the floor. Below is the state in which he left the wall and flooring for me to complete:

Although this dining room cost was more than my typical DIY projects (because of the non-DIY scope), I wouldn’t change a single thing. The state of this dining room now is exactly what it was always supposed to be. We’re already spending so much more time in there but I can’t wait to see it shine during our first party!

Dining Room DIY/Construction Cost:
Wood Trim for Molding– $200
Wall Paint (Behr S470-7 Undersea)- $105
Chandelier– $207
Floor “Classic Oak” Stain & Poly– $30
Misc (tools, paint rollers, my fav caulk etc)- $360
Contractor- $3400
Total DIY/Construction Cost- $4,432
Dining Room Decor Costs & Links:
Dining Table & Chairs- $500
Lachlin Area Rug– $409
Pedestal Bowl– $50 (but free to me bc it was a gift)
Art Print– $60
Total Decor Cost- $1,019
If you have any additional questions about the Dining Room leave me a comment below!
Want to keep up with my newest projects? Come hang out on Instagram and TikTok!