Modern Shiplap Fireplace and Mantel
Add character to your home with this DIY Modern Shiplap Fireplace and chunky wood mantel tutorial. No outdated modern farmhouse over here!
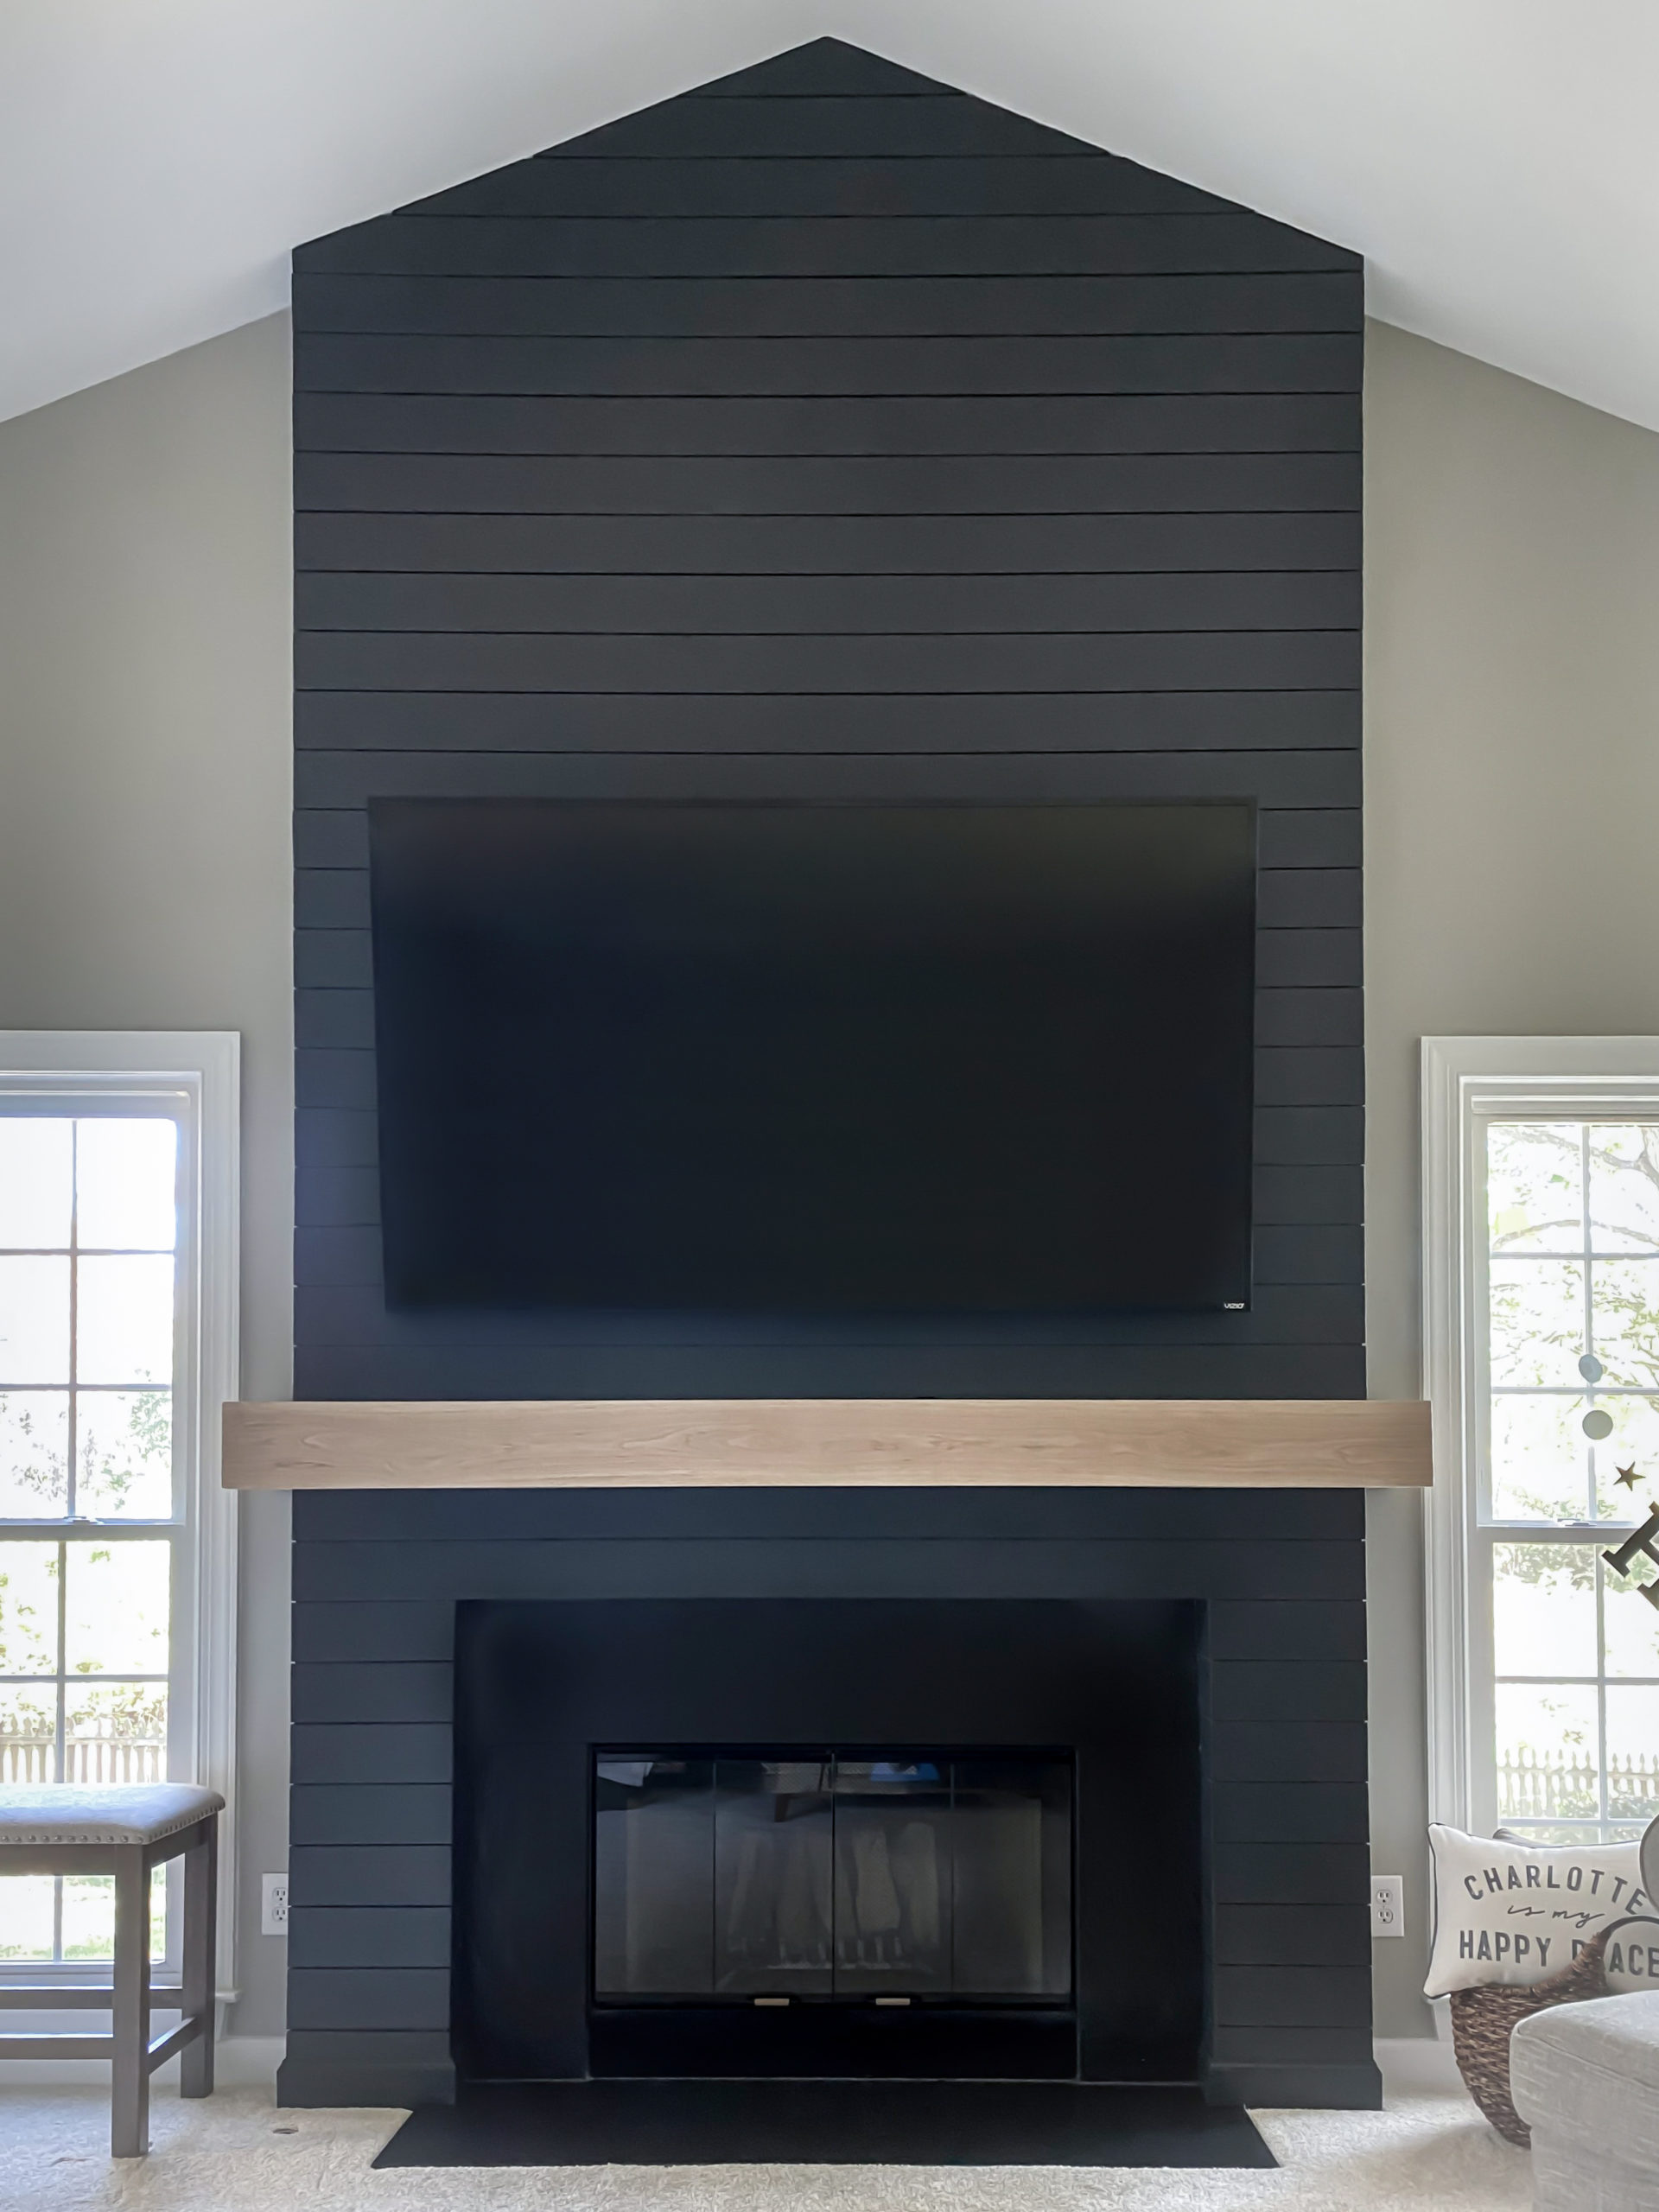
The layout of our downstairs is the main reason that we fell in love with and bought our house. The way that we used this space for the first two years of living here is what truly made this house feel like home. The living room is huge- it’s completely open to the kitchen and has an entrance to the screened porch. It’s an amazing place for friends and family to gather- with the half of a vaulted room and a 15 ft tall fireplace feature.
After living in the space for two years and knowing what a huge gathering place it was becoming for us, I decided to focus on a big impact project for this space. The existing fireplace was OK- it consisted of two vertical columns, some inset box trim and an arched fireplace opening. Although box trim is coming back, the way it was used for this fireplace wasn’t inspired. Plus, the arch wasn’t architecturally significant- as the only arch in the home, it felt out of place.
I wanted to update the space and make it feel more like ‘us’ so I decided I would DIY my own Shiplap Fireplace with a squared off fireplace opening. I’d seen some really good inspiration on Instagram of tall fireplaces with dark shiplap and it was exactly the look I was going for. I also knew that I wanted a substantial, but clean-lined wood mantel and we wanted to hang our large (75″) TV above it.
Don’t need to redo your fireplace? No problem! Check out my other tutorials, like this DIY Modern Barn Door, or my DIY Closet!


How to DIY a Modern Shiplap Fireplace:
(This post contains affiliate links which means I receive a small compensation at no cost to you. As an Amazon Associate I earn from qualifying purchases. You can read more about it here. Thank you for supporting my blog!)
MATERIALS:
2 x 4’s
2 x 12″ (if mounting a TV)
White Oak (or whatever wood you want for your mantel)
18g Nails, Wood Screws (3″ for attaching to studs)
Satin Paint tinted to SW Greenblack
TOOLS:
Ladders
Hand Sander (220 grit paper)
Wood Glue, Wood Filler
Pry Bar, dremel
Wood Clamps, Tape Measure, Level, Stud finder
Painting Supplies (Brush, 3/8″ Paint Roller Cover, 9″ Paint Roller Frame, Tape)
STEP 1- Measure and Design
Measure your existing fireplace or map our how big you want to make your fireplace if you’re starting from scratch. My fireplace was existing and consisted of two columns that I was going to use as part of the foundation of my design.
Since my existing fireplace structure was 83″ wide and 6″ deep. I decided that I would leave the overall dimensions the same (+0.25″ for the thickness of the shiplap). If you don’t have an existing structure, you’ll just build framing to your desired dimensions in the next step.
Here’s the line drawings I created to plan out the final look and the support structure behind it. For the framing, the red lines were existing, the rest I built with 2 x 4″ boards. I originally wanted to replace the slate fireplace surround with tile but later on, decided that the slate perfectly balanced out the large TV above the mantel.

STEP 2- DEMO
If you have any current structure that you don’t plan to build over, remove that in this step. I had to remove some trim pieces at the top and bottom of the columns and the mantel. Most trim pieces are easily removed with a pry bar and some muscle power, however, check to make sure there aren’t any hidden screws or bolts attaching the mantel.


At this point, I also dug into the wood surrounding the fireplace to understand what was behind it for when I had to reshape it in the next step.
STEP 3- Build Stud Wall
Building a stud wall provides a sturdy support material to nail the shiplap into. For my fireplace, since I had the two existing columns I just needed to build studs inside those columns.
Build the stud wall on the floor first, making it ~0.25″ less than the height and length of the space. Make sure to evenly space the studs apart, and get as close to 16″ spacing, without going larger. My studs ended up being spaced around 14″ apart. Once built, lift the stud wall up into the cavity and screw it into the mantel ledge and the existing columns to support it. The columns and mantel ledge were completely made out of 2×4’s so they were acting like studs themselves. If you are building from scratch, make sure to attach your stud wall to the studs in your wall and ceiling.


STEP 4: Add Blocking for TV and Frame Fireplace
Since I knew I wanted to hang a pretty substantial TV on this wall, I added a 2 x 12″ block behind where that would be installed. I ended up with about 2.5″ of space between the stud wall and the back wall. This opened up an additional option to build a little inset electrical plug area that could be behind the TV too.
In this step, I also cut out the arched fireplace opening with a dremel and added 1x 4″ boards to frame the opening. Since I was making the opening larger overall, and was using the same material that was already there (wood) there were no code implications. When updating any surrounding for a wood or gas burning fireplace, you’ll want to research your local code for distance and usage of combustible materials near a fireplace.


STEP 5: Paint your Shiplap
I’m a big fan of painting before installing things, even if it’s just one coat and you have to paint again. Getting that first coat on in the garage without having to maneuver your brush (or your body) to get into all the little crevices makes it so much easier and faster in the long run. It’s especially important to paint shiplap before installation. If it’s already primed, that’s a plus- you don’t have to fully paint the board (or prime at all, obviously). You do always need to paint the top and bottom “laps” otherwise you won’t be able to fully get paint into the grooves after it’s installed.
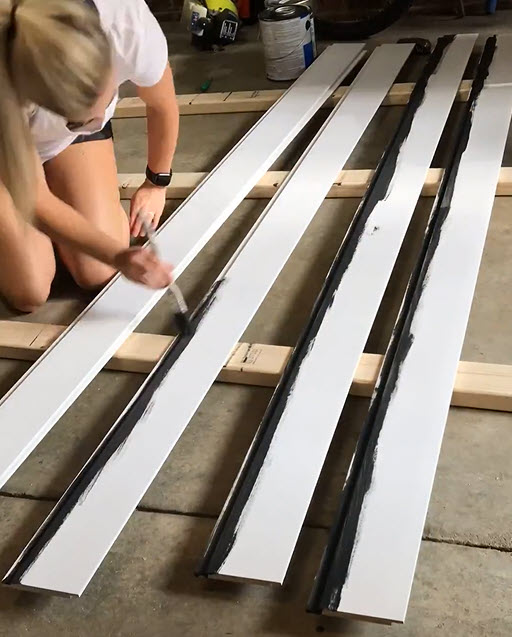

Step 6: Start to Add Shiplap
If you have an angled ceiling like I do, the first few boards will easily be the hardest. You’ll want to measure your angle with a T-bevel to understand what angles to cut your top board at. Whatever angle that measures, you’ll want to subtract that from 180° and then divide that number in half. I cut each of my boards to 15° since my ceiling peak is a 150° angle. 180° – 150° = 30° / 2 = 15°.

For the length of the first board, I played a bit of a guessing game. I measured down from the peak, 5.25″ which is the width of the shiplap then measured across the wall. I added an inch to my measurement, so that I didn’t cut it too small and placed the board up against the ceiling to check it. After cutting off 9 small slivers, the point of the board perfectly touched the point of the ceiling, as well as sat flush with the side walls. It was a great moment.

Step 7: Complete Shiplap
Once the angled part of the ceiling is complete you can start to cut straight cuts but at an angled bevel. This is similar to cutting 2 miter cuts at 45° to create a right angle, but along the long plane of the wood. This allows us to wrap the shiplap around the framing seamlessly.

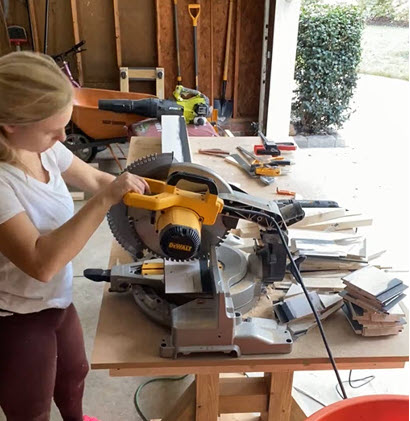
For each row, it’s best practice to cut the front board at a constant length (for me that was 83.5″). This ensures that your fireplace doesn’t get longer or shorter as you work your way down and look weird. Since walls (and the existing columns) are not always completely level or plum, you may not need an exact 45° and 45° to meet at 90°. I cut a few pieces of scrap wood at different angles so that I could test them before cutting the side pieces. I used 45° and 47.5° and if the piece still didn’t fit properly, I placed a thin shim behind the wood to prop up one edge and make one of those angles work.

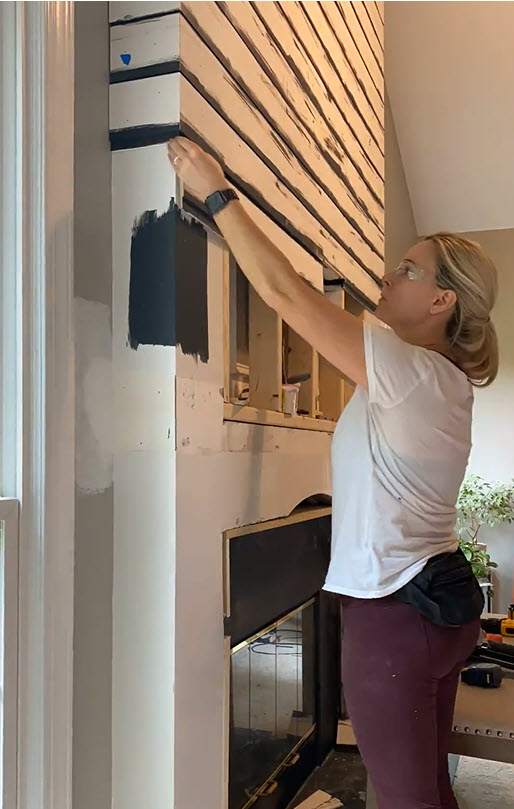
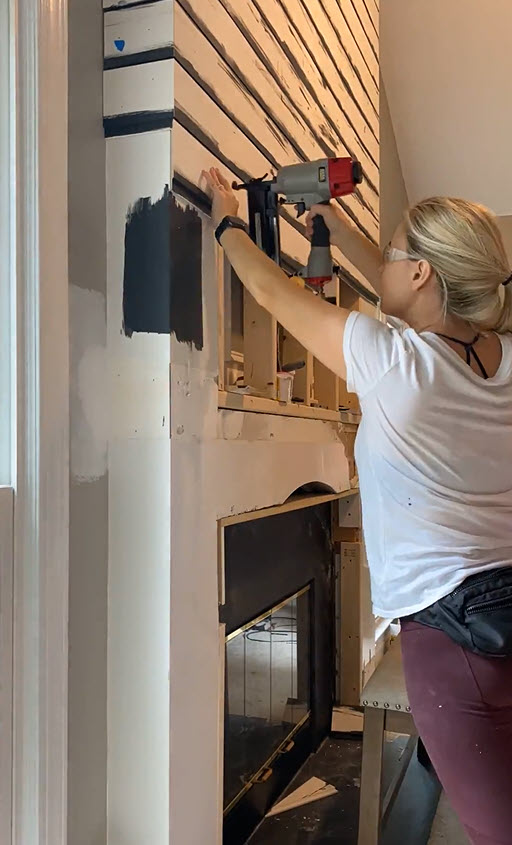
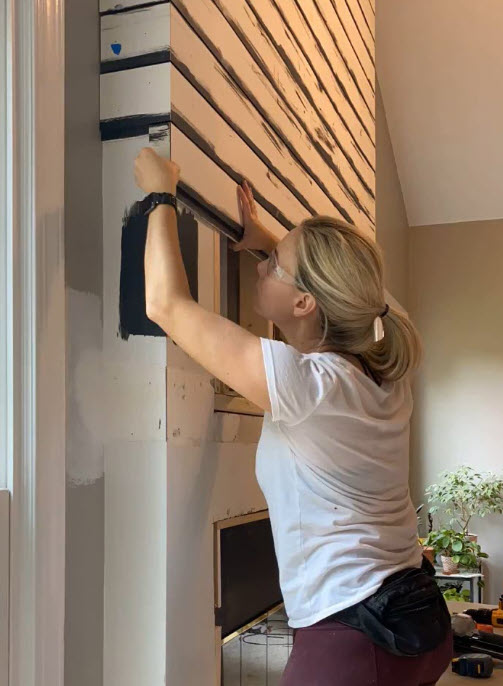
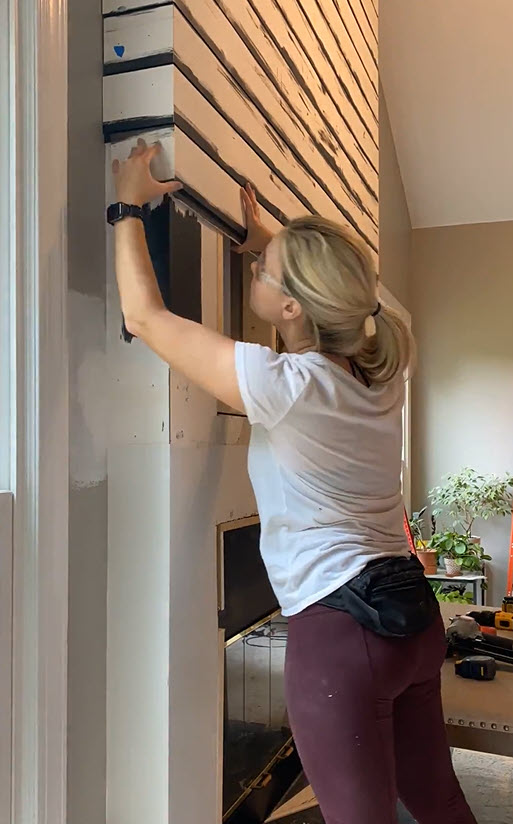
Attach each board to your stud wall with 16g nails in each stud. Even without a backer board behind the shiplap, the 16″ studs are enough support to make the wall sturdy. This part is extremely repetitive but pretty easy! Make sure to mark on top of the shiplap where your TV block is located as you’re covering it. Once you get to the fireplace opening, you just adjust your cuts to be two small front boards, and 2 edges to each front board.
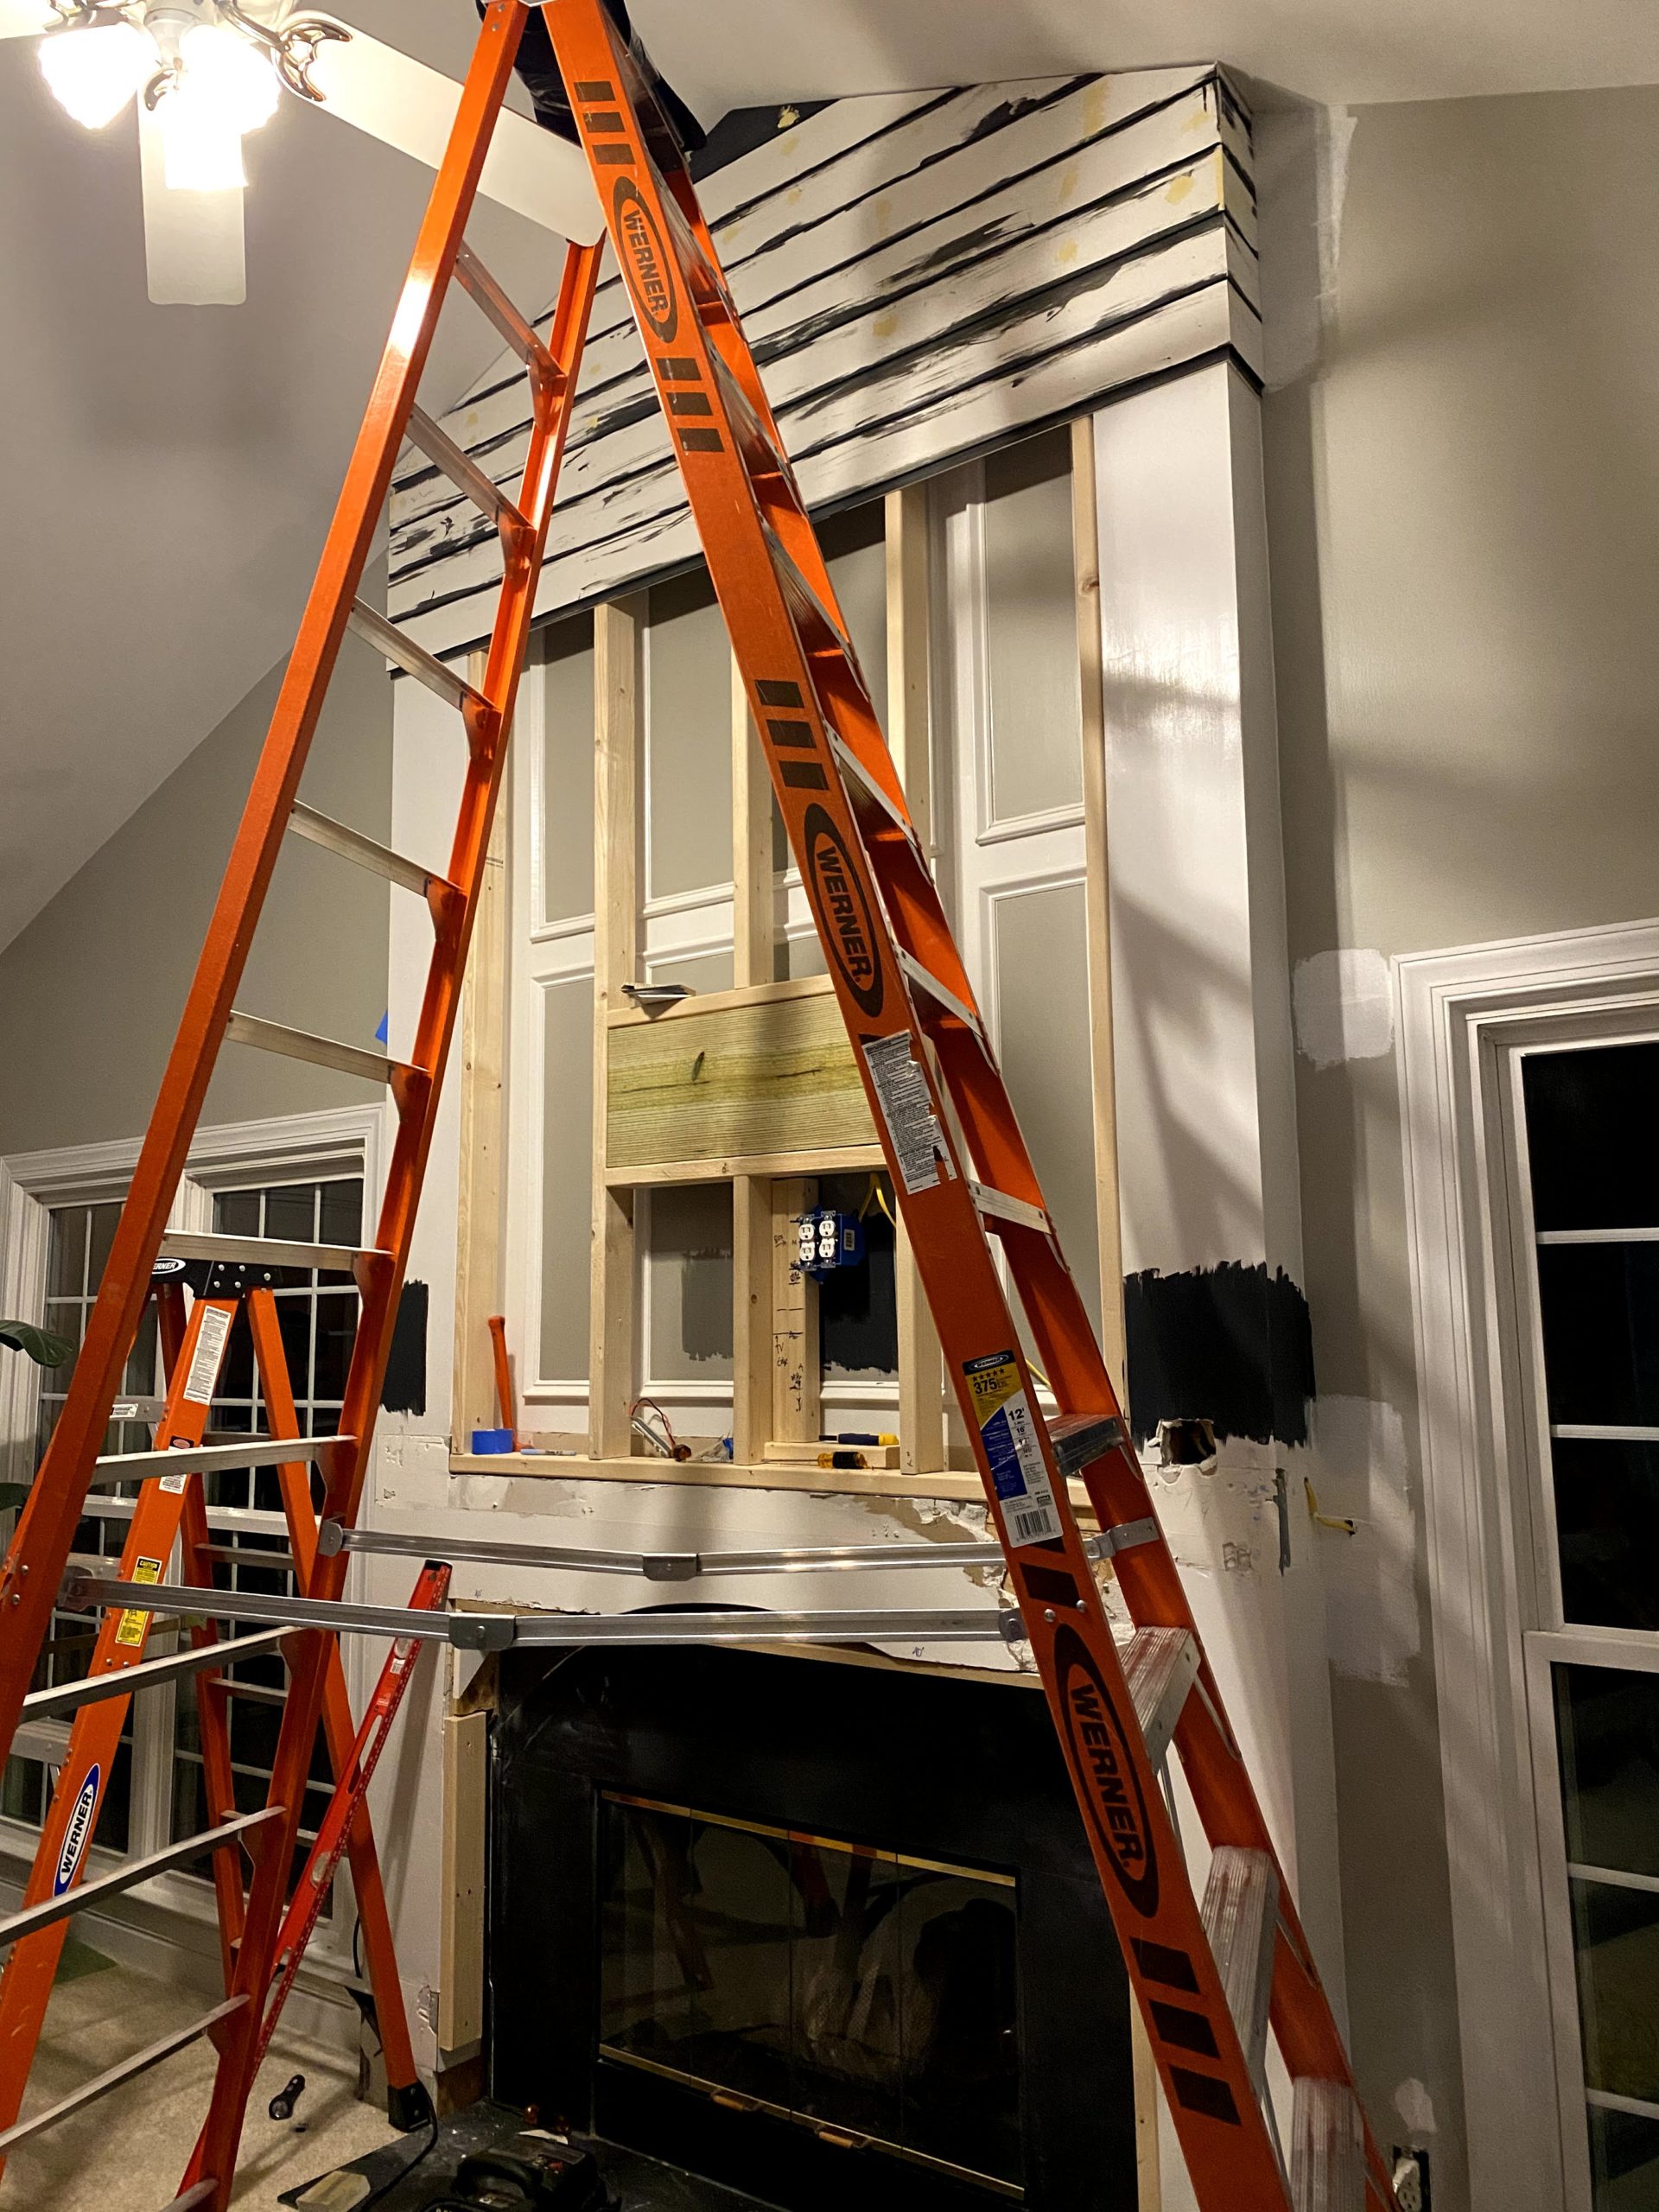
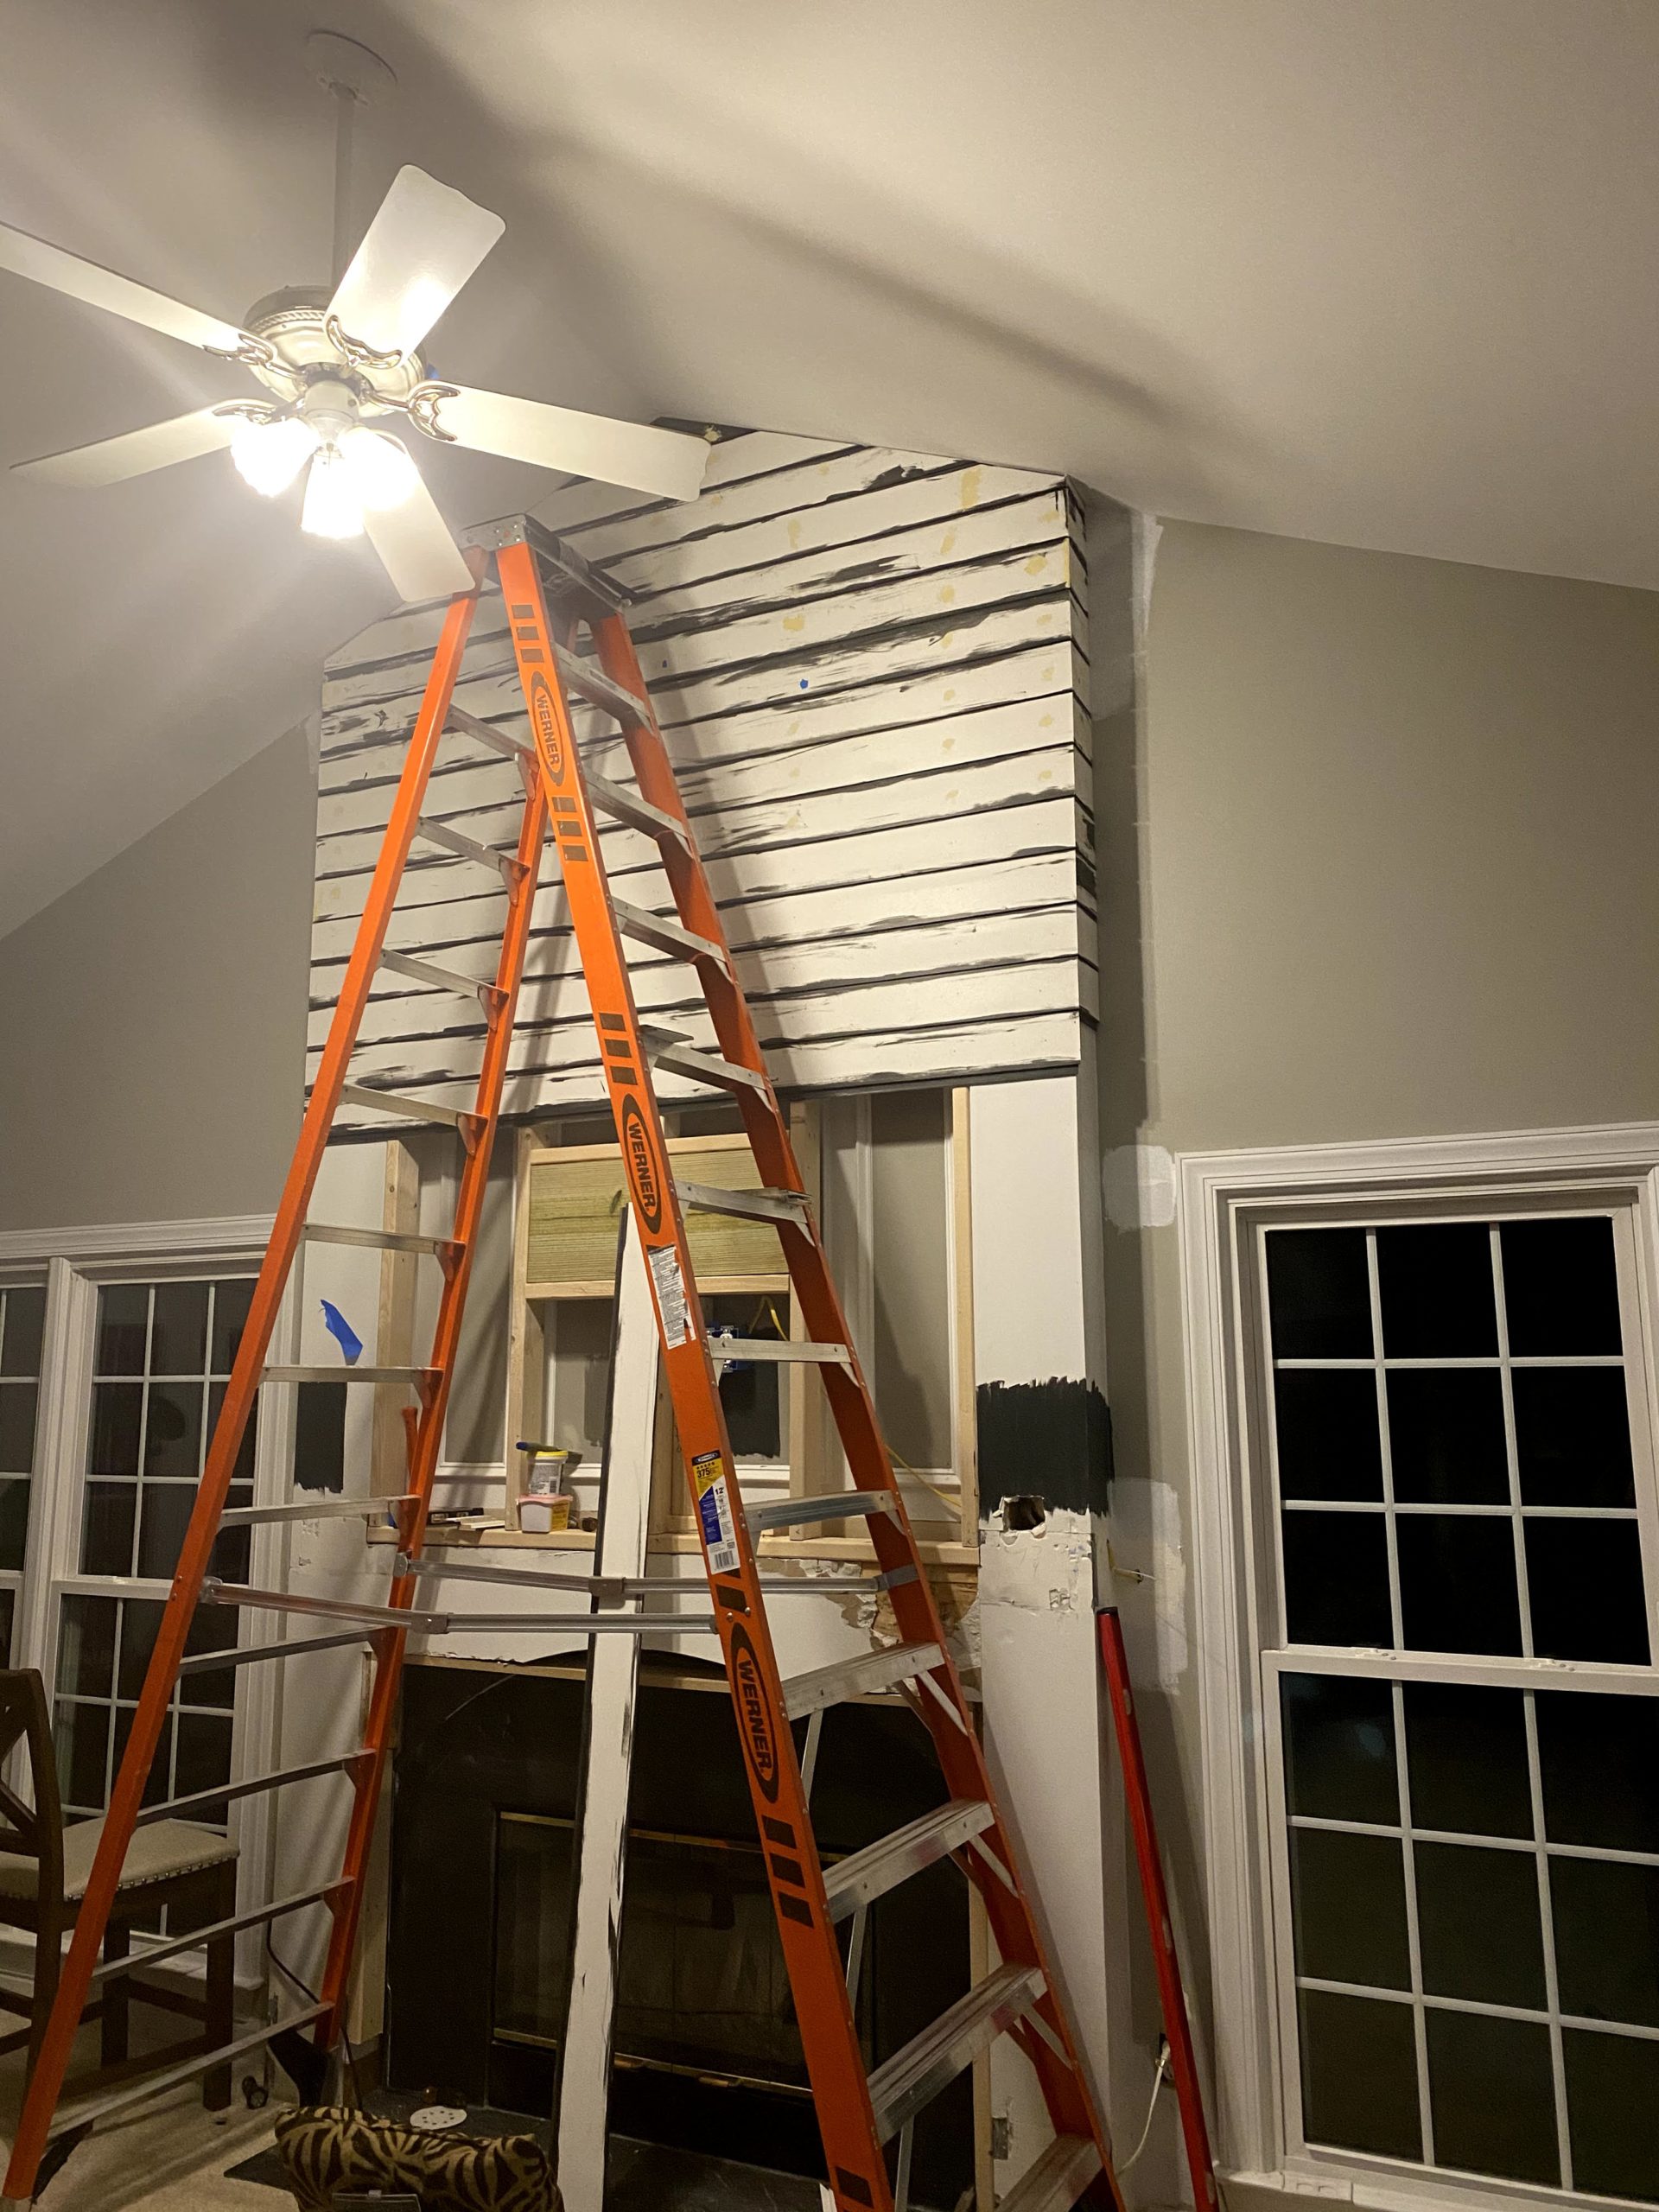

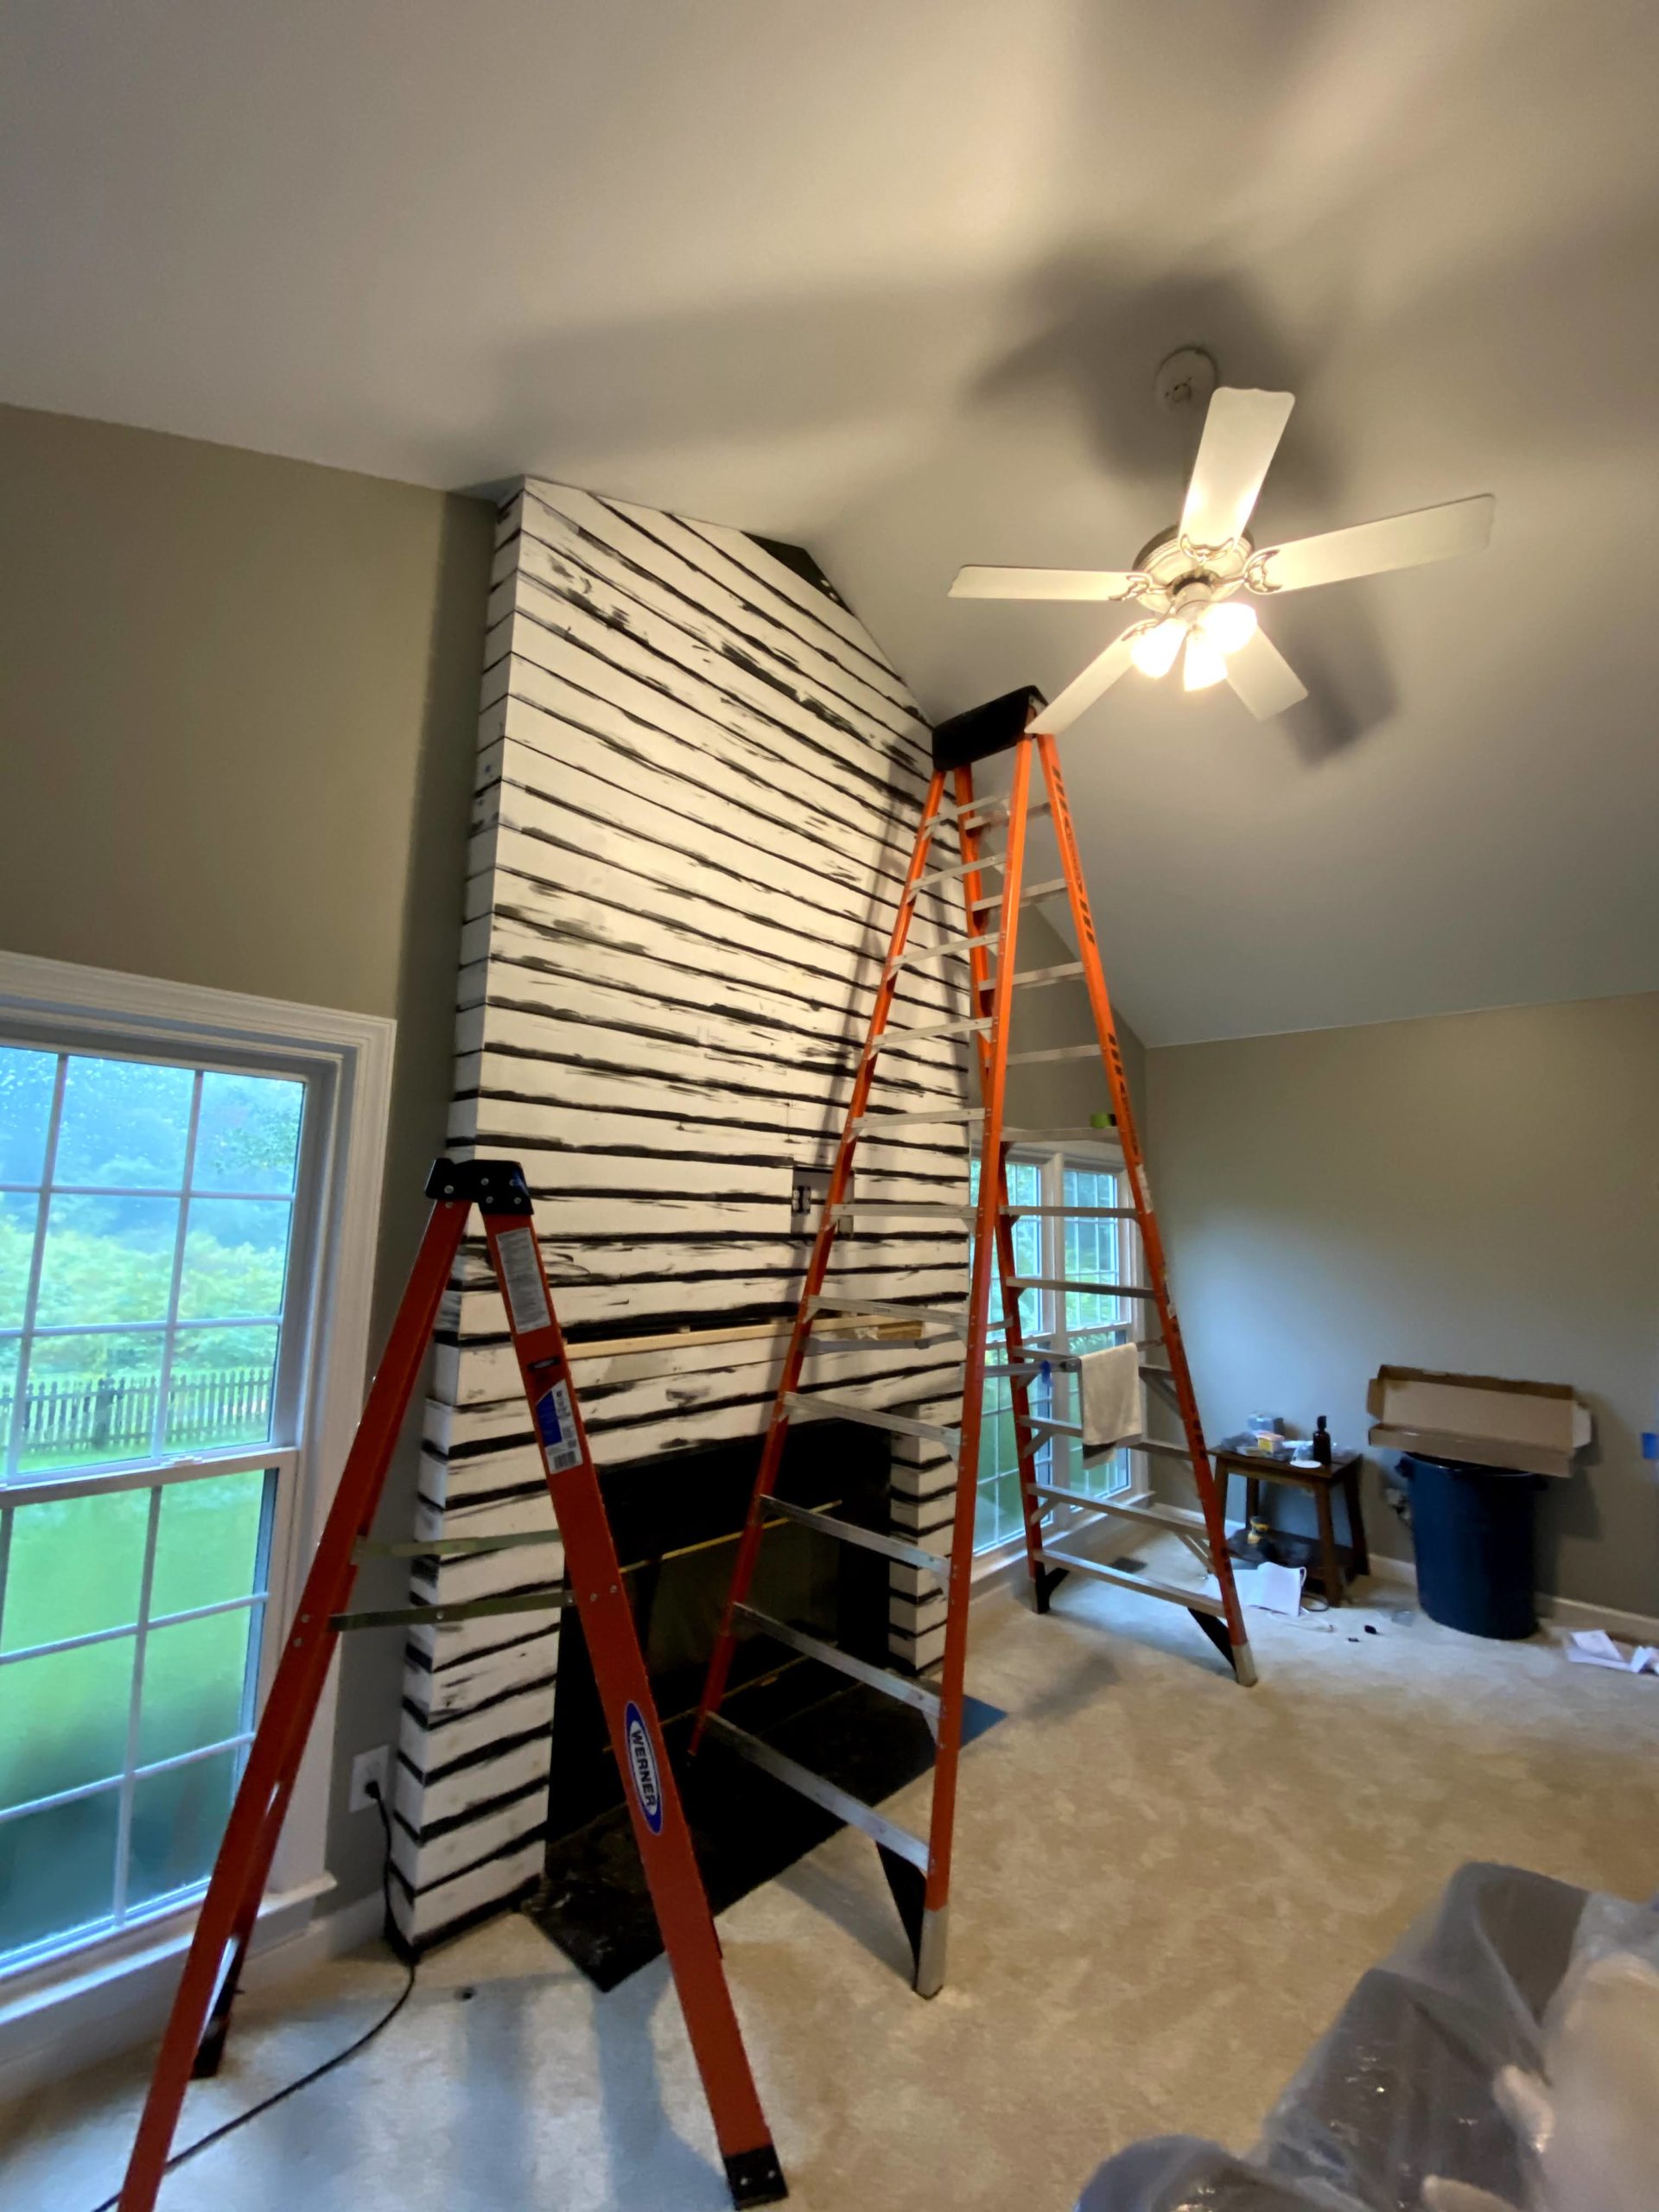
STEP 8: Paint the Shiplap
Now that all the boards are up, you’ll need to paint the entire structure. If you didn’t paint the entire board with the final color during step 5 (like me) then you should paint 2 coats of the color to make sure you get good coverage and the true color shows. Be careful when painting against the walls- use painters tape to protect it but still aim to be super accurate with your brush when cutting in. The laps in the shiplap can make it difficult to cut in correctly and you don’t want to paint the wall at all. Even in those lap areas, paint will show and make the structure look sloppy in the final product. I definitely messed some areas up but went back with the wall color and a toothpick to fix it later.
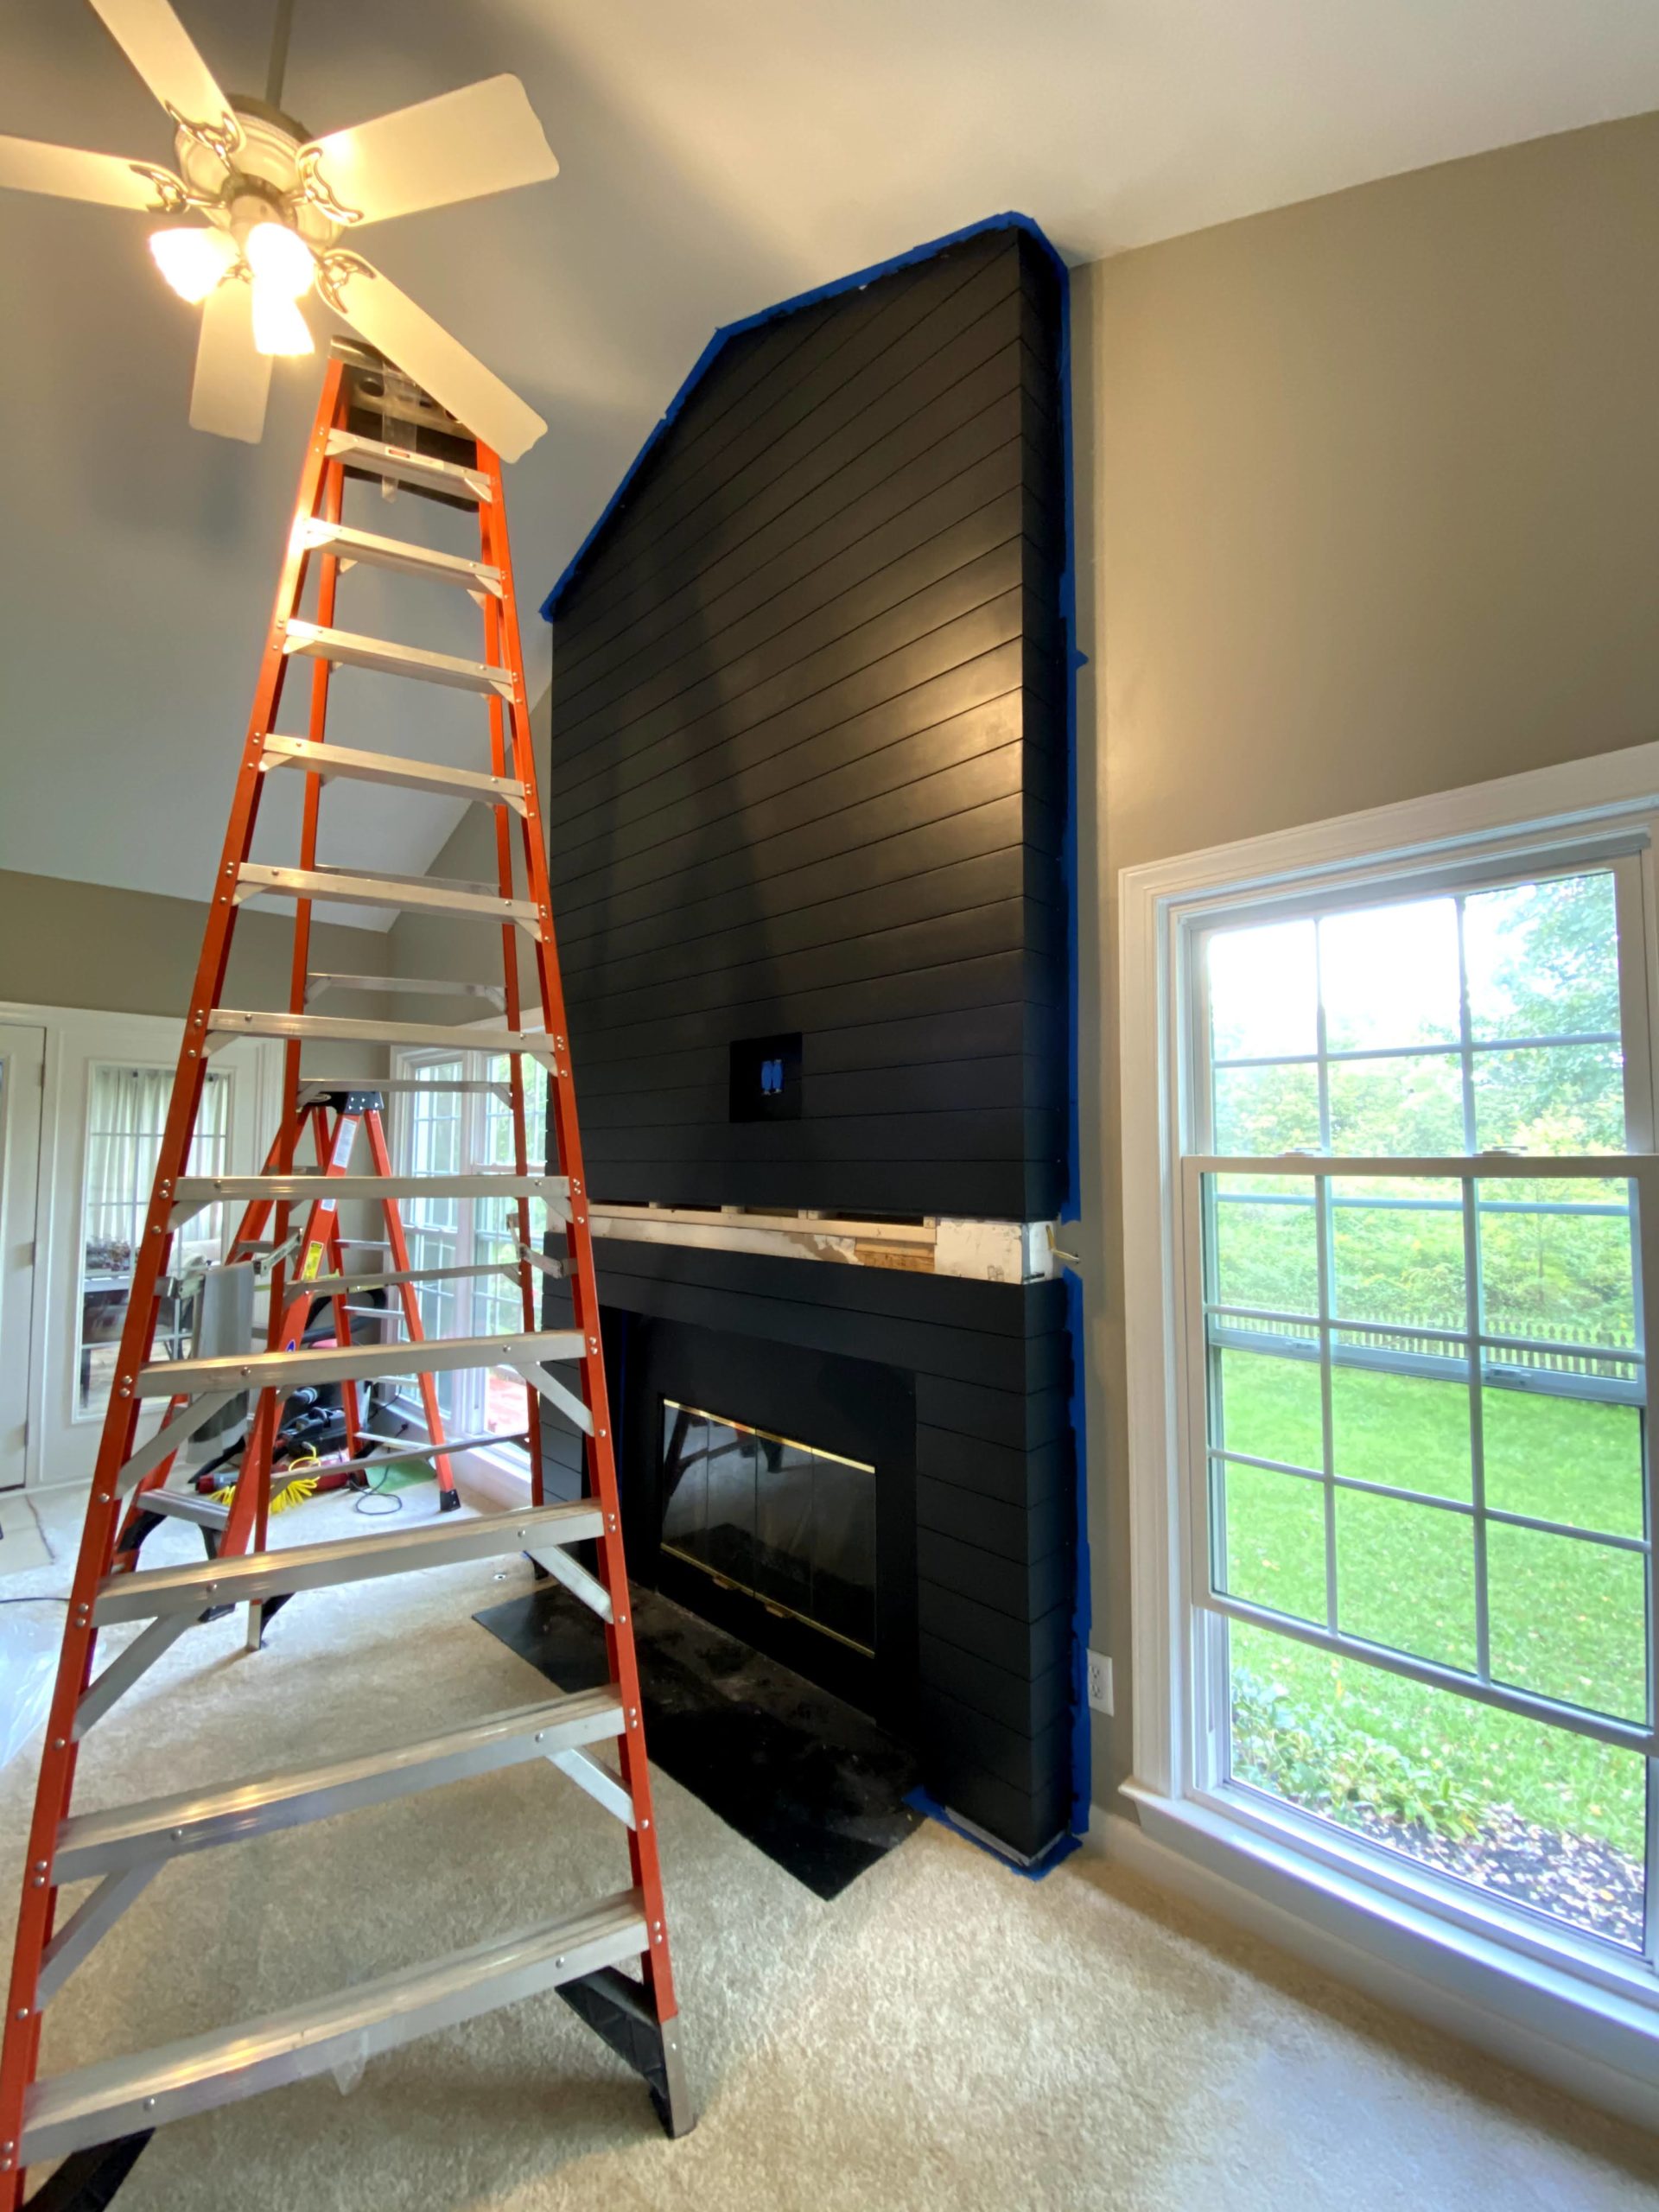


Step 9: Mount TV
Mount your TV according to your TV mount instructions. We have the Vizio V-series 75″ TV and found the correct mounting hardware for the TV on the product page. A lot of TVs use the same mounting specification, you just have to confirm before you buy it. We bought this super affordable full motion wall mount so that we could tilt the TV for the perfect viewing angle. You’ll need a second person to help lift the TV onto the mount, but installing the actual mount was really easy! Just 4 pilot holes and 4 bolts to secure it.

STEP 10: Build Mantel
You could buy wood from the big box stores for your mantel but I would recommend going to a local lumber store for some high quality wood. I had never gone to a lumber store or worked with anything other than pine, so this was a big step for me. From my pinterest research, I knew I wanted a white oak mantel that had just enough warmth to complement the moody shiplap, but still neutral overall. I bought 4 pieces of 4/4 ~96″ oak. This means the boards are at least 96″ long and 1″ thick.
To build the mantel:
MANTEL STEP 1: Cut Top and Front Boards
Rip two of your boards at a 45° bevel to the overall depth and height you want your mantel to be. I made my mantel a square that wrapped around the fireplace at the ends, so both boards were ripped to 7″. Take those boards to the miter saw and cut both ends at a 45° angle to the length you want your mantel to be. My mantel is 90.5″ long. At this point you will have your correct width board with one long side flat and three sides cut at 45°. The flat sides will go along the fireplace (for the top board) and face the floor (for the front board).


MANTEL STEP 2: Add Wrap Extension
I then cut two small extension pieces for the top of the mantel where it would wrap around the fireplace. Each extension piece was about 2.5″ (also beveled to 45°) and I attached them with pocket holes and glue.


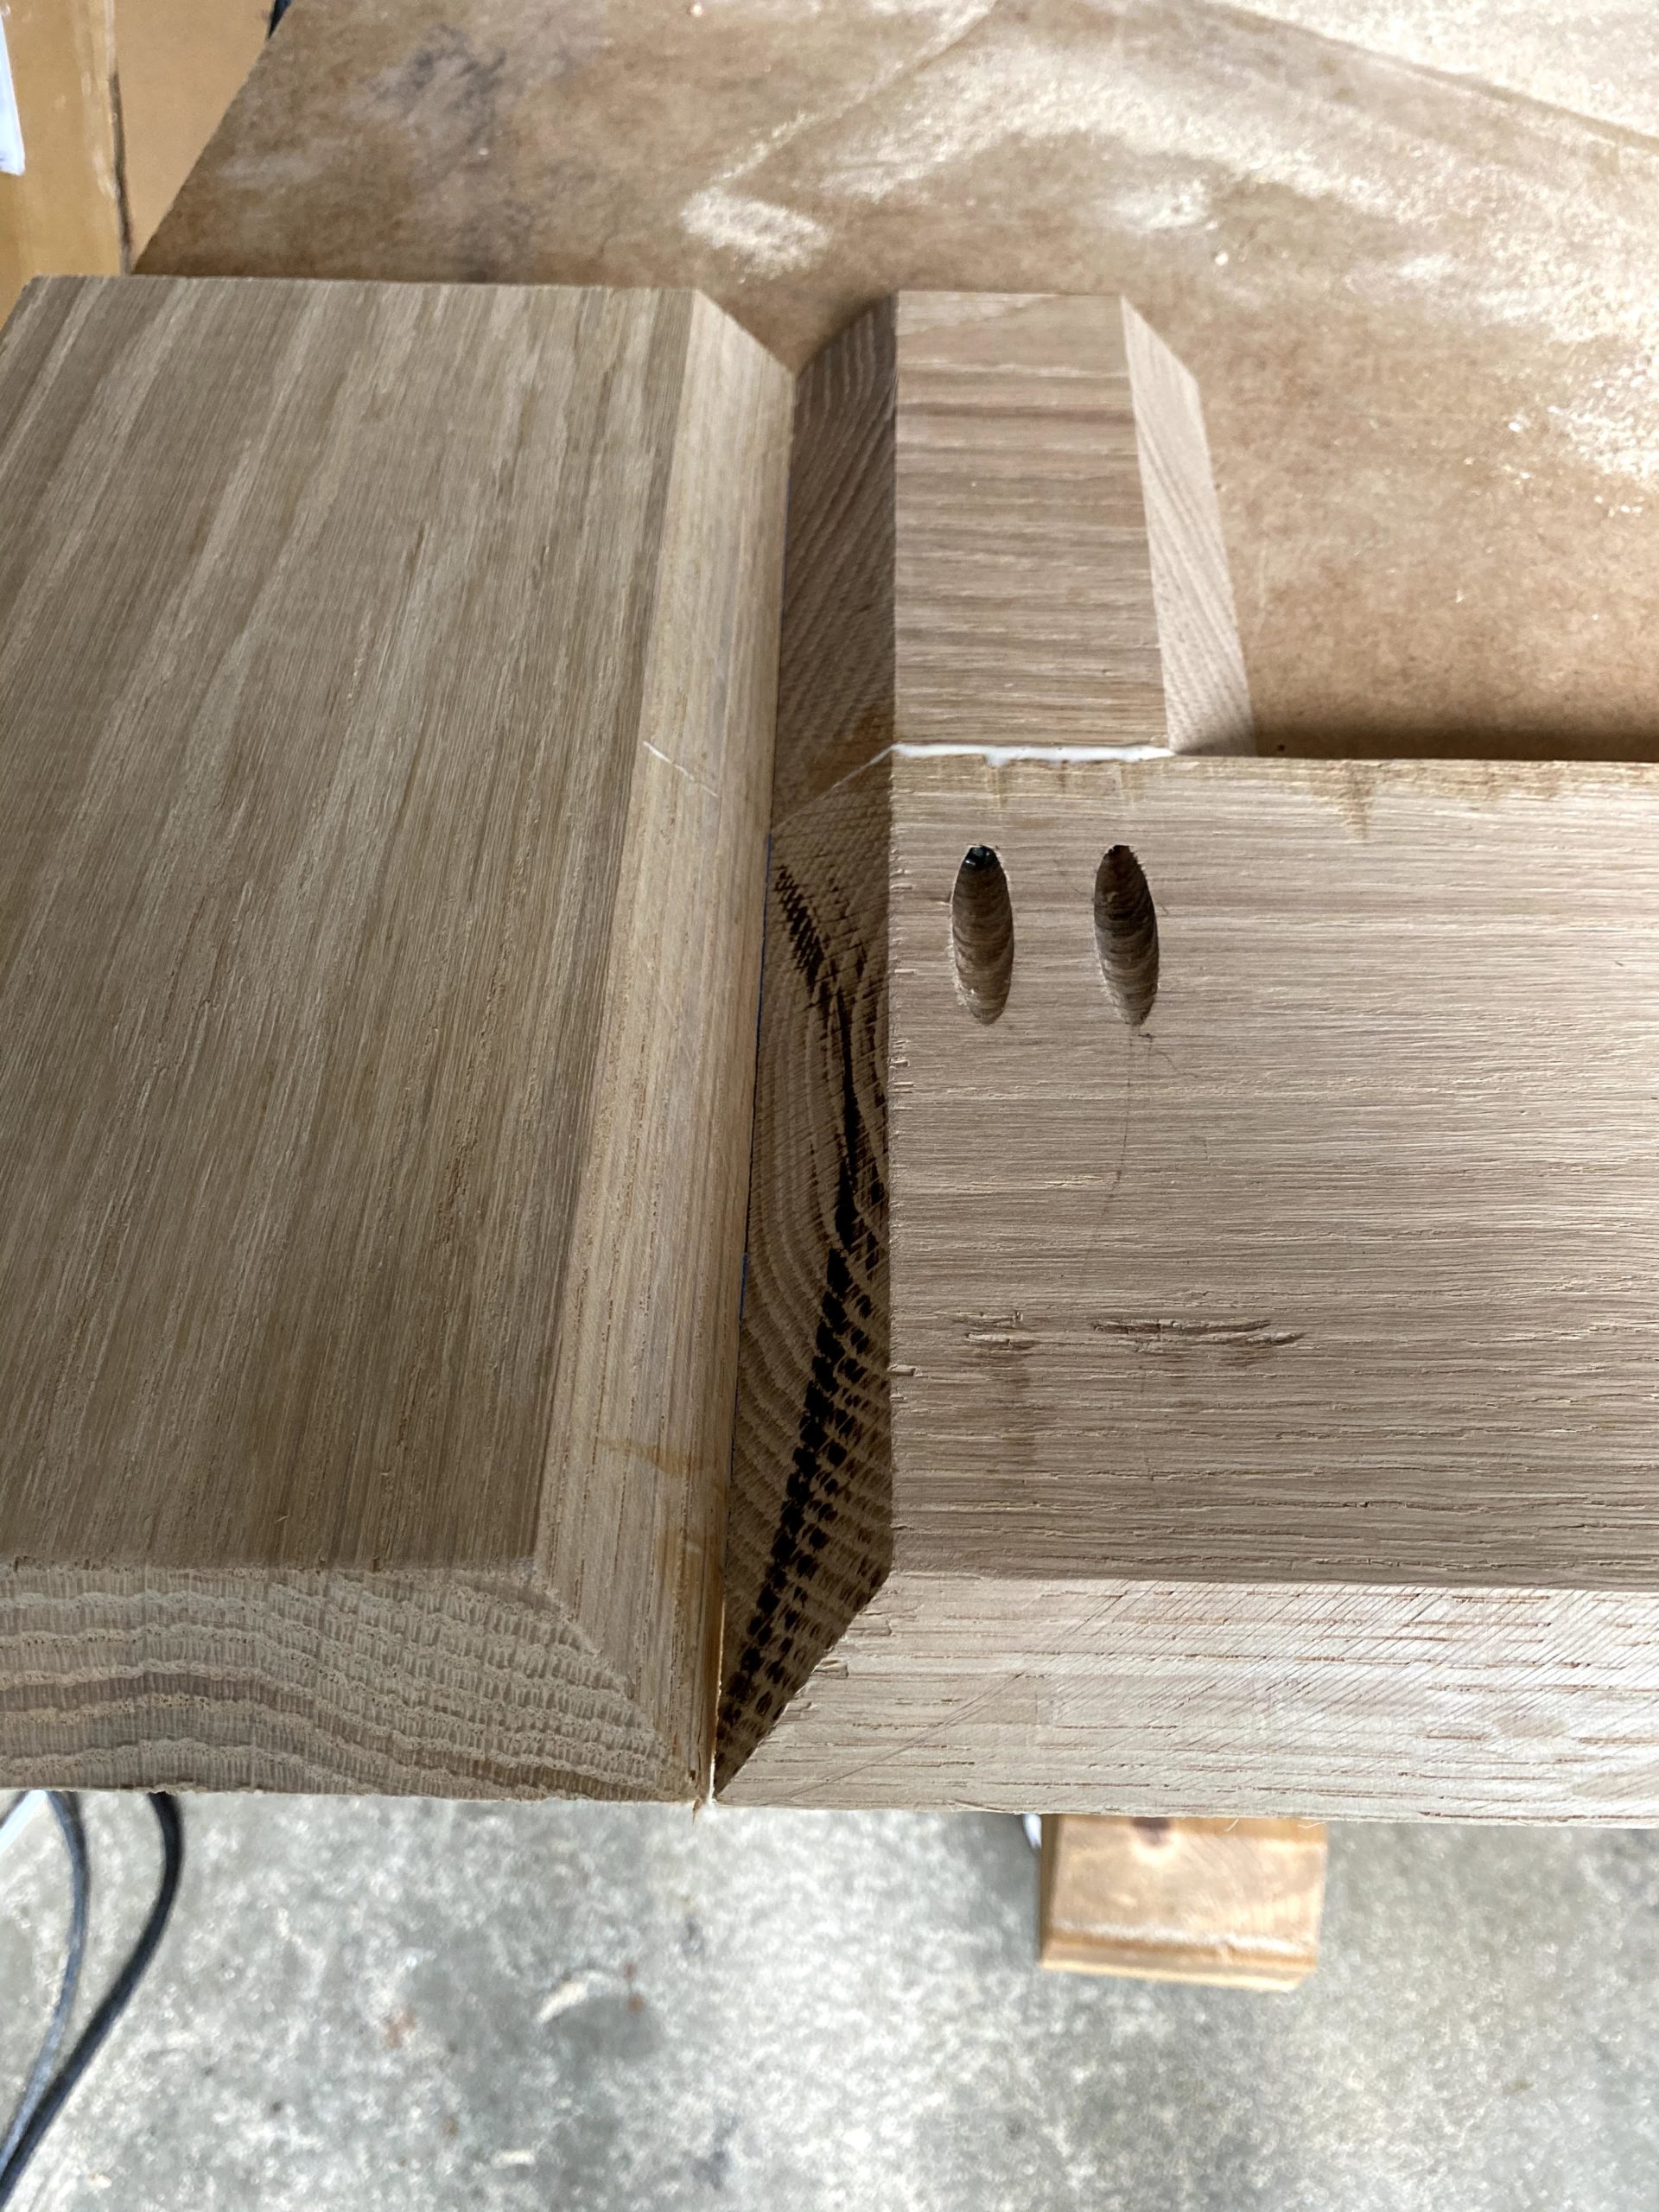
MANTEL STEP 3: Cut Side Boards
For the side pieces, cut 2 sides at a 45° bevel as shown below. Make sure it is cut to the height of the mantel and the extended length of the wrap.
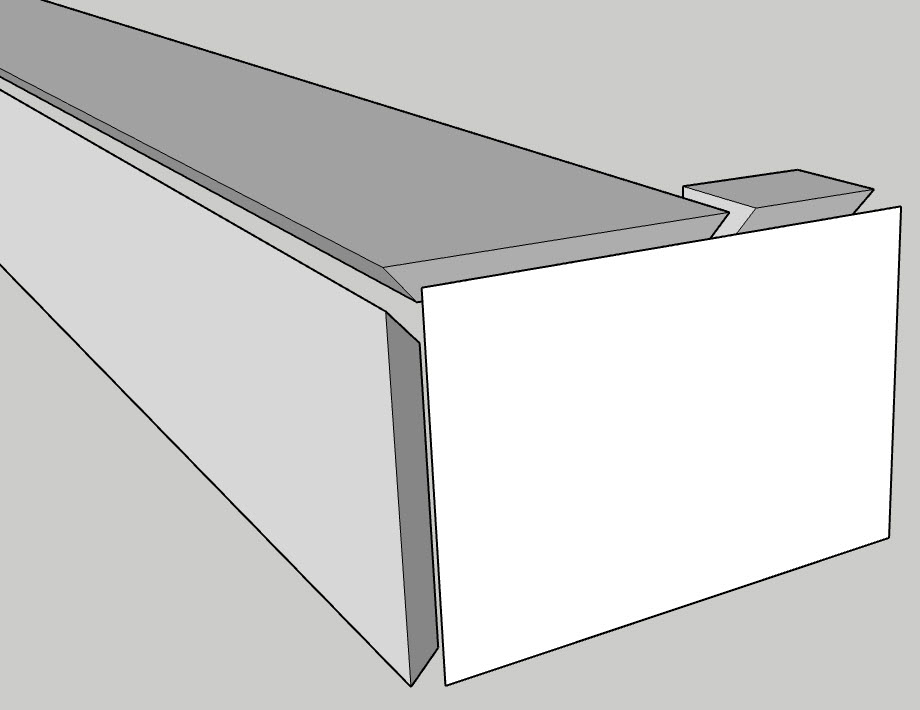

MANTEL STEP 4: Attach all Boards
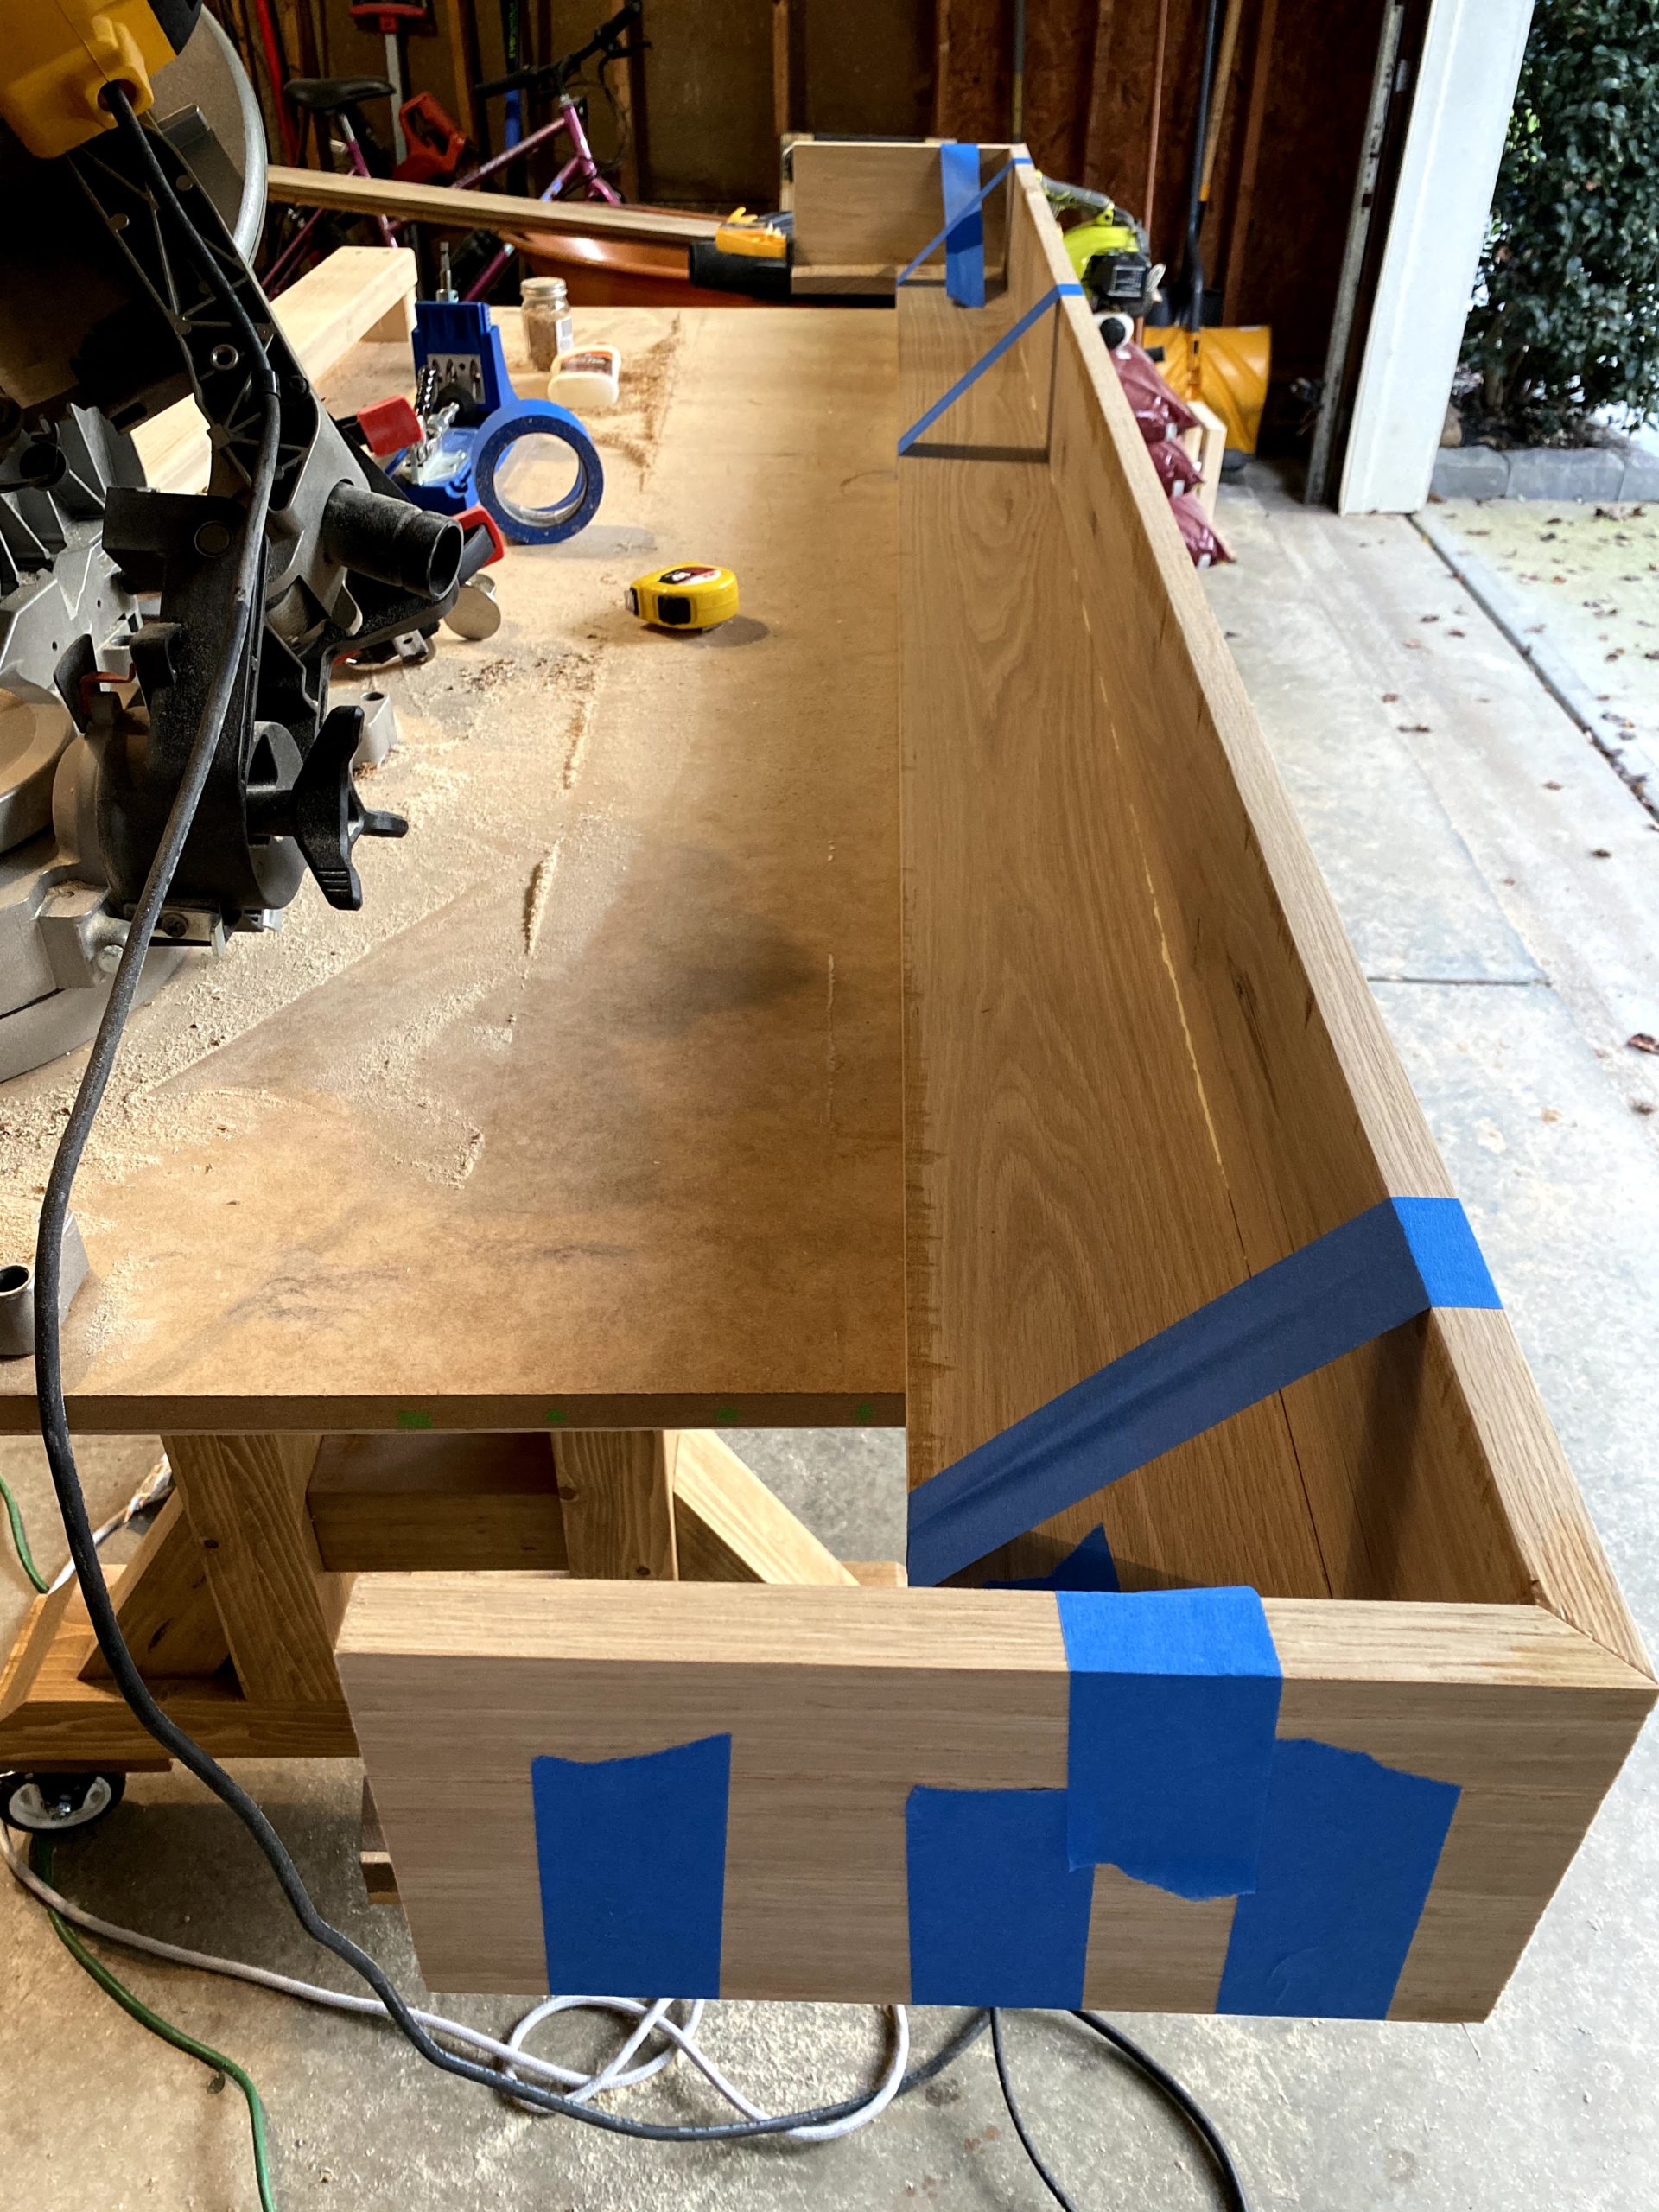
Attach the side boards to the top board first. Apply glue liberally to the bevelled edges that will be connected and tape in a 90° angle using a square and some painters tape. It’s best if you mostly tape along the outside to make sure the joint stays super tight. I added one piece of tape on the inside to keep the boards perfectly square.
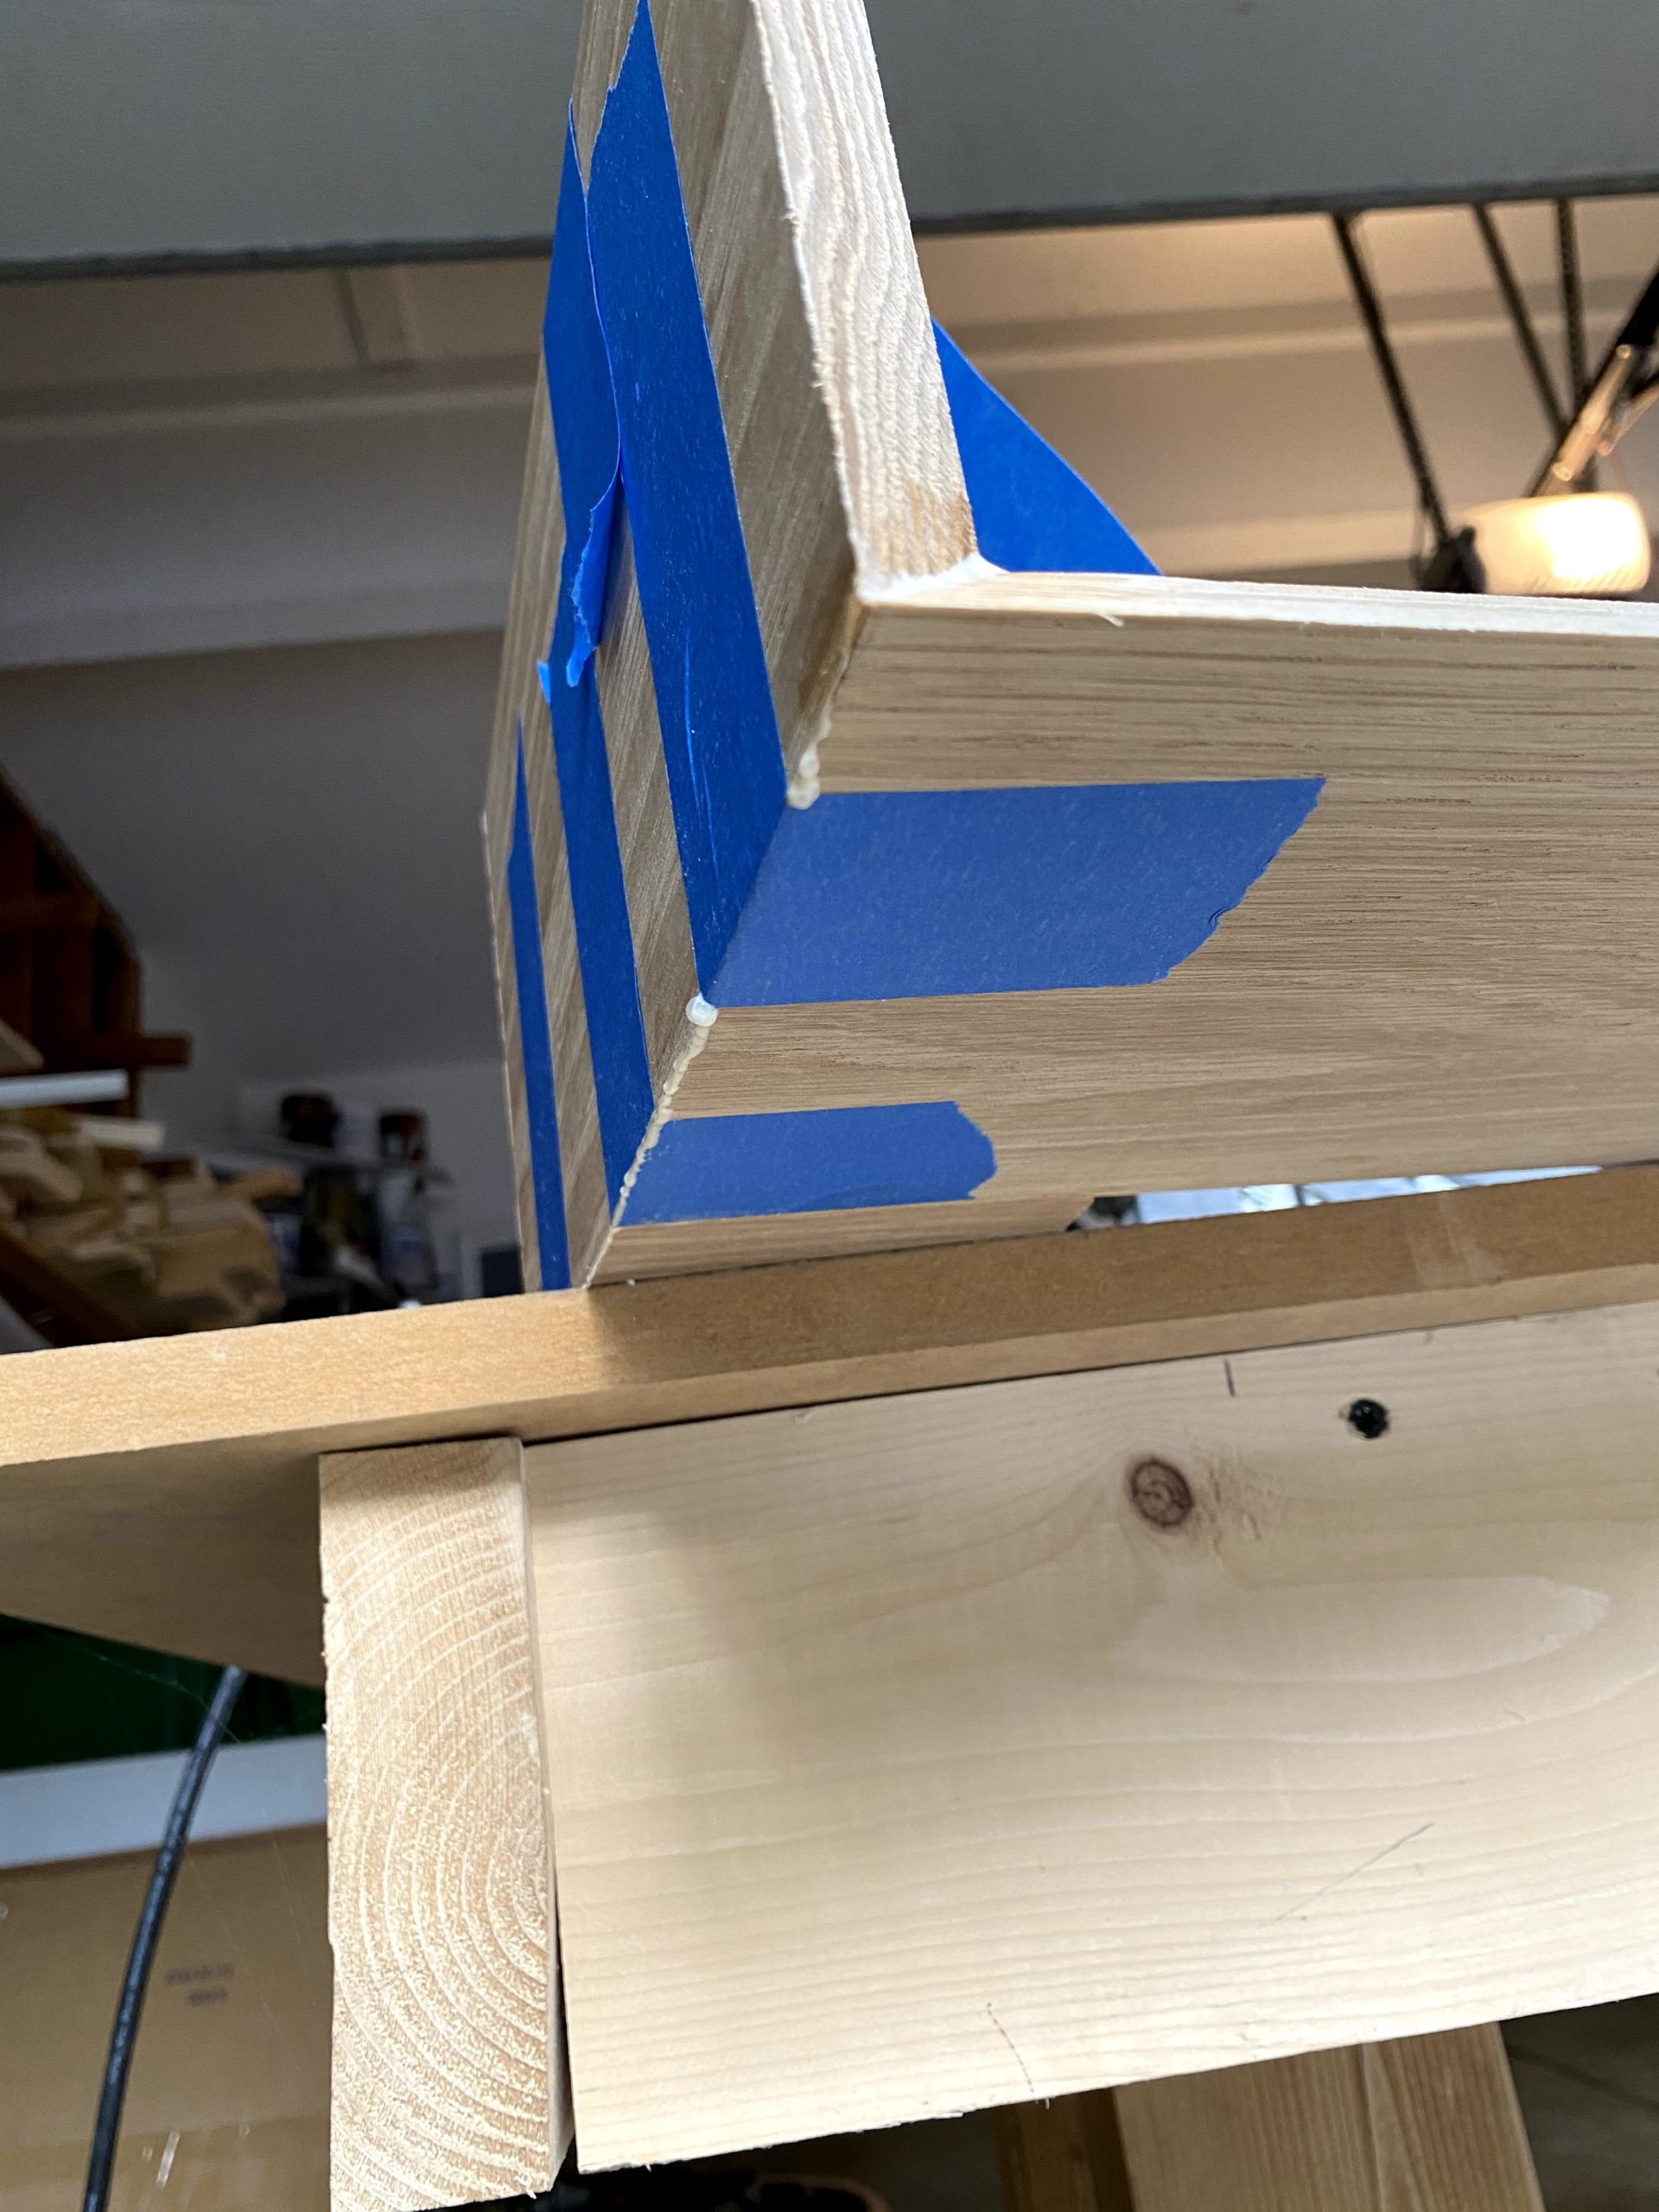

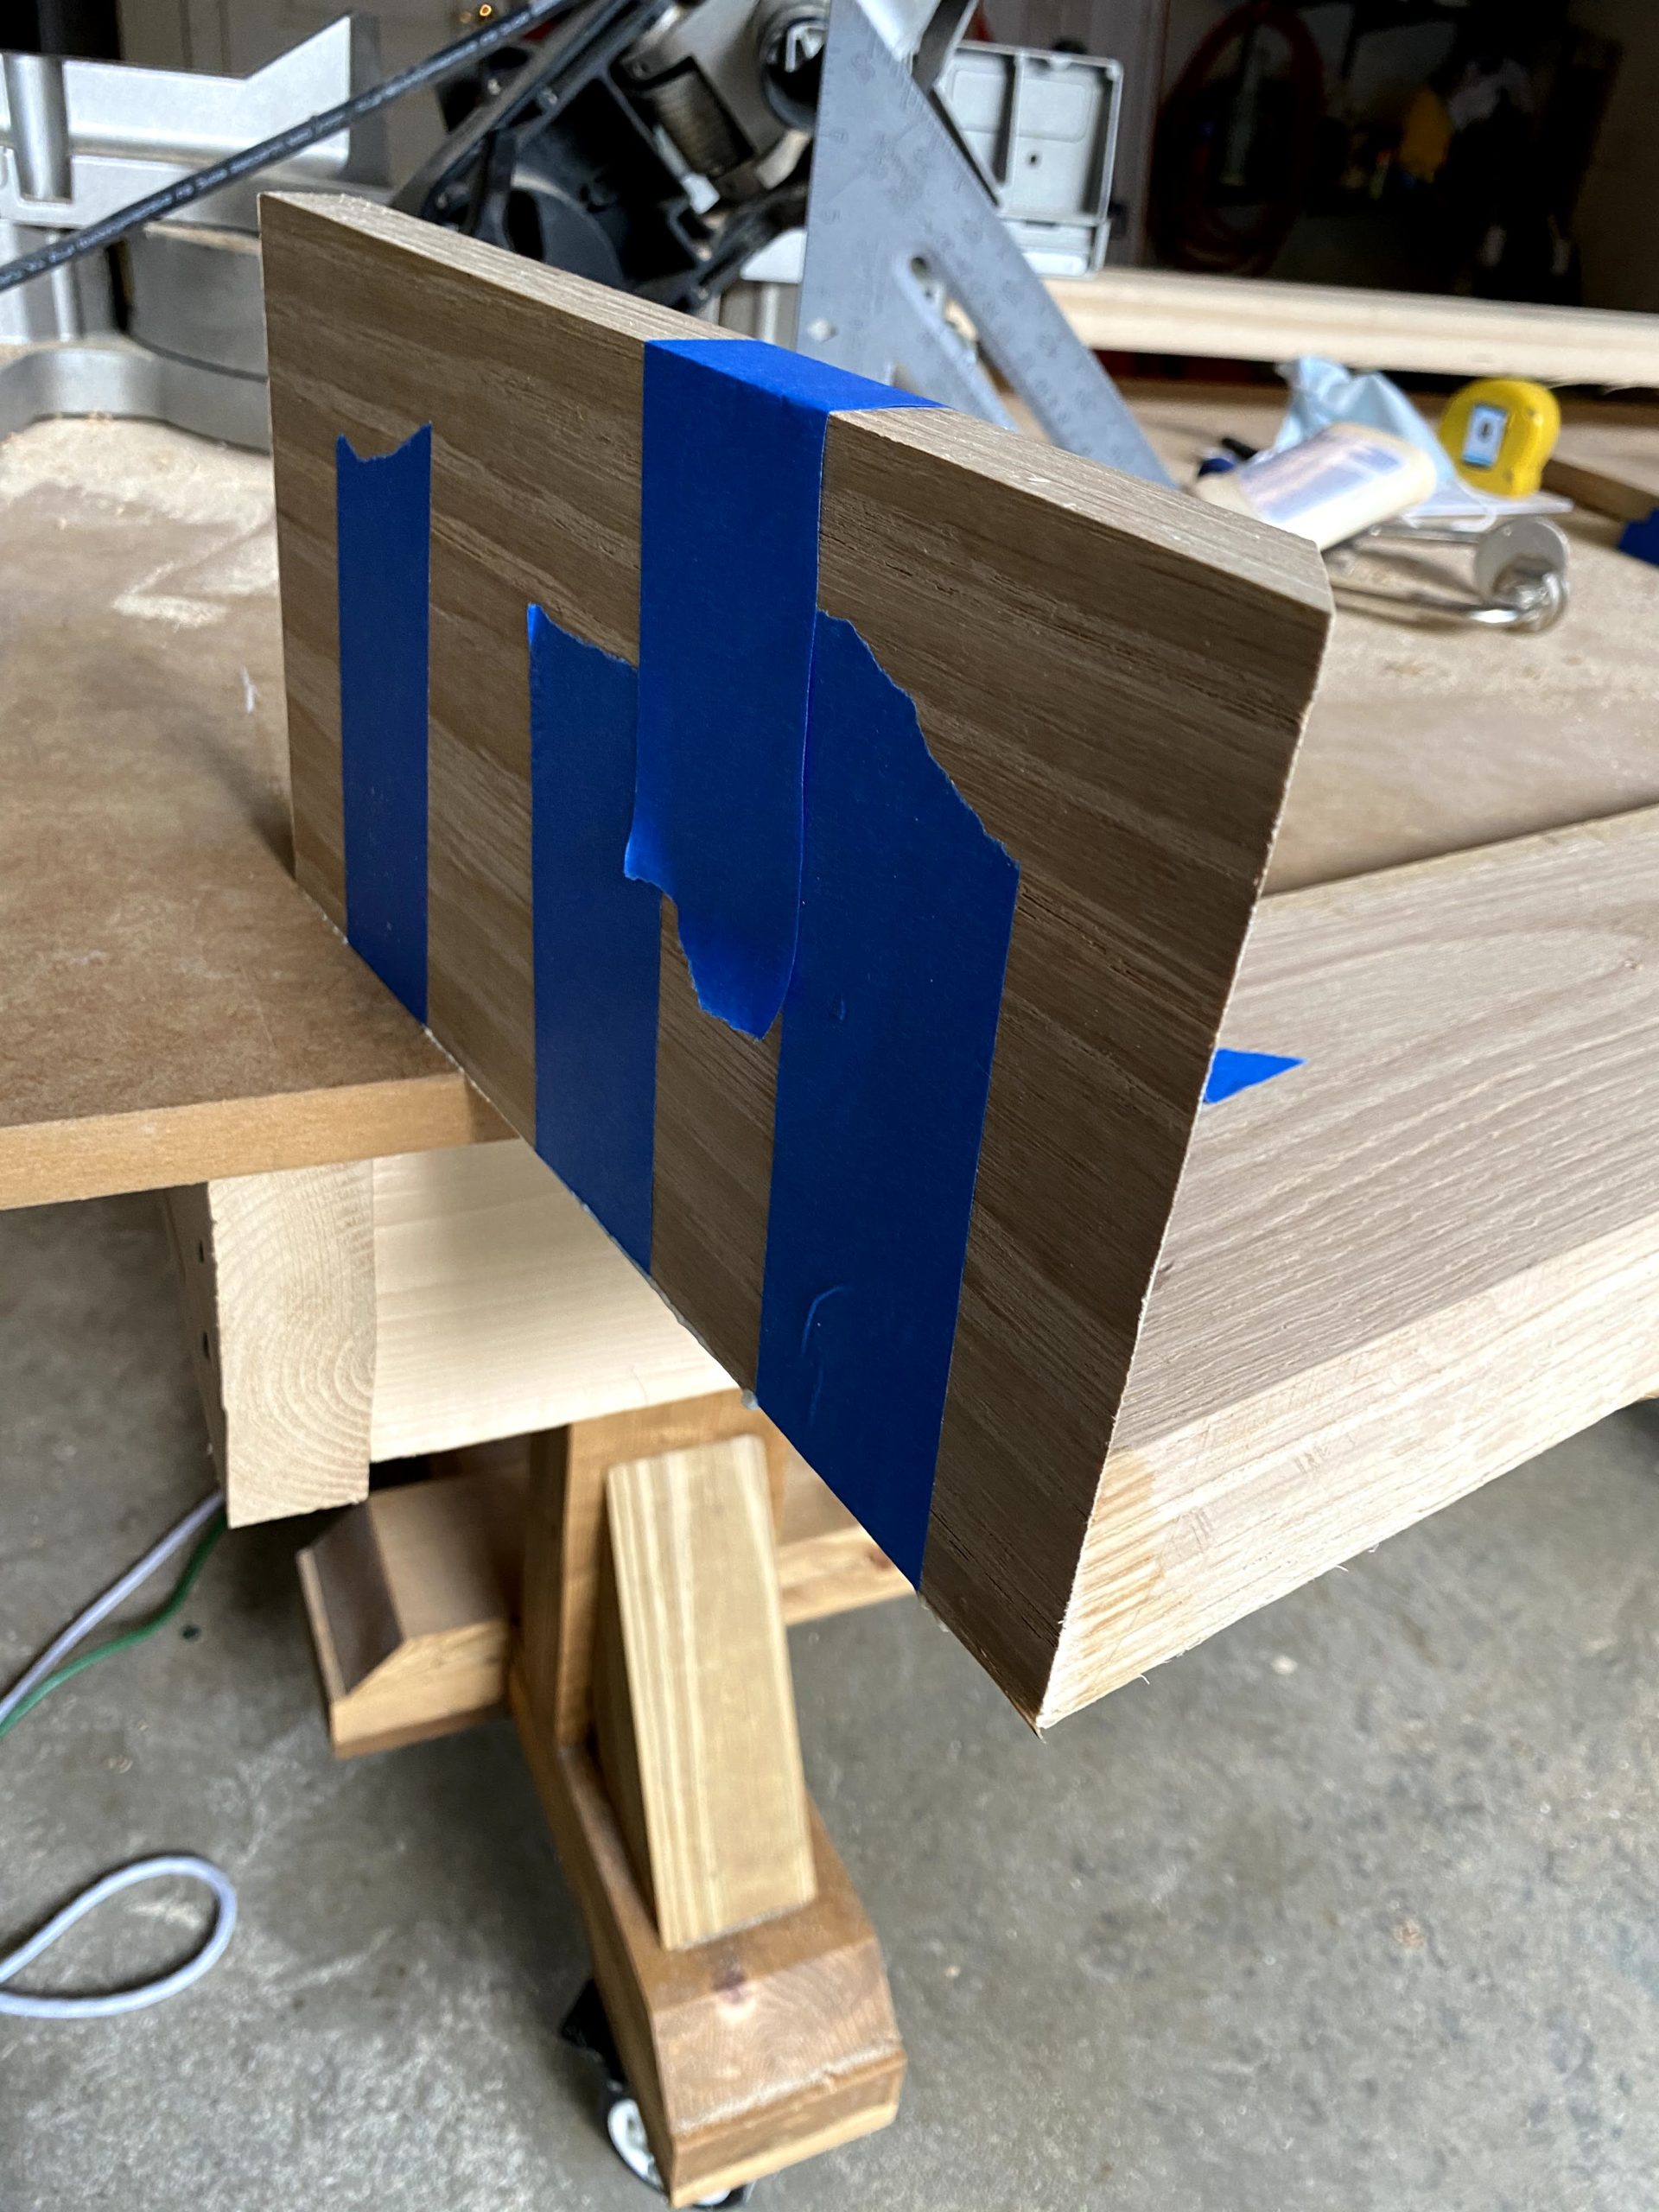
Once the sides are set, I recommended letting the glue cure for about an hour before adding the front piece. After an hour, the glue will be set but is still slightly malleable so that the joints can bend. Repeat the glue application for the front piece, applying to the bevels, then setting them together with tape. Follow the directions on your bottle of glue but I suggest waiting 24 hours for the glue to completely dry/cure.
You do not have a bottom to your mantle yet- and that’s how I choose to build it. If you feel comfortable with the accuracy of your measurements at this point, you can attach your bottom piece. I’ll show you how I did it in the next step.
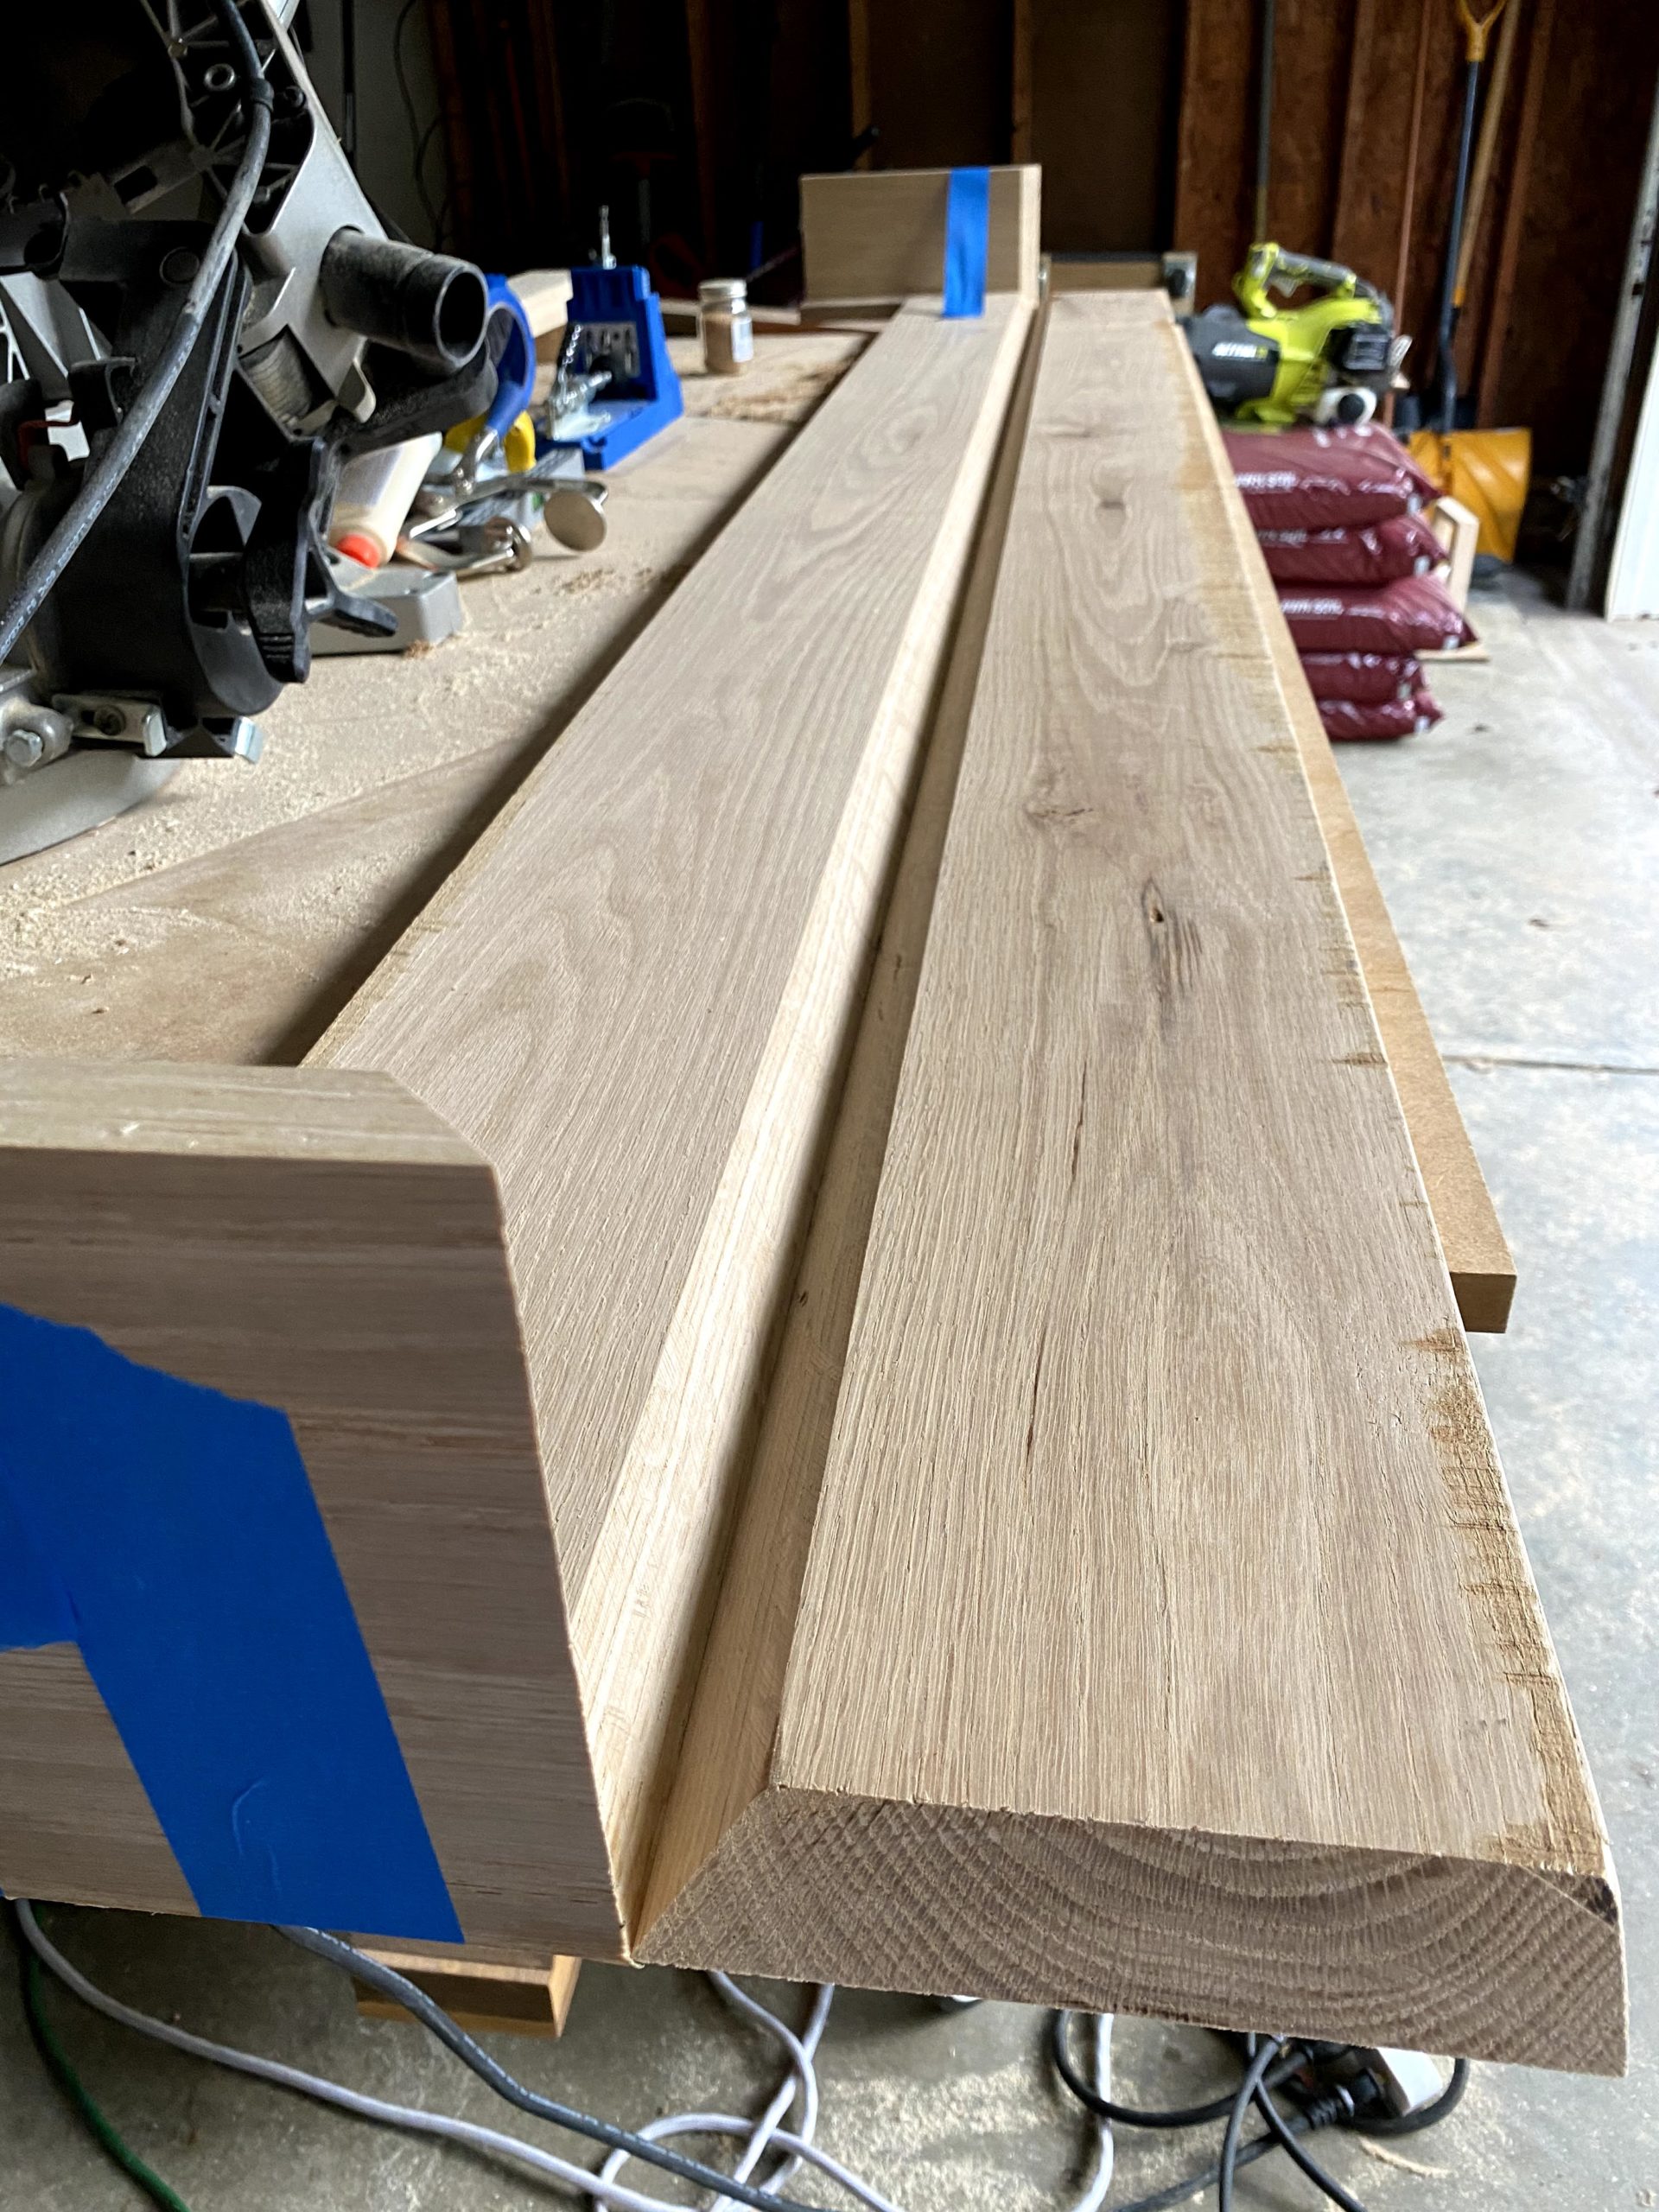
STEP 11: Install Mantel
Using 2×4’s screwed into your structure to support it, place the mantle onto the supports and slide it into place. Make sure to evenly slide both sides so that you don’t accidently damage your mantel joints (or shiplap). Attach the fireplace to the 2×4’s with small screws or even a few brad nails. At this point, I could have taken off the tape- not sure why I didn’t.

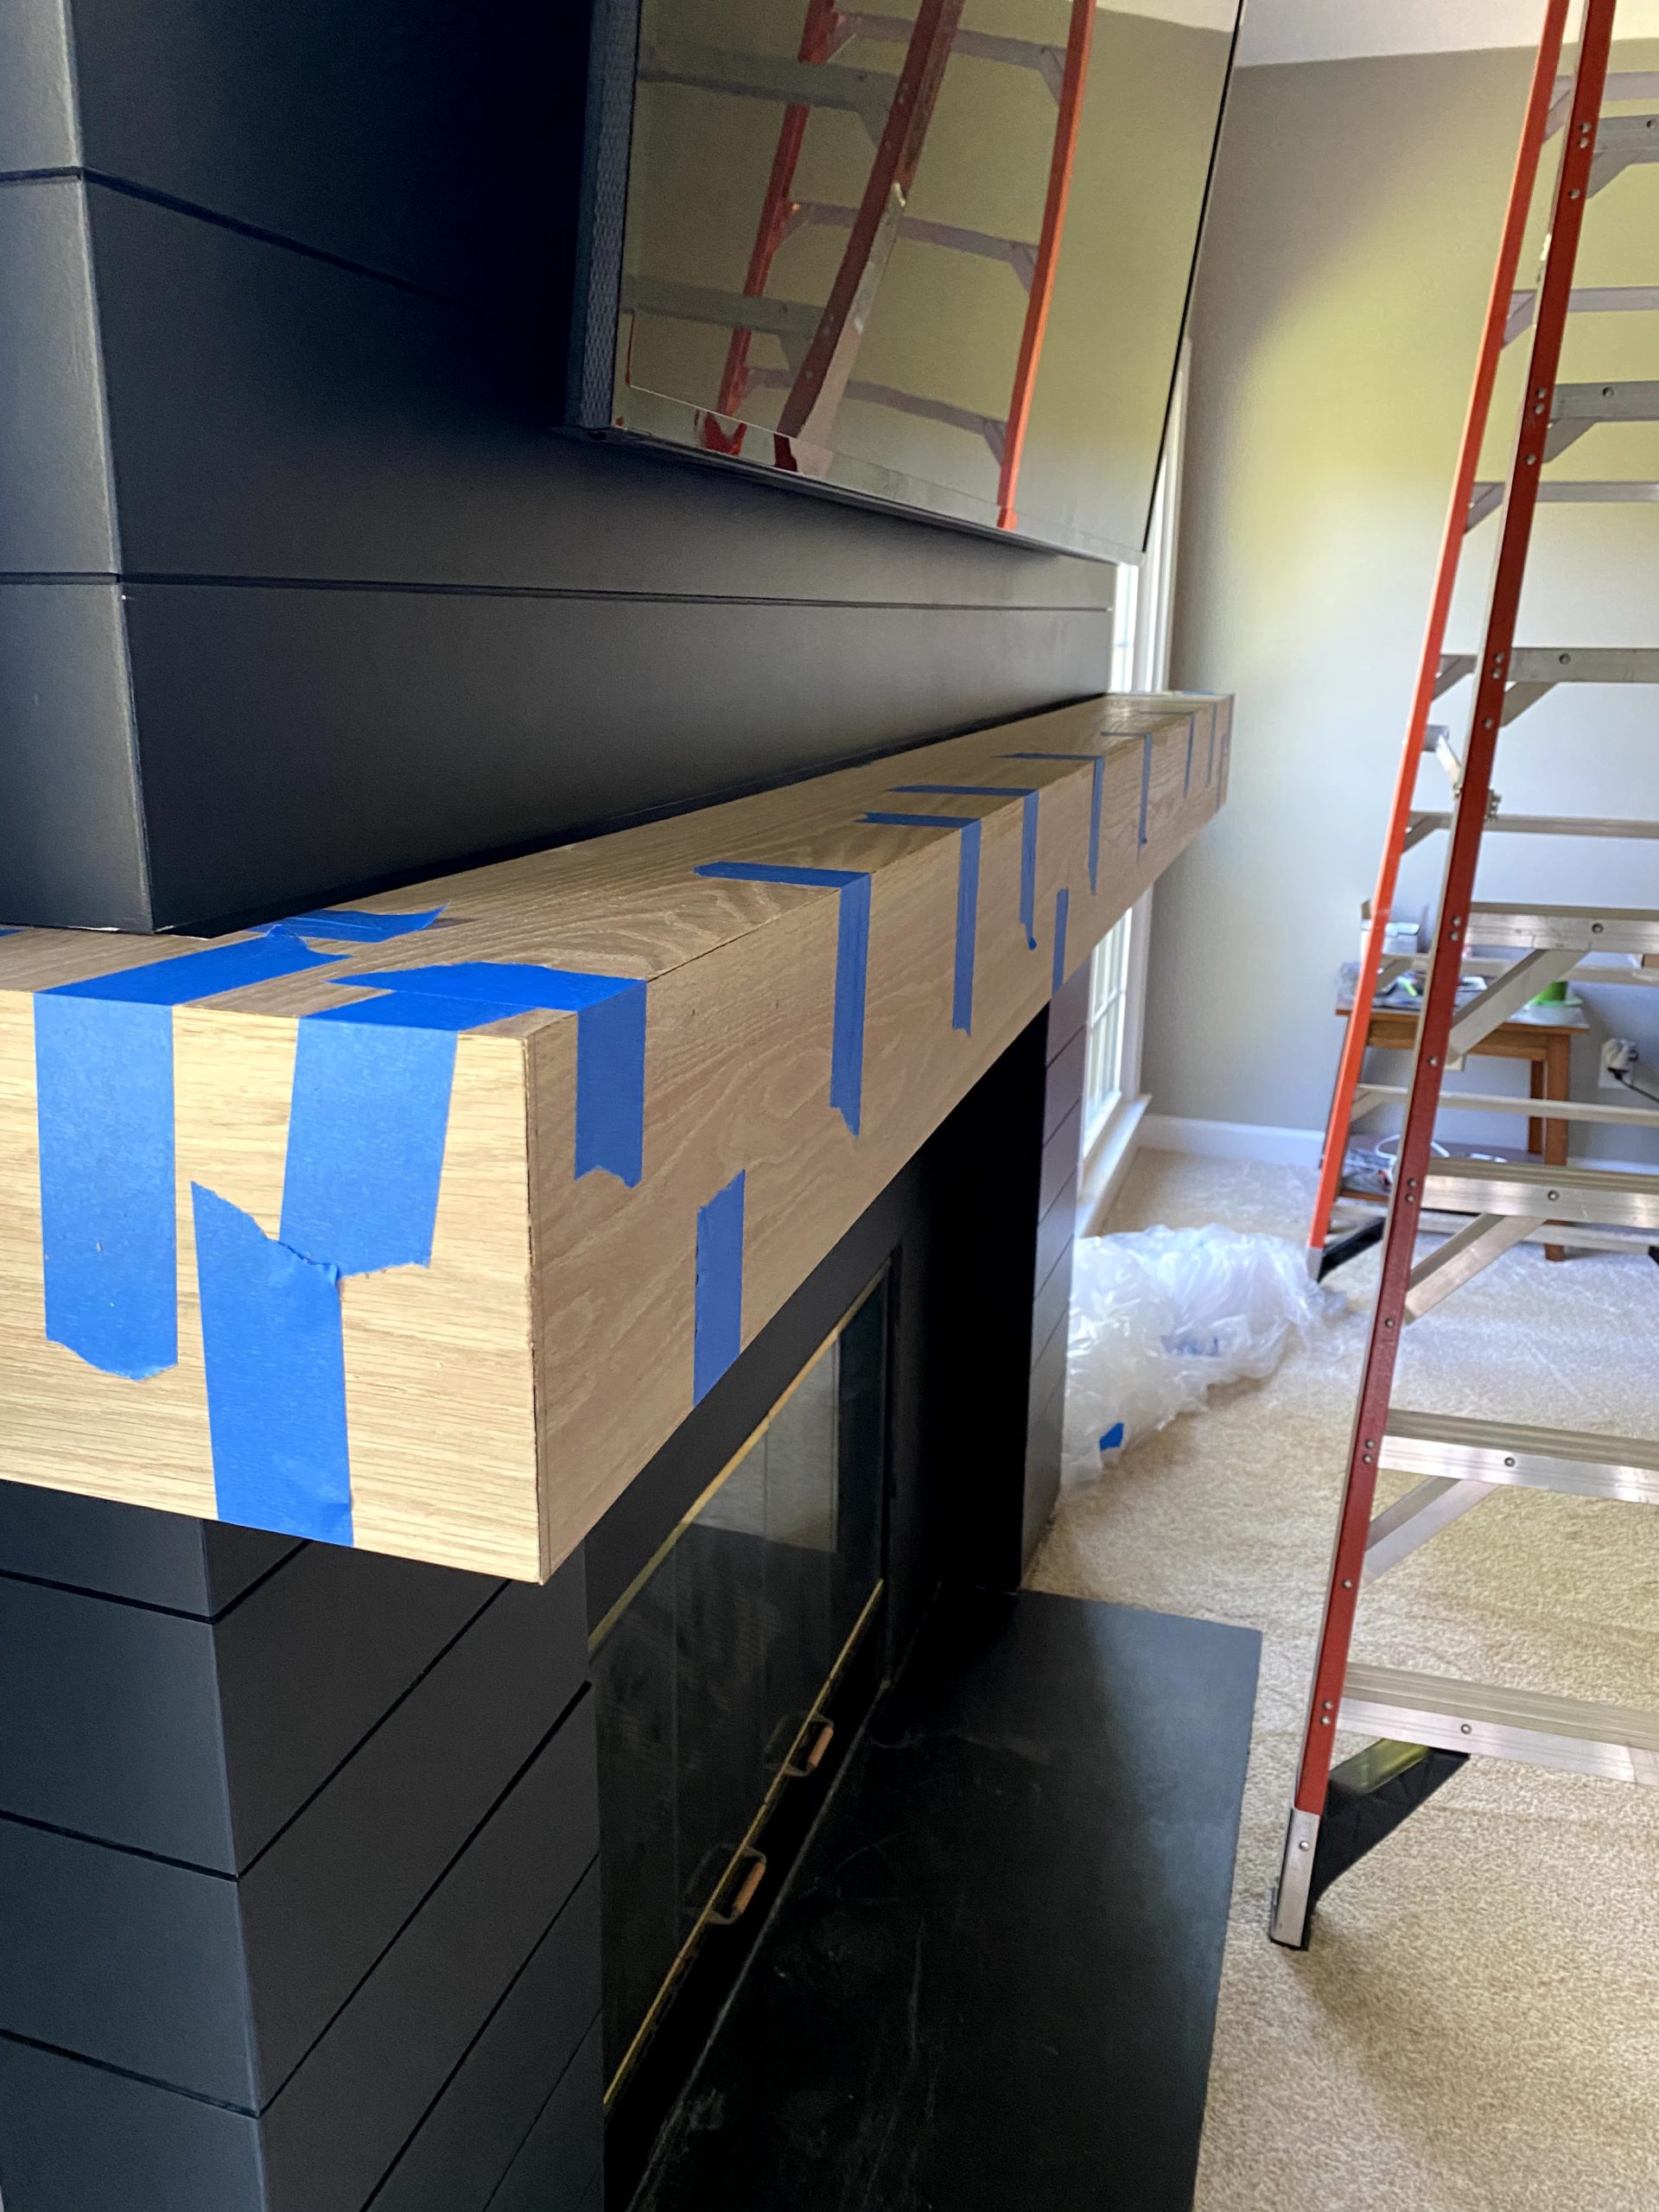
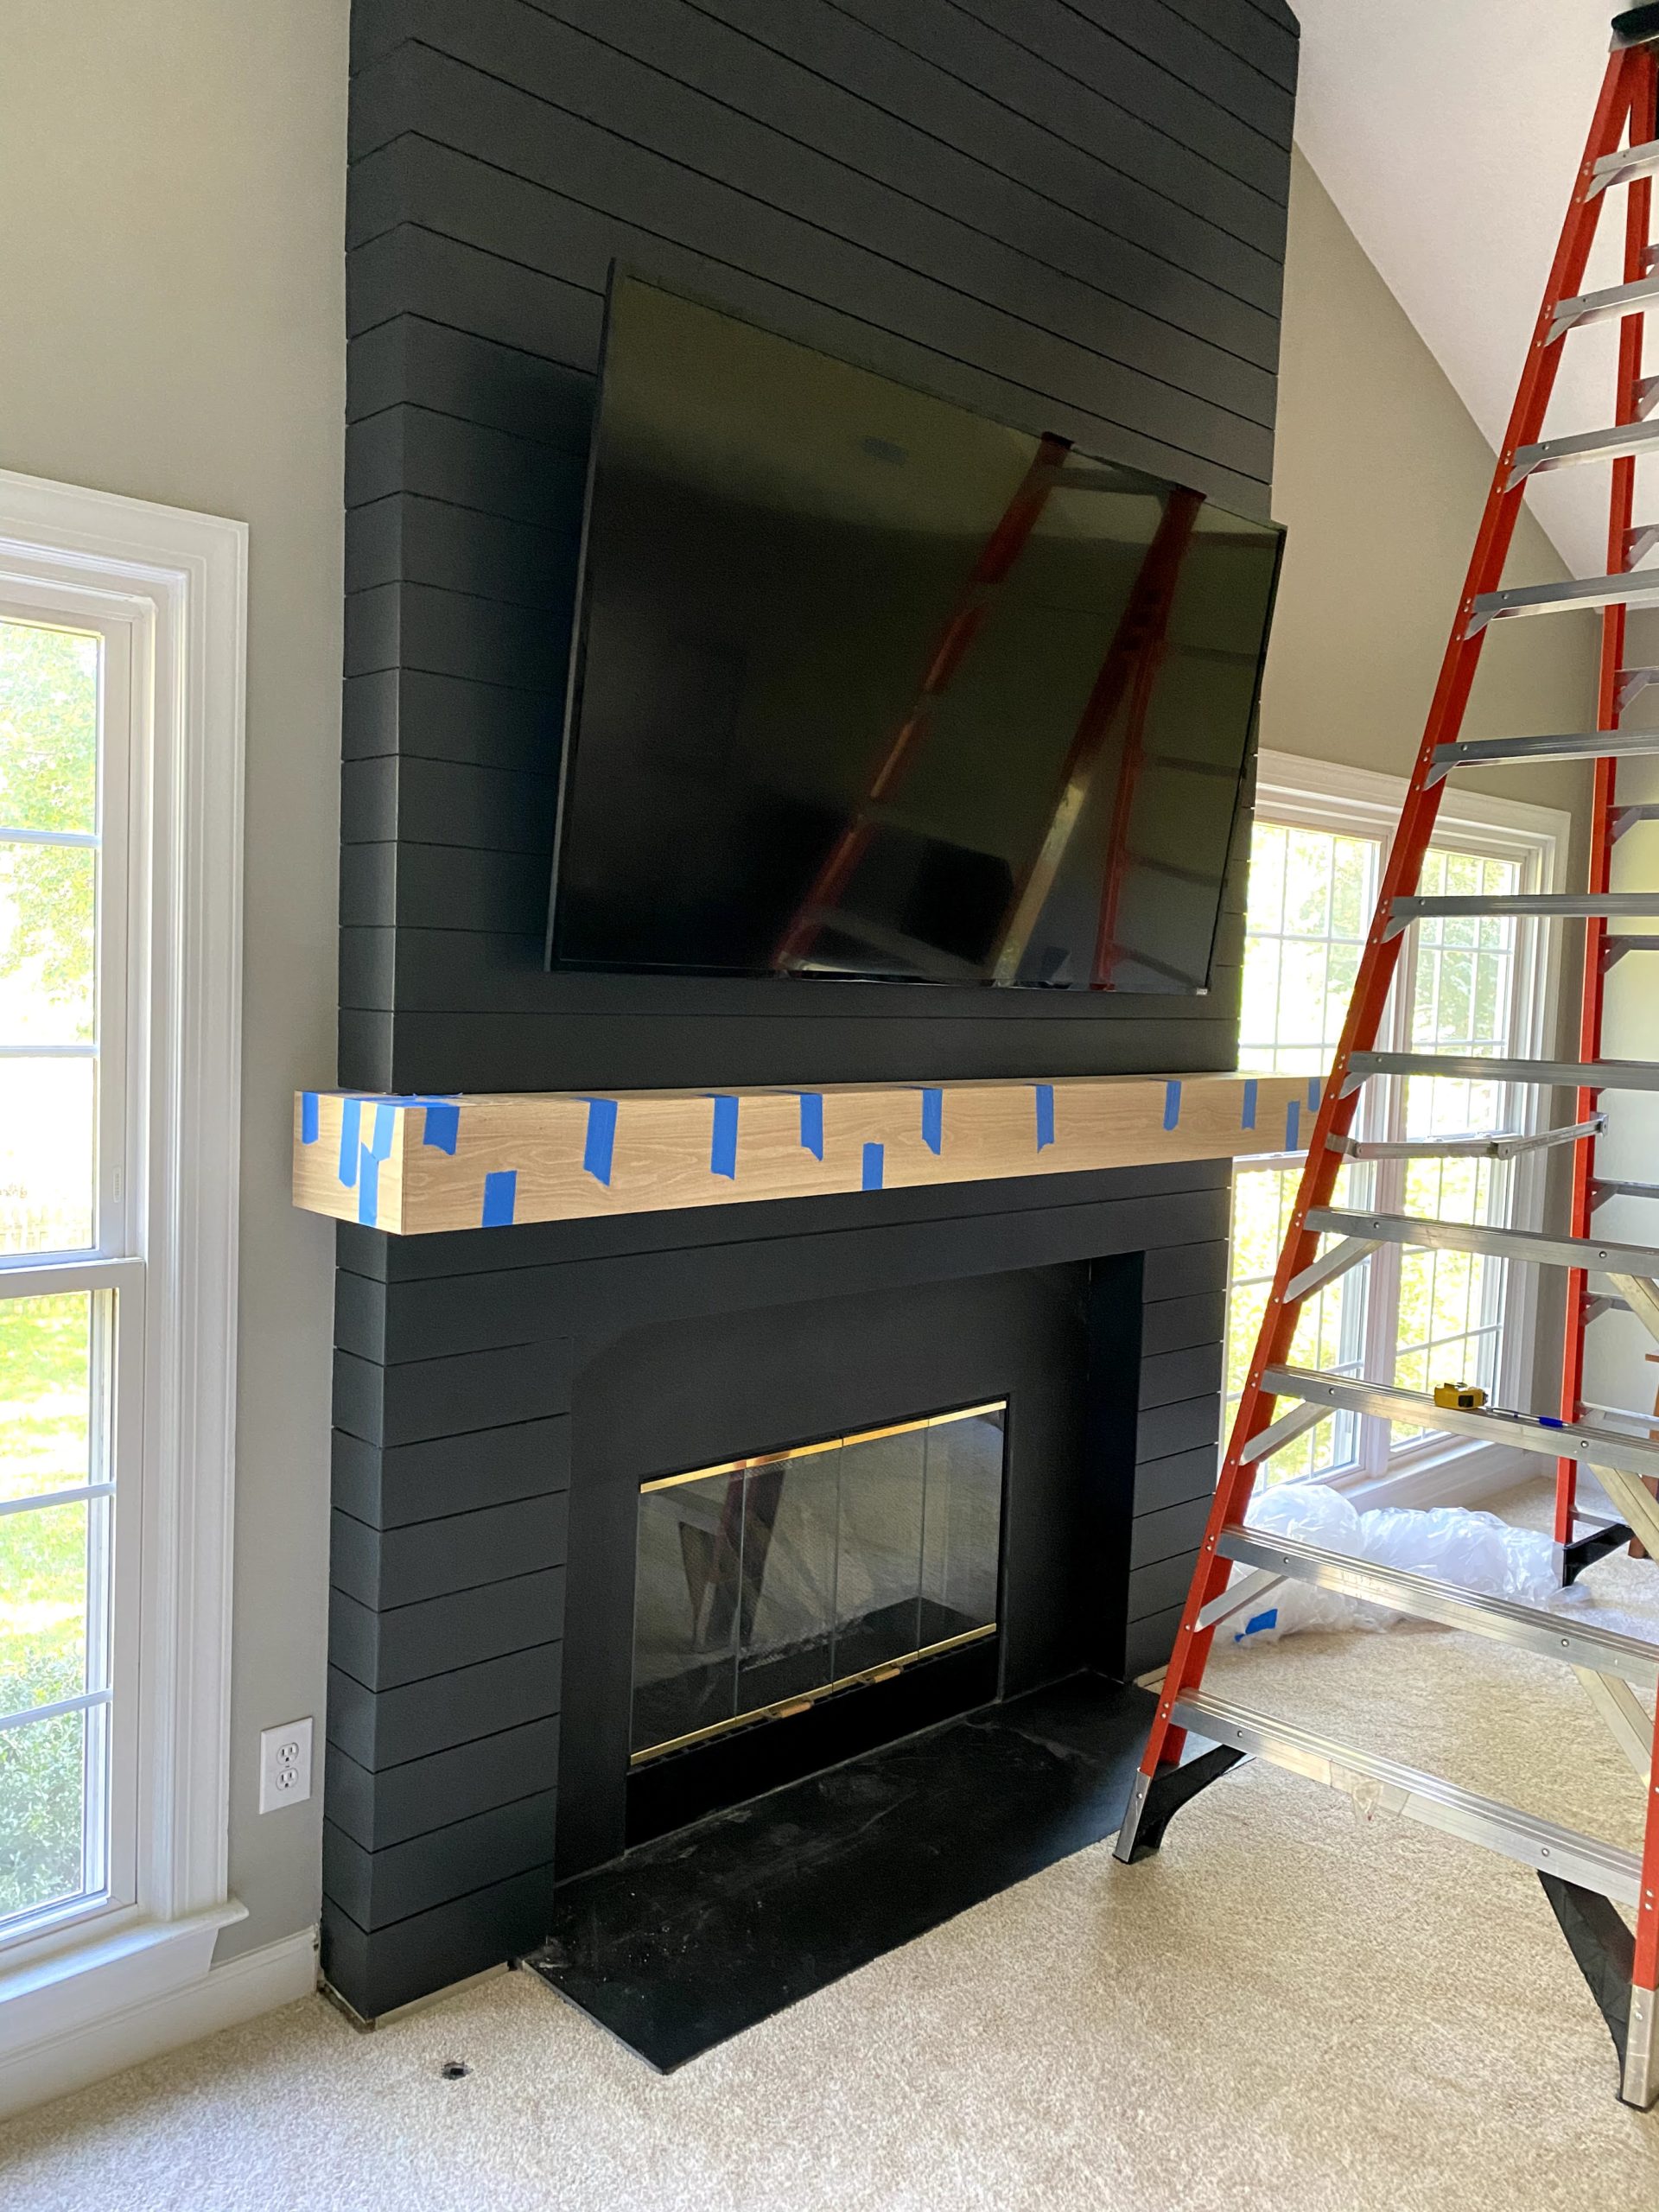
Once the mantel is in place, measure for the bottom board and bottom extension pieces and cut those boards to size. No fancy angles needed for this since we didn’t bevel any of the bottom mantel pieces.
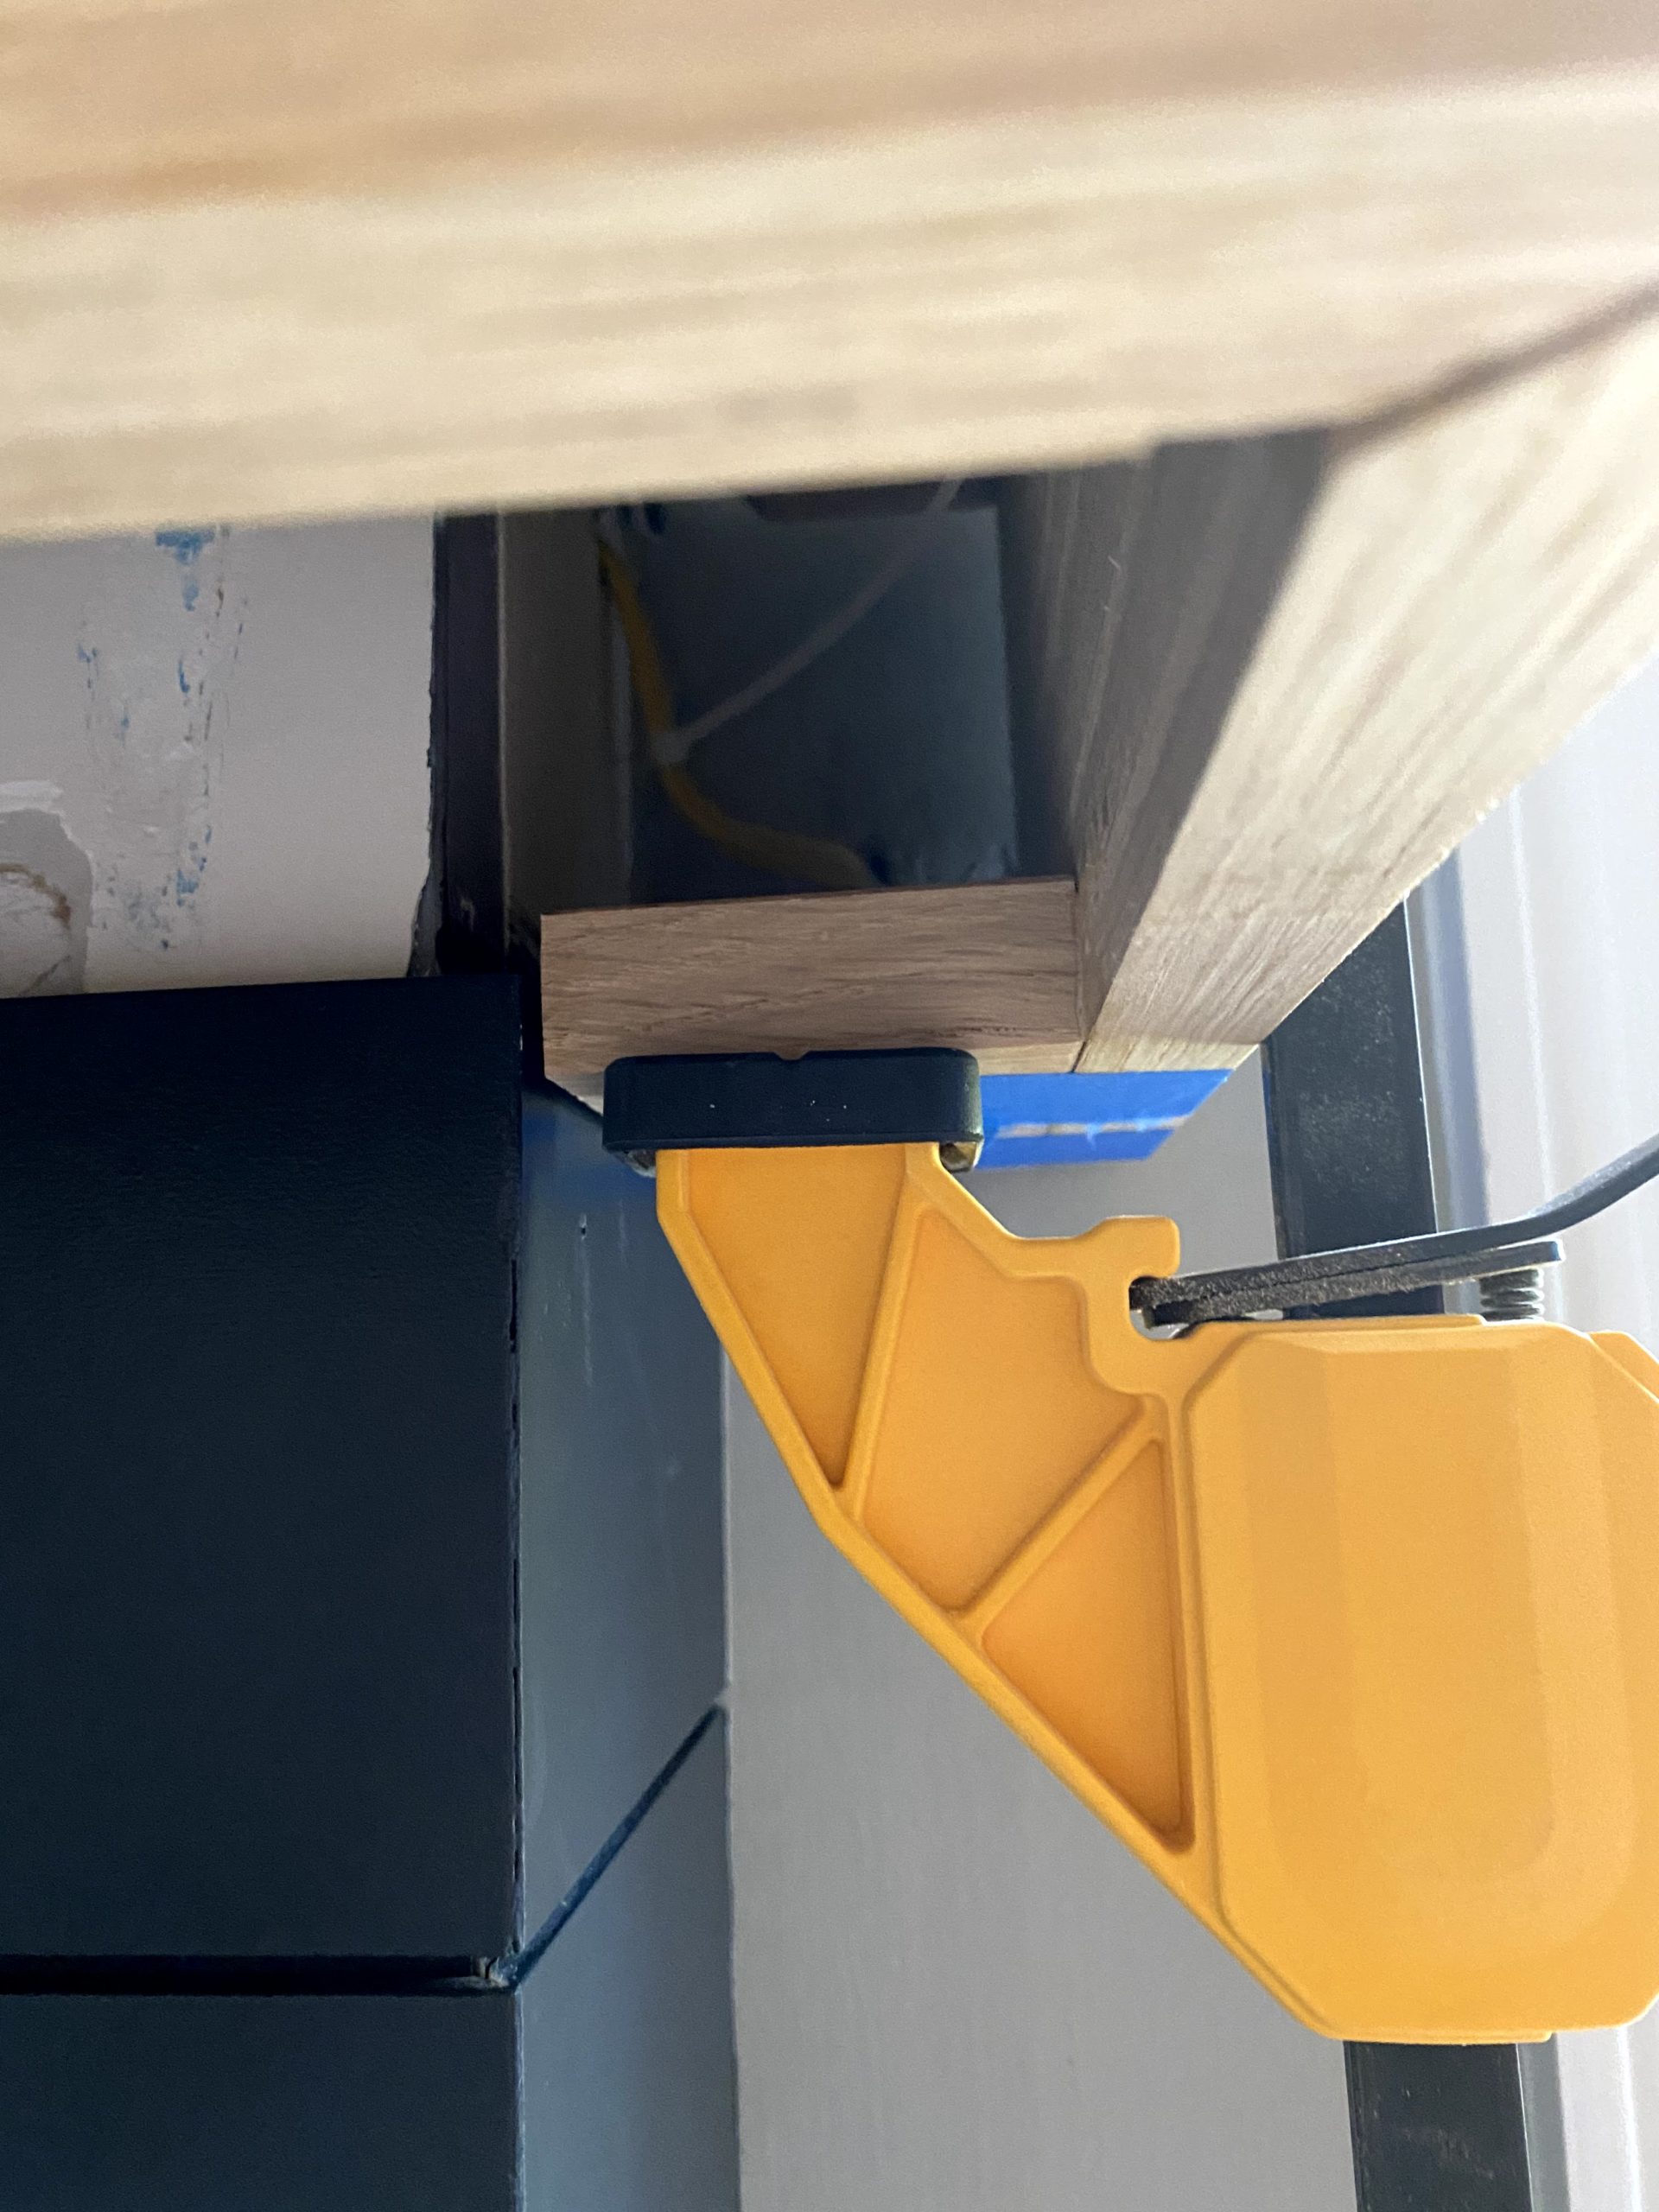
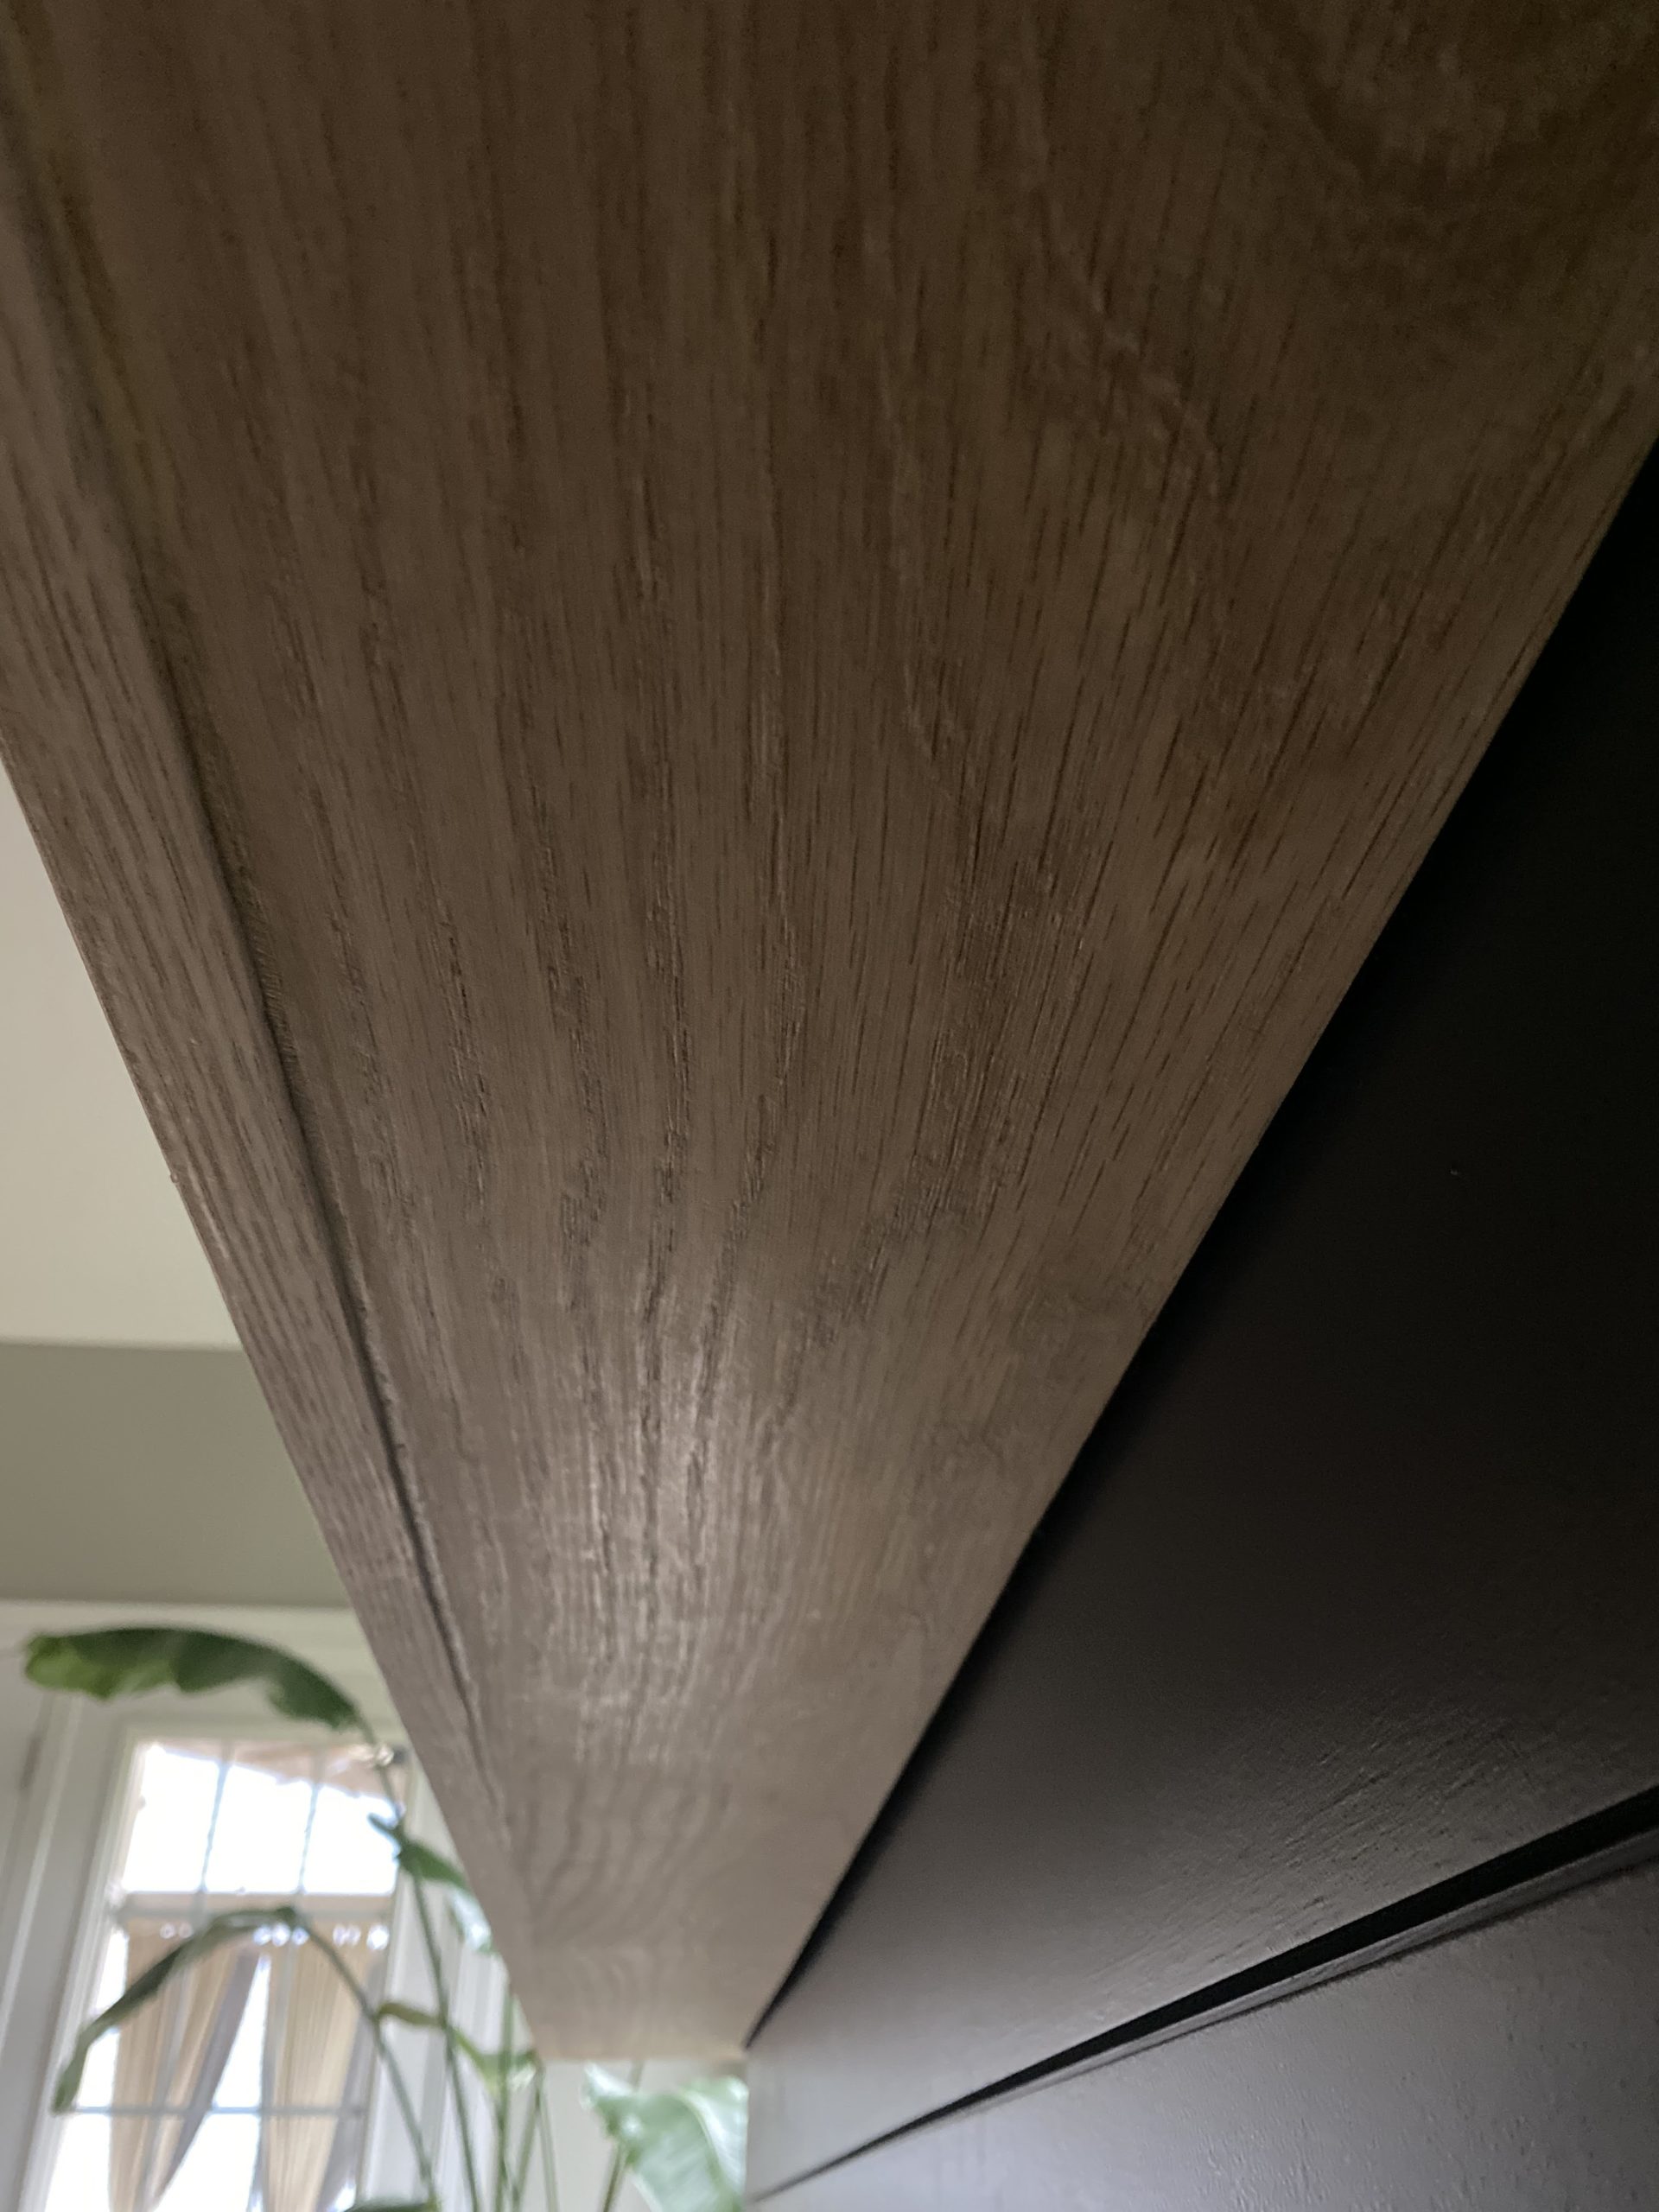
First, attach the extension pieces to the bottom by applying glue to the edge and sliding it into place. I used tape and a clamp to hold it into place while it dried. Lastly, insert the bottom piece and attach the same way, with glue, tape and a clamp. The bottom of my mantel has some gaps but it isn’t a big issue since people will rarely see it. I just filled them in with wood filler and called it a day.

STEP 12: Paint and Install Baseboards
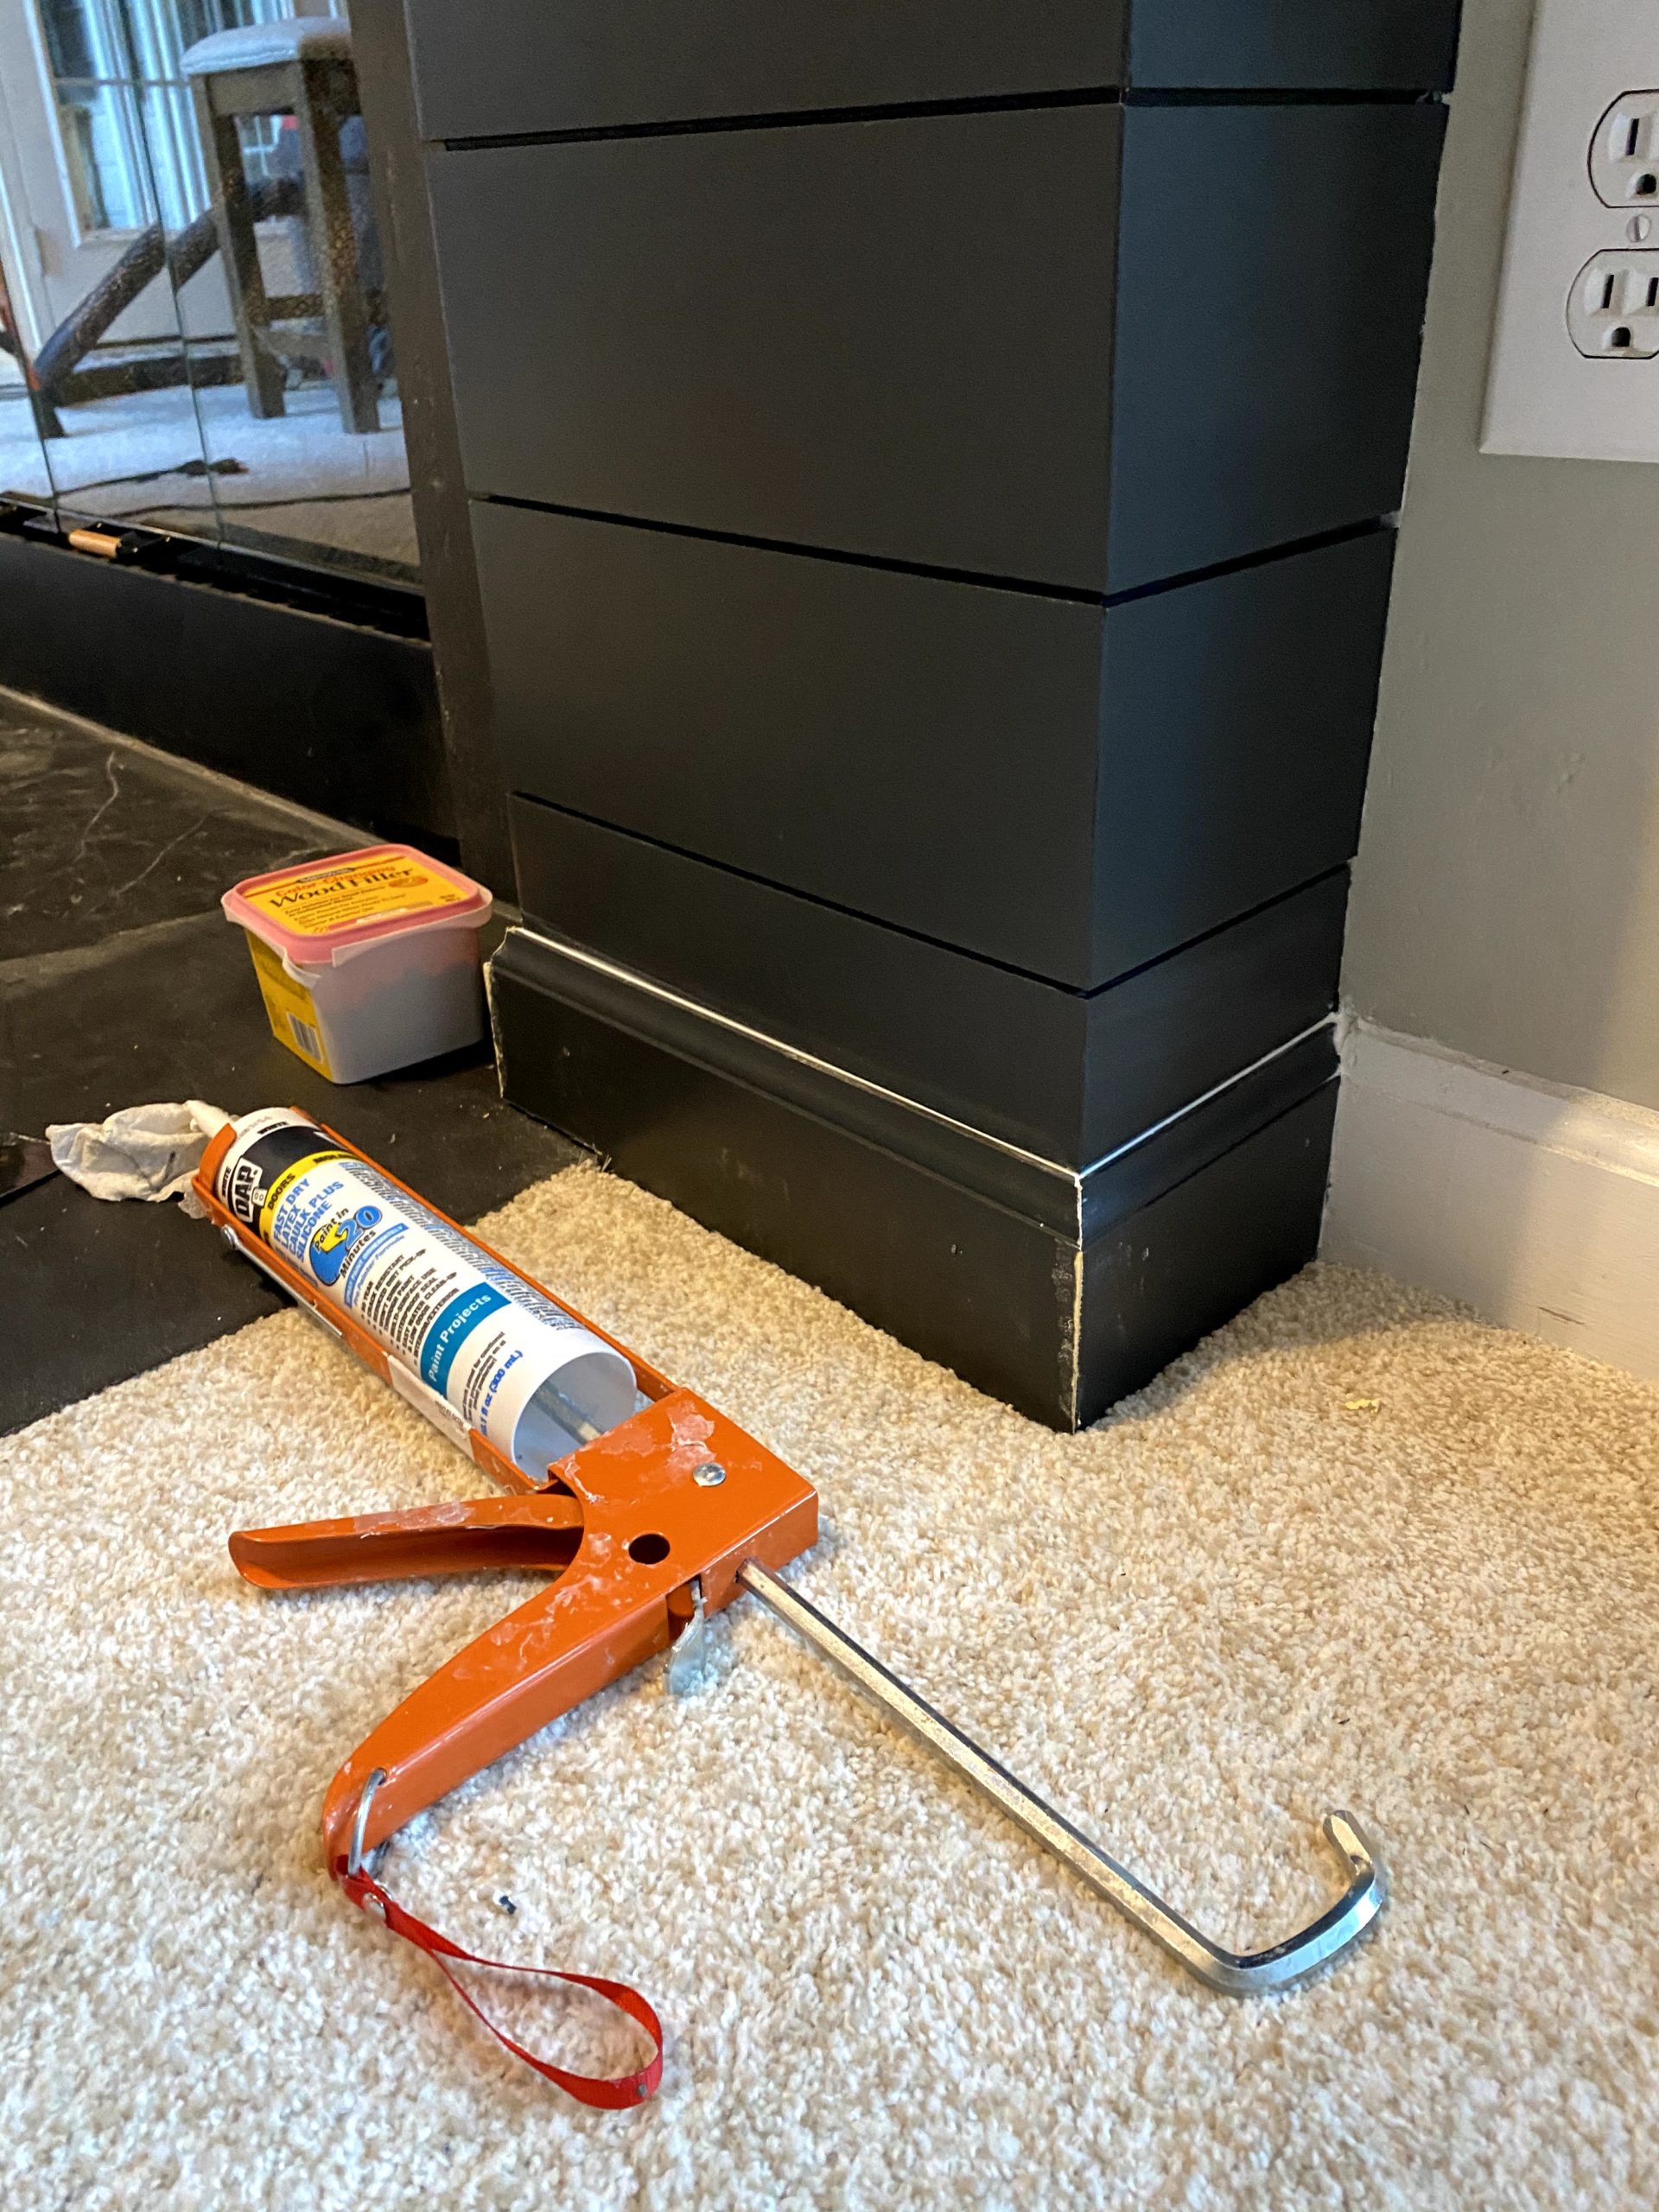
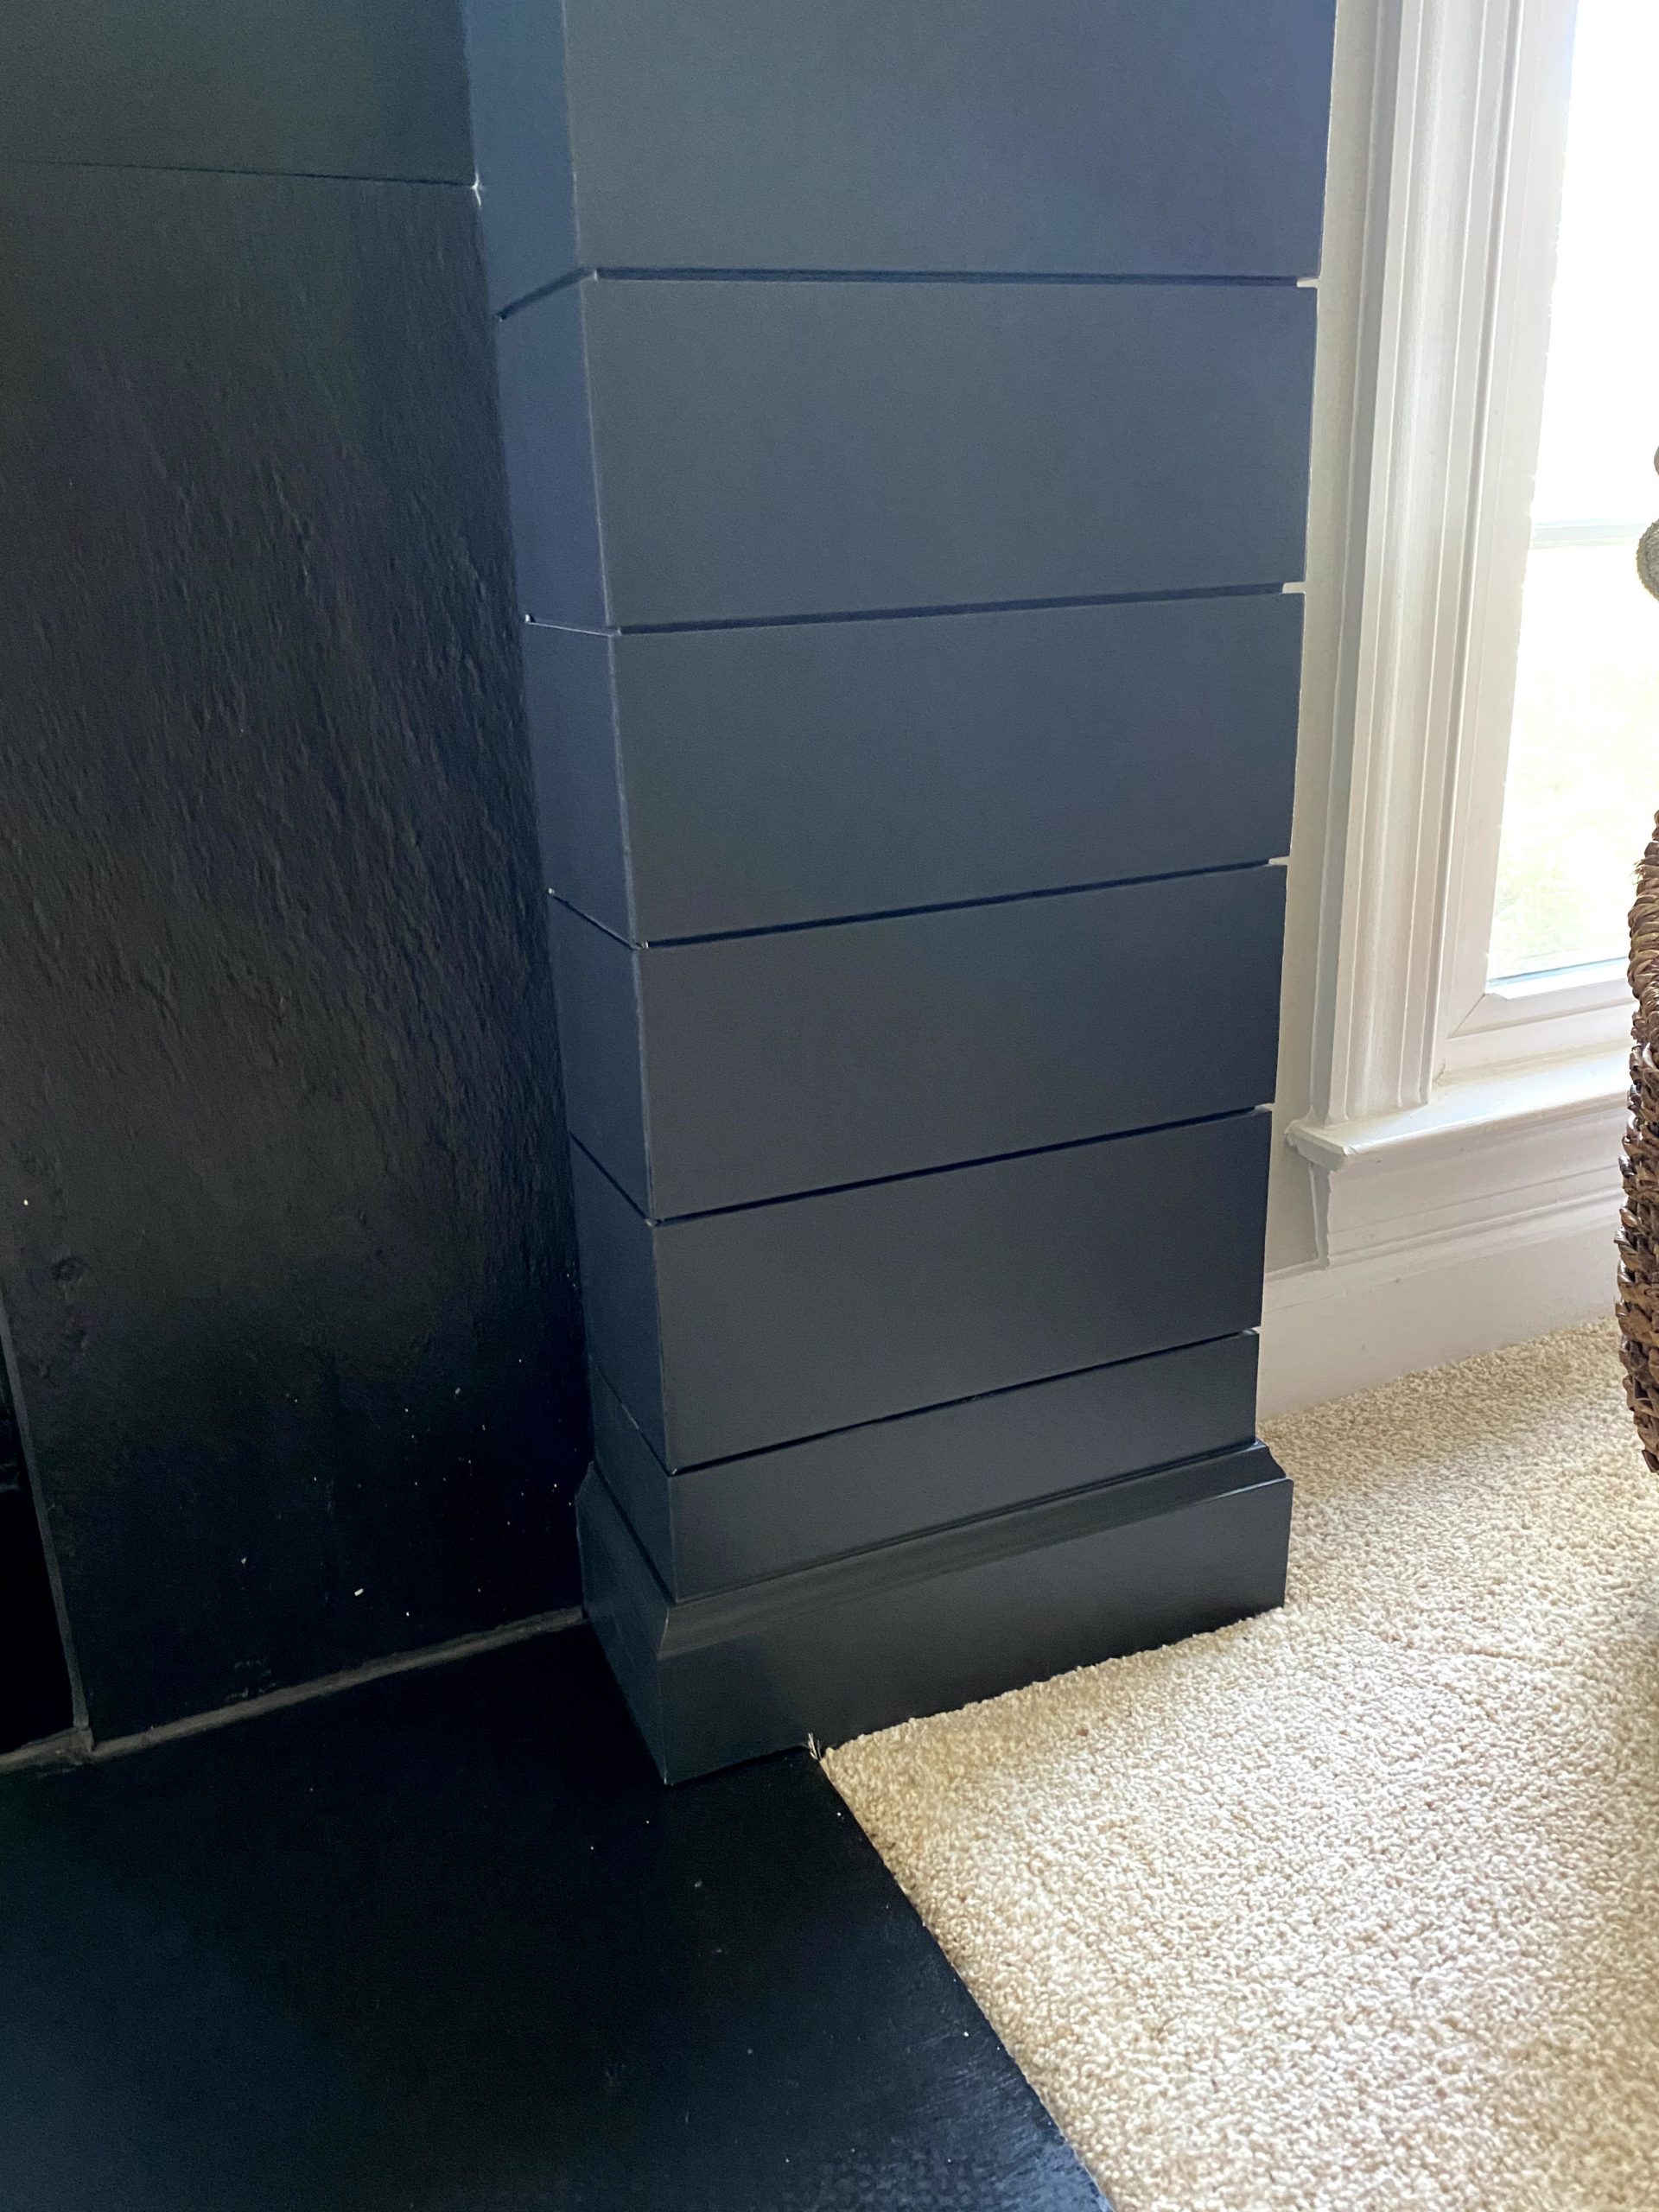
You do have the option to leave your fireplace without trim if your shiplap goes all the way to the bottom of the floor. I always like to add trim to my projects to make them truly look built in. To do this, grab some trim from your favorite hardware store, paint it the same color as the fireplace and installed it at the base. I used caulk to cover all the gaps between the trim and the shiplap and then painted over that caulk once it was dry.
STEP 13: Clean Up/Last Details
Everyone’s project is different so you might have some additional details you have to finish up. For me, it was spray painting the gold trim on the doors and oiling the slate tile surrounding the fireplace. The parts of the slate that were previously covered by the arch had some adhesive stuck to it and were really dusty. It took a few applications of butcher block oil, but soon the slate looked good as new.

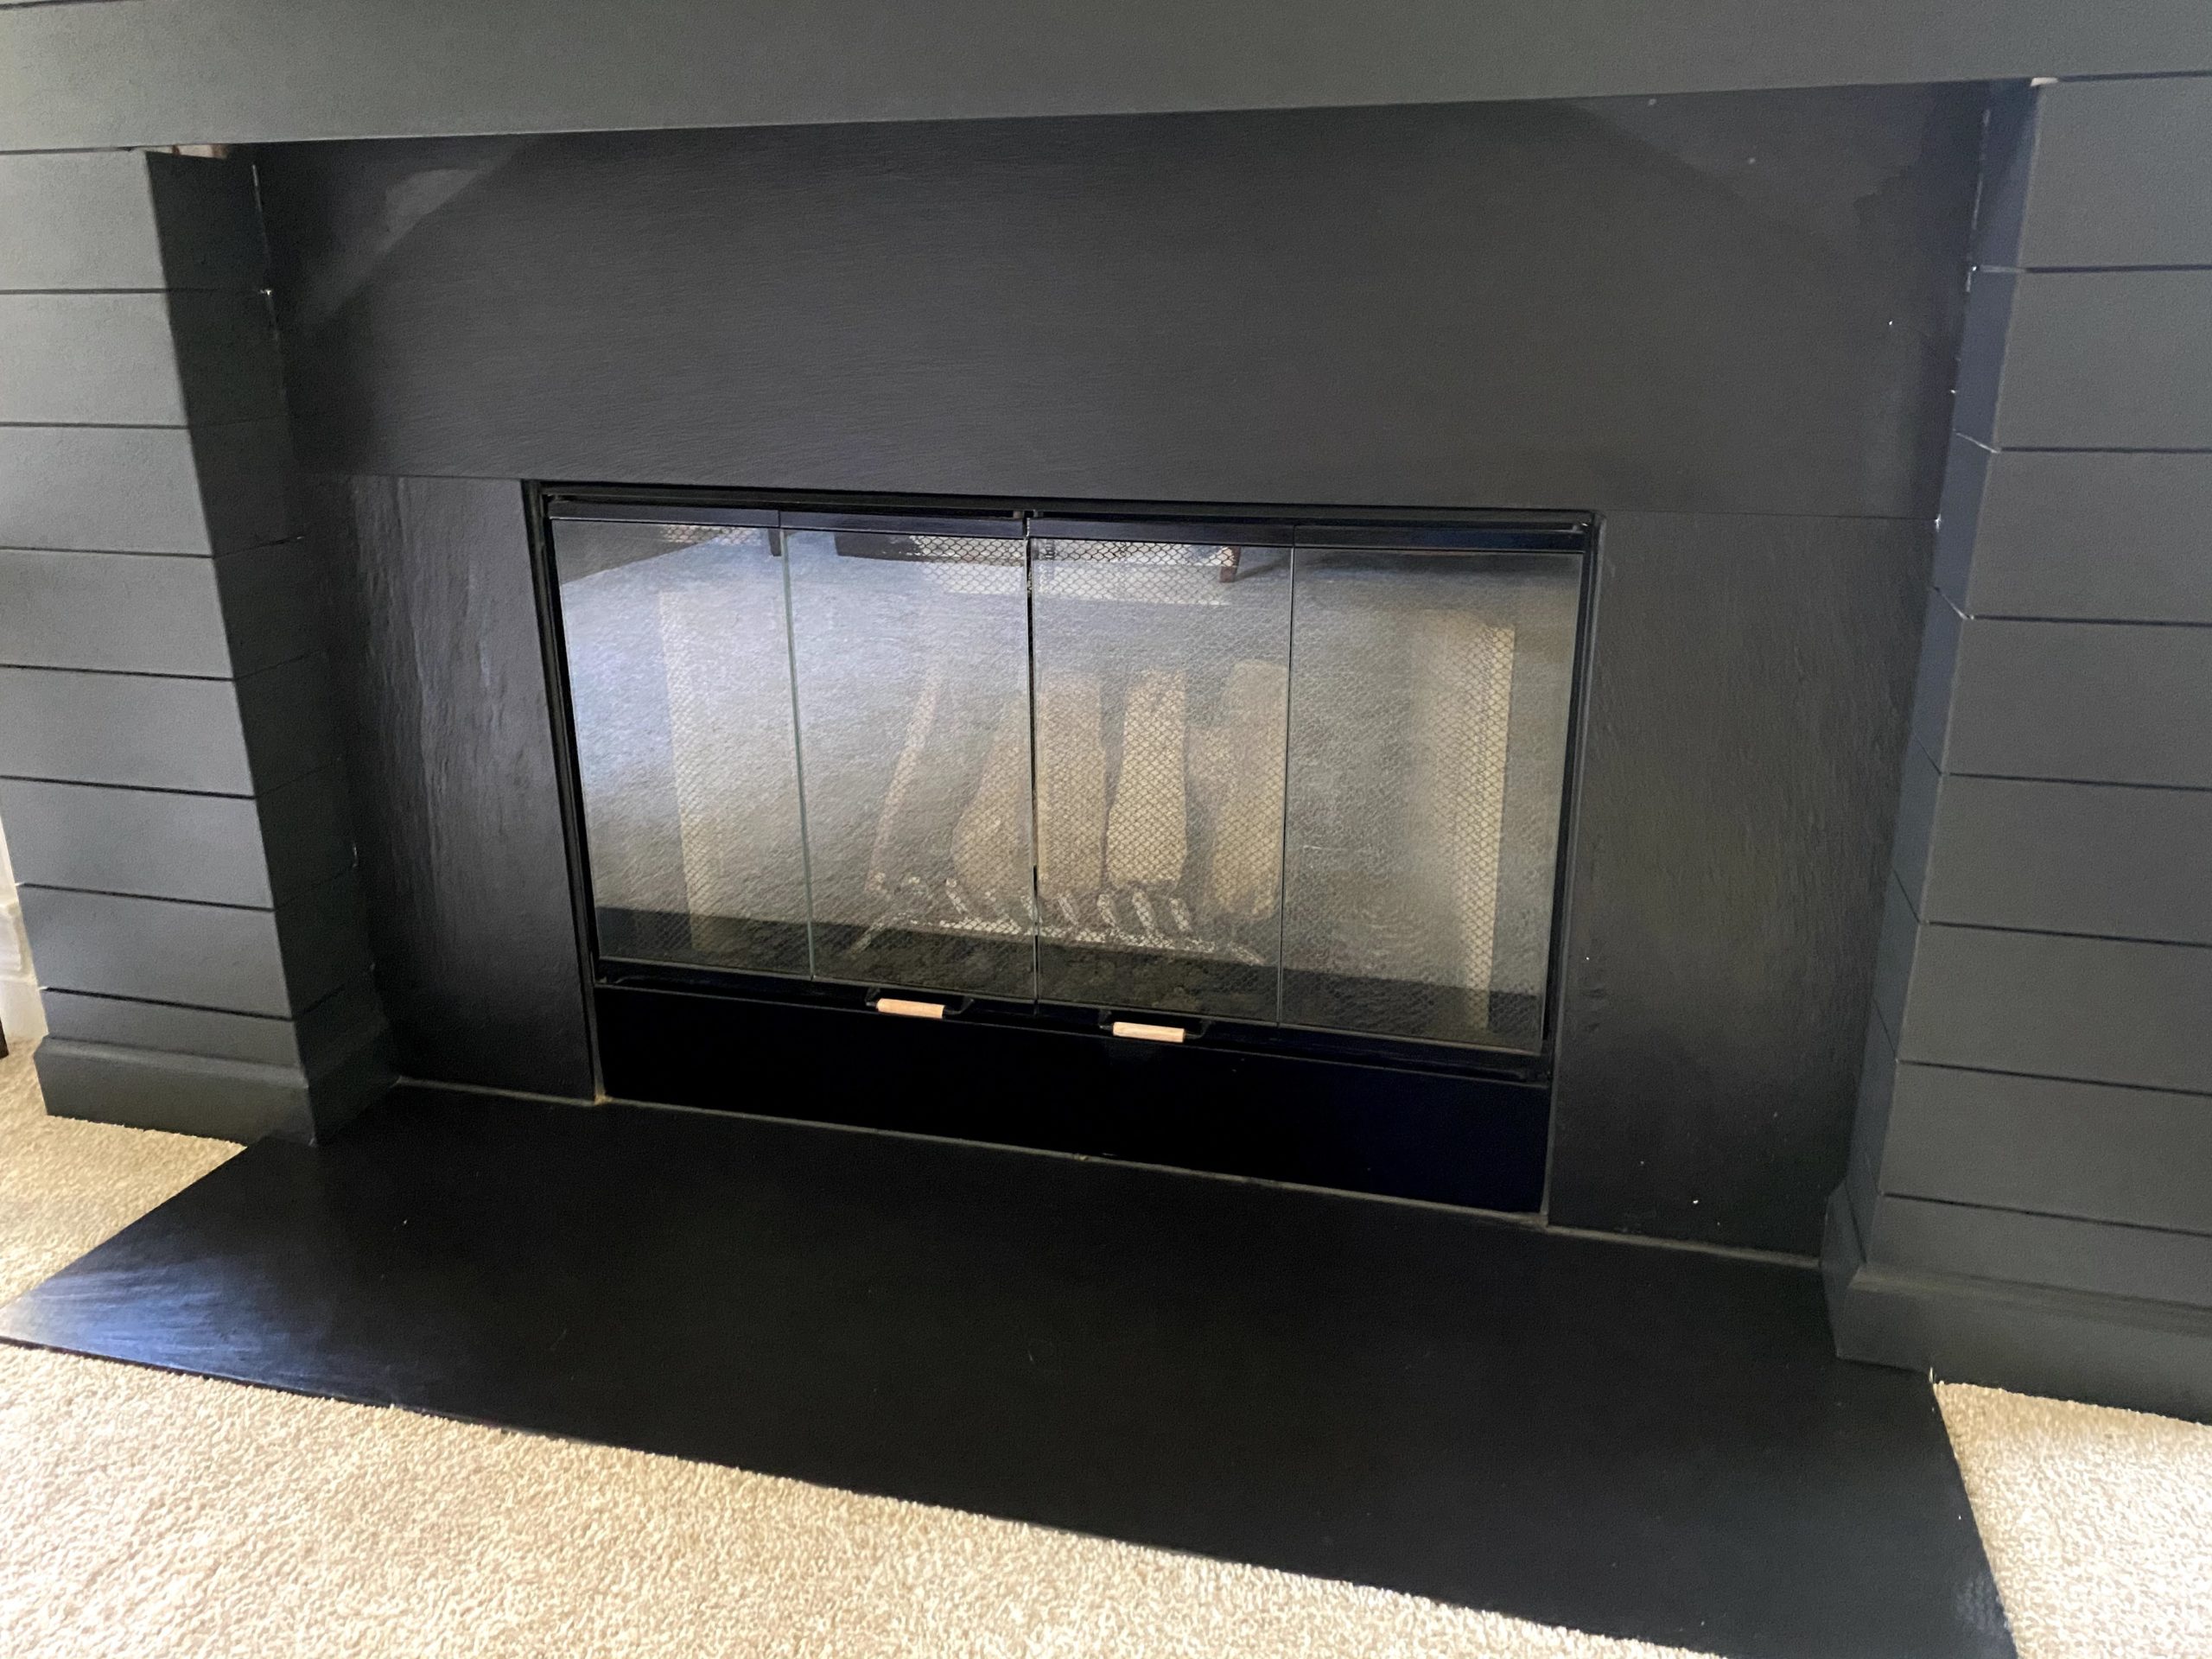
All that was left was installing a new fan (old gold and white fan be gone!) and we were having friends and family over in our new, updated space!
Here’s the final product:

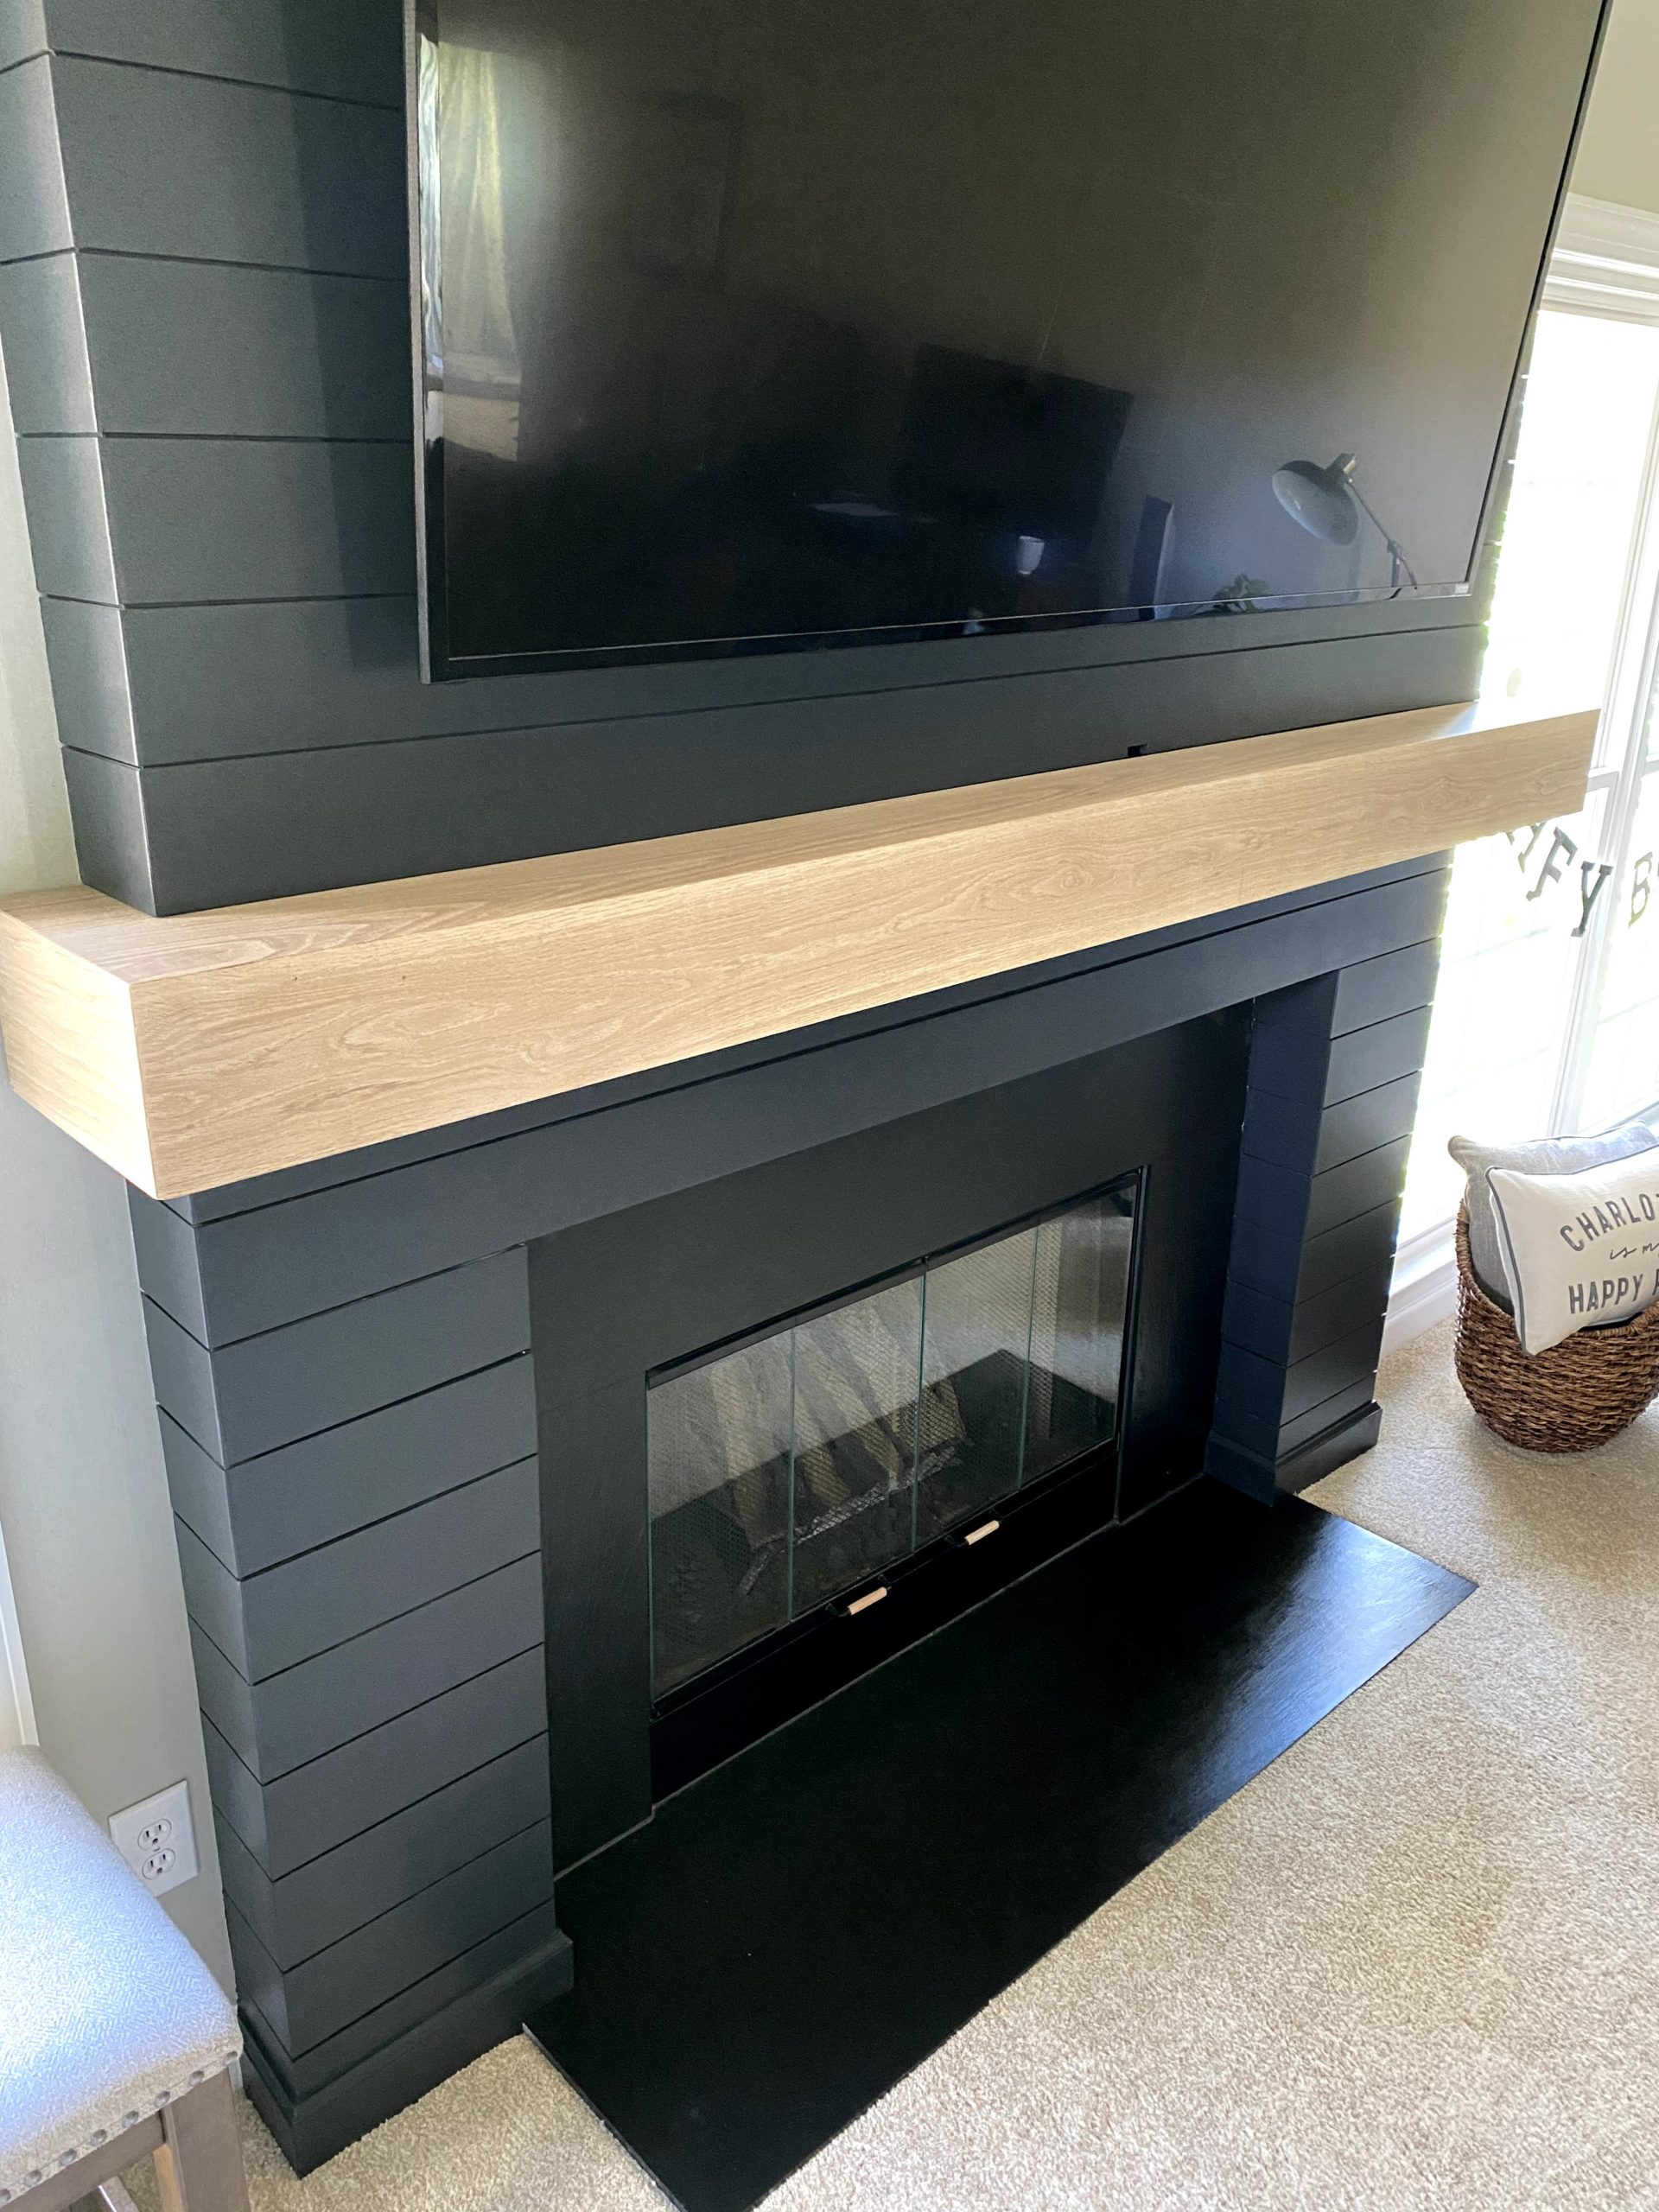
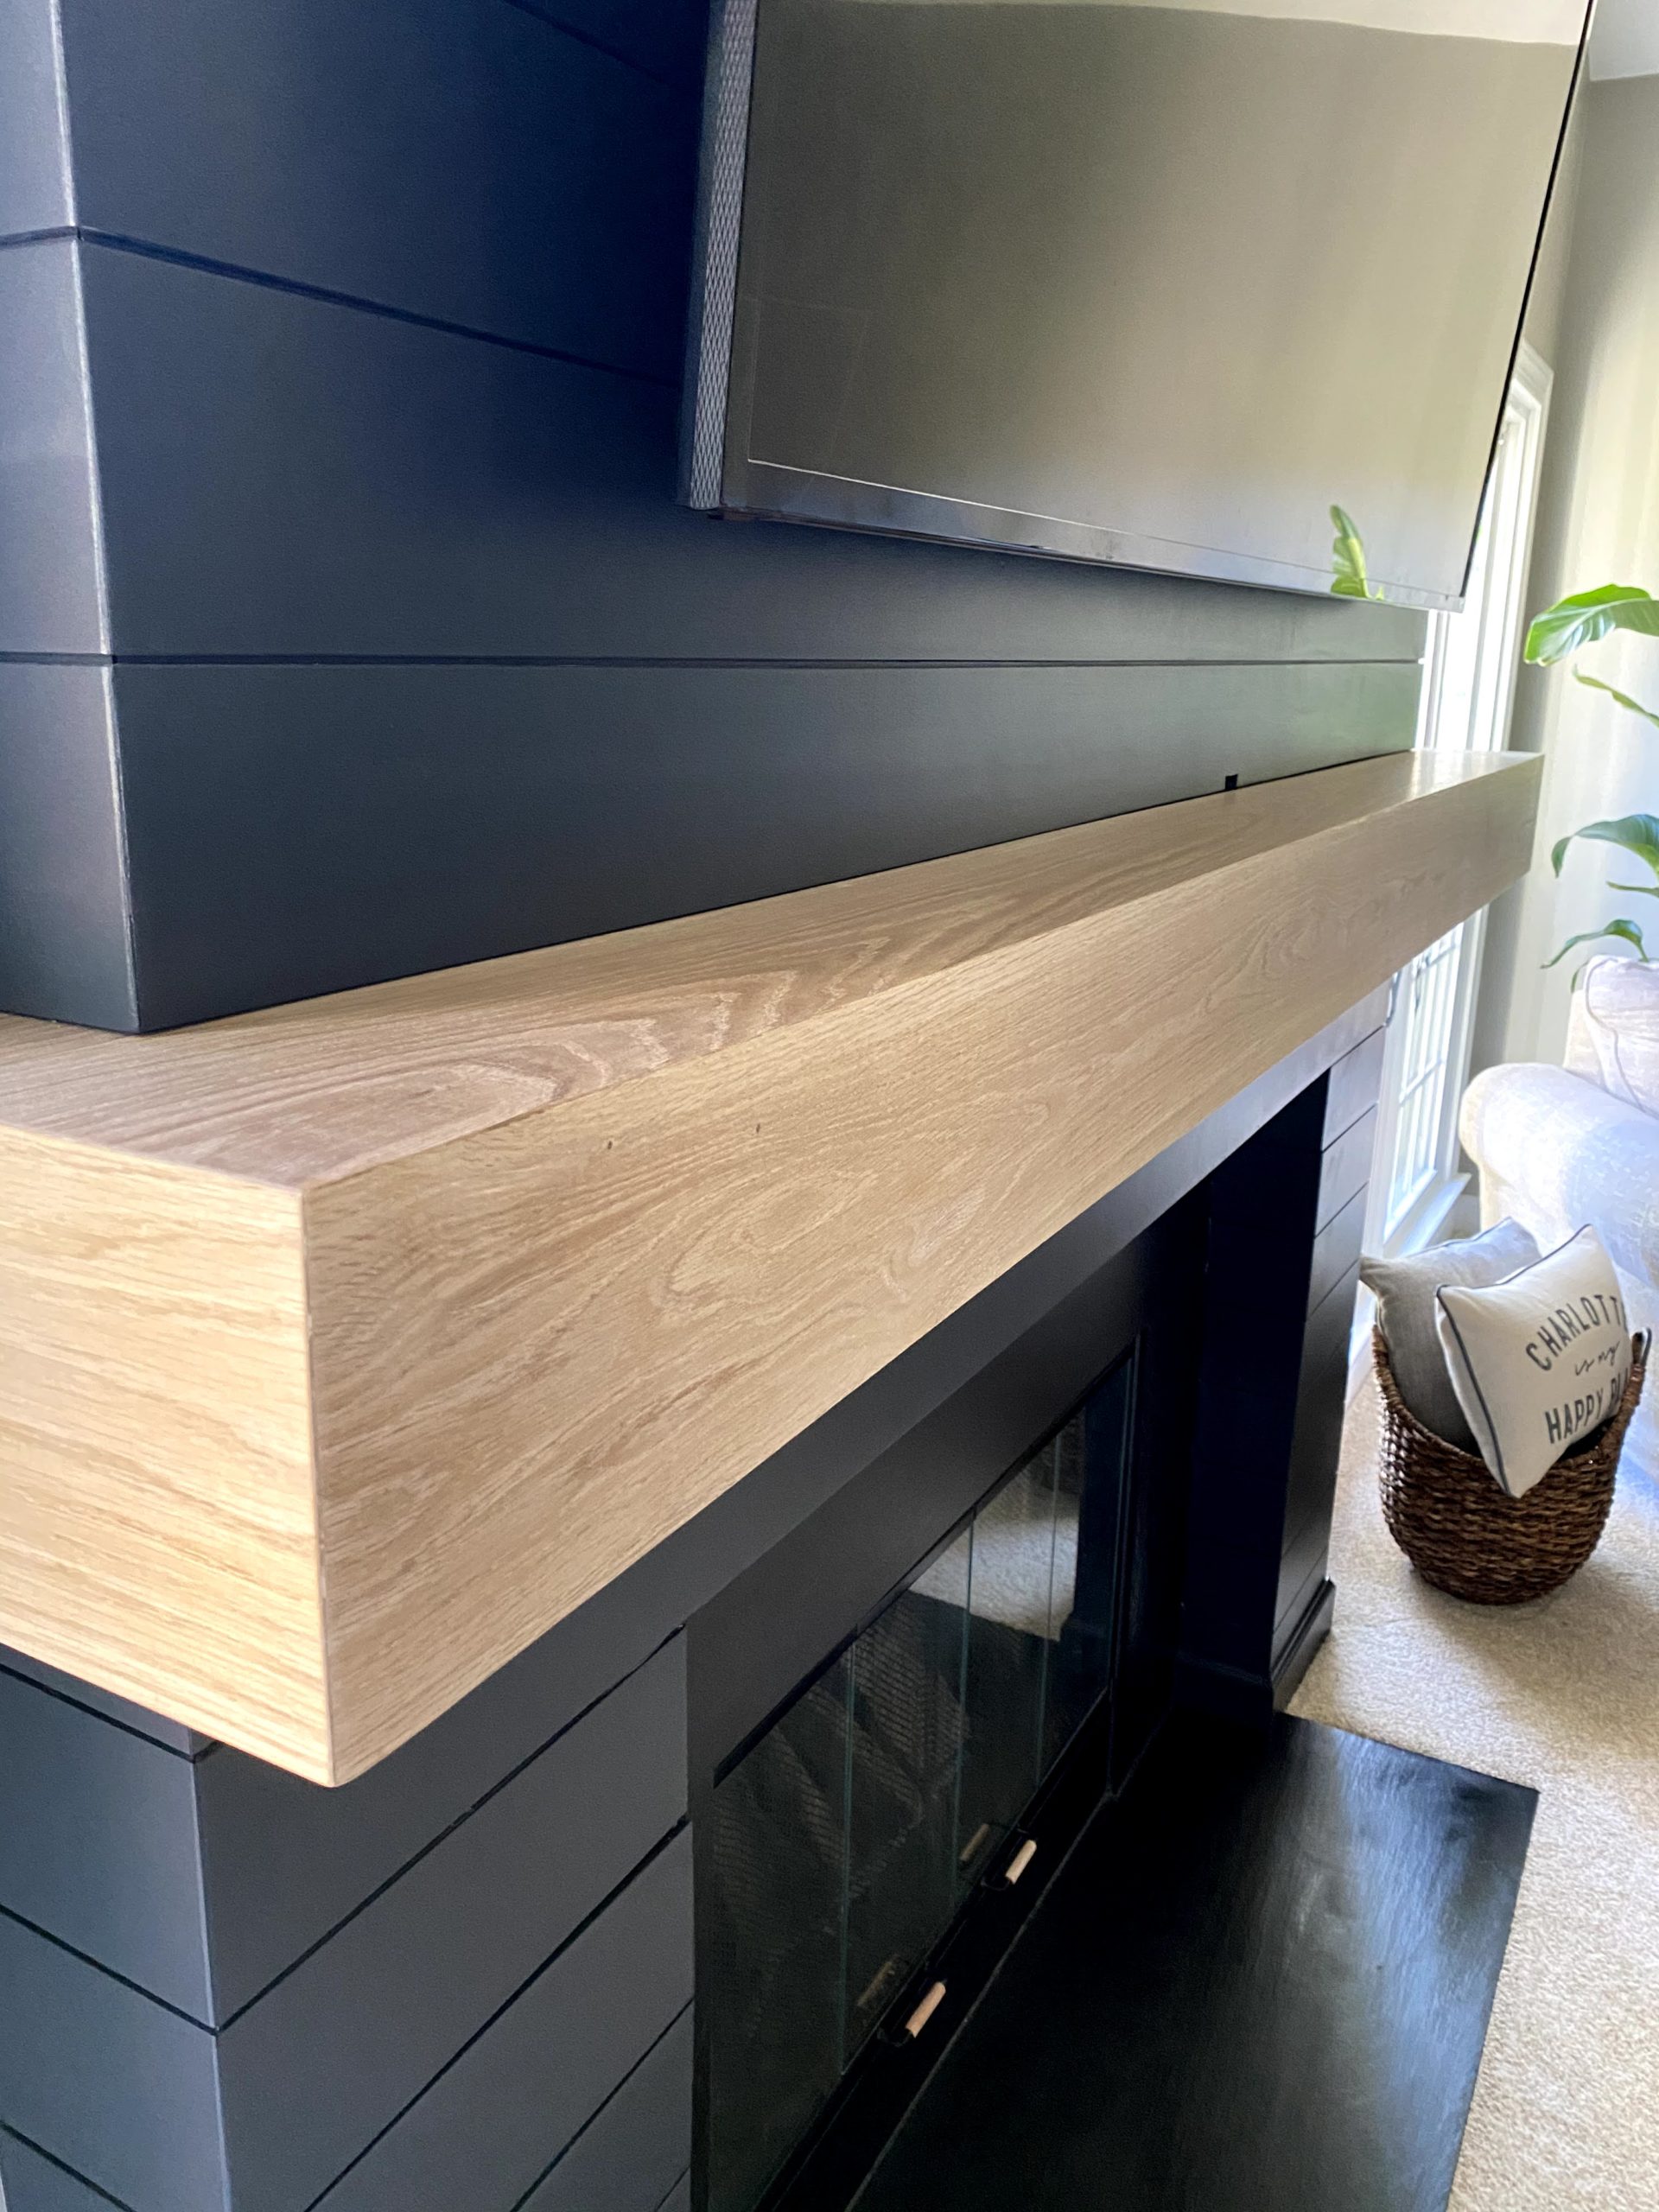
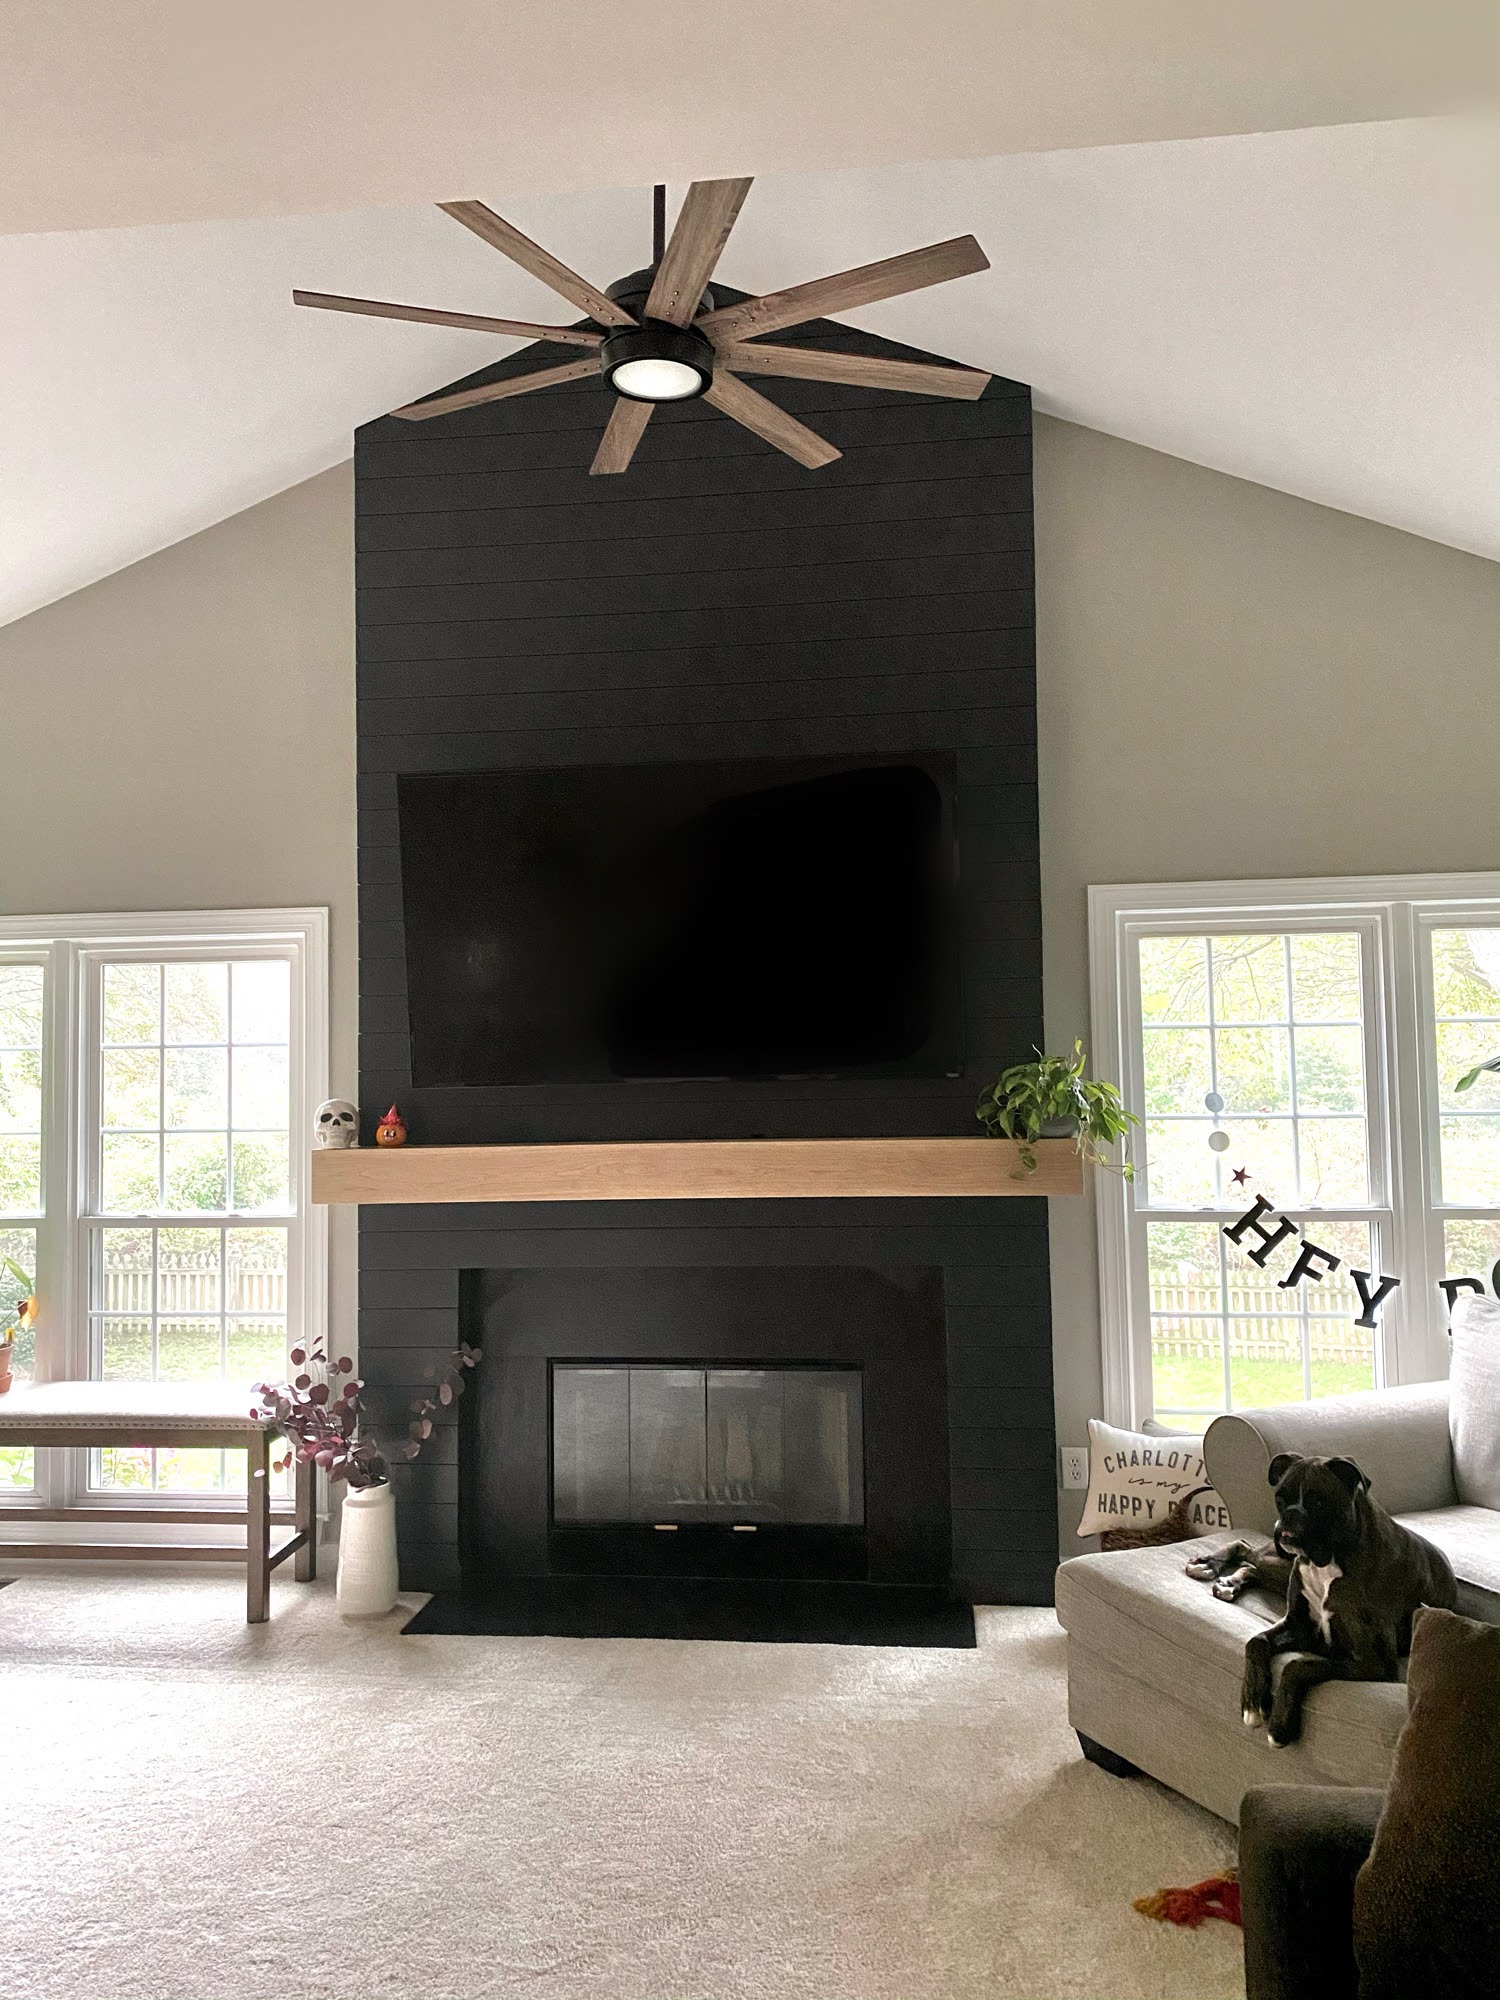
Want to keep up with my newest projects? Come hang out on Instagram!
What material did you use for the black trim around the fireplace?
Hi Brittany,
The black trim around the fireplace is a black slate slab. It was here already when I bought the house but you can buy this material from a stone yard- like where you get countertops. It’s about 1/2″ thick and you can ask them to look through any remnant pieces they have to keep the cost down!
Thanks!
Rachel
What are the measurements of the black slate around the fireplace and the measurements of your hearth? Also, what is the measurement of the mantel from the fireplace?
Hi Candice,
The slate around the fireplace is 60″ wide by 40″ tall. The hearth comes out 20″. The mantel is 24″ above the fireplace opening. Please research your local codes for fireplace construction- every state is different and measurements are extremely specific.
For example, here is the NC code for combustible material near the opening of a fireplace:
“Exposed combustible mantels or trim may be placed directly on the masonry fireplace front surrounding the fireplace opening providing such combustible materials are not placed within 6 inches (152 mm) of a fireplace opening. Combustible material within 12 inches (306 mm) of the fireplace opening shall not project more than 1/8 inch (3 mm) for each 1-inch (25 mm) distance from such an opening.”
Thanks!
Rachel
What color paint did you use?
Hi Gavin,
The color is Sherwin Williams Greenblack (SW 6994) tinted HGTV Sherwin Williams Infinity Satin Paint from Lowes. I can’t believe I missed sharing the paint color in this post!
Thanks!
Rachel
What stain did you use on the mantel?
Hi Tami! I did not stain or poly the mantle, it’s completely raw, and therefore will need to be sanded every so often to maintain the color I wanted, otherwise it could yellow or darken. I like the raw wood look and couldn’t find a color I liked enough to stain it! I’ve had it for 4 years and it needs a sand but honestly no one would notice except for me!
Wow really beautiful…thanks for the inspiration!
Hi Lori- thank you for the compliment! I’m really happy with how the fireplace turned out!
What stain did you use in the mantle?
Hi Nicole!
I didn’t stain the mantel at all! I built it with a beautiful white oak and loved the original color of the wood. In fact, when I attempted to put a protective layer of poly on it, it changed the color of the wood so much that I decided to sand it all off and just leave it completely bare. This isn’t ideal- now the wood is more susceptible to humidity, water spills or oils transferring from skin when you touch it, but since it’s not a heavily used/touched surface in my home, I decided to risk it. It’s been over two years now and it still looks amazing!
Thanks!
Rachel
Hi! I saw the paint color you used—- I was thinking black or charcoal but does your have any hues of green or black?
Thank you
Missy
Hi Missy!
SW Greenblack is true to it’s name and is a warm, yet saturated black. Our fireplace is in a Northeast facing room, against the windows, so it almost takes on a navy appearance throughout the day. If you’re looking for a more true black with no strong undertones, I would go with Sherwin Williams Tricorn Black, or SW Caviar if you’re in a North facing room!
Hey! beautiful work. What is the color code for your walls in that room?
Hi!
The walls are Sherwin-Williams Mindful Gray in the living room!
Thanks,
Rachel
I absolutely love the design of this modern shiplap fireplace! It adds such a cozy yet stylish touch to the room. The mantel looks perfect for displaying decor items. Great job on the project!