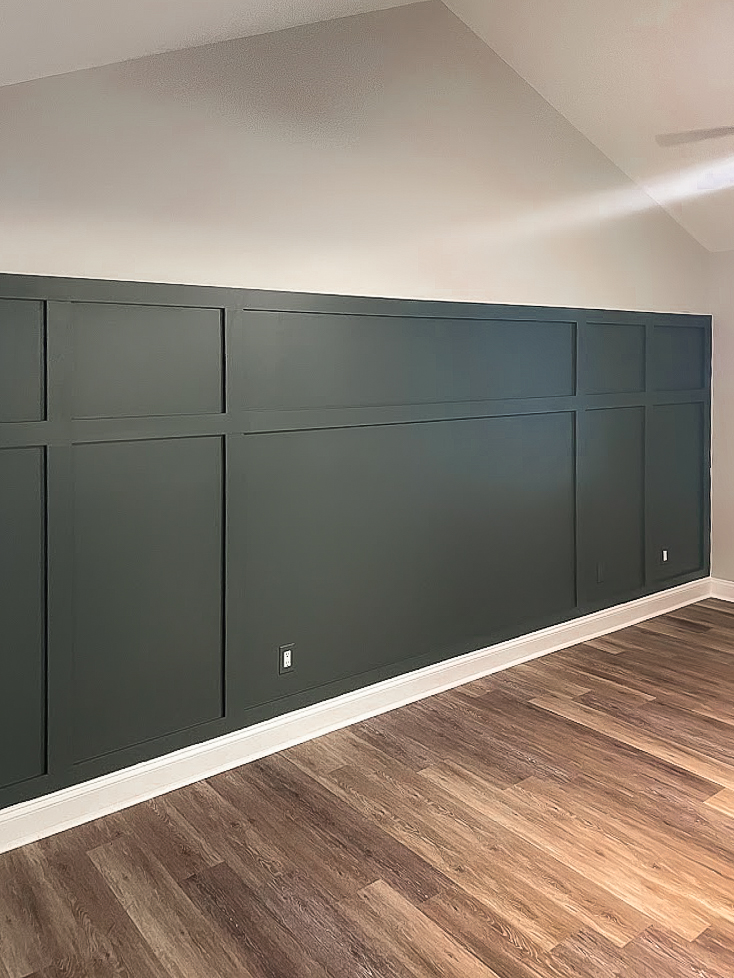
How to Plan a Board & Batten Accent Wall using Sketchup
Accent walls are like the marijuana of the DIY world- they’re the gateway project to the harder stuff- like updating fireplaces and installing built-ins. Ironically, I didn’t build my first accent wall until after I completed those other projects. I didn’t even do an accent wall until my friend, Sam asked me if I could do a Board & Batten Accent Wall in her new house!
Check out all the videos of this project on my Board & Batten Instagram Highlight!
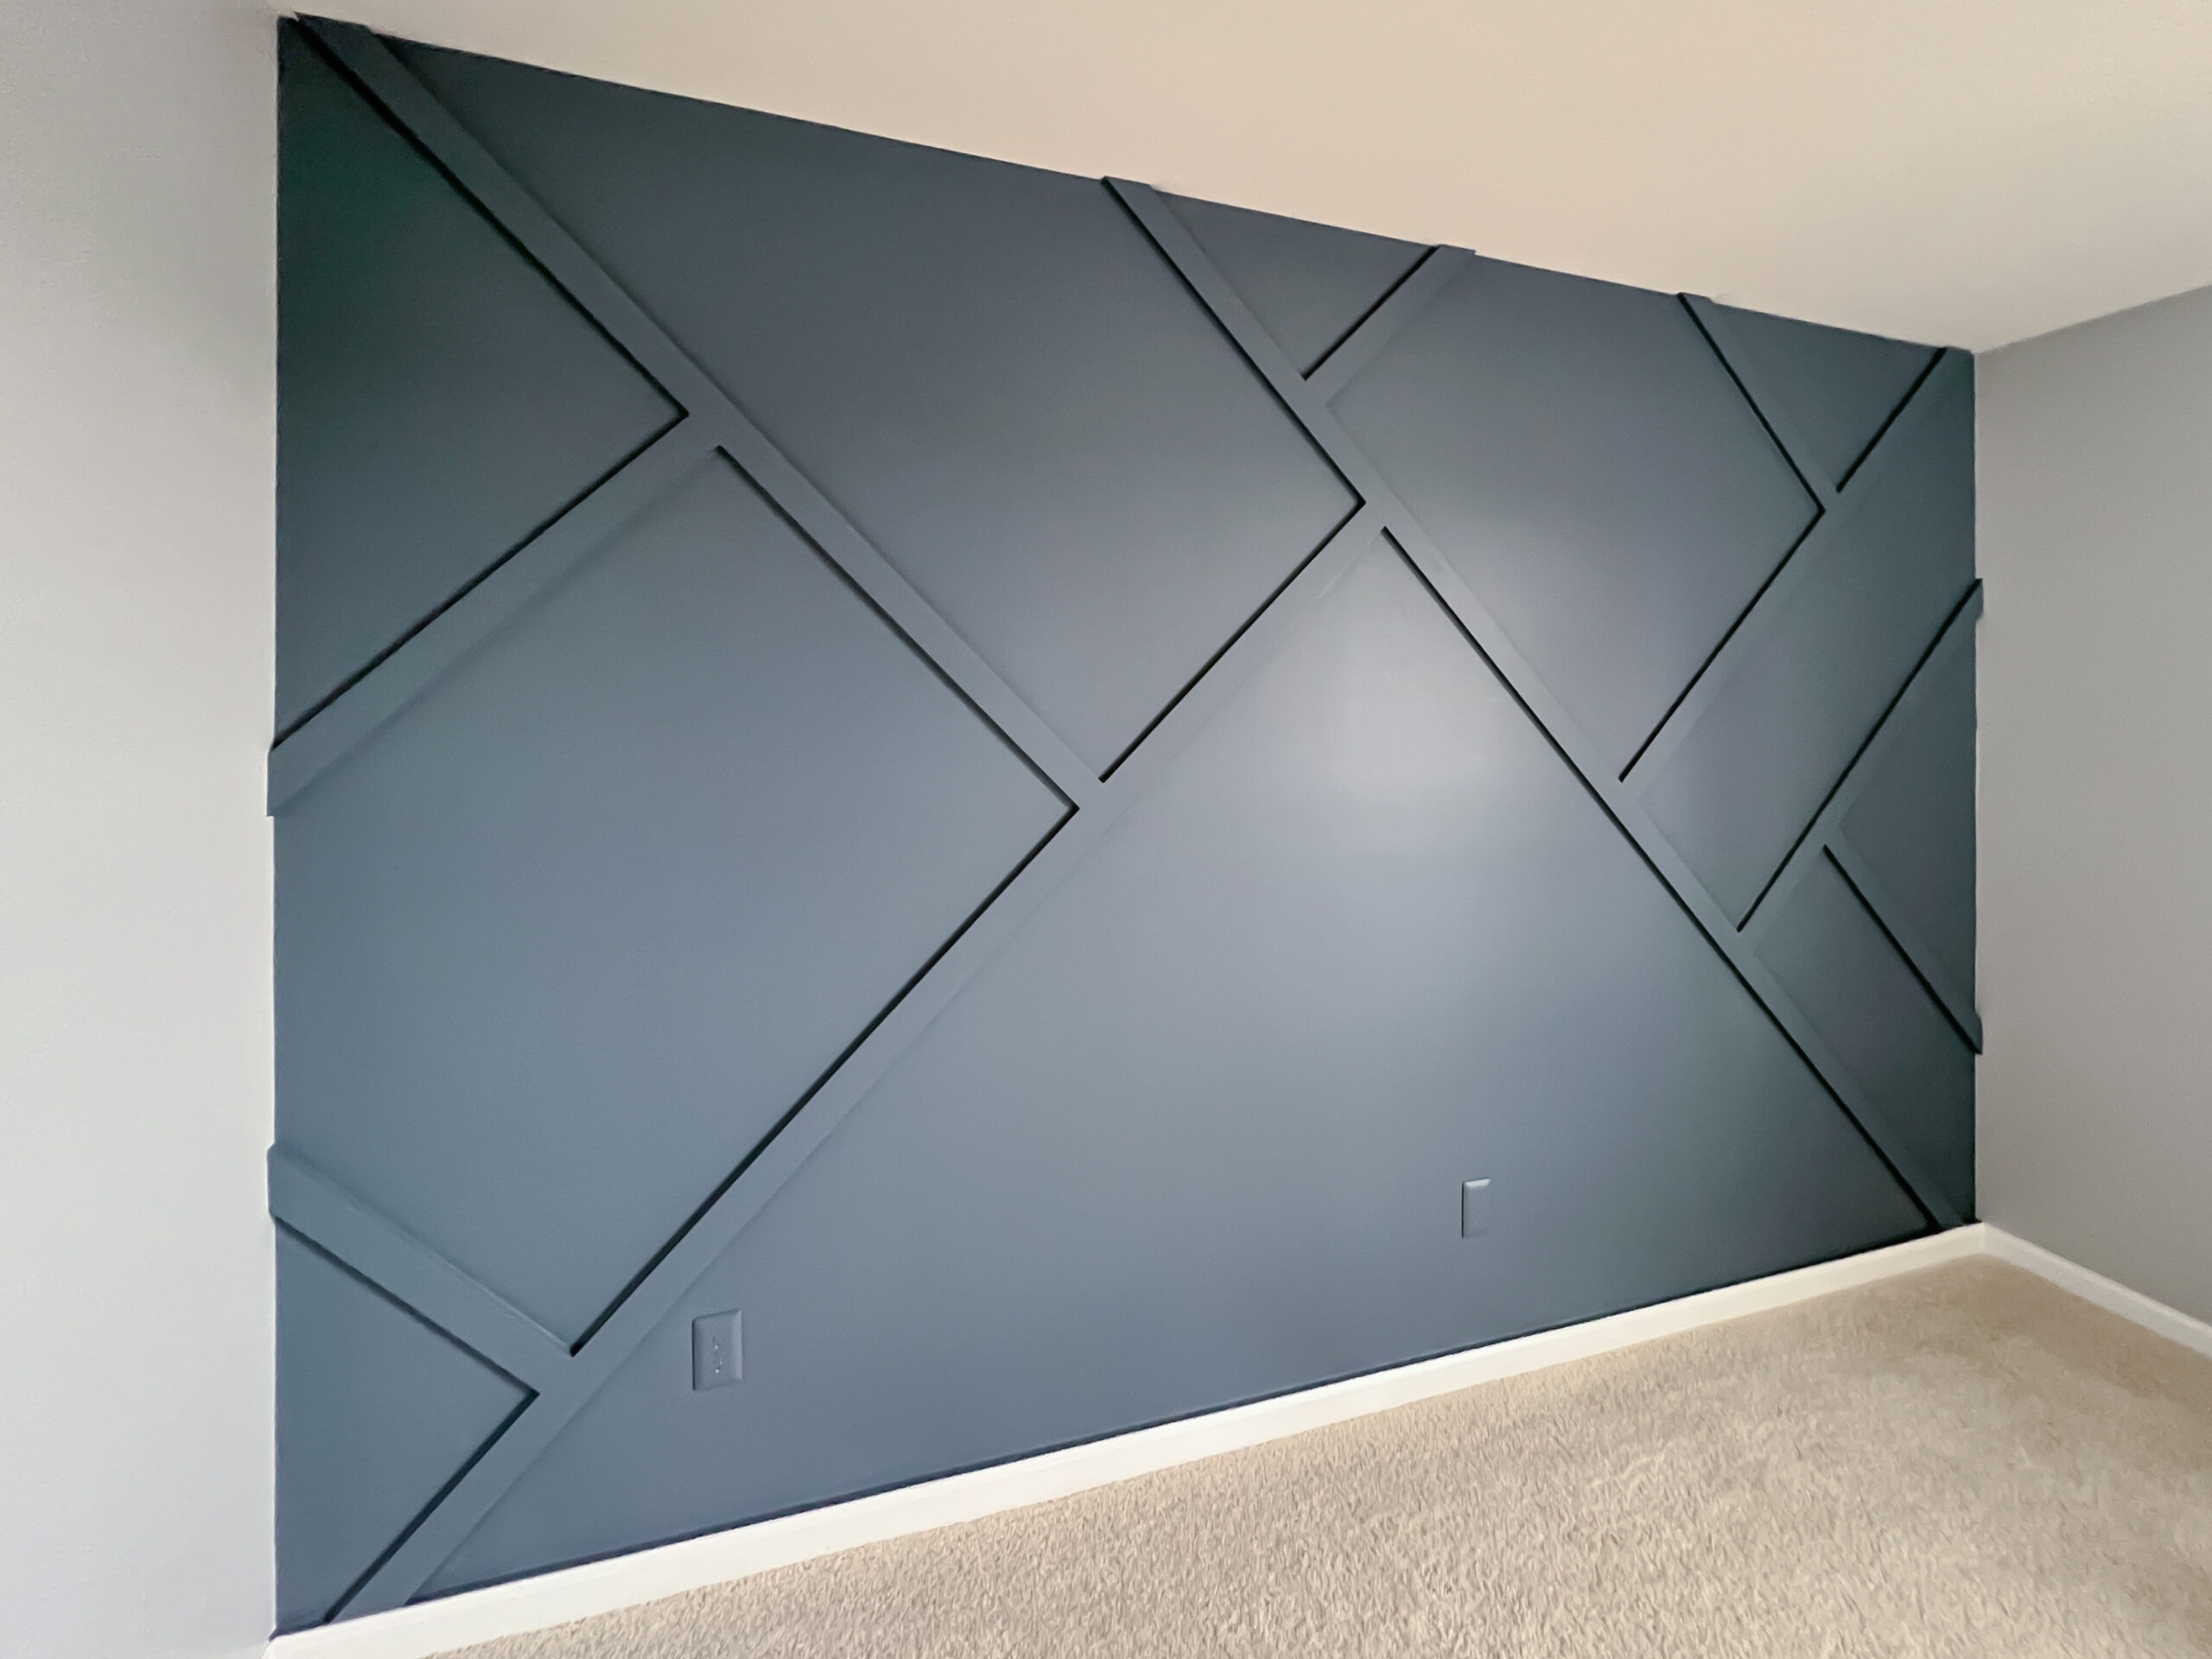
Once I had that first trim accent wall project under my belt, I was confident that I could repeat the process with other designs. The only issue I had was planning for the different designs- especially the more complex ones like this Modern Angled Accent Wall I did for my friend Brooke.
Check out all the videos of this project on my Modern Angled Accent Wall Instagram Highlight!
I quickly learned the easiest way to design, mockup and plan for new accent wall designs is to use an online program called SketchUp. SketchUp is a 3D modeling program that’s known for being easy to use. It’s a popular software in the architecture and interior design world. I use a free version that’s available on the web, but there’s also a paid version with a lot more capabilities.
Before I started Brooke’s accent wall, she was interested in a few different types of designs. I was able to mockup those designs on her wall dimensions to show her what the design might look like in her room. In this blog, I’ll detail the first of three different designs that I mocked up for Brooke before we decided on the Angled design. Here’s the SketchUp mockup I shared with her of the wall design we ultimately chose to move forward with:
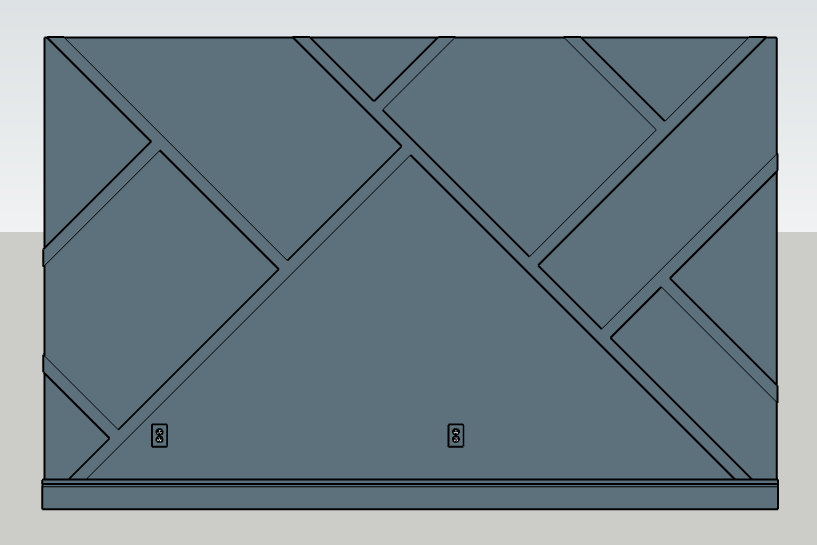
This blog does not detail the process for the above accent wall design. Once I complete that future blog, I’ll link it here.
Quick disclaimer before we start- this is not a SketchUp tutorial, this blog is intended to show you how I design and plan for accent walls using SketchUp. If you are new to SketchUp, I recommend looking up some beginner tutorials on YouTube (there are a lot!). I have most of the basics down but I still struggle with the program a fair amount so I am not the right person to be teaching you how to actually use it!
Back to the accent walls!
First up: A Board & Batten Accent Wall:

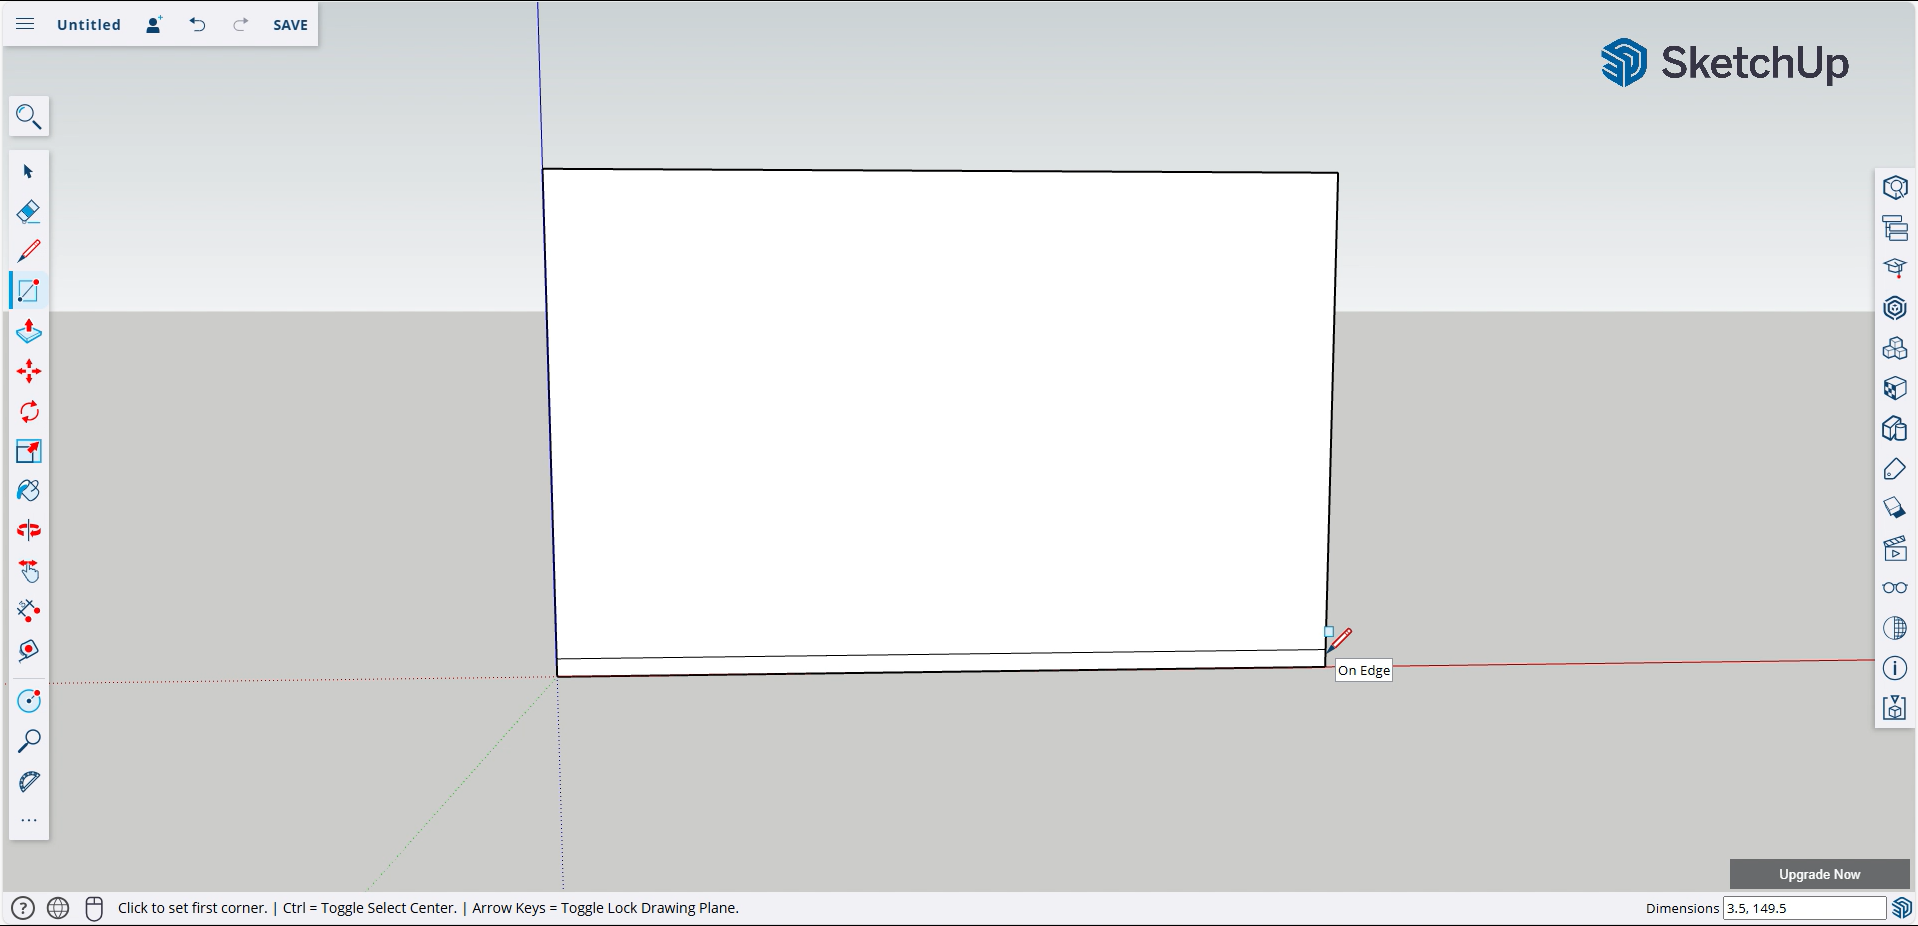
First, I build out my wall on one of the vertical planes, using the rectangle tool. The wall I’m working on is 96″ tall (8 feet) and 149.5″ wide. You can create the wall by freehand finding those dimensions OR what I do (what’s easier) is typing in the dimensions of the wall into the bottom right measurement text box.
The dimension you start with, depends on the [color-coded] plane that you’re working on (see SketchUp’s instructor note below) but I can never remember the order when I’m working. I typically just use trial and error. If I try one way and it builds the wall in the wrong orientation, I undo and then list the measurements the opposite way.
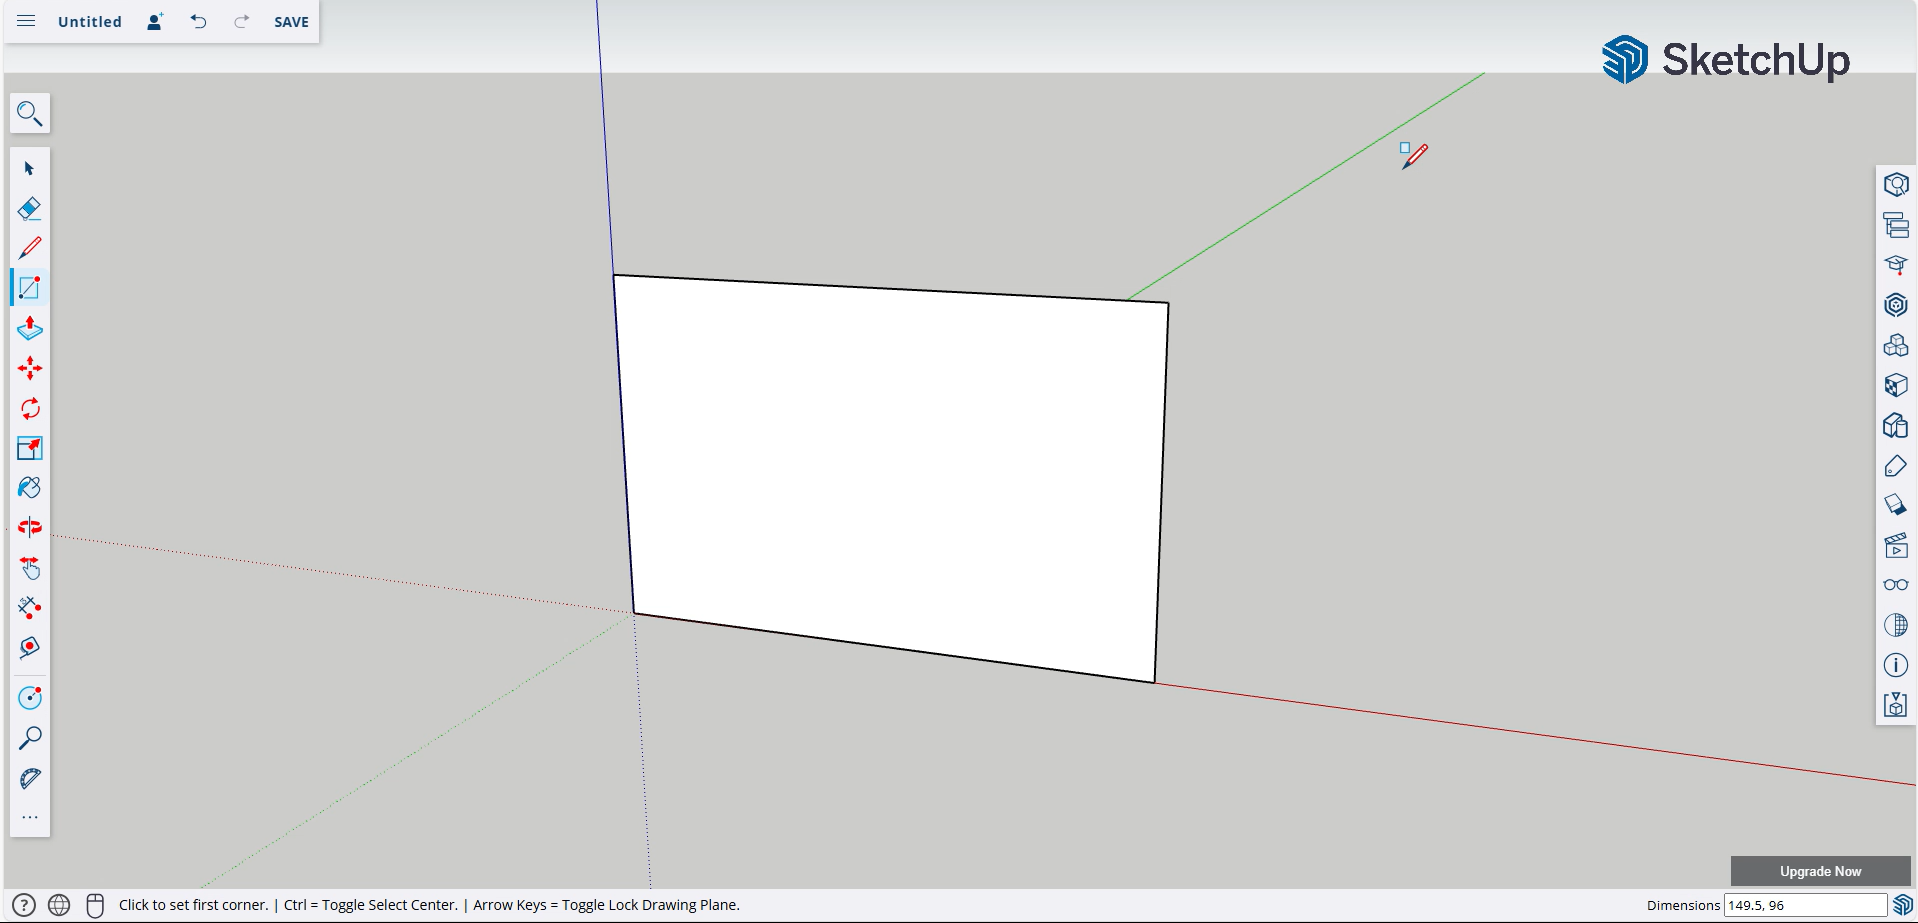
SketchUp Instructor Note: The order of the measurements matches the order of the axes (Red, Green, Blue). For example: Red, then Green; Red, then Blue; or Green, then Blue.
You can find these notes by clicking the graduation hat in the right-hand tool menu!
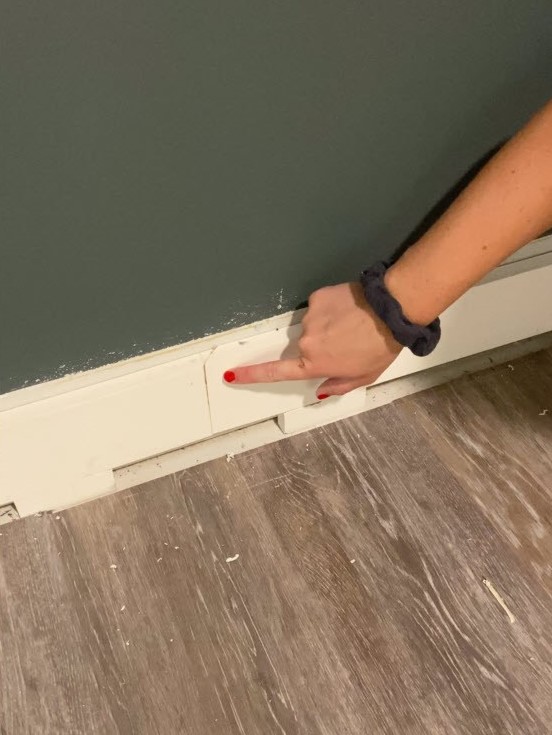
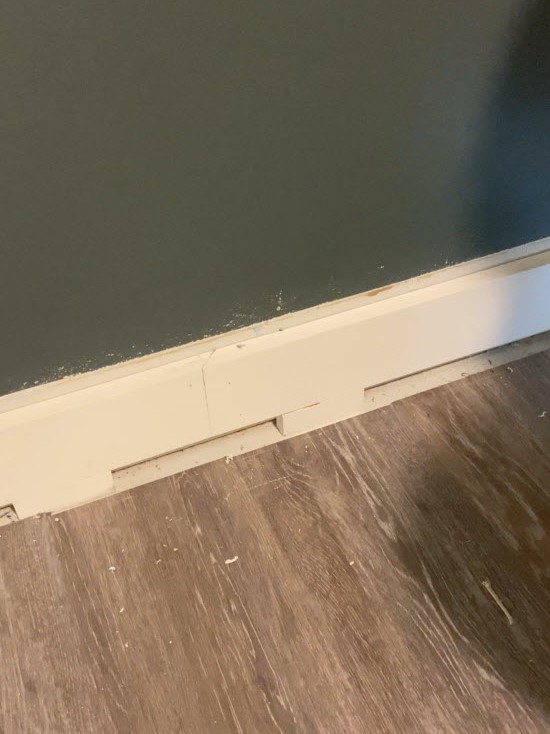
Once your wall is built, add the baseboard or bottom trim board in. Whether you are keeping the baseboard on or replacing it with trim, always start at the bottom in your design. For my accent wall, I plan to remove the existing baseboard then add a trim board on the bottom of the wall. I will reapply the baseboard over that trim board at the end.
My trim board is a 1×4″ (which is what I’m using for the majority of this build) so the dimensions I enter in SketchUp are 3.5″ x 0.75″ x whatever length I need it to be.
Lumber Dimension Tip: If you’re not familiar with lumber dimensions, they are a bit confusing. What we call the board, “one by four” or, “two by four” is actually the nominal measurement which comes from a board’s size before it’s dried and planed smooth on all 4 sides. The actual measurements of the board are smaller, therefore a 1×4″ actually measures 0.75″ x 3.5″
Add that board along the bottom of the wall using the rectangle tool by starting on one of the bottom corners, then dragging it to the other side. Make sure the width is correct per the type of board you’re using. Alternatively, you can click on the first corner, then enter the board dimensions into that bottom right text box to make it easier.
Now comes the fun part! (Adding the wall trim)
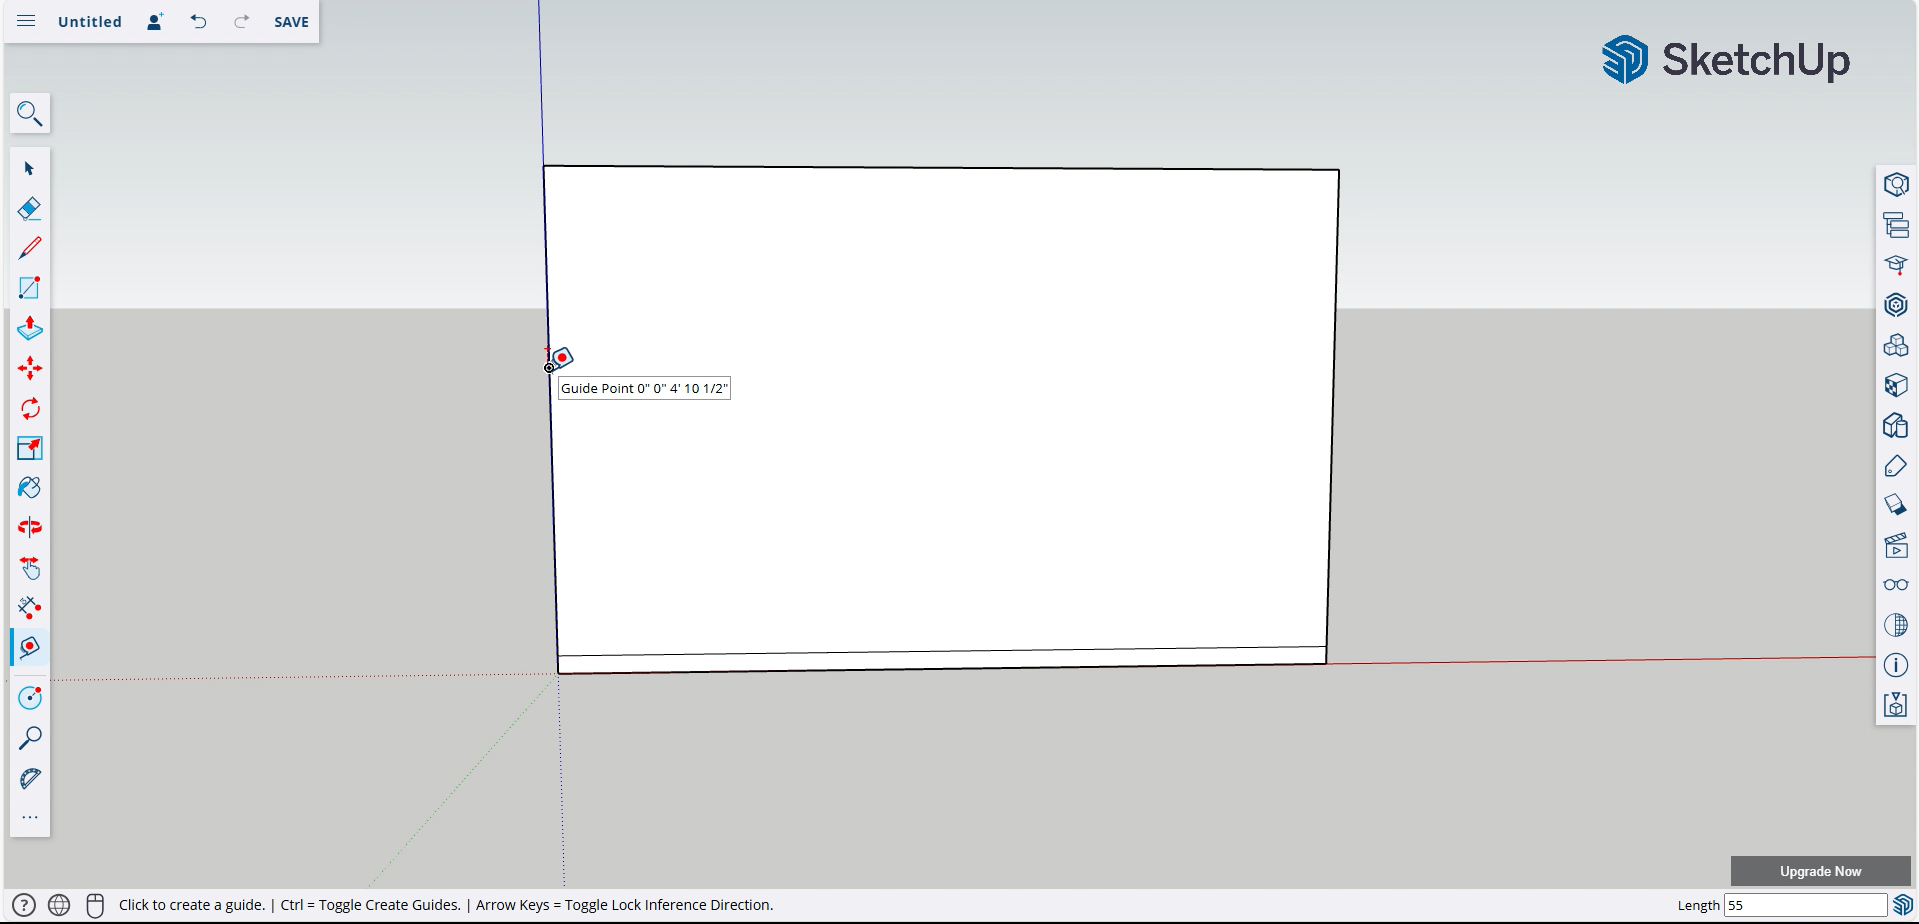
My design is a half wall board and batten. I played around with some painter’s tape in person to determine the height I wanted the top horizontal board to be. I landed on 55″ from the floor. To add this board to the design, I use the tape measure tool to measure 55″ directly up from the bottom corner of the wall. Once you type 55″ (+ enter) or click when your measurement reads 55″, the tape measure will leave a reference mark at that dimension. This will be your starting point for your next rectangle.
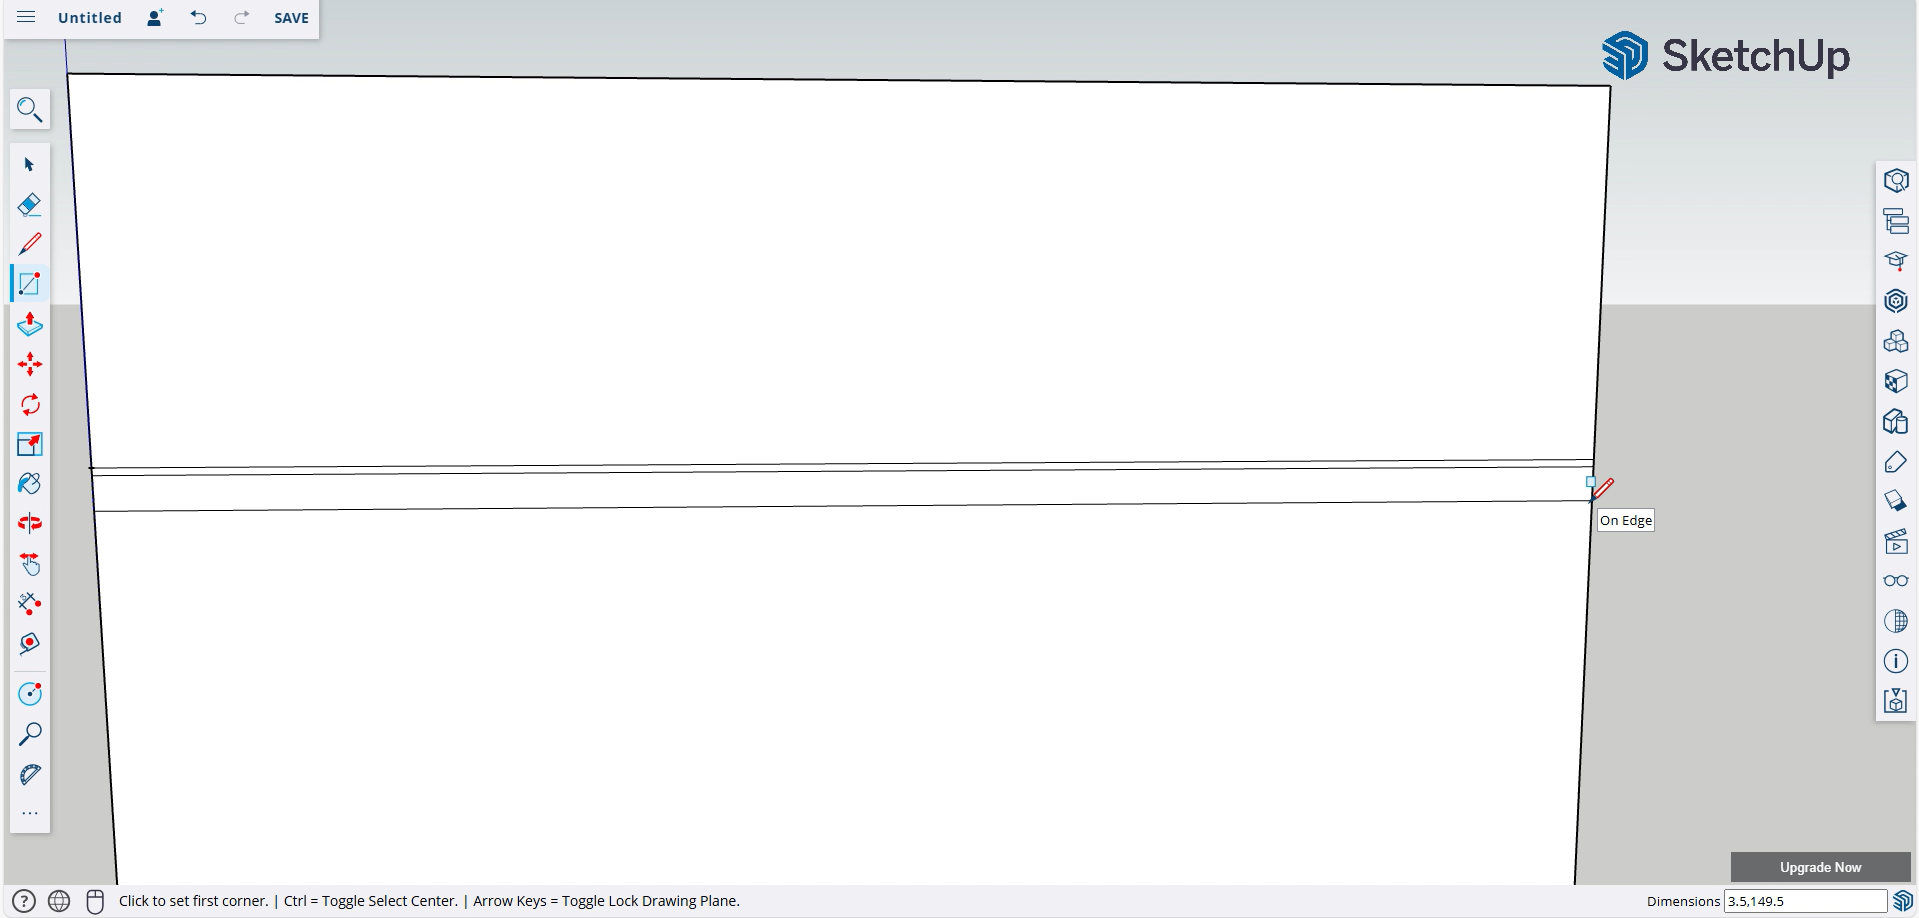
Again, grab the rectangle tool and add your horizontal board from the reference point, all the way across your wall. As always, make sure the width of your board matches the board you’ll be using.

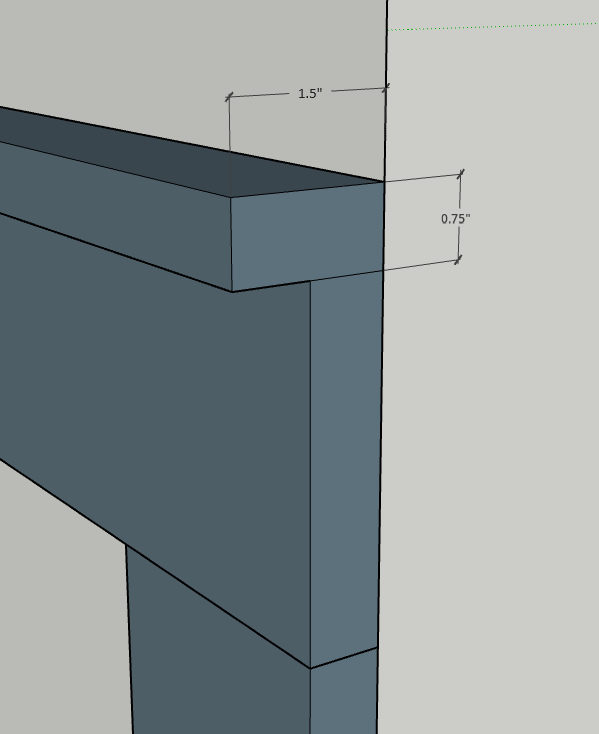
In my case, I’m placing a 1×2″ on the very top of the design to create a cap. My width for this board will then be 0.75″ (the actual measurement, not the nominal measurement). The board will stick out from the wall 1.5″, which is more than the rest of my design. Don’t worry about the depth of the boards right now, I’ll show you how to make them 3D before we measure!
Now I want to add my last horizontal board, right underneath that 1×2″ cap. Following the same process, use the bottom corner of your 1×2″ and stretch a rectangle out towards the opposite side of the wall.
Calculating your Batten Spacing
Before we start drawing the vertical battens in Sketchup, we need to narrow in on the number of battens we want to use. I typically like to start with battens against each edge of the wall, so that’s two right there. Then, I did some quick math and a tape measure to look at potential spacing. I divided the wall length (149.5″) by 5, 6 and 7 to see how large the spaces might be between the battens. Here’s the math:
149.5″ – (7 * 3.5″) = 125″ of wall space
125″ / 6 = 20.83″ width of each gap
You’re taking the length of the wall minus the width that would be taken up by 7 vertical batten boards. Then you divide that by 6 to get the gap width. If you’re using my same strategy of boards against both walls, you’ll always have one less gap than board.
There’s also a way to visualize this in SketchUp without building out an entire scenario, but it requires a little more imagination:
Once you’re done with adding your horizontal boards, click on the bottom line of one of those boards and right click. There is an option called “Divide” that will divide that line by evenly spaced segments.
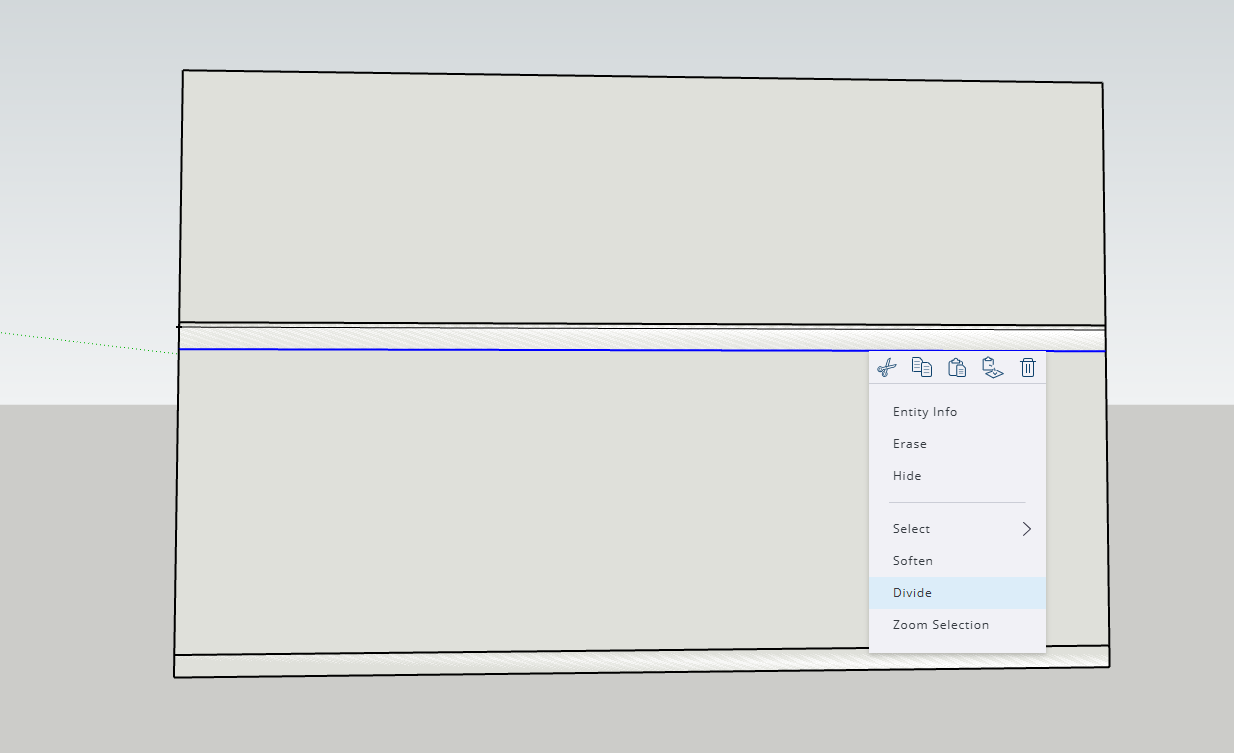
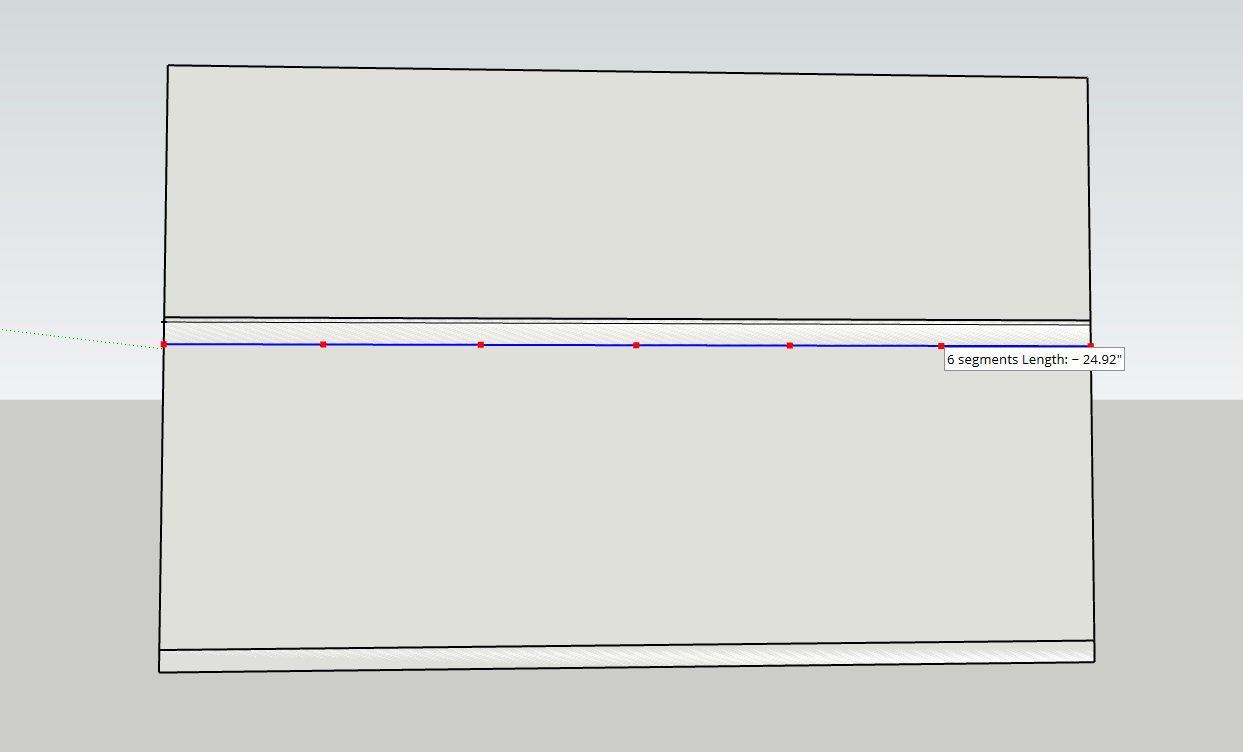
As you move your mouse out towards the end of the line, it will increase the number of segments.
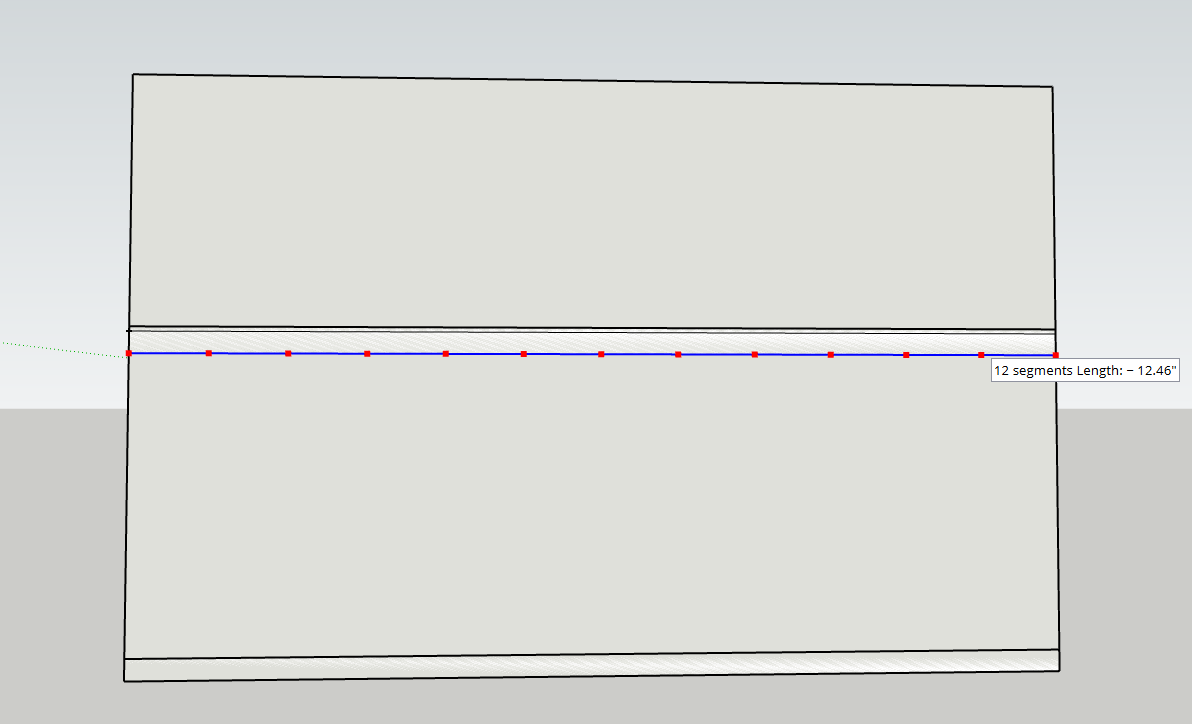
This approach may help you to narrow down your options if you have no idea where to start in terms of boards/gaps. This luckily leads us right into adding the battens into your design!
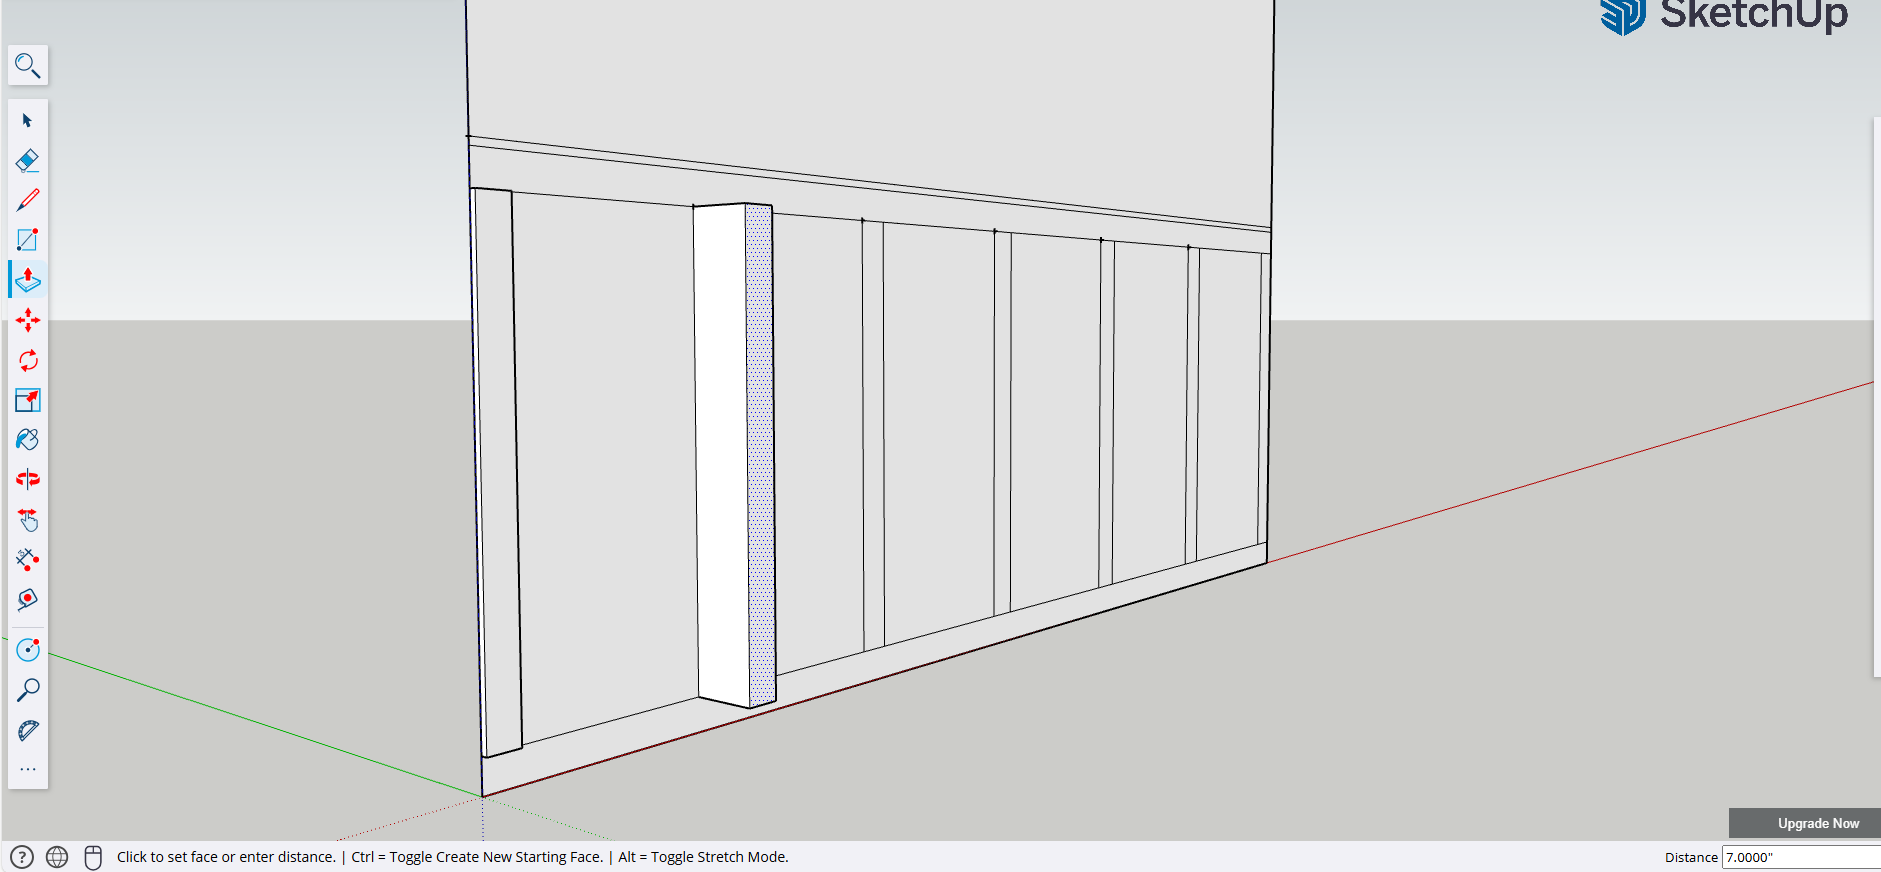
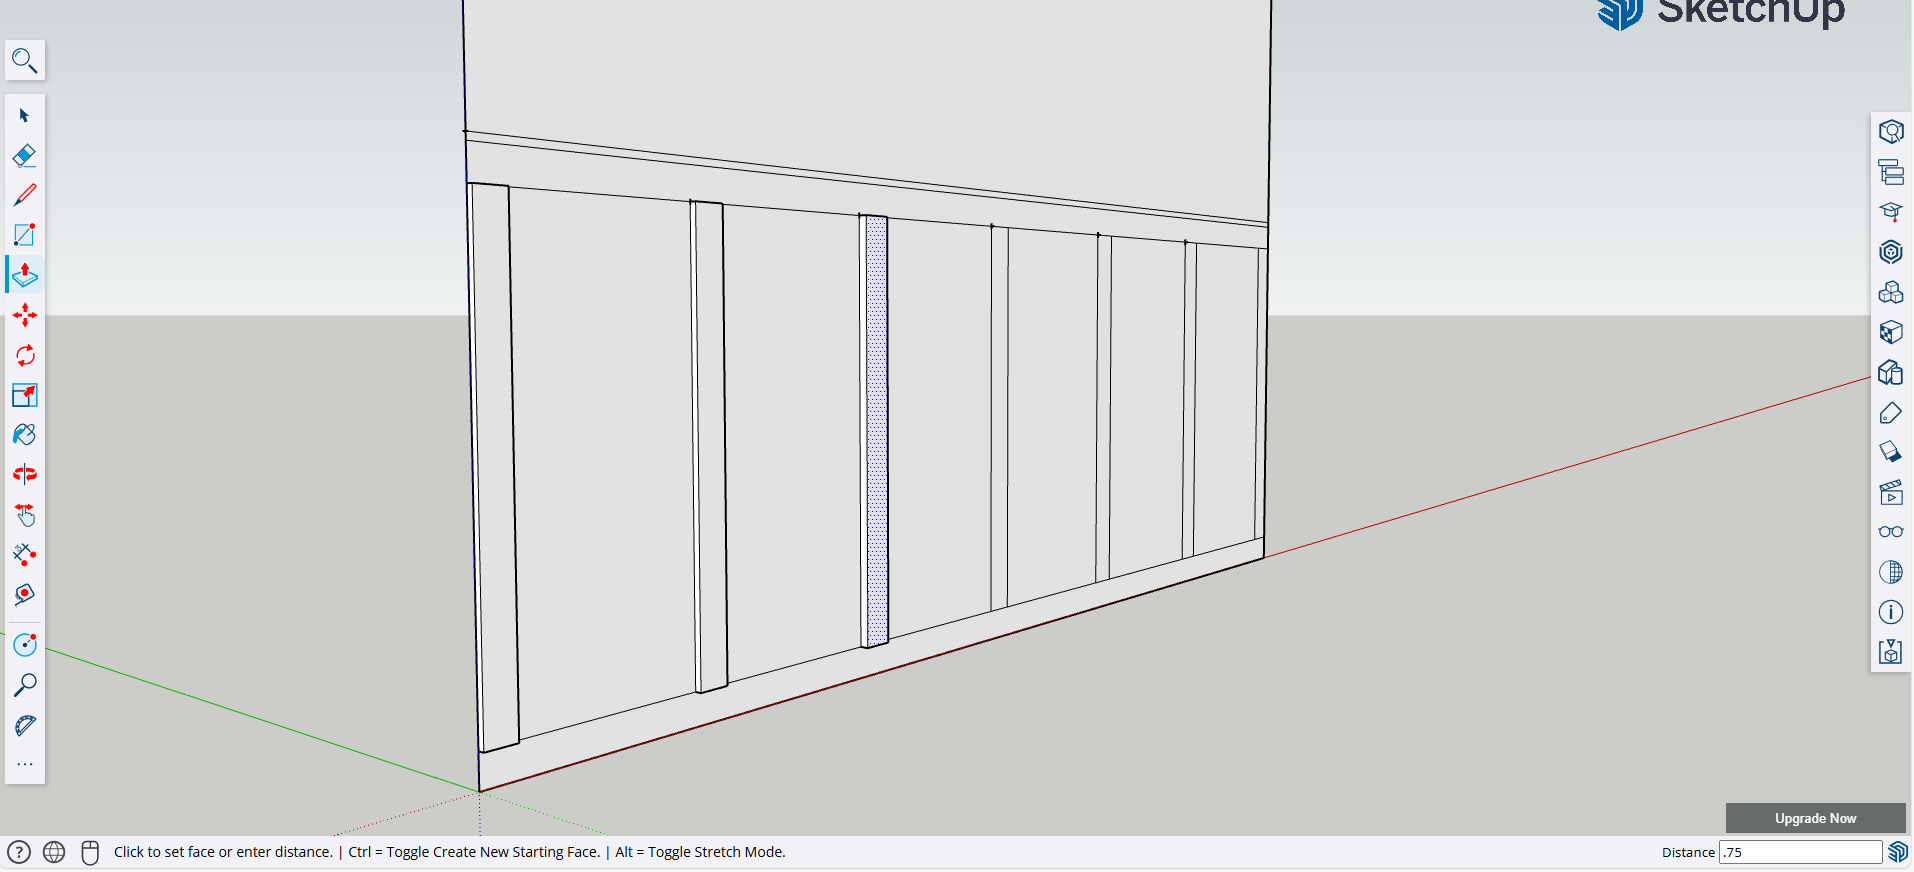
Adding the battens! (the vertical pieces)
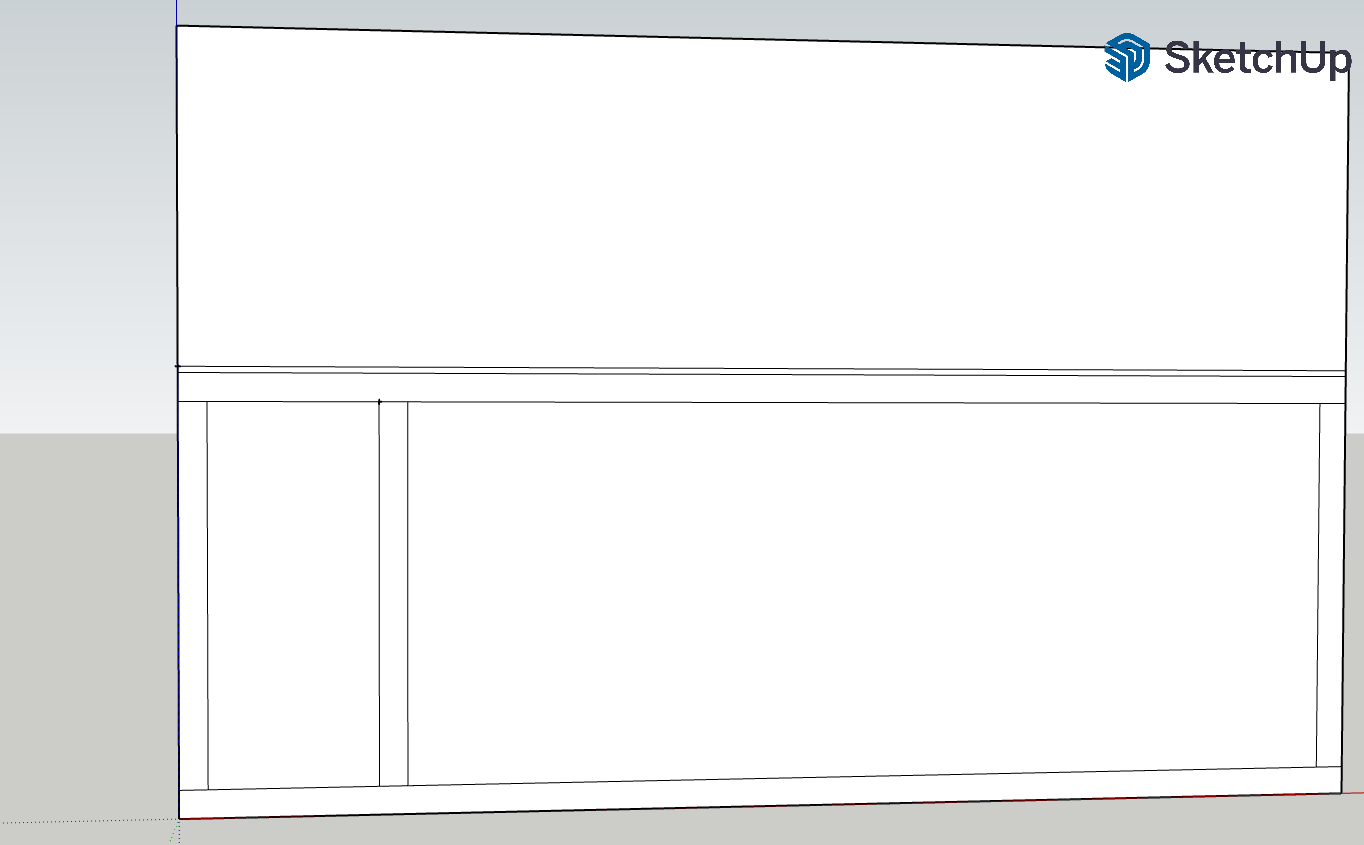
First, draw your outside pieces of batten on your wall using the rectangle tool.
Next, use the measuring tape tool to measure over and place a reference point at the gap width you calculated in the last step. My gaps were 20.83″.
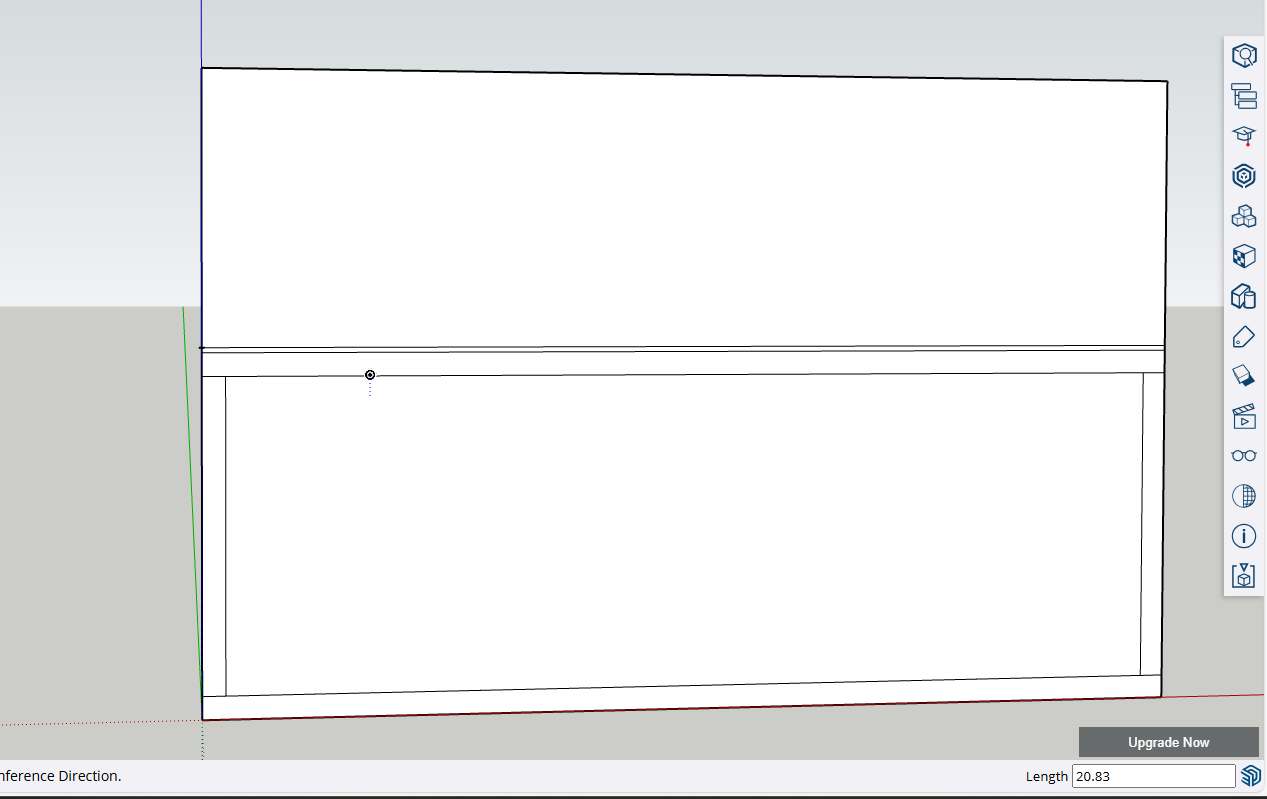
Once you have the gap and reference point, build your next batten off that reference point. You can see my reference point in the upper left-hand corner of my second batten.
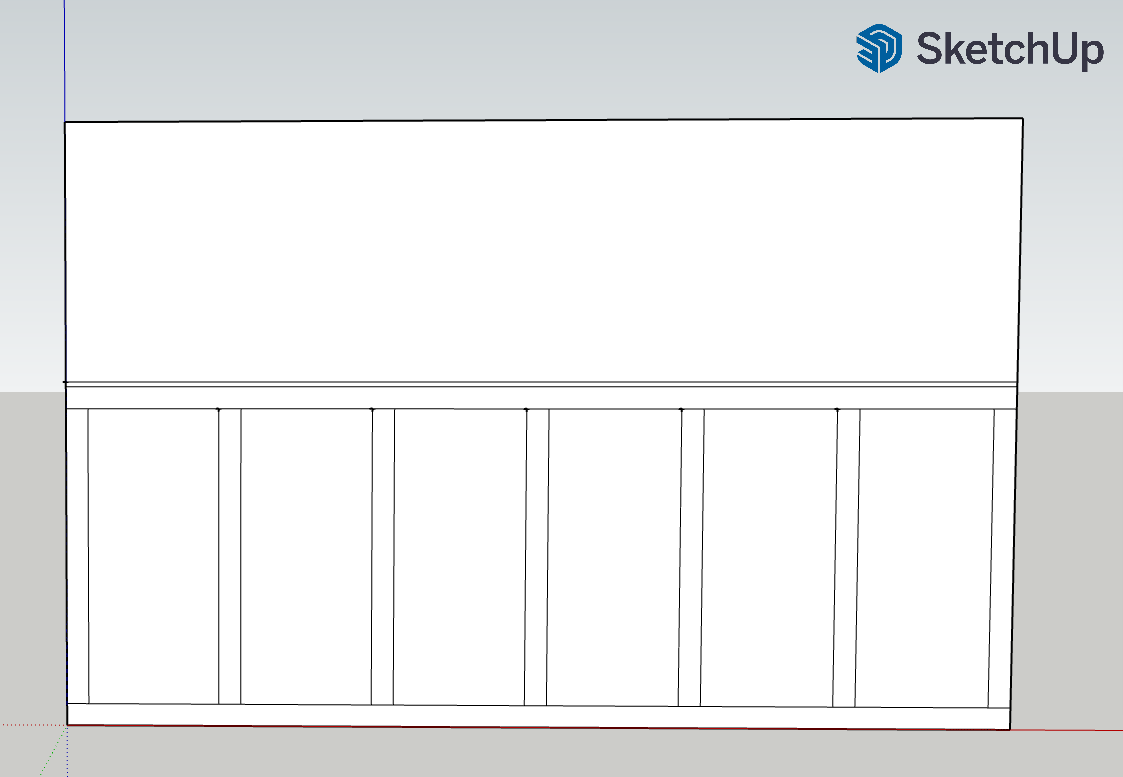
Now, repeat this process until all your battens are built in the model. There are shortcuts to this process, but again, I’m just showing you the most basic way to complete this task. To learn how to create a component in SketchUp and then copy/paste that component, look to the experts on YouTube.
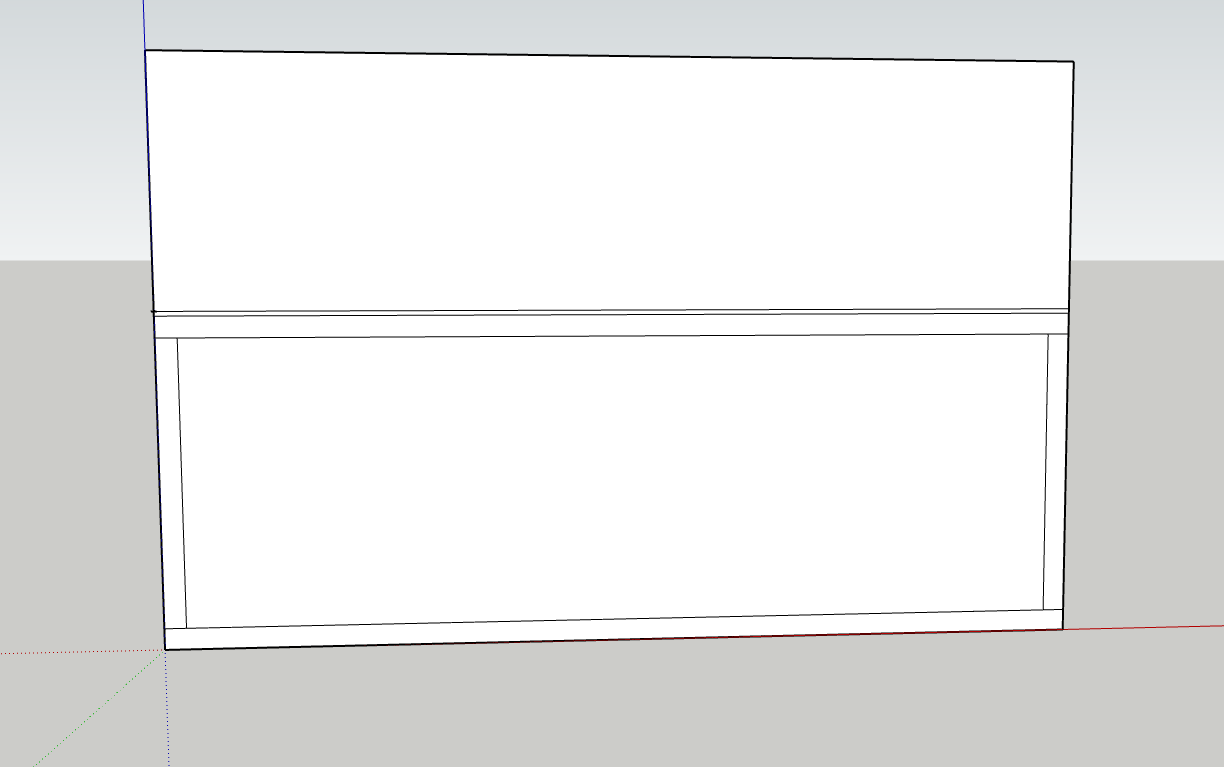
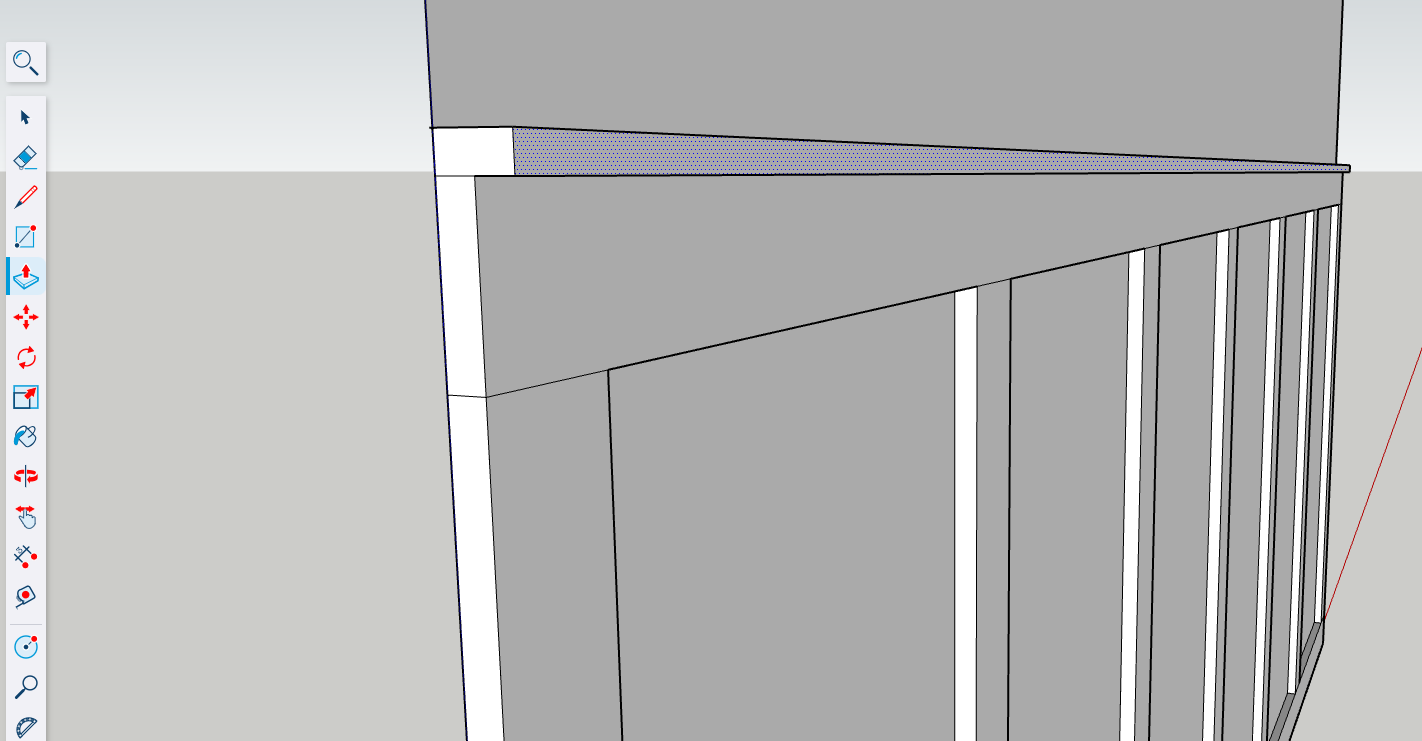
How to make your design 3D and add your custom paint color
Now that your design is built, you might be wondering how to make it 3D and add color. I love this part because it’s relatively simple and makes your model look realistic!
To make your board 3D, use the push/pull tool.
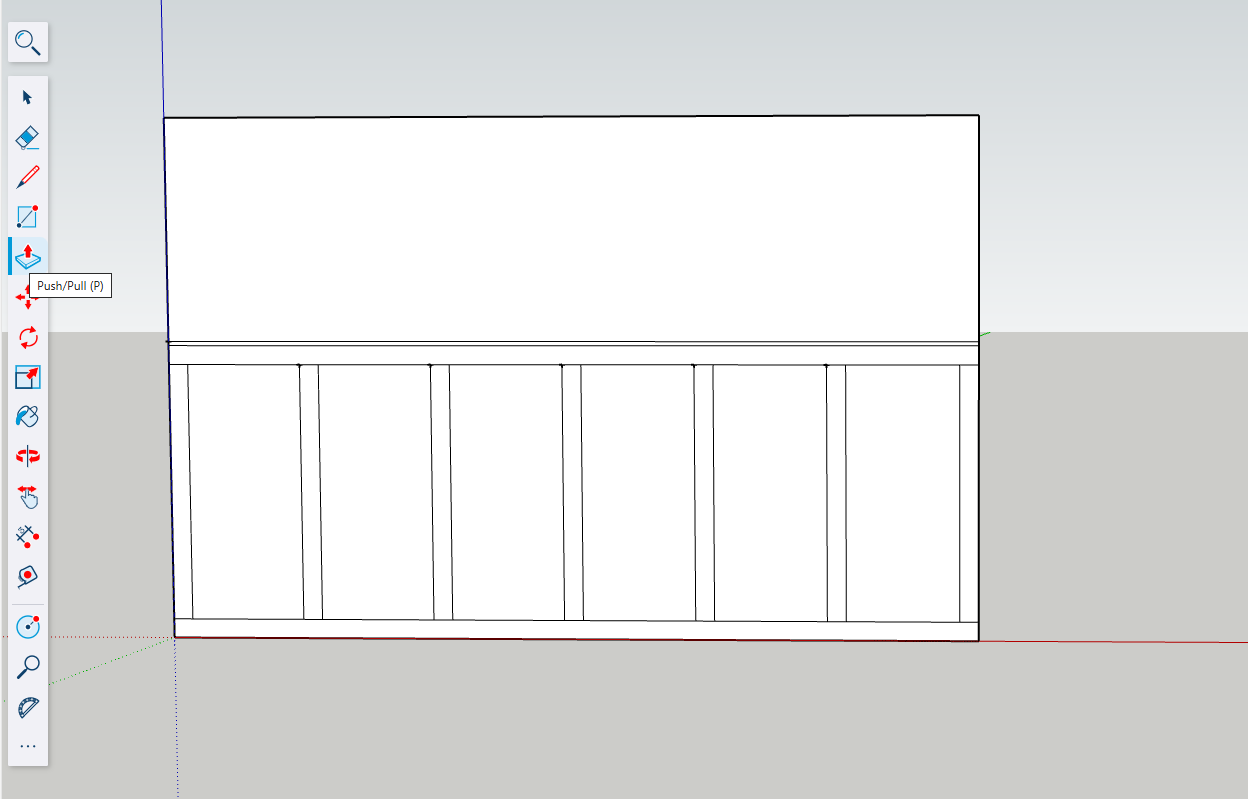
Click in the middle of any of your boards and it should highlight the inside plane of the board. The tool will automatically want to make this piece 3D, so it may suddenly stick out really far (or push out the back of the wall in your design)! Move your mouse to make sure the board is being pushed/pulled in the right direction. Then, just type in the thickness of your board (probably 0.75″ if you’re using a 1″ board) and press enter.
Repeat this step for all of your boards.
For the top board, if you’re following my same design, you’ll just alter your measurement for board depth to be 1.5″ (for a 1×2″ board). See how this makes a cap at the top of your design?
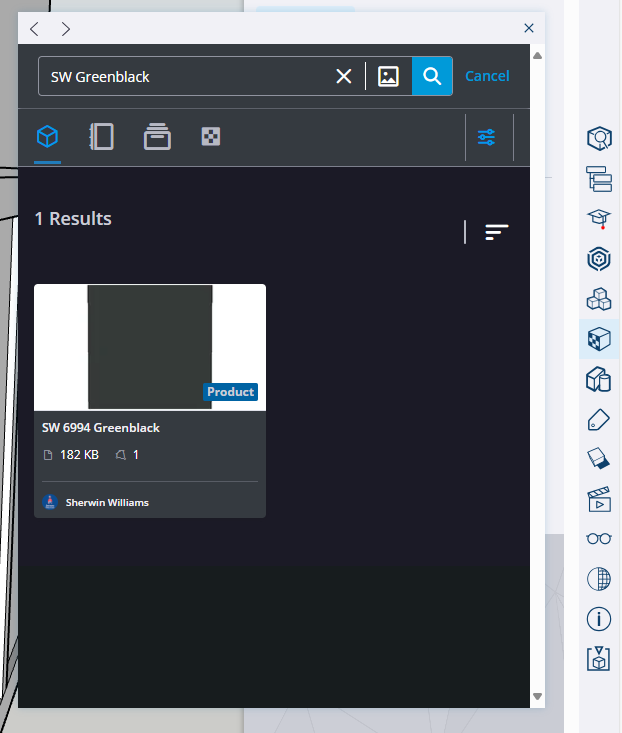
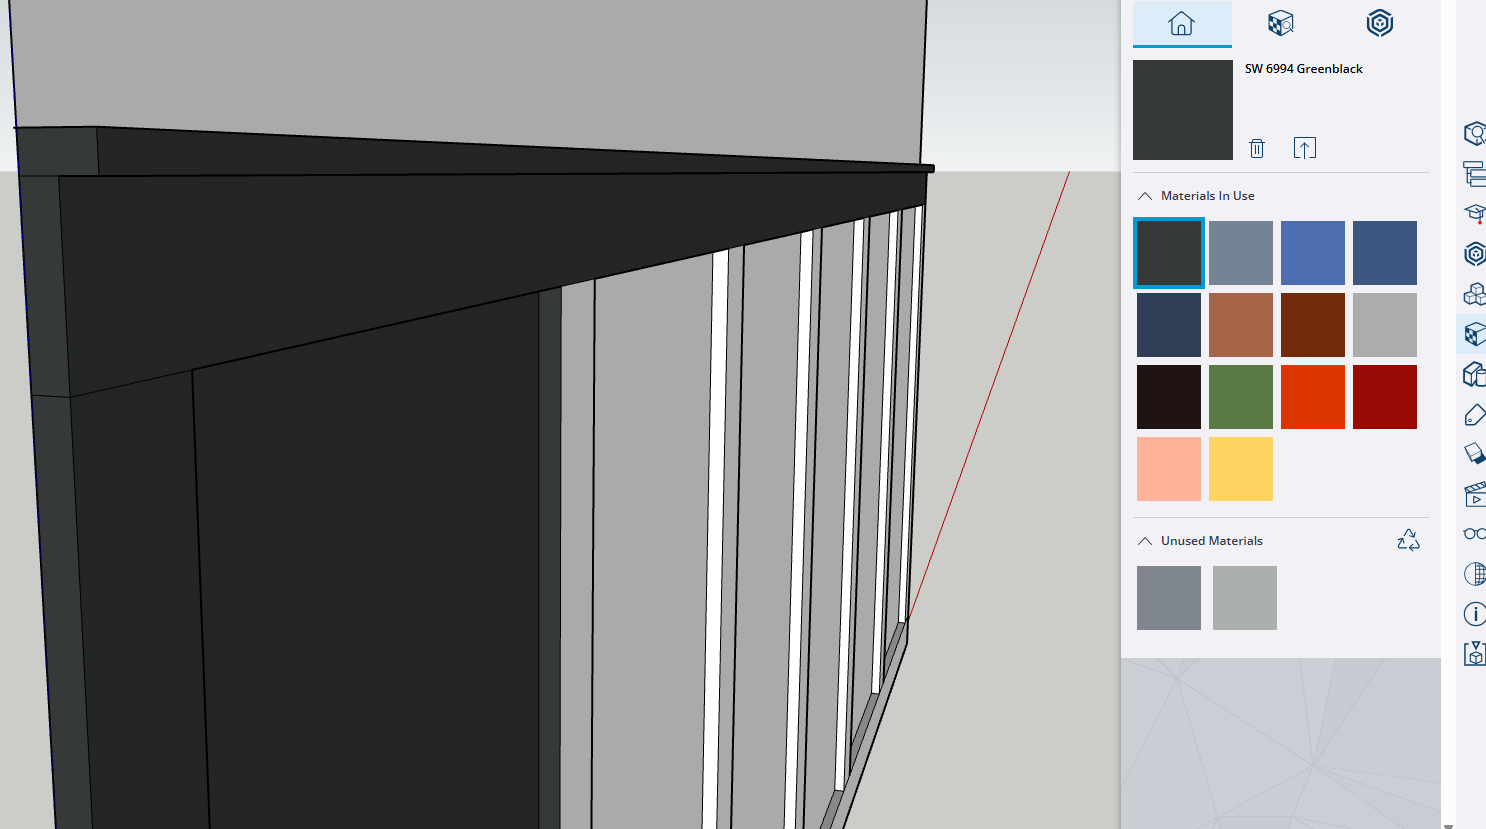
To add paint, you can choose a color from the materials menu or download a custom color from the 3D warehouse. I’ve found that most Sherwin William paint colors are uploaded in the 3D warehouse.
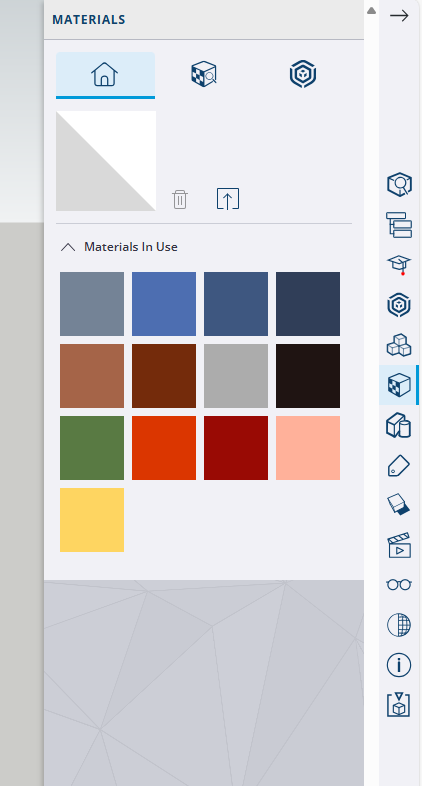
To apply the color to your design, just click on all the panels you want to “paint”!
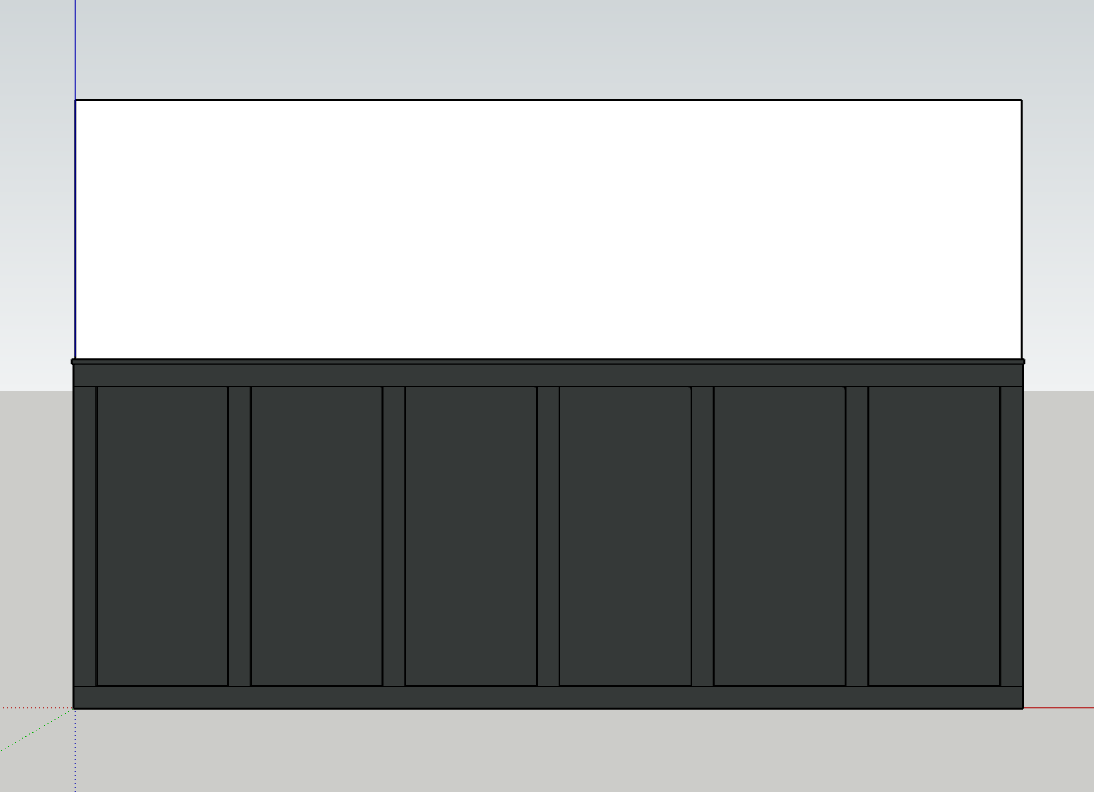
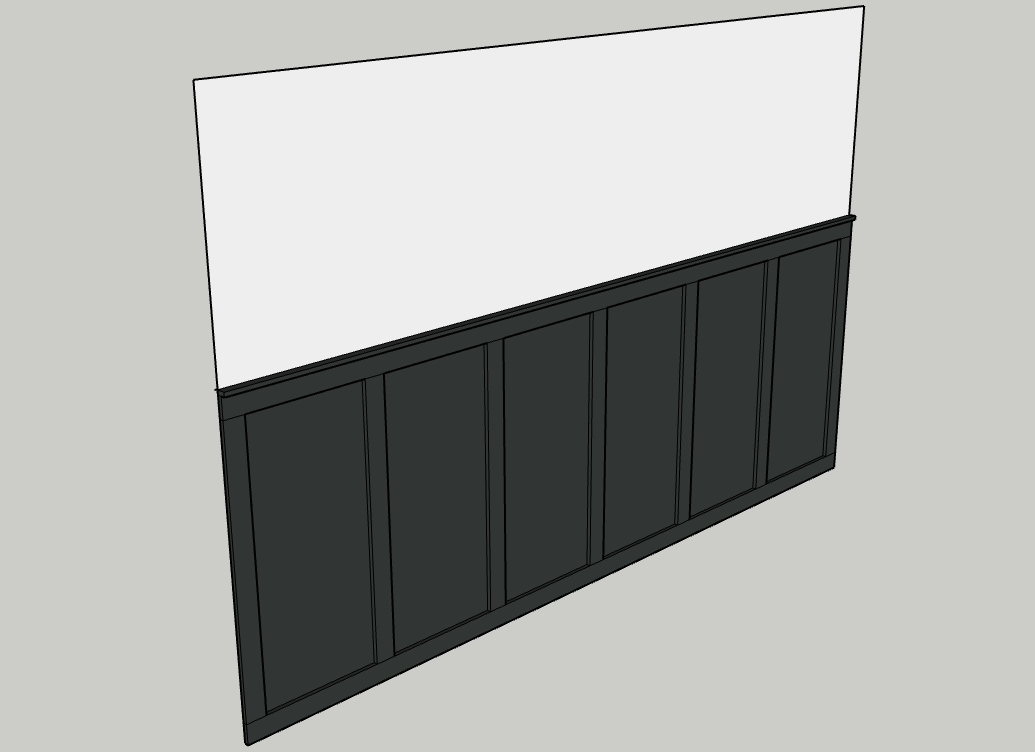
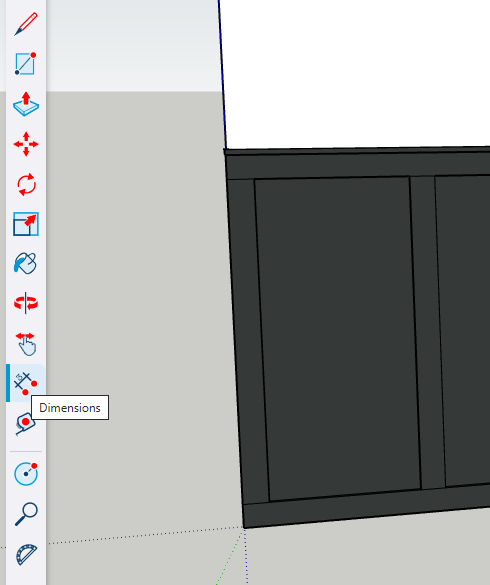
How to measure your design for the real thing
To measure your design to approximate the amount of wood you’ll need, use the dimensions tool. Click on two corners of a single board then drag your cursor out a small way, and it’ll show you the length of your board.
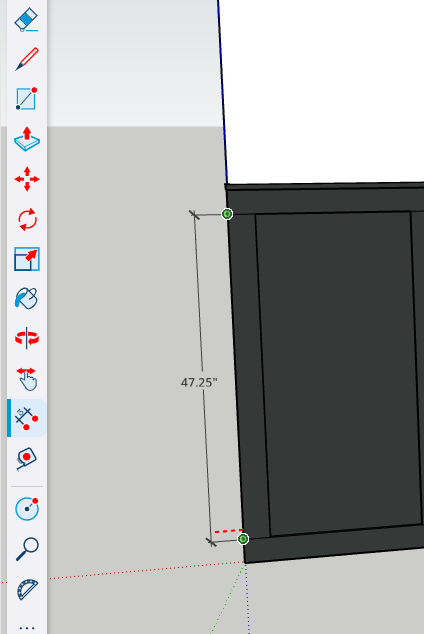
Repeat this until you’ve dimensioned all the boards needed. This design is pretty easy because you really only need to measure one board- the vertical battens. The horizontal boards all span the entire length of the wall, which we’ve already measured.
Now you’ll be able to calculate your approximate board needs. I say approximate because you should always confirm measurements as you’re building your wall. Designs can work out perfectly on paper, but in real life, walls aren’t perfectly straight.
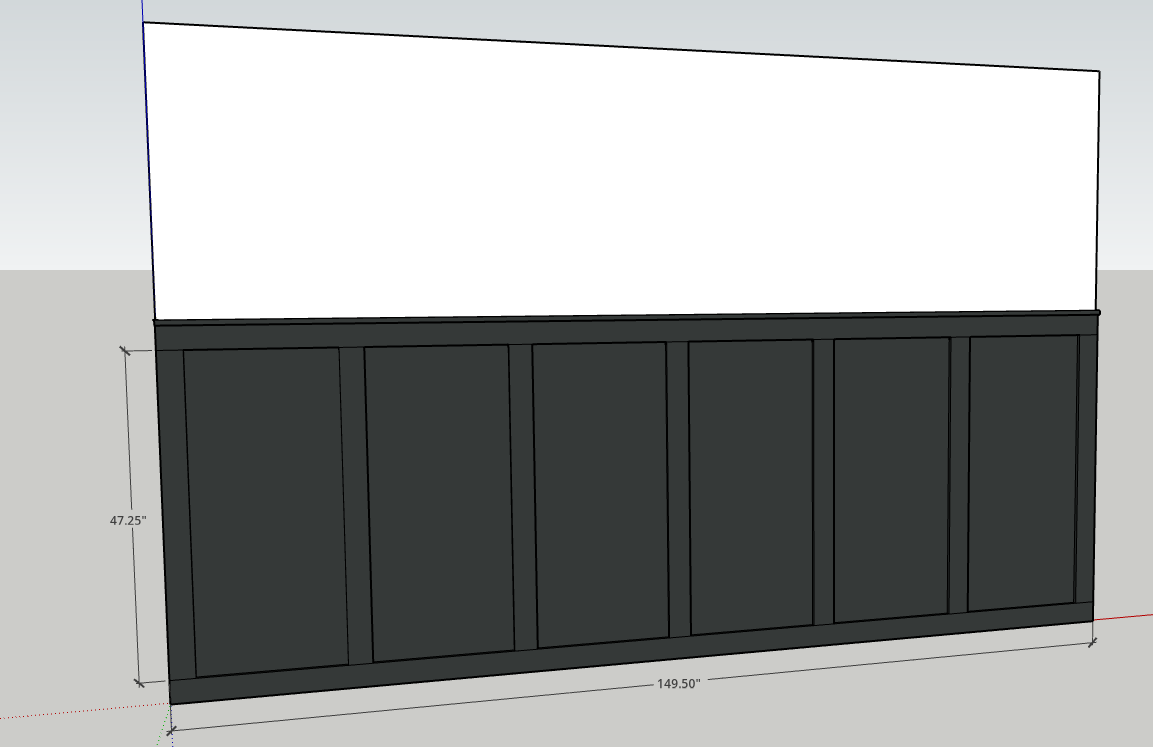
Here are the board needs for my design:
1×4″
- 7 @ 47.25″
- 2 @ 149.5″
1×2″
- 1 @ 149.5″
For the 149.5″ boards, these are longer than the standard wood dimensions you can buy in store. Divide that total length by the length of wood you can buy, and you’ll get the number of pieces you’ll need to buy for those long boards.
Calculation for the 1×2″: 149.5″ / 96 = 1.56 (2 boards, rounding up)
Calculation for the 1×4″: 299″ / 96″ = 3.11 (4 boards, rounding up)
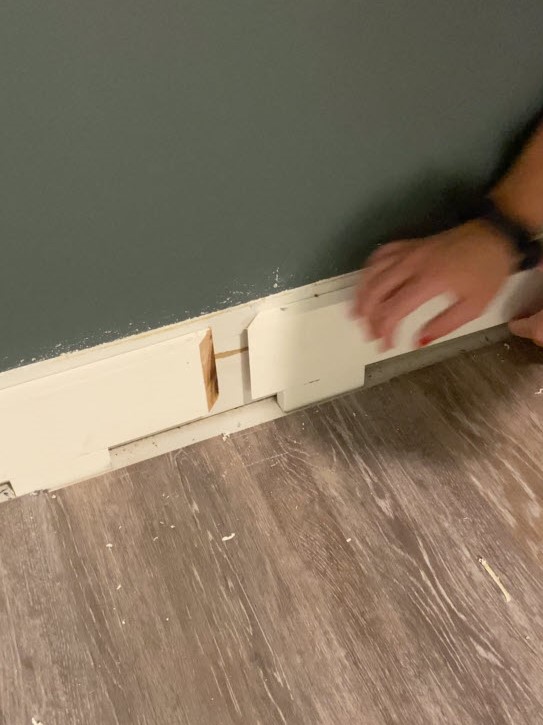
To connect these pieces, cut them at opposing 45″ degree bevels, then attach them to the wall with the joint as tight as possible. Once you wood fill, sand and paint, it will look seamless. Look how it already starts to disappear after nailing it in during my Board & Batten install:
If you have any questions about designing your own accent wall in SketchUp, leave me a comment below!
Want to keep up with my newest projects? Come hang out on my social media accounts, below!