Turn your Shelves into Drawers with this Easy DIY
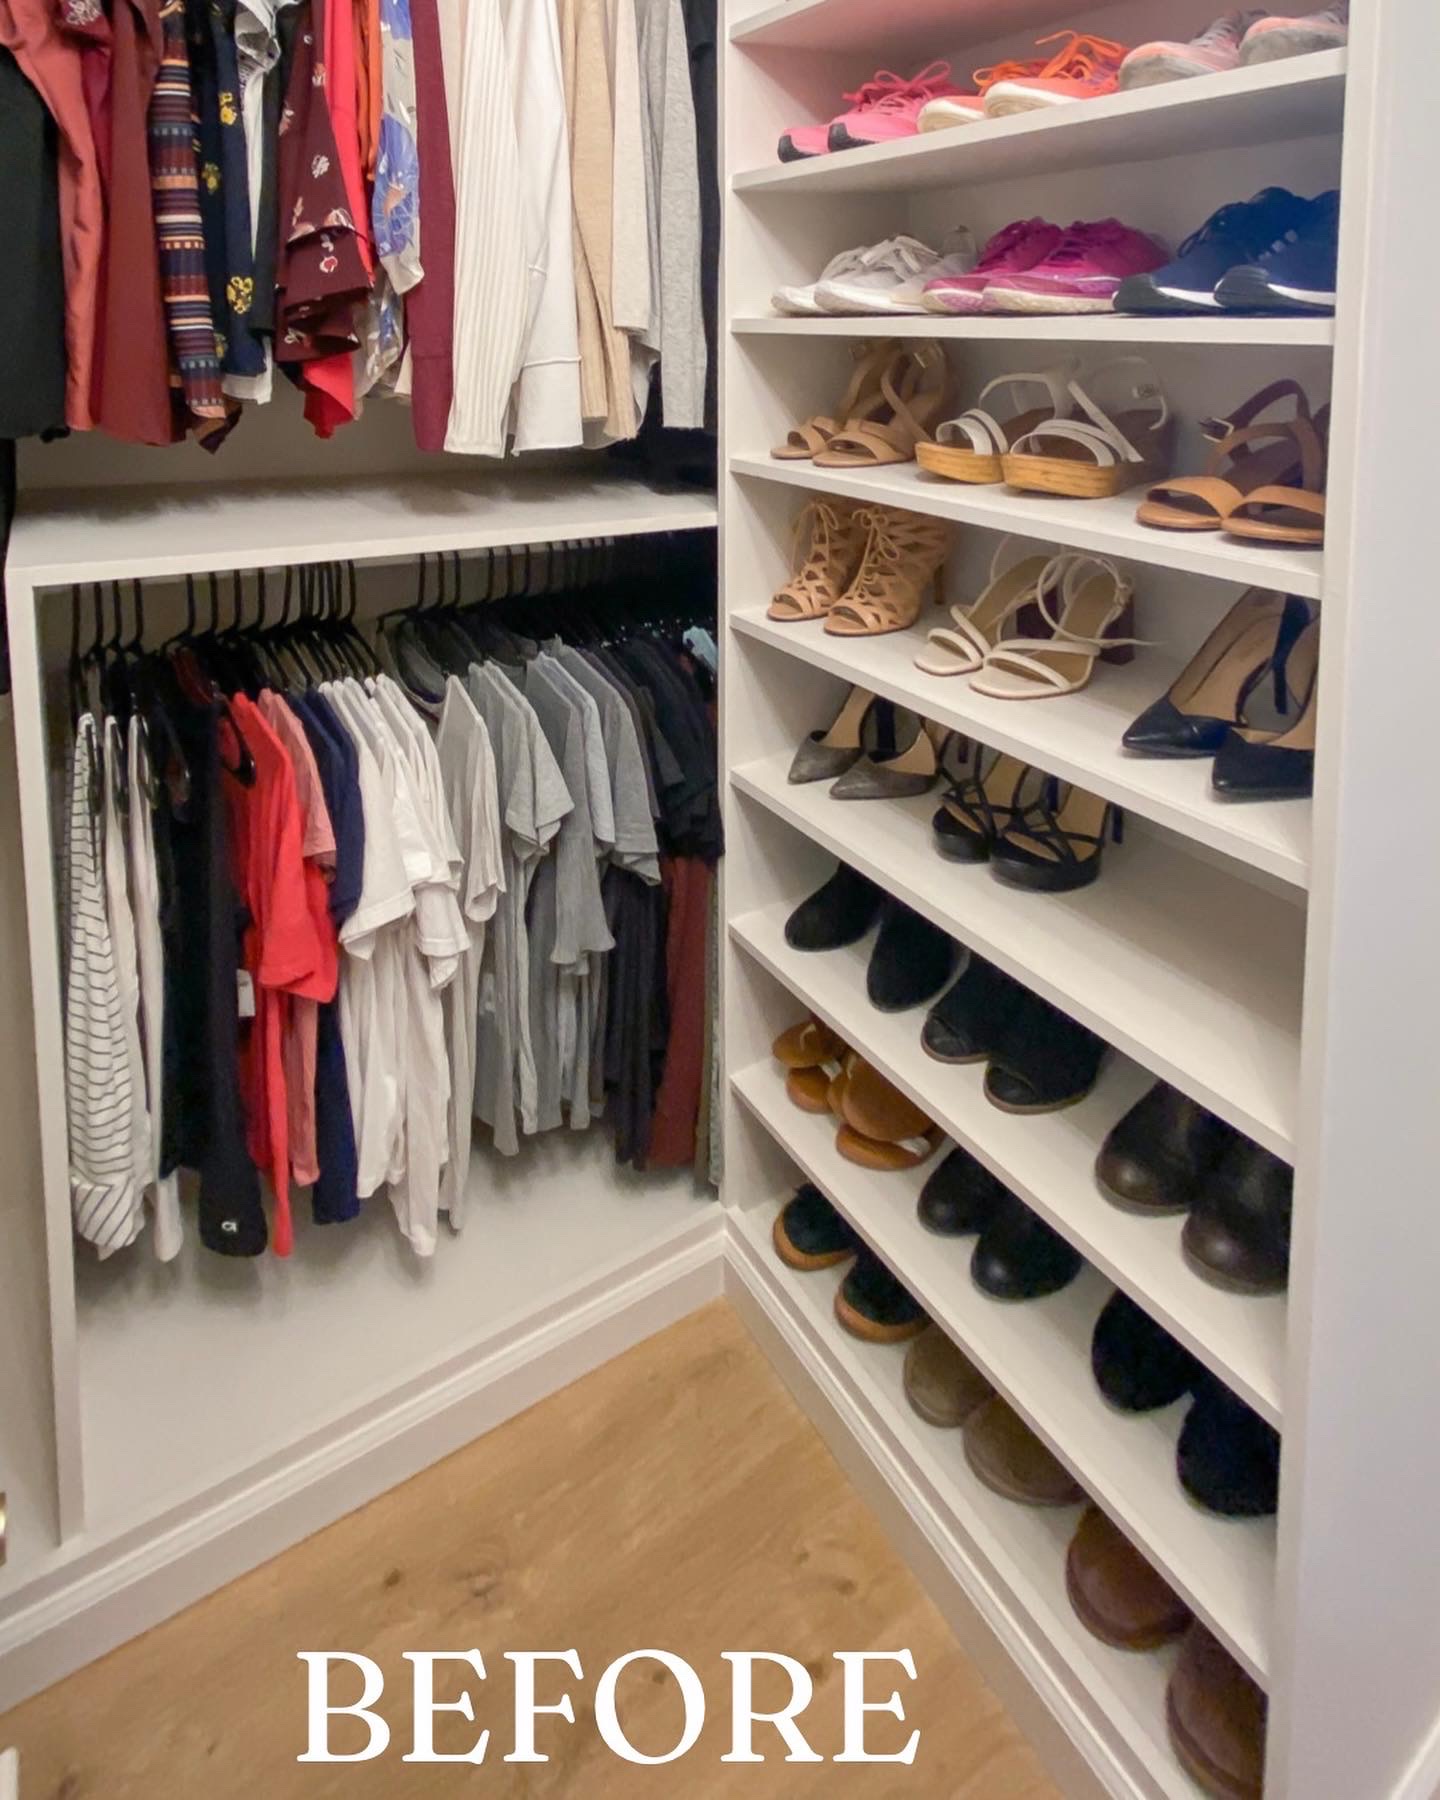
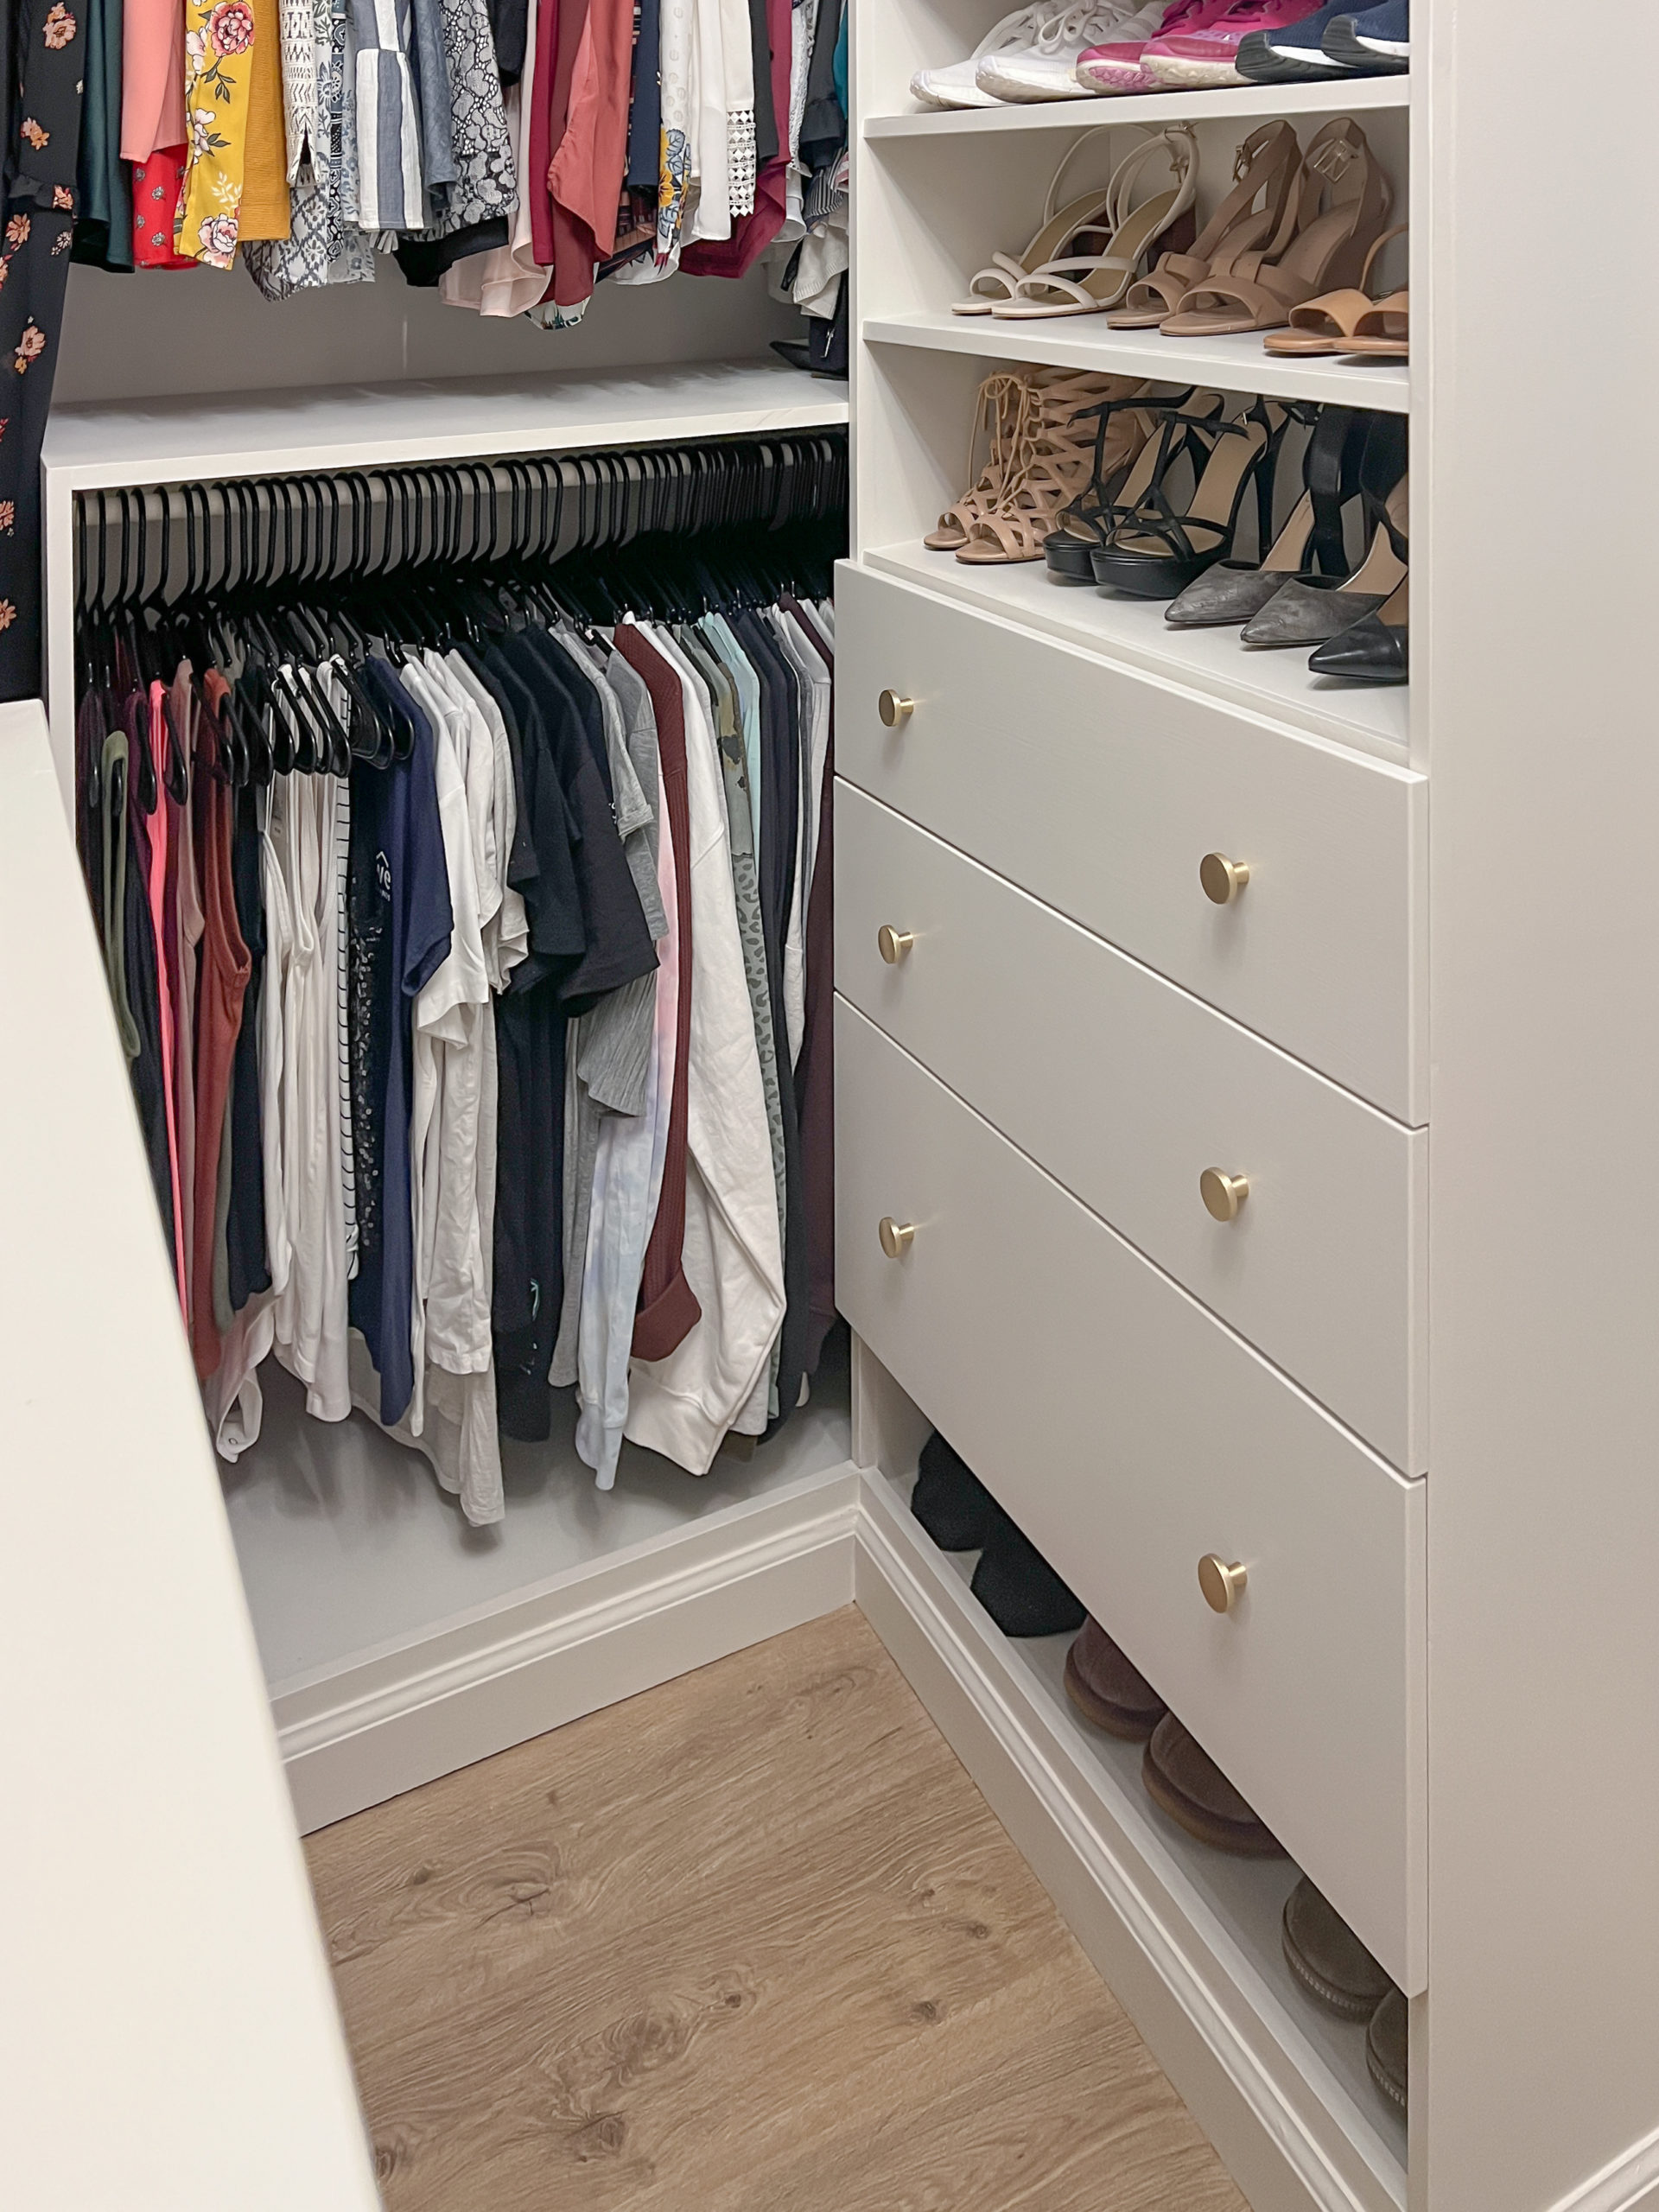
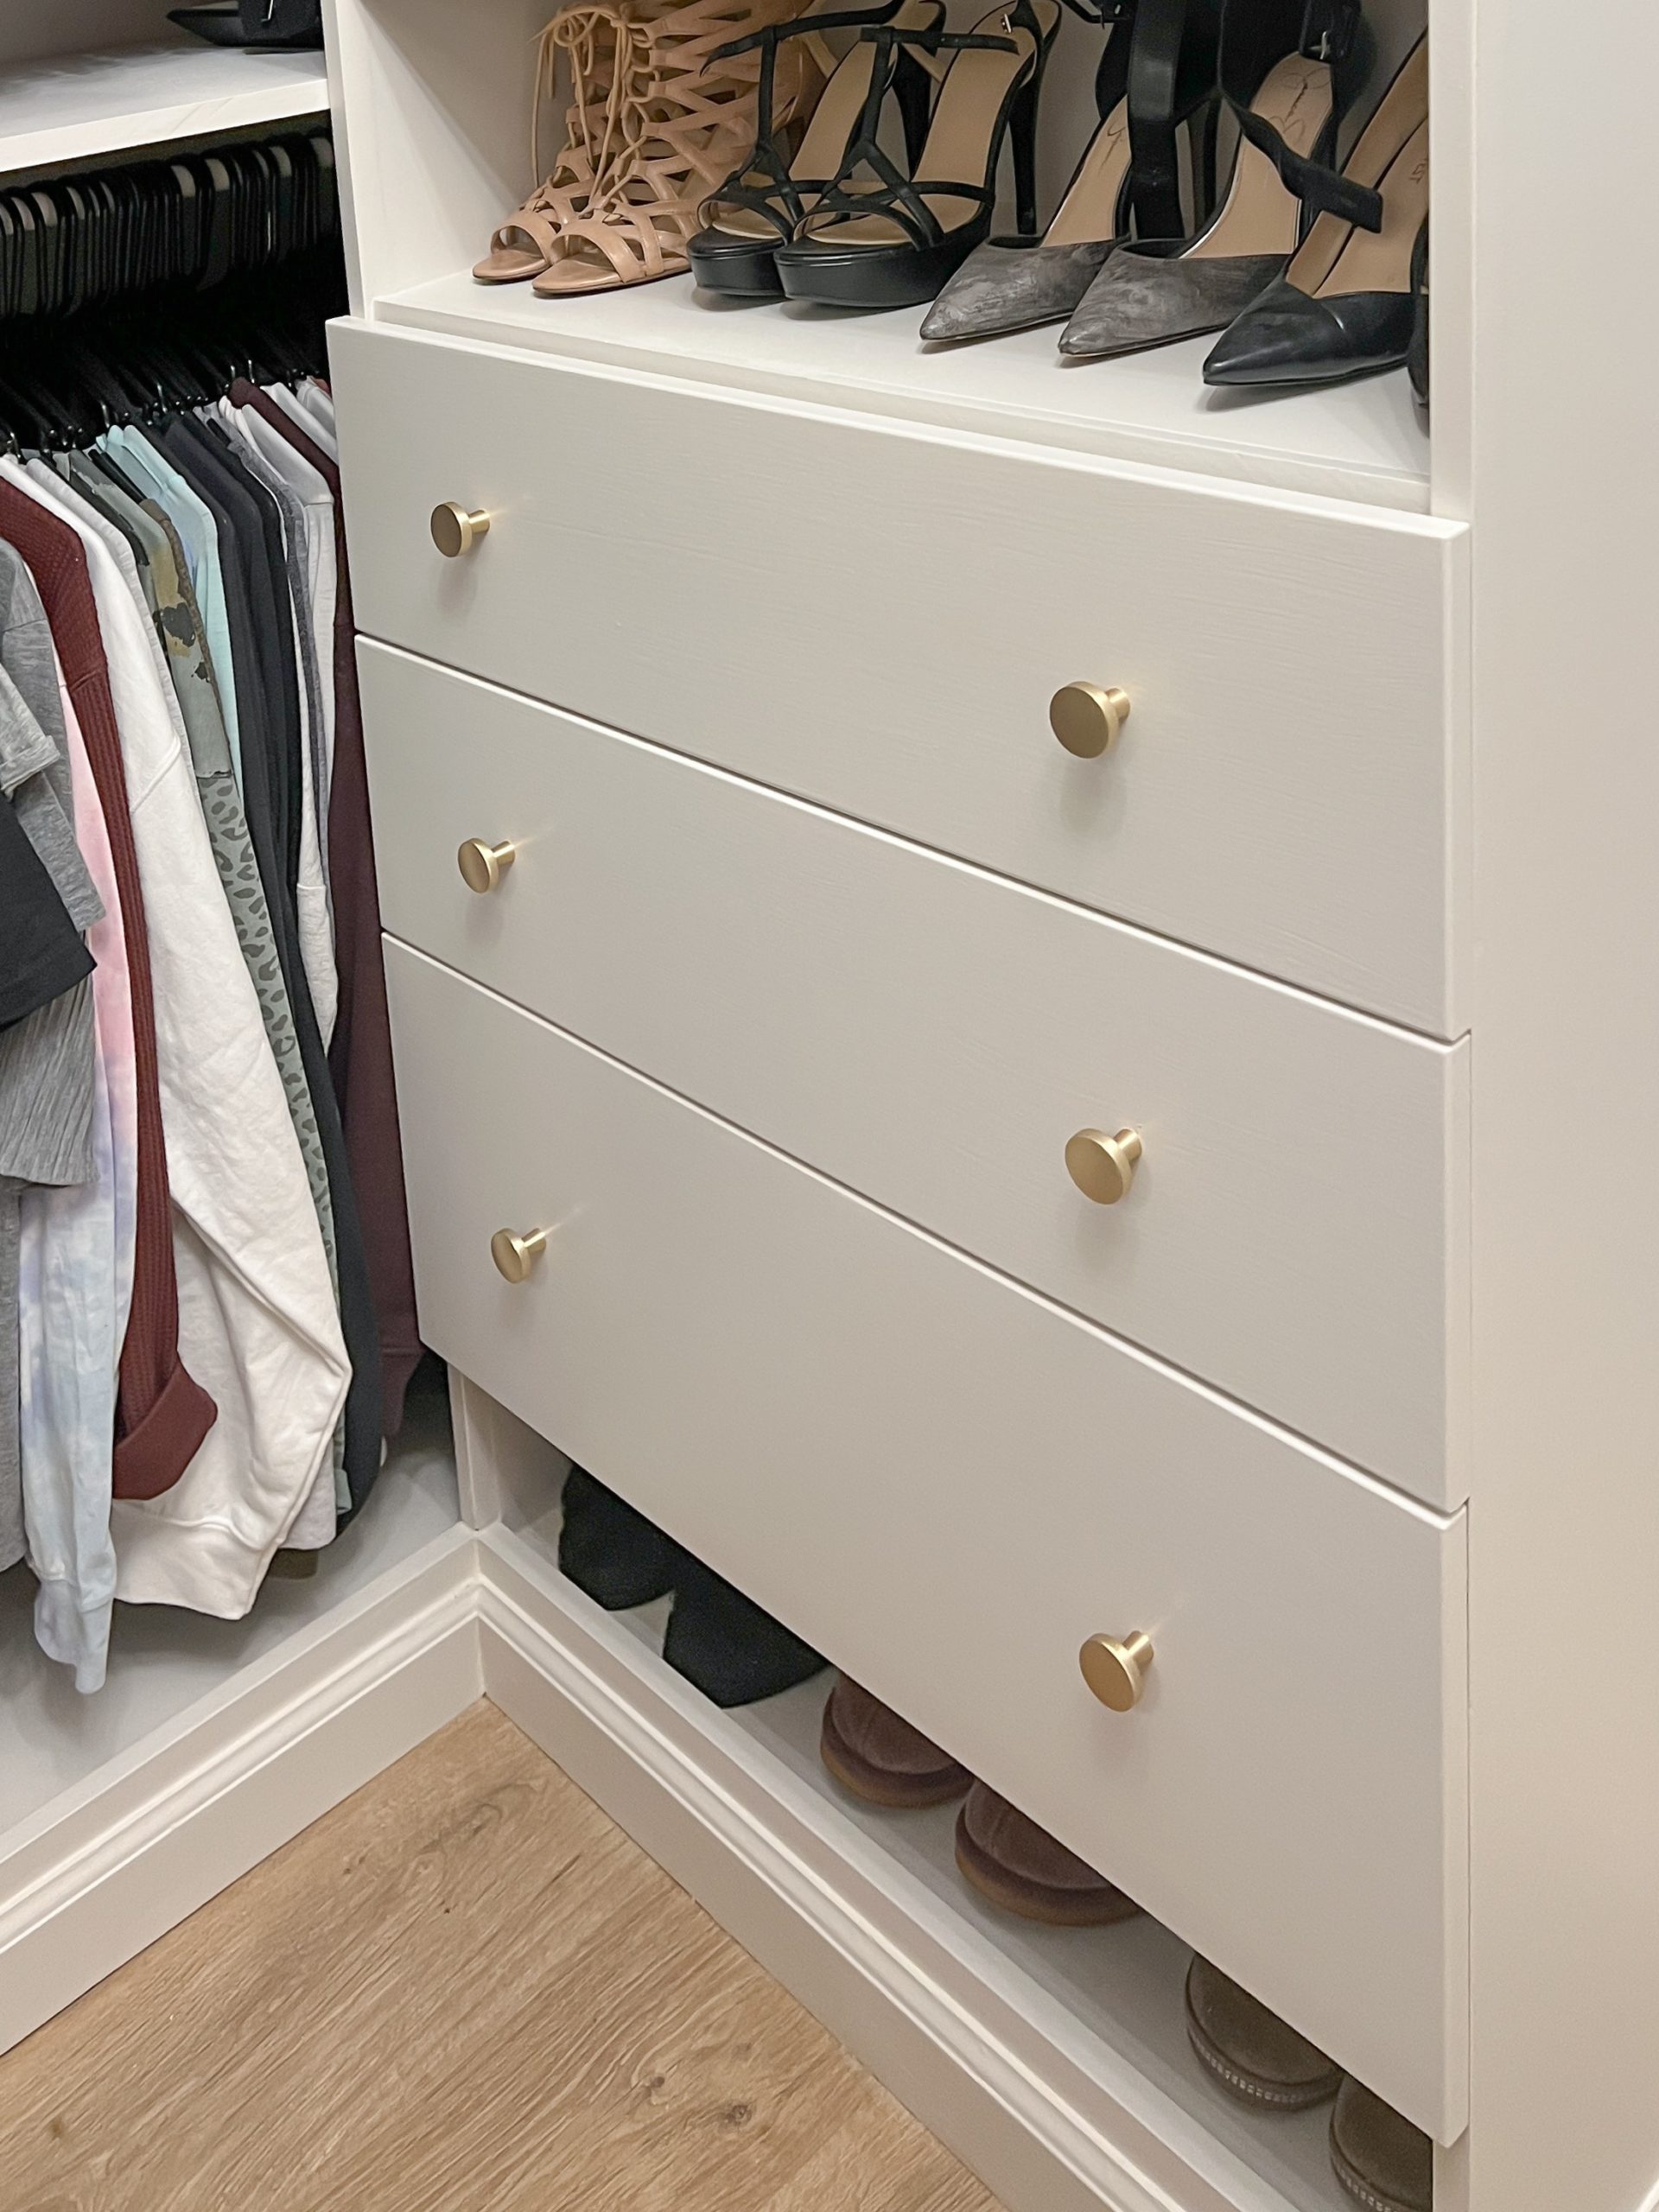
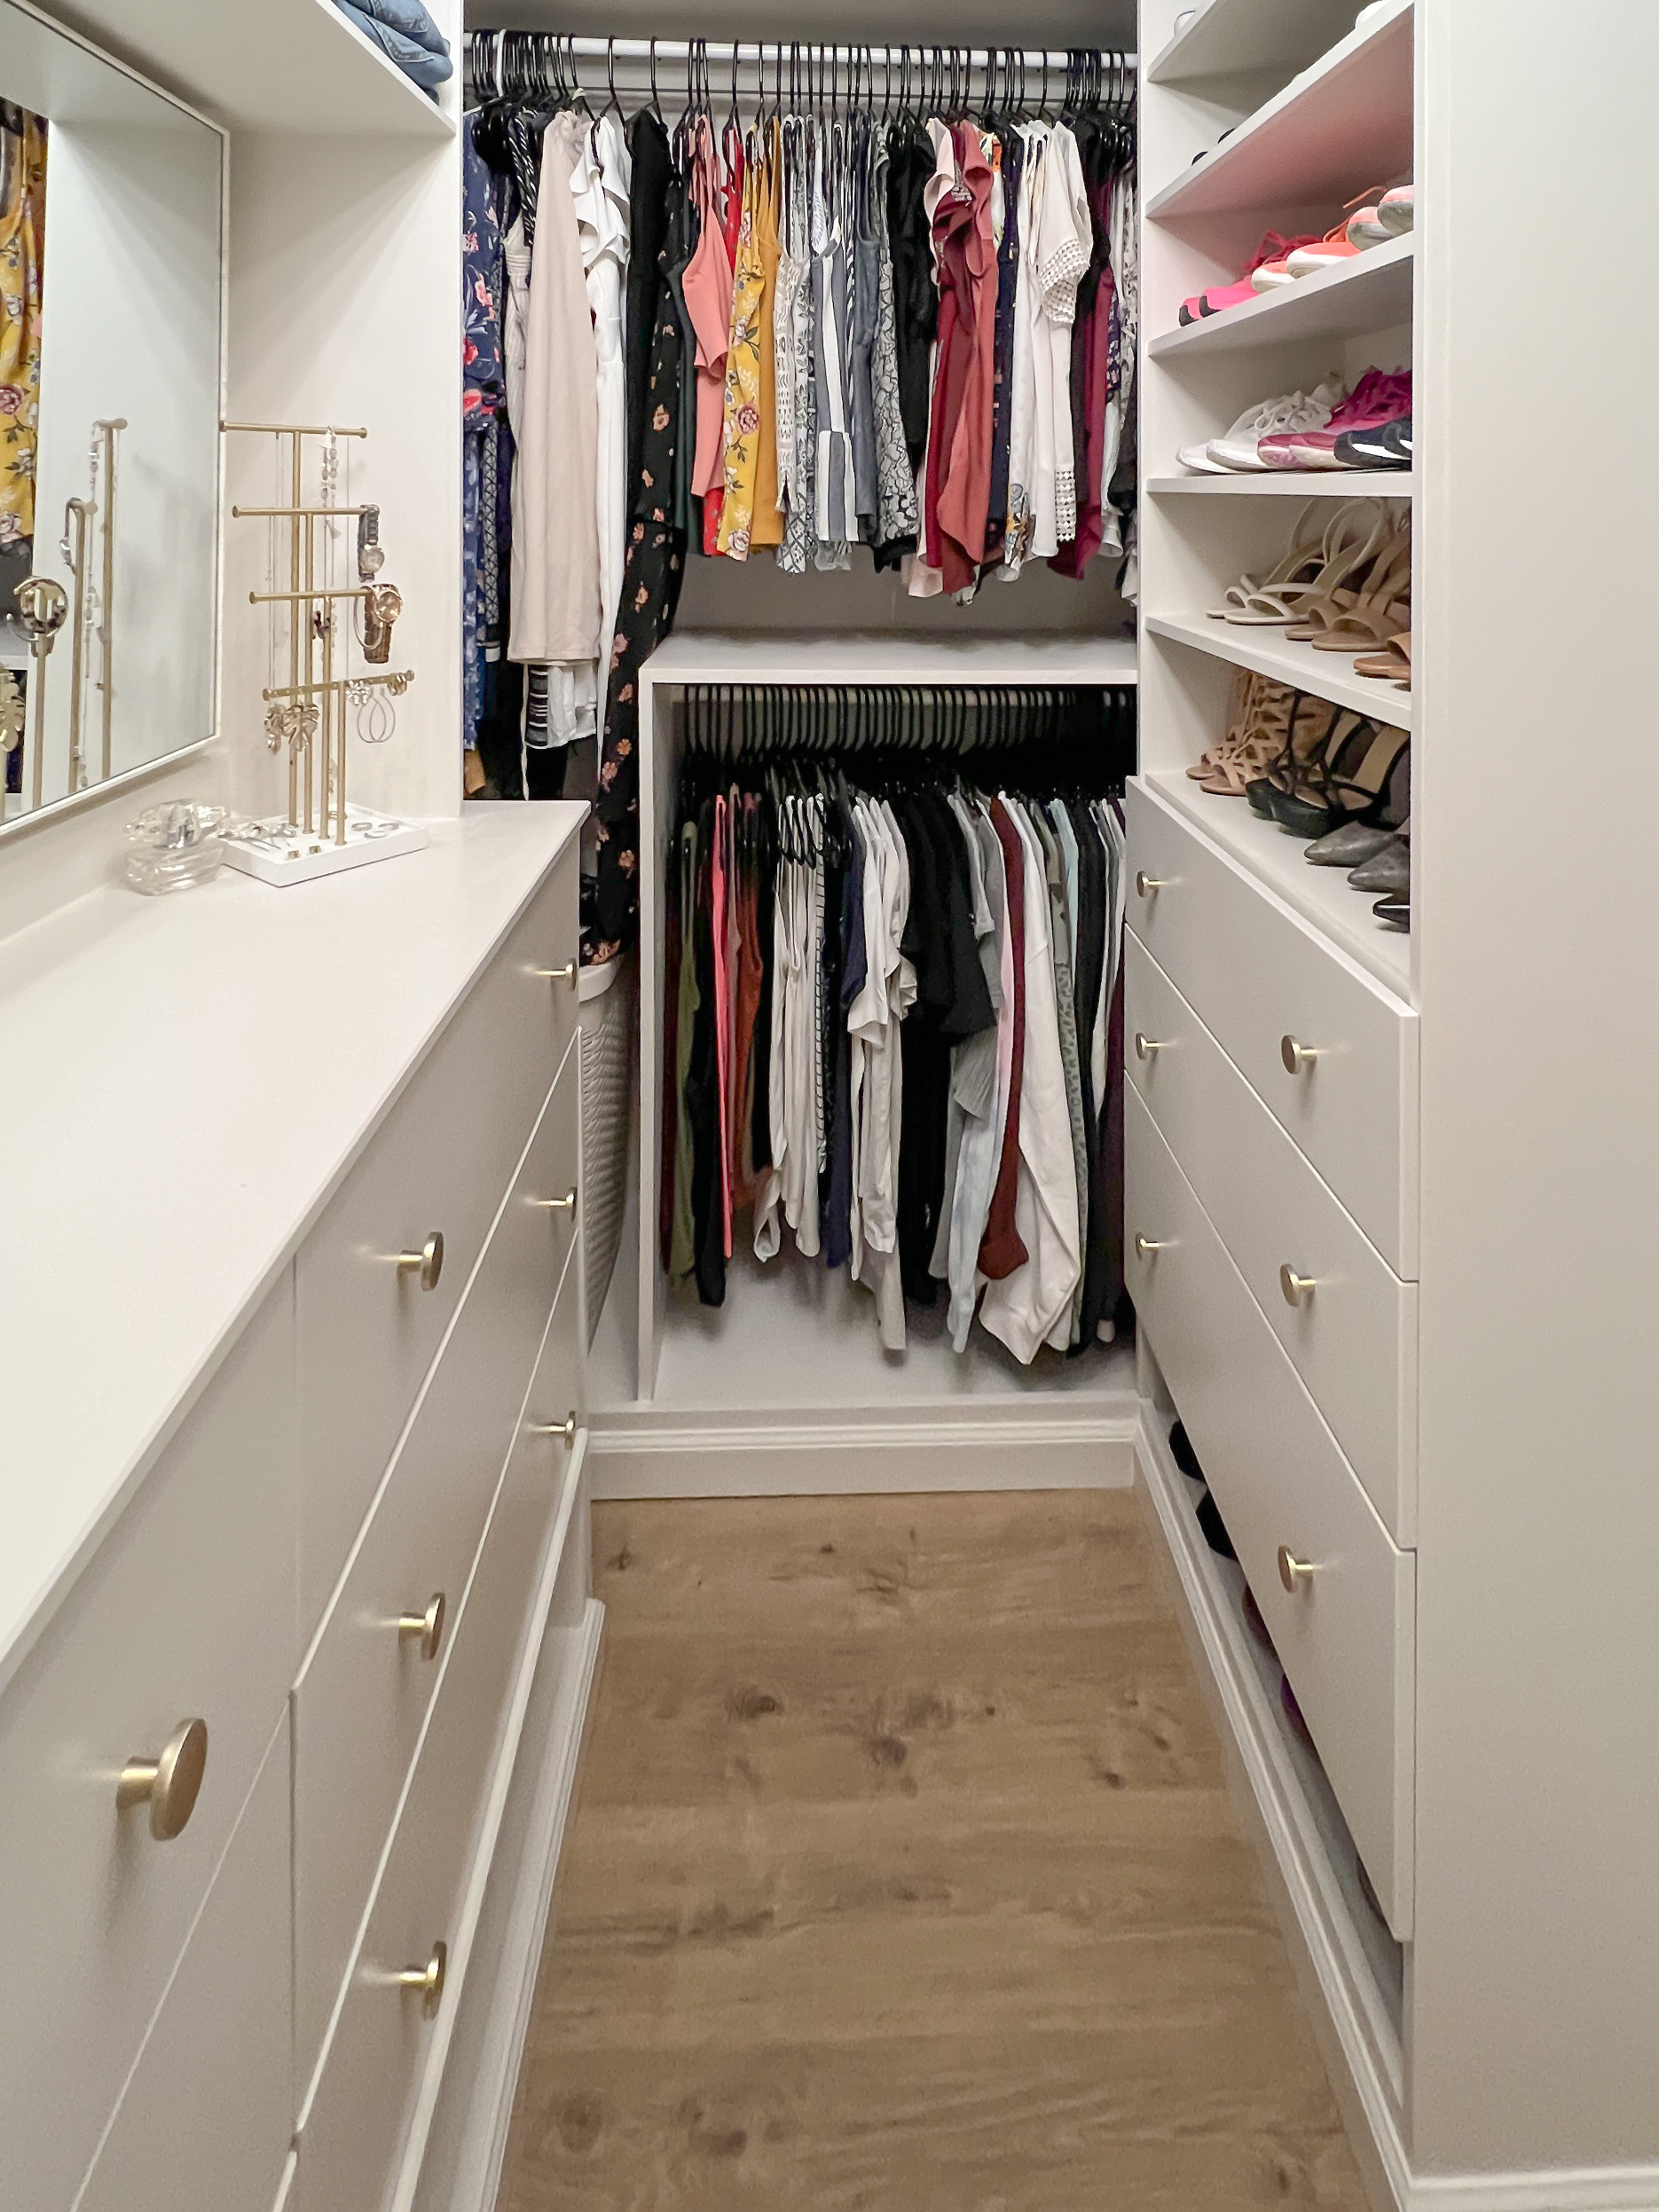
It’s a pretty simple process to convert an existing cabinet or shelf into a much more functional pull out drawer. All you’ll need is drawer slides, a little bit of wood for boxing in the drawer, and some basic power tools. Below I share how I converted three of the shoe shelves in my DIY built in closet into drawers!
(This post contains affiliate links which means I receive a small compensation at no cost to you. As an Amazon Associate I earn from qualifying purchases. You can read more about it here. Thank you for supporting my blog!)
MATERIALS:
1/2″ Sanded Plywood or 1″ x 10″ wood
Drawer Fronts (I got these VEDDINGE fronts at IKEA as-is)
KILZ 2 Primer & Satin Furniture Paint tinted SW Aesthetic White
TOOLS:
Brad Nailer + 18g Nails
Electric Sander (120 grit paper)
Tape Measure, Level
Painting Supplies (Brushes, Rollers)
STEP 1: Measure your space
Whether you’re building drawers for an enclosed cabinet or converting bookcase shelves to drawers (like me) you’ll first need to measure the space you have to build and mount your drawers. Note down the width of front opening (both behind and between the face frame if your cabinet has a face frame) and the depth of the cabinet.

If you’re adding a single drawer you want to take up the entire space or multiples, you’ll also want to measure and plan your height at this time. If you’re cabinet has doors, make sure they open wide enough to allow a pullout drawer to be installed.
STEP 2: Cut Sides of Drawer Boxes
Depending on the height of your drawer front you’ll want to decide how tall to make your drawer boxes. For the shorter drawers (8″ front), I made the drawer boxes 5″ tall. For the taller drawer (12″ front) I used a 1″ x 10″ to build the boxes, which is 9.5″ high.
Determine the outer dimensions (OD) of your drawer boxes by using the measurements you took in step 1 and taking into account the width of your material and the clearance needed for your drawer slides. Typical drawer slides need around 1″ of space total for clearance so you’d subtract 1″ from your OD. Cut the plywood or solid wood to size with a miter saw.
Here are two examples of how I could build my drawer boxes (And the cut math) based on my 28″ x 10.25″ opening:
Example #1
Depth sides are inset

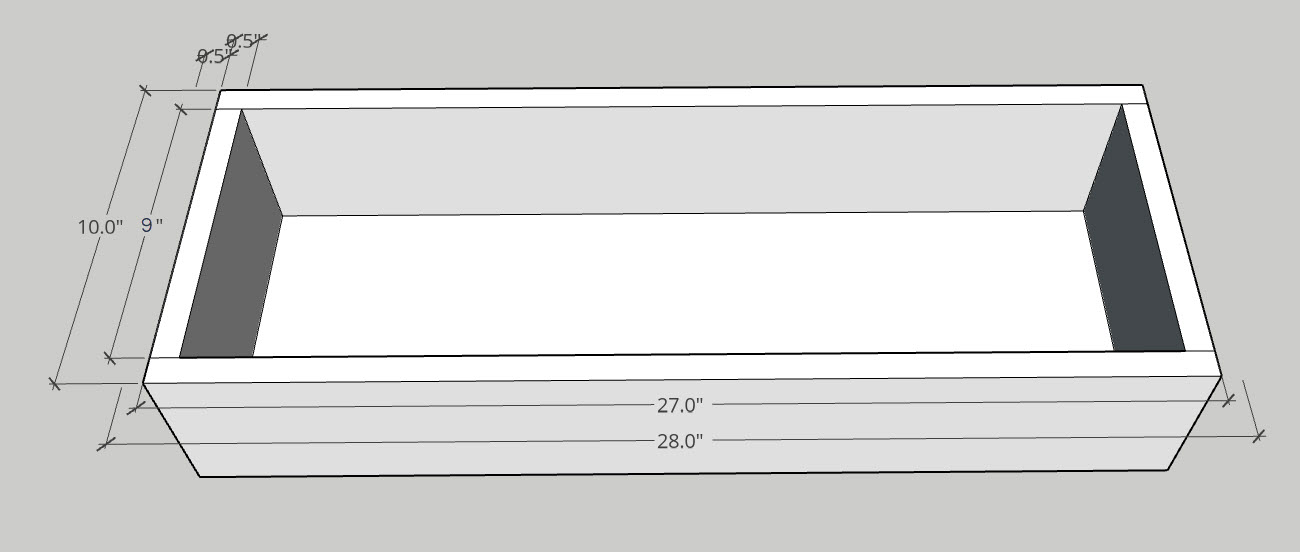
Cabinet= 28″ (L) x 10.25″ (D)
28″ (L) – 1″ (Drawer Slide Clearance)= 27″ Length
10.25″ (D) – 1″ (Material Width x2) – 0.25″ (Addtn’l Clearance)= 9″ Depth
Example #2
Length sides are inset
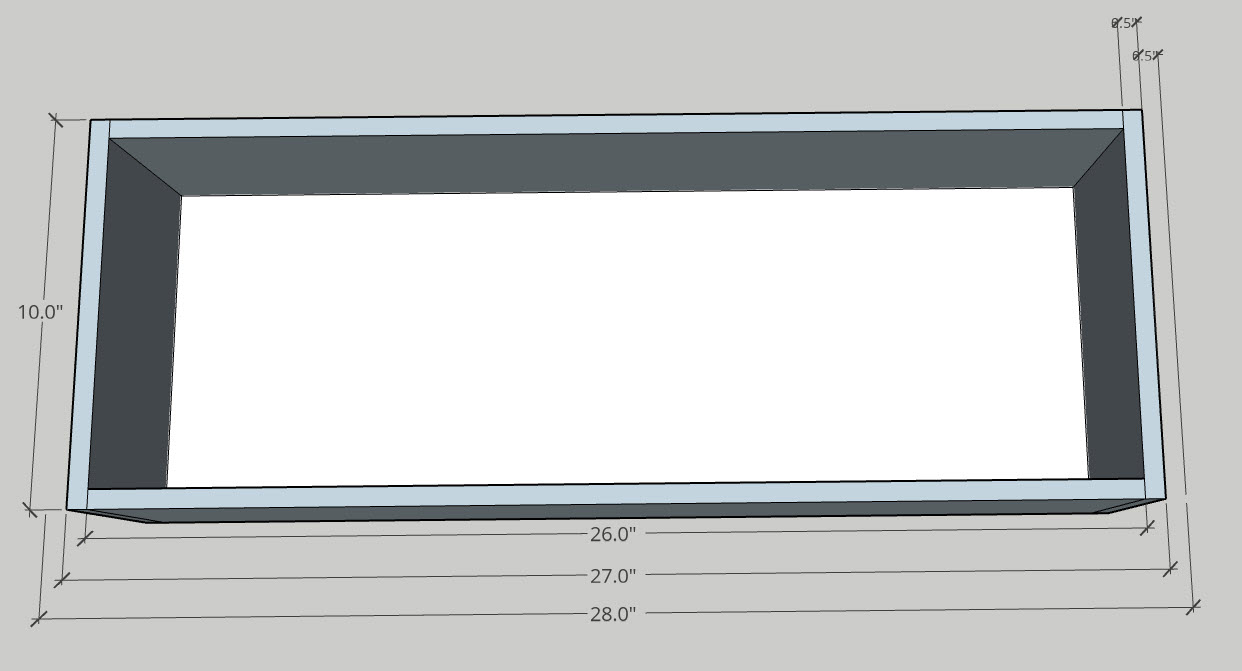

Cabinet= 28″ (L) x 10.25″ (D)
28″ (L) – 1″ (Drawer Slide Clearance) – 1″ (Material Width x2) = 26″ Length
10.25″ (D) – 0.25″ (Addtn’l Clearance)= 10″ Depth
Optional Step: Route Channel for Drawer Bottom
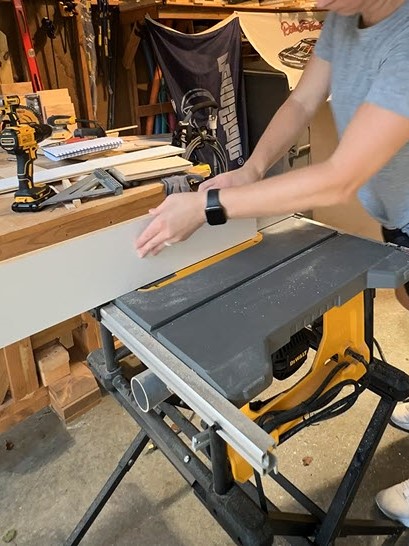

I used my table saw set to 1/8″ height to route a small channel and create an inset for the hardboard that I’m using as the bottom of my drawer. You can also use a router if you have one (I don’t). I put my boards through the table saw twice, moving it out just less than 1/8″ between passes. This way the I was sure the inset would be enough to hold the hardboard.
Step 3: Assemble Drawer Boxes
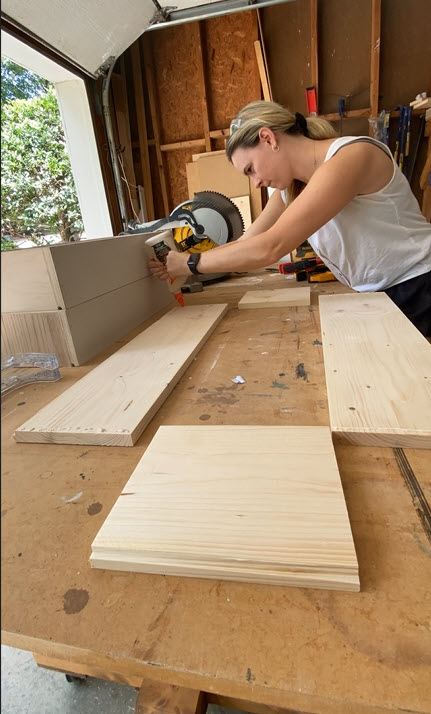
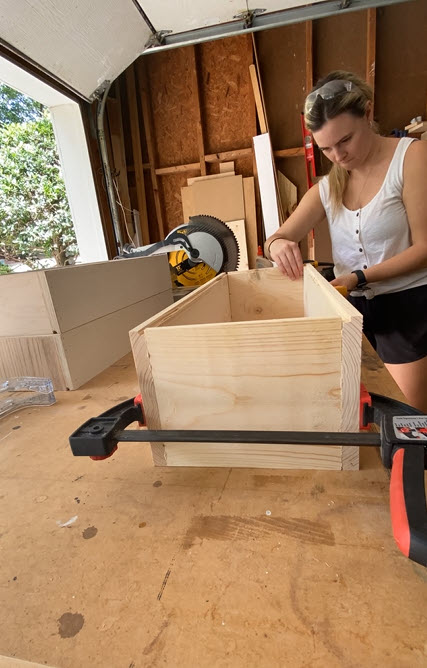
Lay out your boards and apply glue to the edges that need to be joined. Clamp the pieces together to get a flush joint and use 18g brad nails to secure the two pieced together.
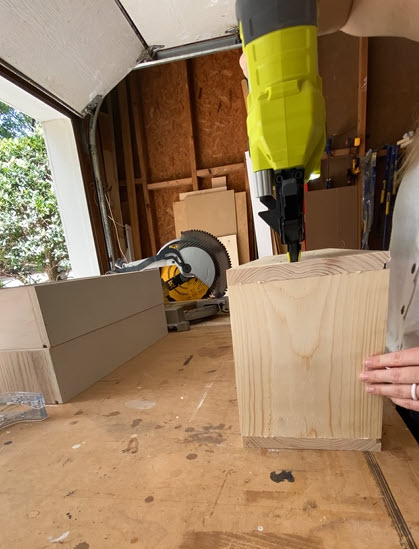
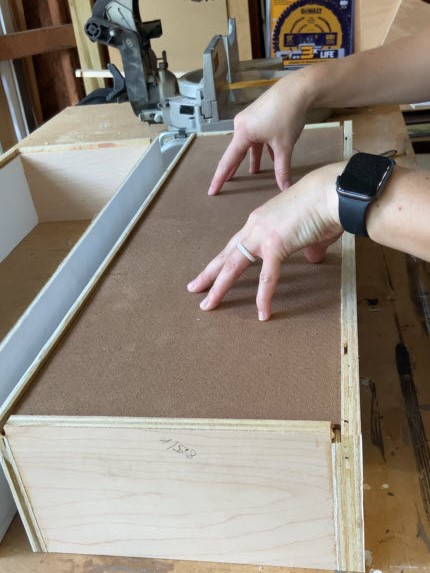
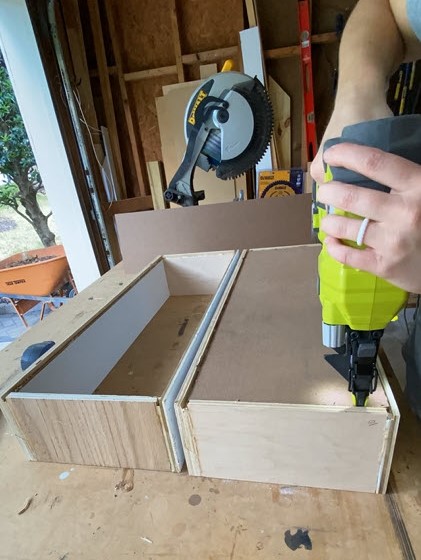
For the bottom of the drawers, cut your hardboard to size and place inside the inset. Secure using glue and 18g nails.
STEP 4: Apply Edge Banding
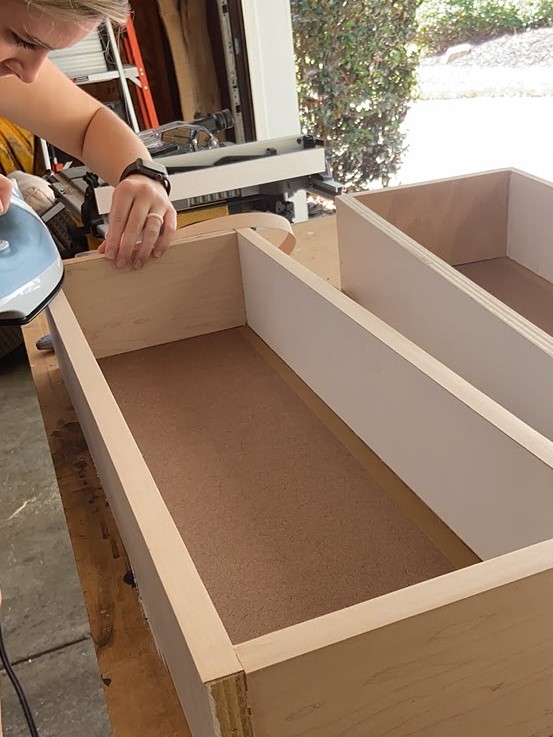
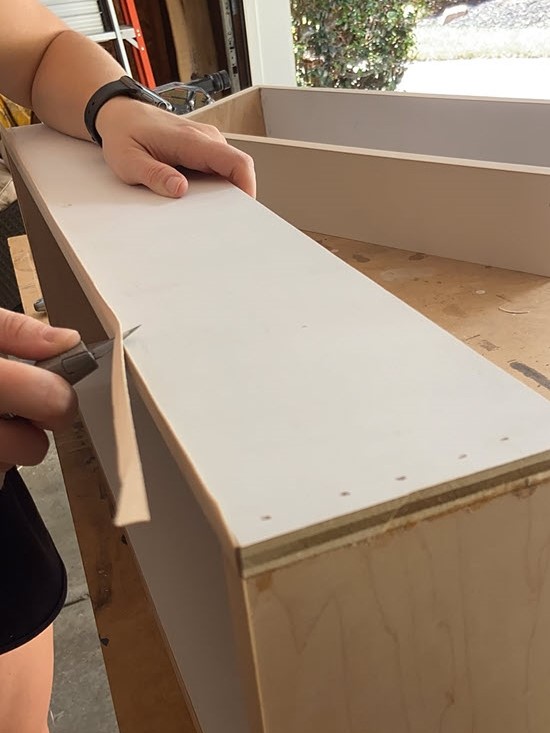
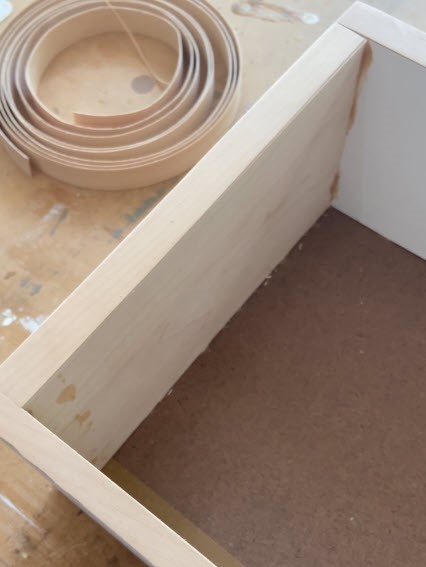
Lightly sand the drawer boxes with a medium to fine grit sandpaper. If you made your drawers out of plywood, apply edge banding by lining up the edge banding on the rough edges of the plywood and running over them with an iron. This will make the boards look like solid wood, and give your drawer a more professional look. Once cool, go back with a razor to cut the excess edge banding off.
You can also apply a finish to the drawer at this stage if you want. I didn’t since I sanded really well and the bottom of the drawers already had a smooth finish.
STEP 5: Install Drawer Slides into Cabinet
The following installation is for the side mounted drawer slides I linked– yours could be different so make sure to read the instructions included with your drawer slides before installation.
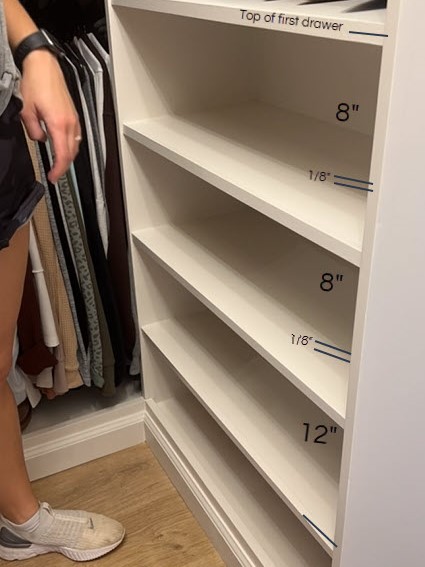
Start by mapping out your drawers on the inside of the cabinet box. I started with the heights of my drawer fronts- 8″, 8″ and 12″ plus 1/8″ gap between them. The size of your gap is up to you, just make sure there is enough room for the drawers to open without rubbing each other.
Once you have the spacing mapped out, you’ll want to identify the approximate height where your drawer hardware will be placed. I planned to put the drawer knobs right in the middle of my drawer fronts, so I just marked the middle of the drawer area.
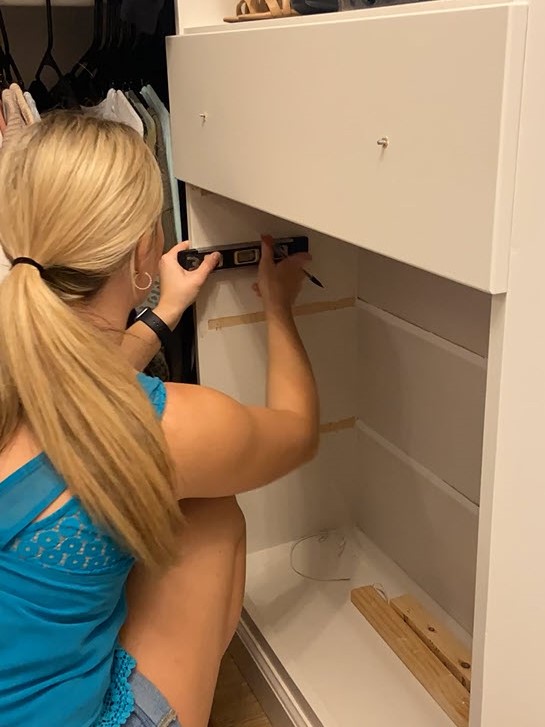
Mark a level line at that point and then attach the drawer slides according to the instructions so that the screws in the slide all screw into the level line.
Tip: The optimum height to install your drawer slides depends on the height of your drawer and the location of your drawer pull. The force of the drawer weight is always going to be downward, perpendicular to the mounted slide position, so it doesn’t necessarily make it easier to open and close with a slide at certain heights but it can affect the stability. A deep loaded drawer is more stable from the side to side movement with the slides set in the middle of the drawers. However, if you have a very deep drawer and plan to place the drawer pull at the top of the drawers, this could require additional force to pull the drawer out, therefore I would recommend placing the drawer slide at the top of the drawer box, or even double up on drawer slides for even more stability.
STEP 6: Install Drawers
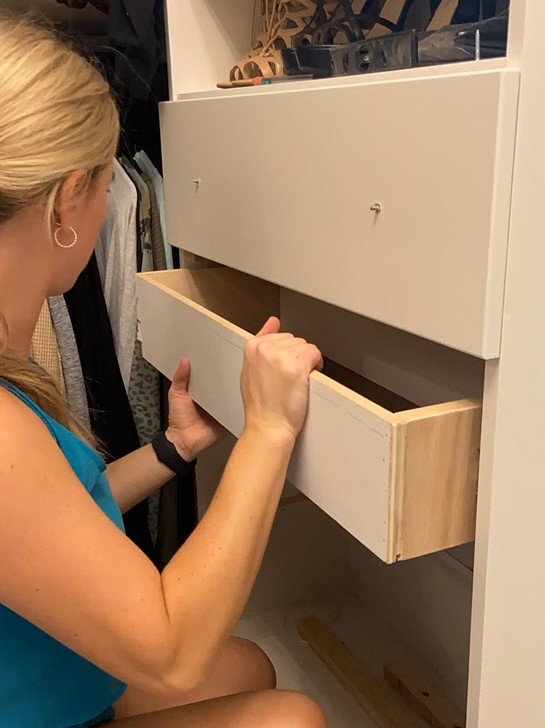
Once the drawer slides are on the cabinet, grab a friend or some scrap pieces of wood and slide your drawer into the space. Use the scrap wood (or friend) to hold the drawer box relatively level. Slowly extend the drawer slides to the open position and pull the drawer out so that the front of the door is flush with the front of the slide. Ensure that your drawer box is not sitting below the mark you made for the bottom of your drawer front and screw the slide into the side of the drawer box.
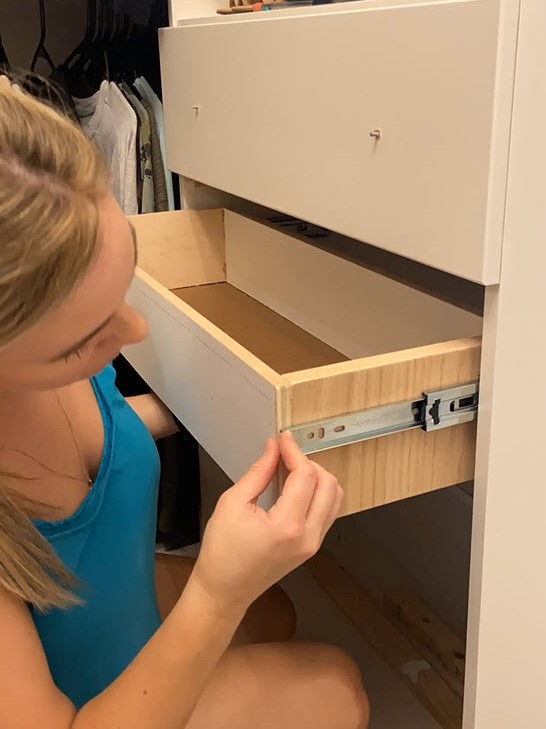
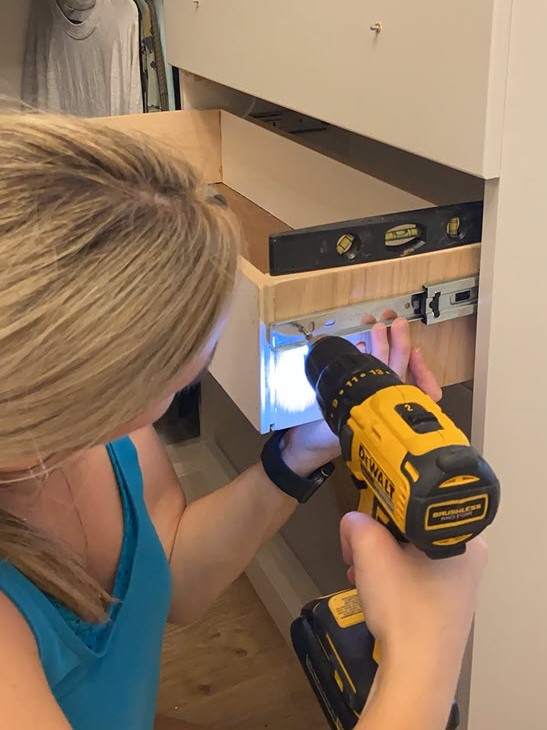
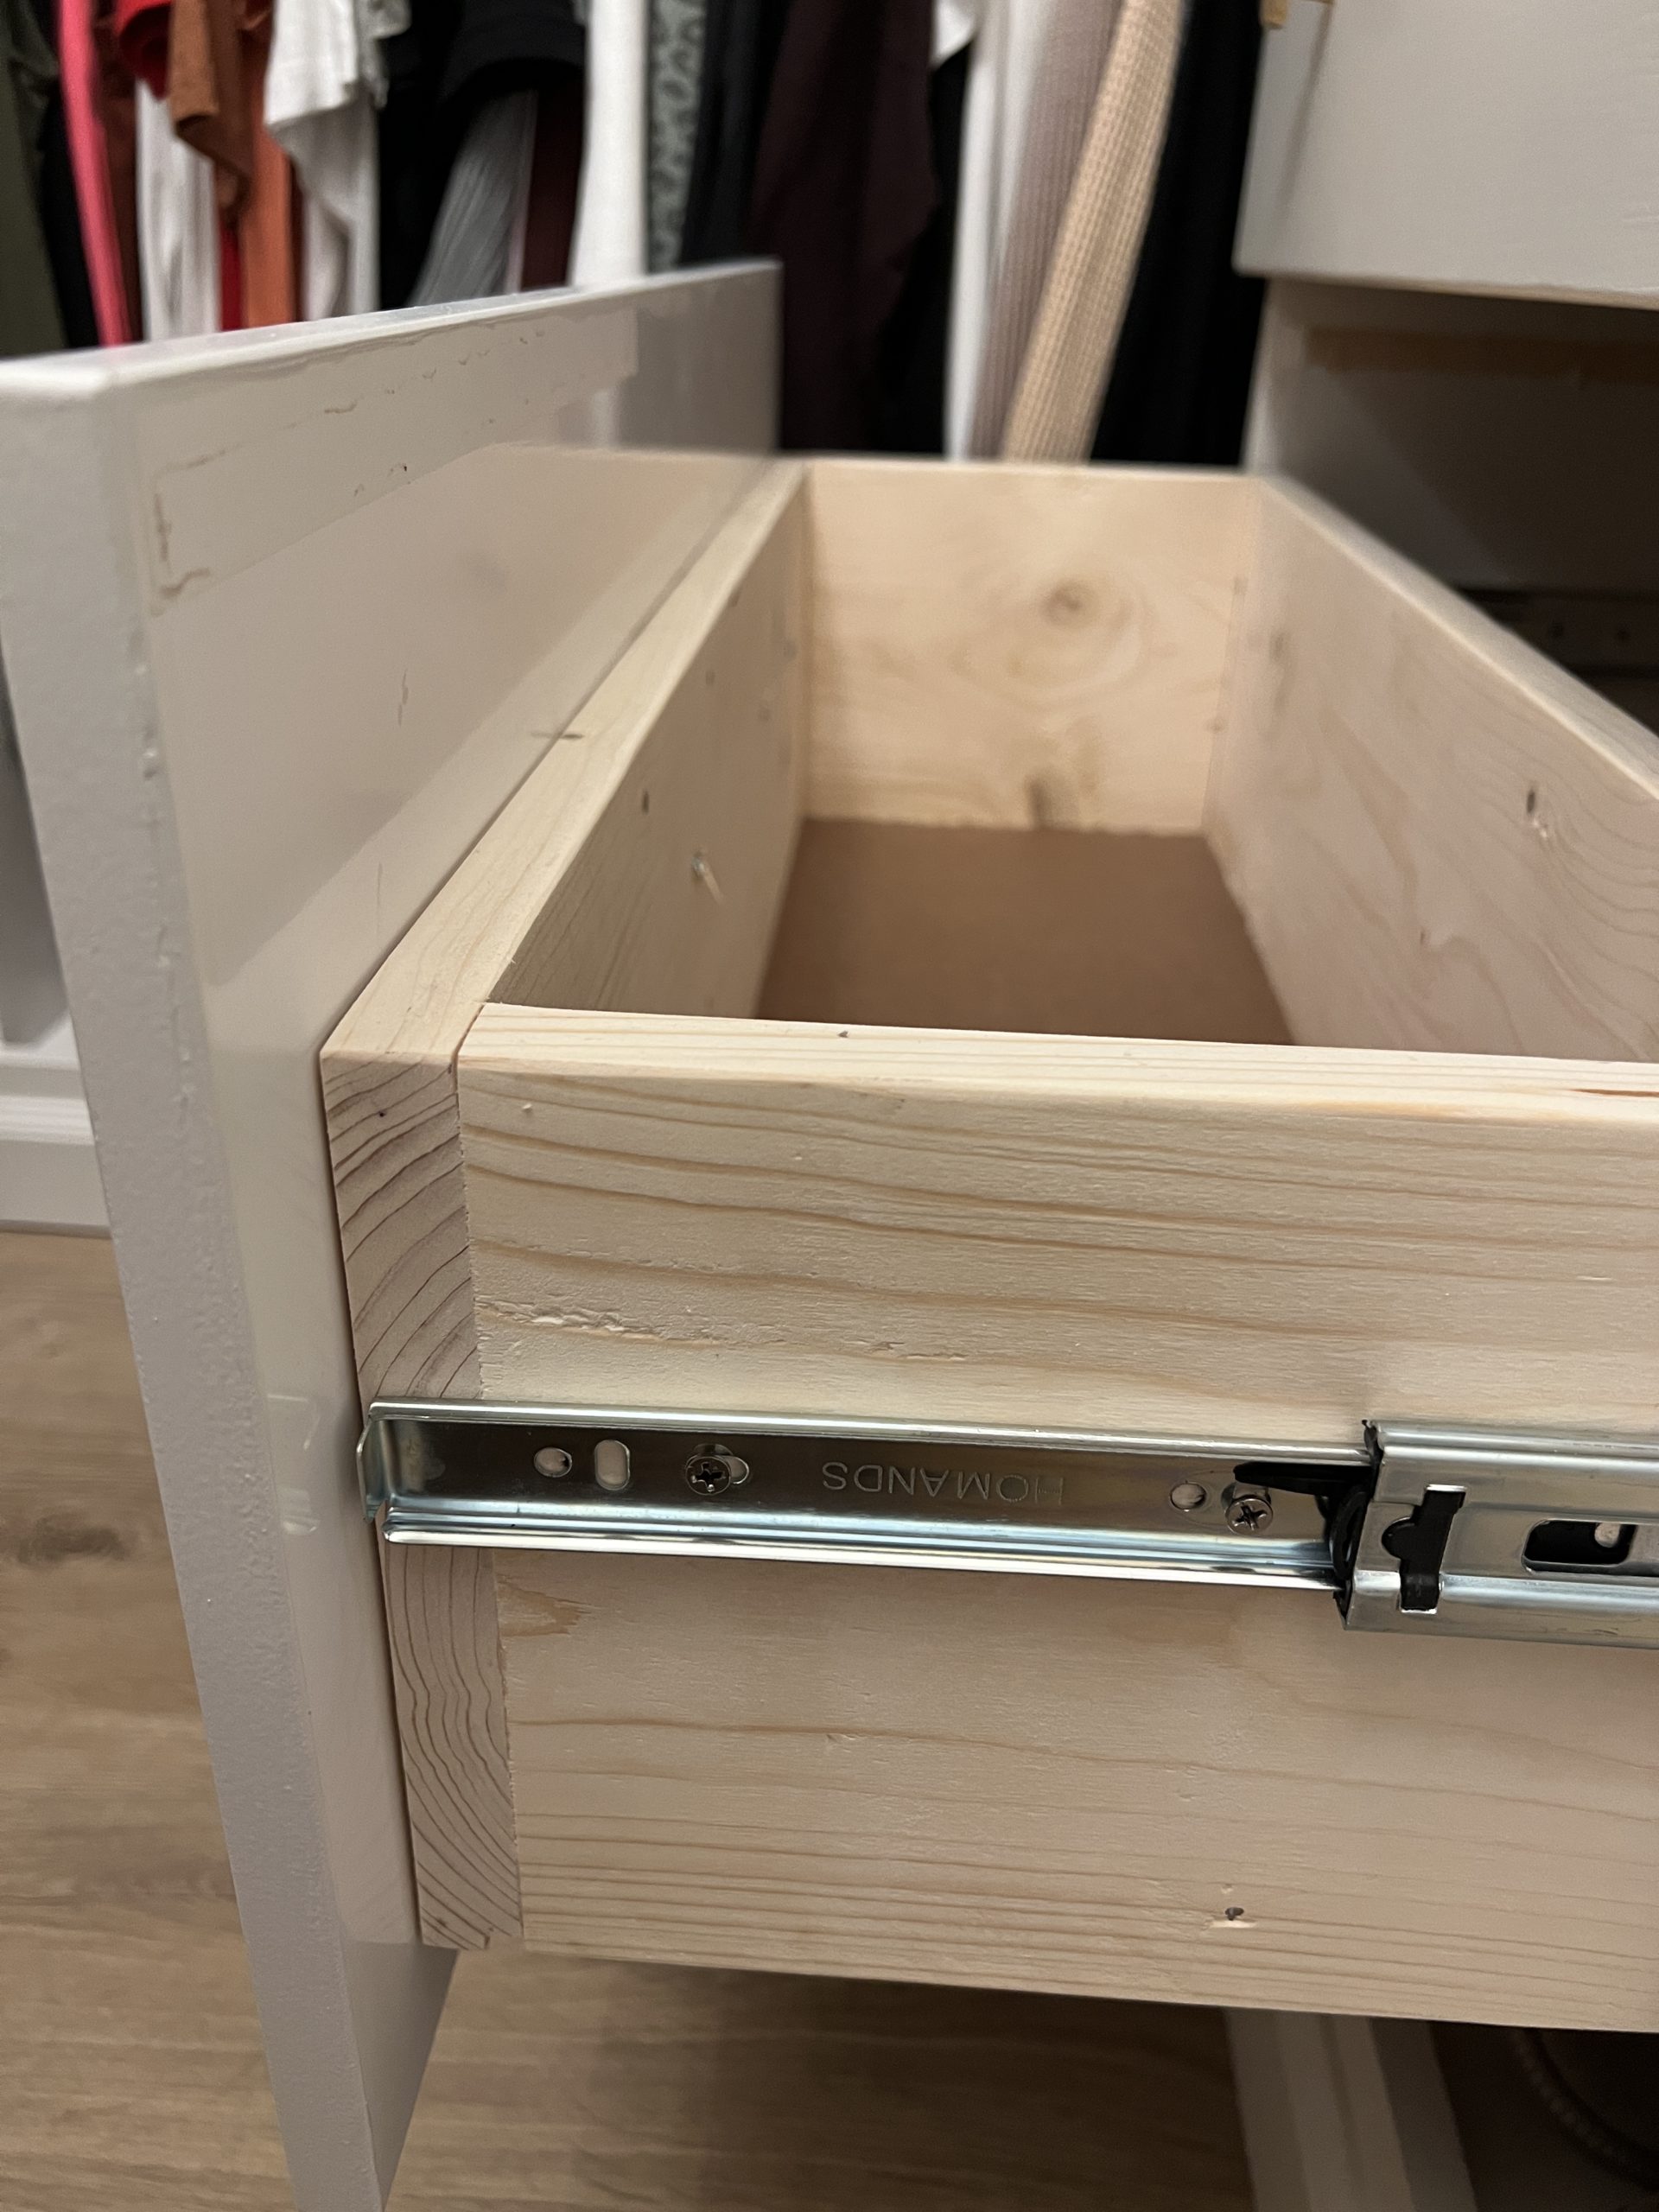
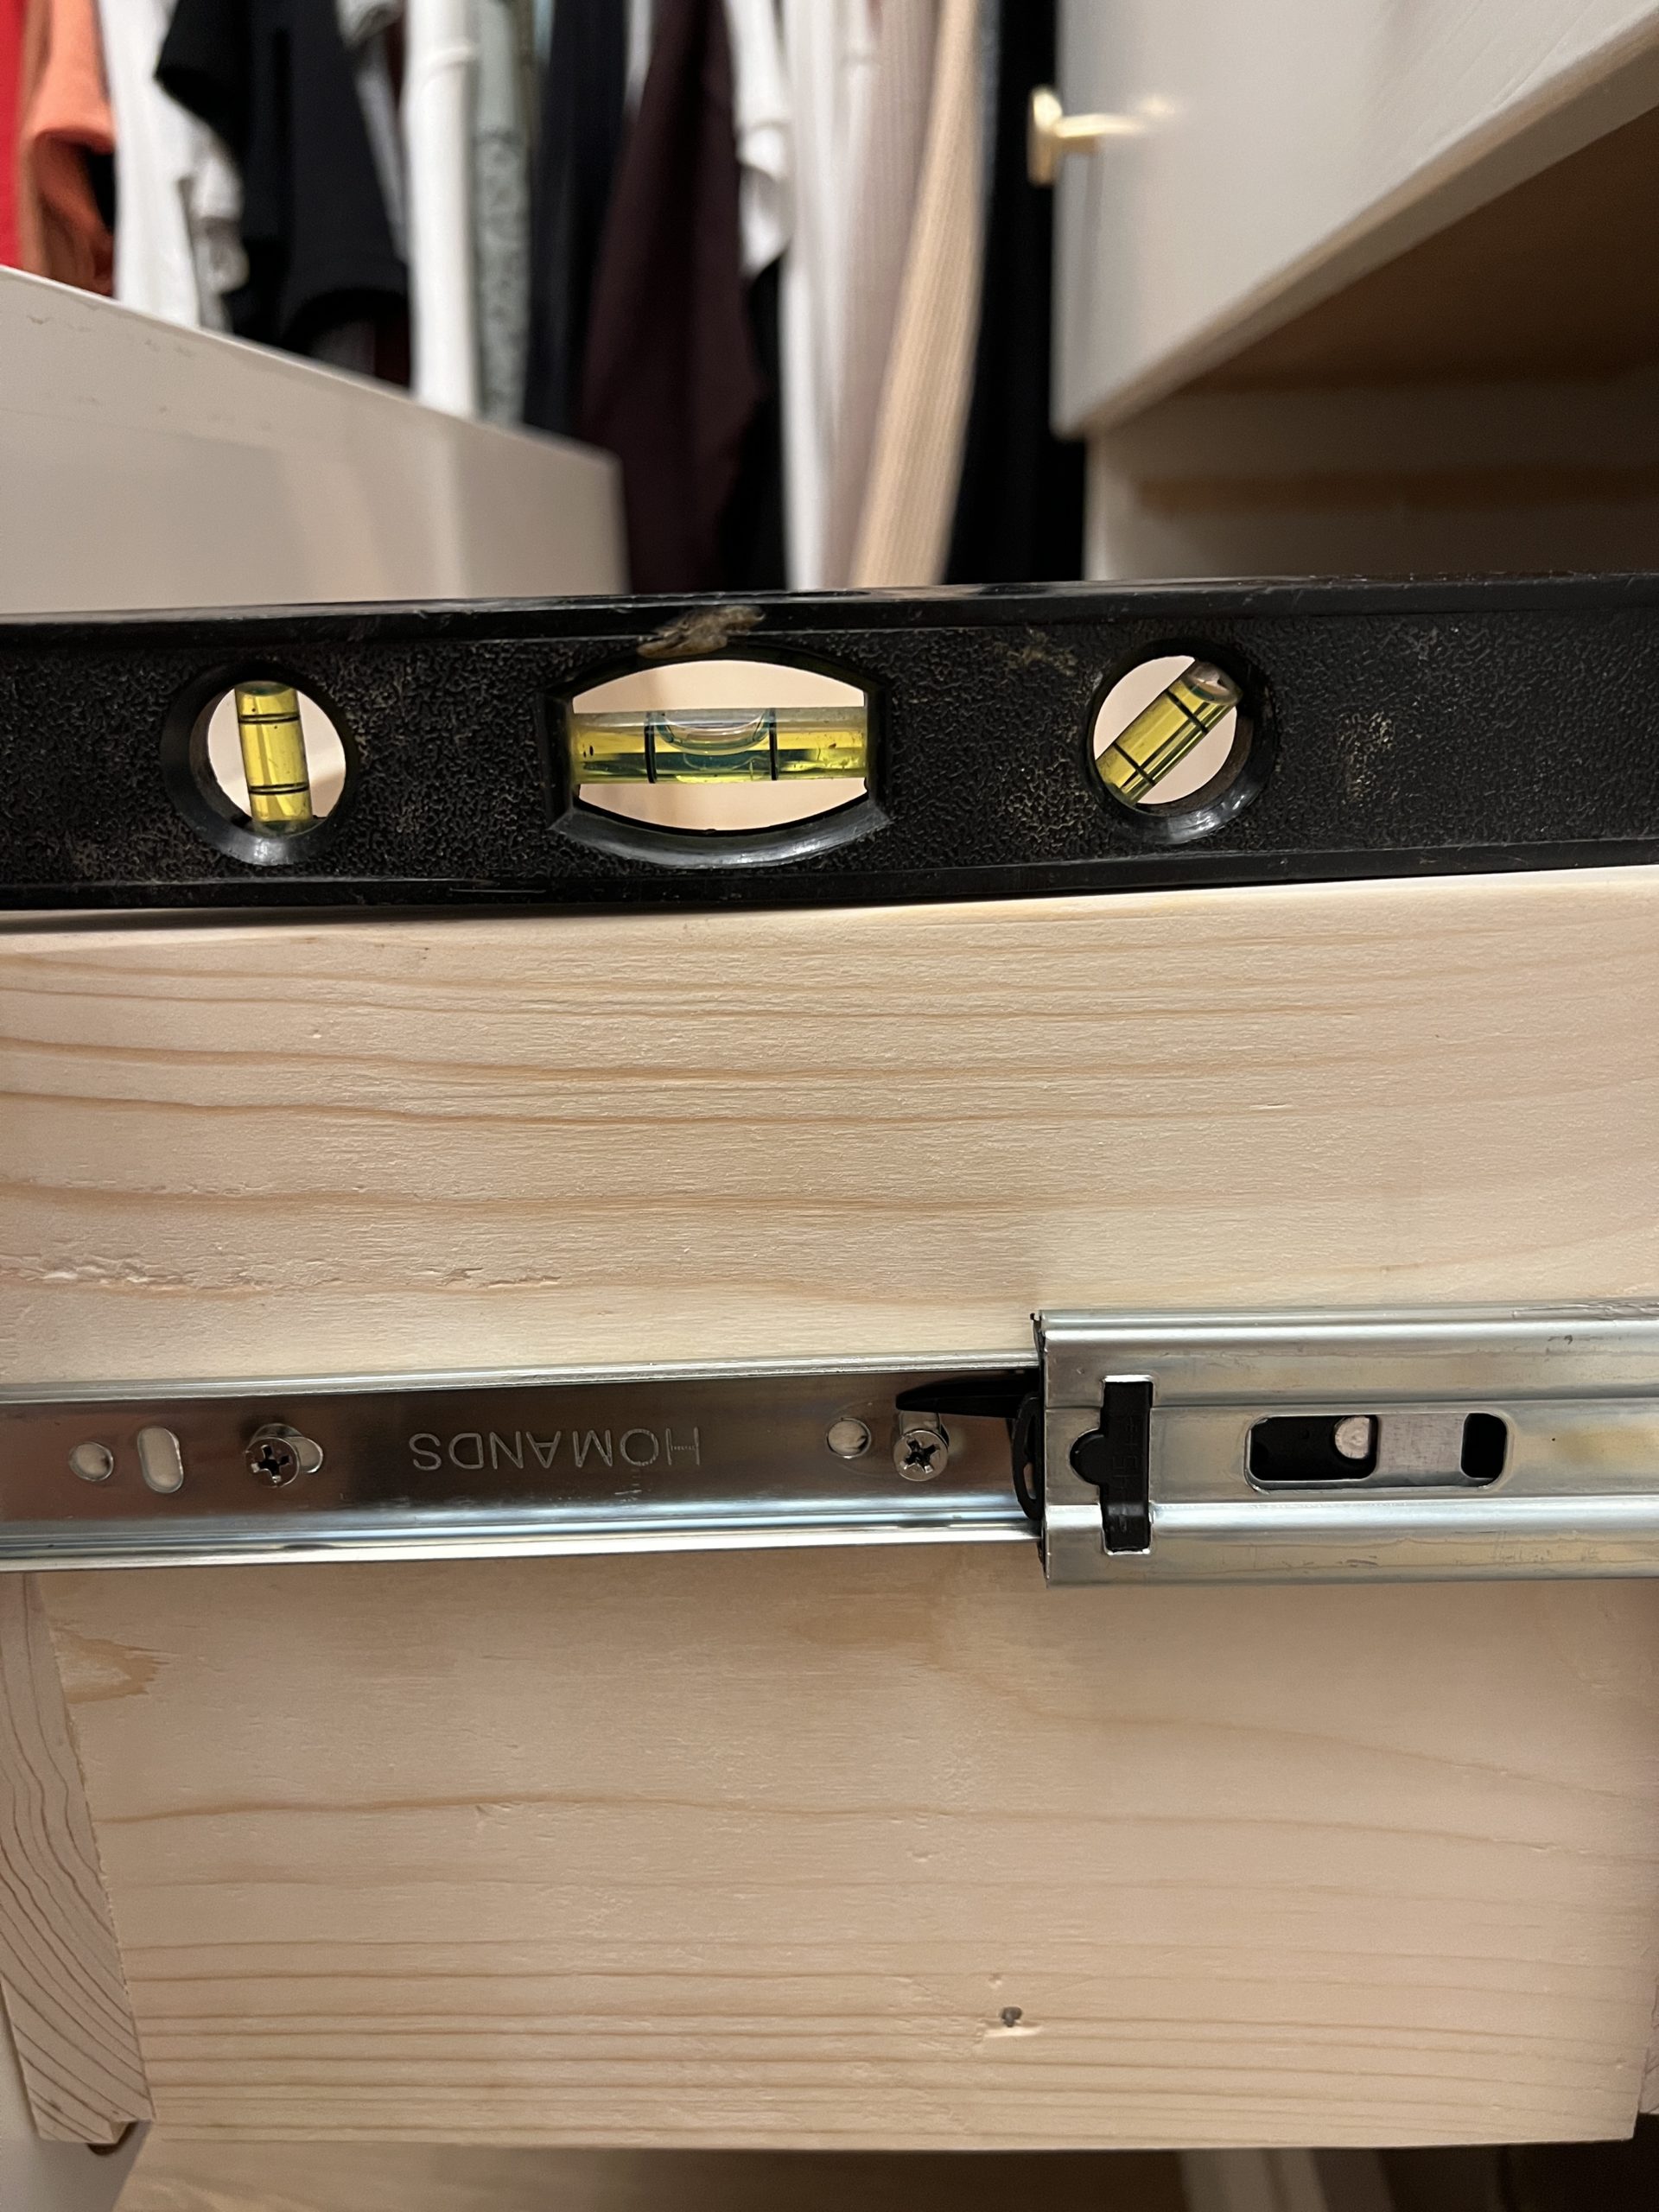
After the first screw is in the first side, move to the other side. Balance the drawer on the screw that’s already engaged and use a level to ensure the front of the box is level across the length. Screw in the first screw into the second side. Once you have both sides screwed in, place the level on one of the depth panels and add the second screw on each side.

STEP 7: Prepare Drawer Fronts

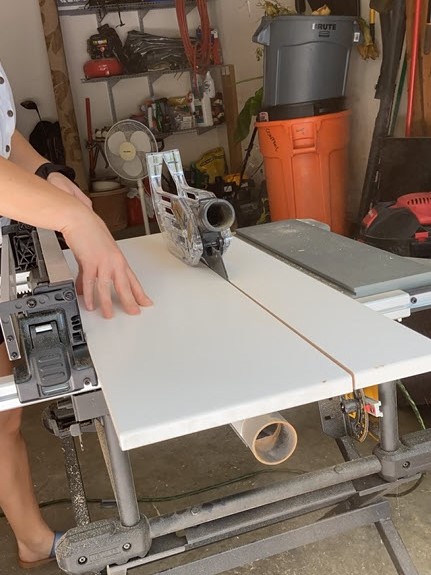
You can make your own drawer fronts with 1″ thick solid wood, or you can check out your local IKEA as-is section to find drawer fronts that will fit your space. I was able to find 3 of the VEDDINGE drawer fronts on sale for $12.50 each (normally $20 each!). They were the exact length I needed but I needed two- 8″ tall drawer fronts and one at 12″. Since all the Veddinge fronts were 12″, I cut two of them down to 8″ on the table saw.

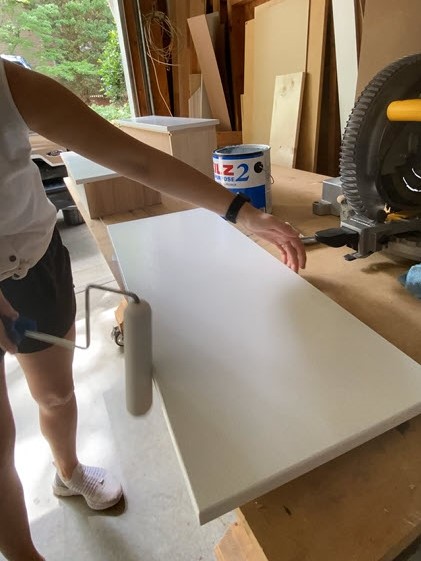
I sanded the drawers down, paying special attention to the cut side, adding a slight bevel so that it matched the rest of the machine-finished edges. Then, I primed all the drawer fronts and painted them with two coats of SW Aesthetic White to match the rest of my closet.
STEP 8: Install Drawer Fronts
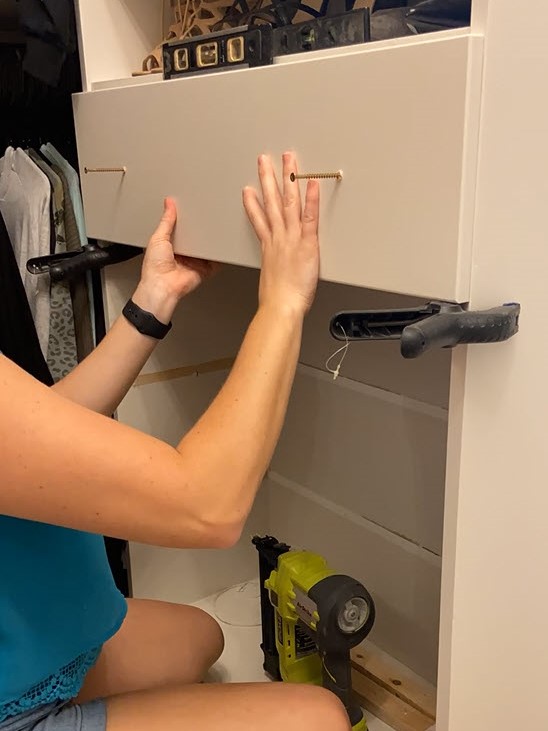
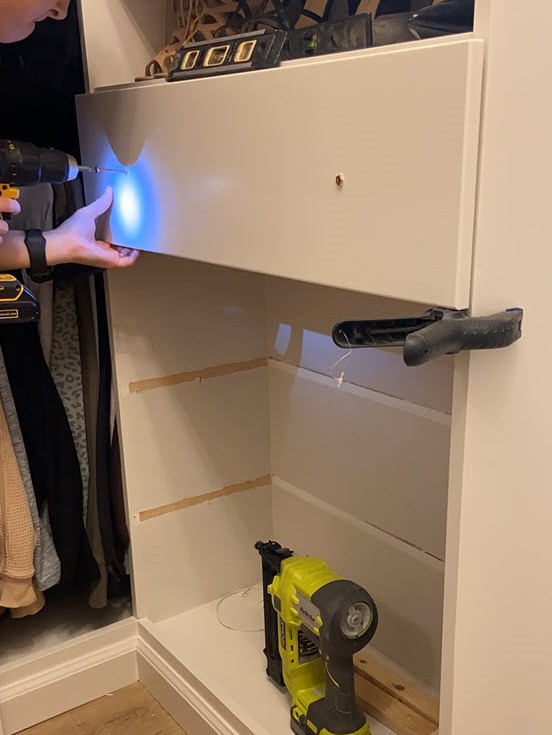
To install the drawer fronts, first mark where you are going to place the drawer hardware, then screw two long screws into those marks, making sure not to break through the backside just yet. I held the drawers up how I wanted them placed with one hand, making sure the sides were flush and then screwed the screws into the drawer boxes, securing them in place.
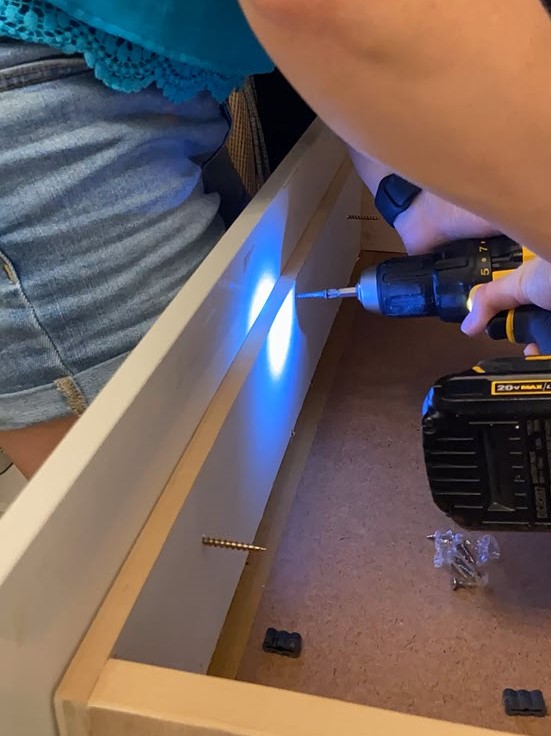
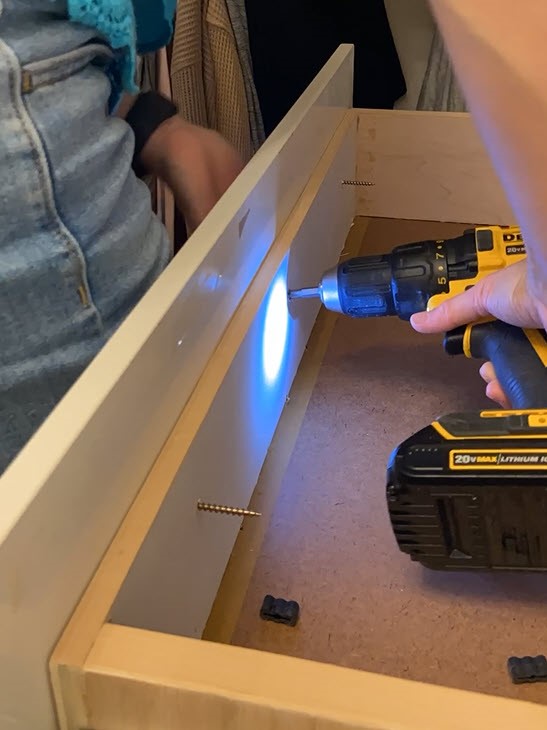
Once the drawer front is secure, open the drawer and use a few short screws through the inside of the drawer box, going into the drawer front (but not through!!) I used 4 screws for each drawer. Once those are in, you can remove the long screws that you drill in initially.
STEP 9: Install Hardware

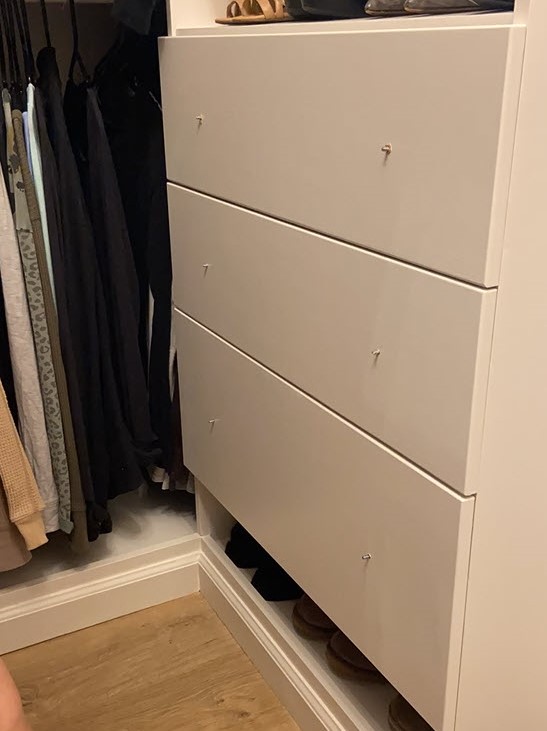
The last (and my favorite) step! Drill through the two marked holes with a drill bit that matches the size of the bolts that came with your hardware. Insert the bolt through the backside of the drawer front then screw the knobs on from the back. Hold the knob still with one hand while screwing in the bolt from the back, rotating the pull could cause damage to the front of your drawer!
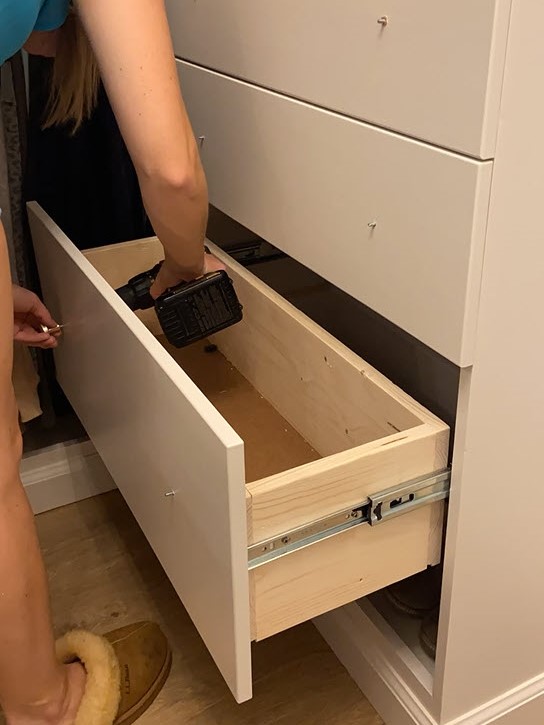
I used a drill to screw the knobs in but I would recommend using a screwdriver until you get the hang of it!
DIY Drawers Total Cost:
1/2″ Sanded Plywood – $26*
3/4″ Edge Banding– $20
3mm hardboard –$15
VEDDINGE “as-is” Drawer Fronts – $37.50
Full Extension Drawer Slides (I got 10″ for my space)- $36
KILZ 2 Primer & Satin Furniture Paint– $48*
Drawer Knobs– $17
Total Cost- $199.50
*For the plywood and paint, I used very little of material I already had, so I calculated the cost of buying a 2’x4′ piece of plywood and the smallest amounts available of primer and paint (which is way more than I needed- 1 gallon of primer ($20) and a quart of paint ($28).
If you have any additional questions about building DIY drawers, leave me a comment below!
Want to keep up with my newest projects? Come hang out on my social media accounts, below!