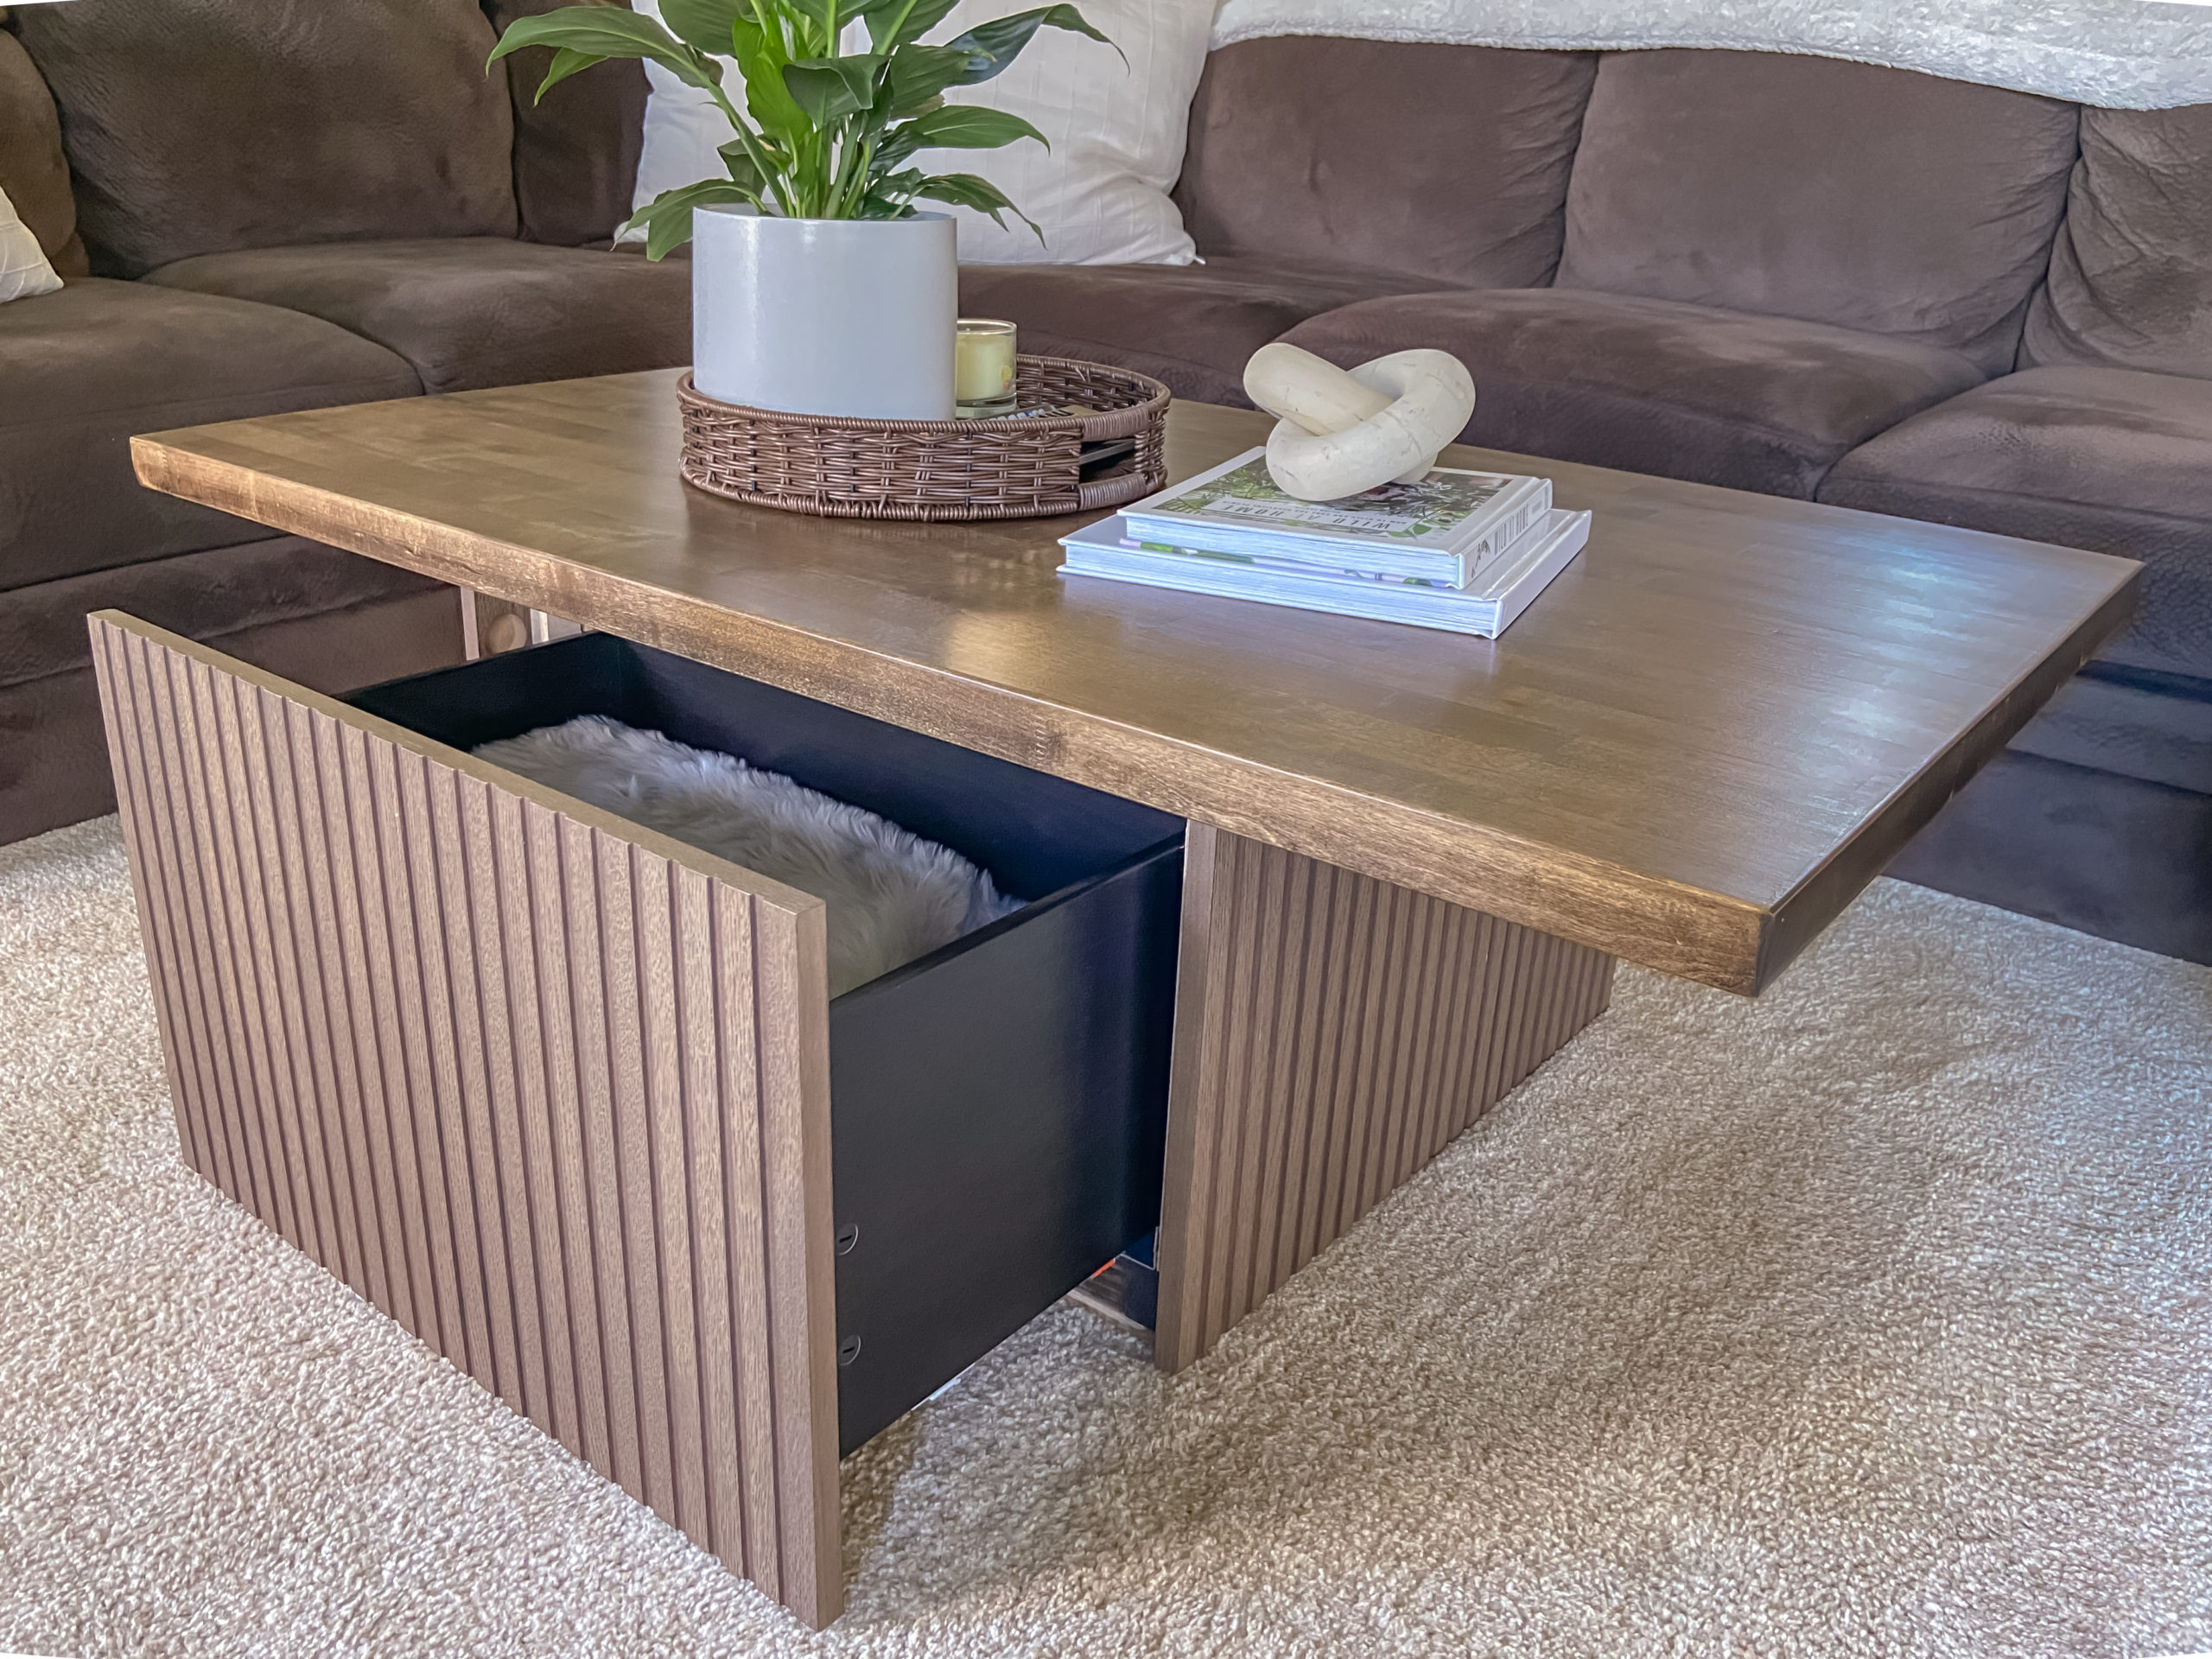
Build your own Coffee Table with Storage (Ikea Hack)
(This post contains affiliate links which means I receive a small compensation at no cost to you. As an Amazon Associate I earn from qualifying purchases. You can read more about it here. Thank you for supporting my blog!)
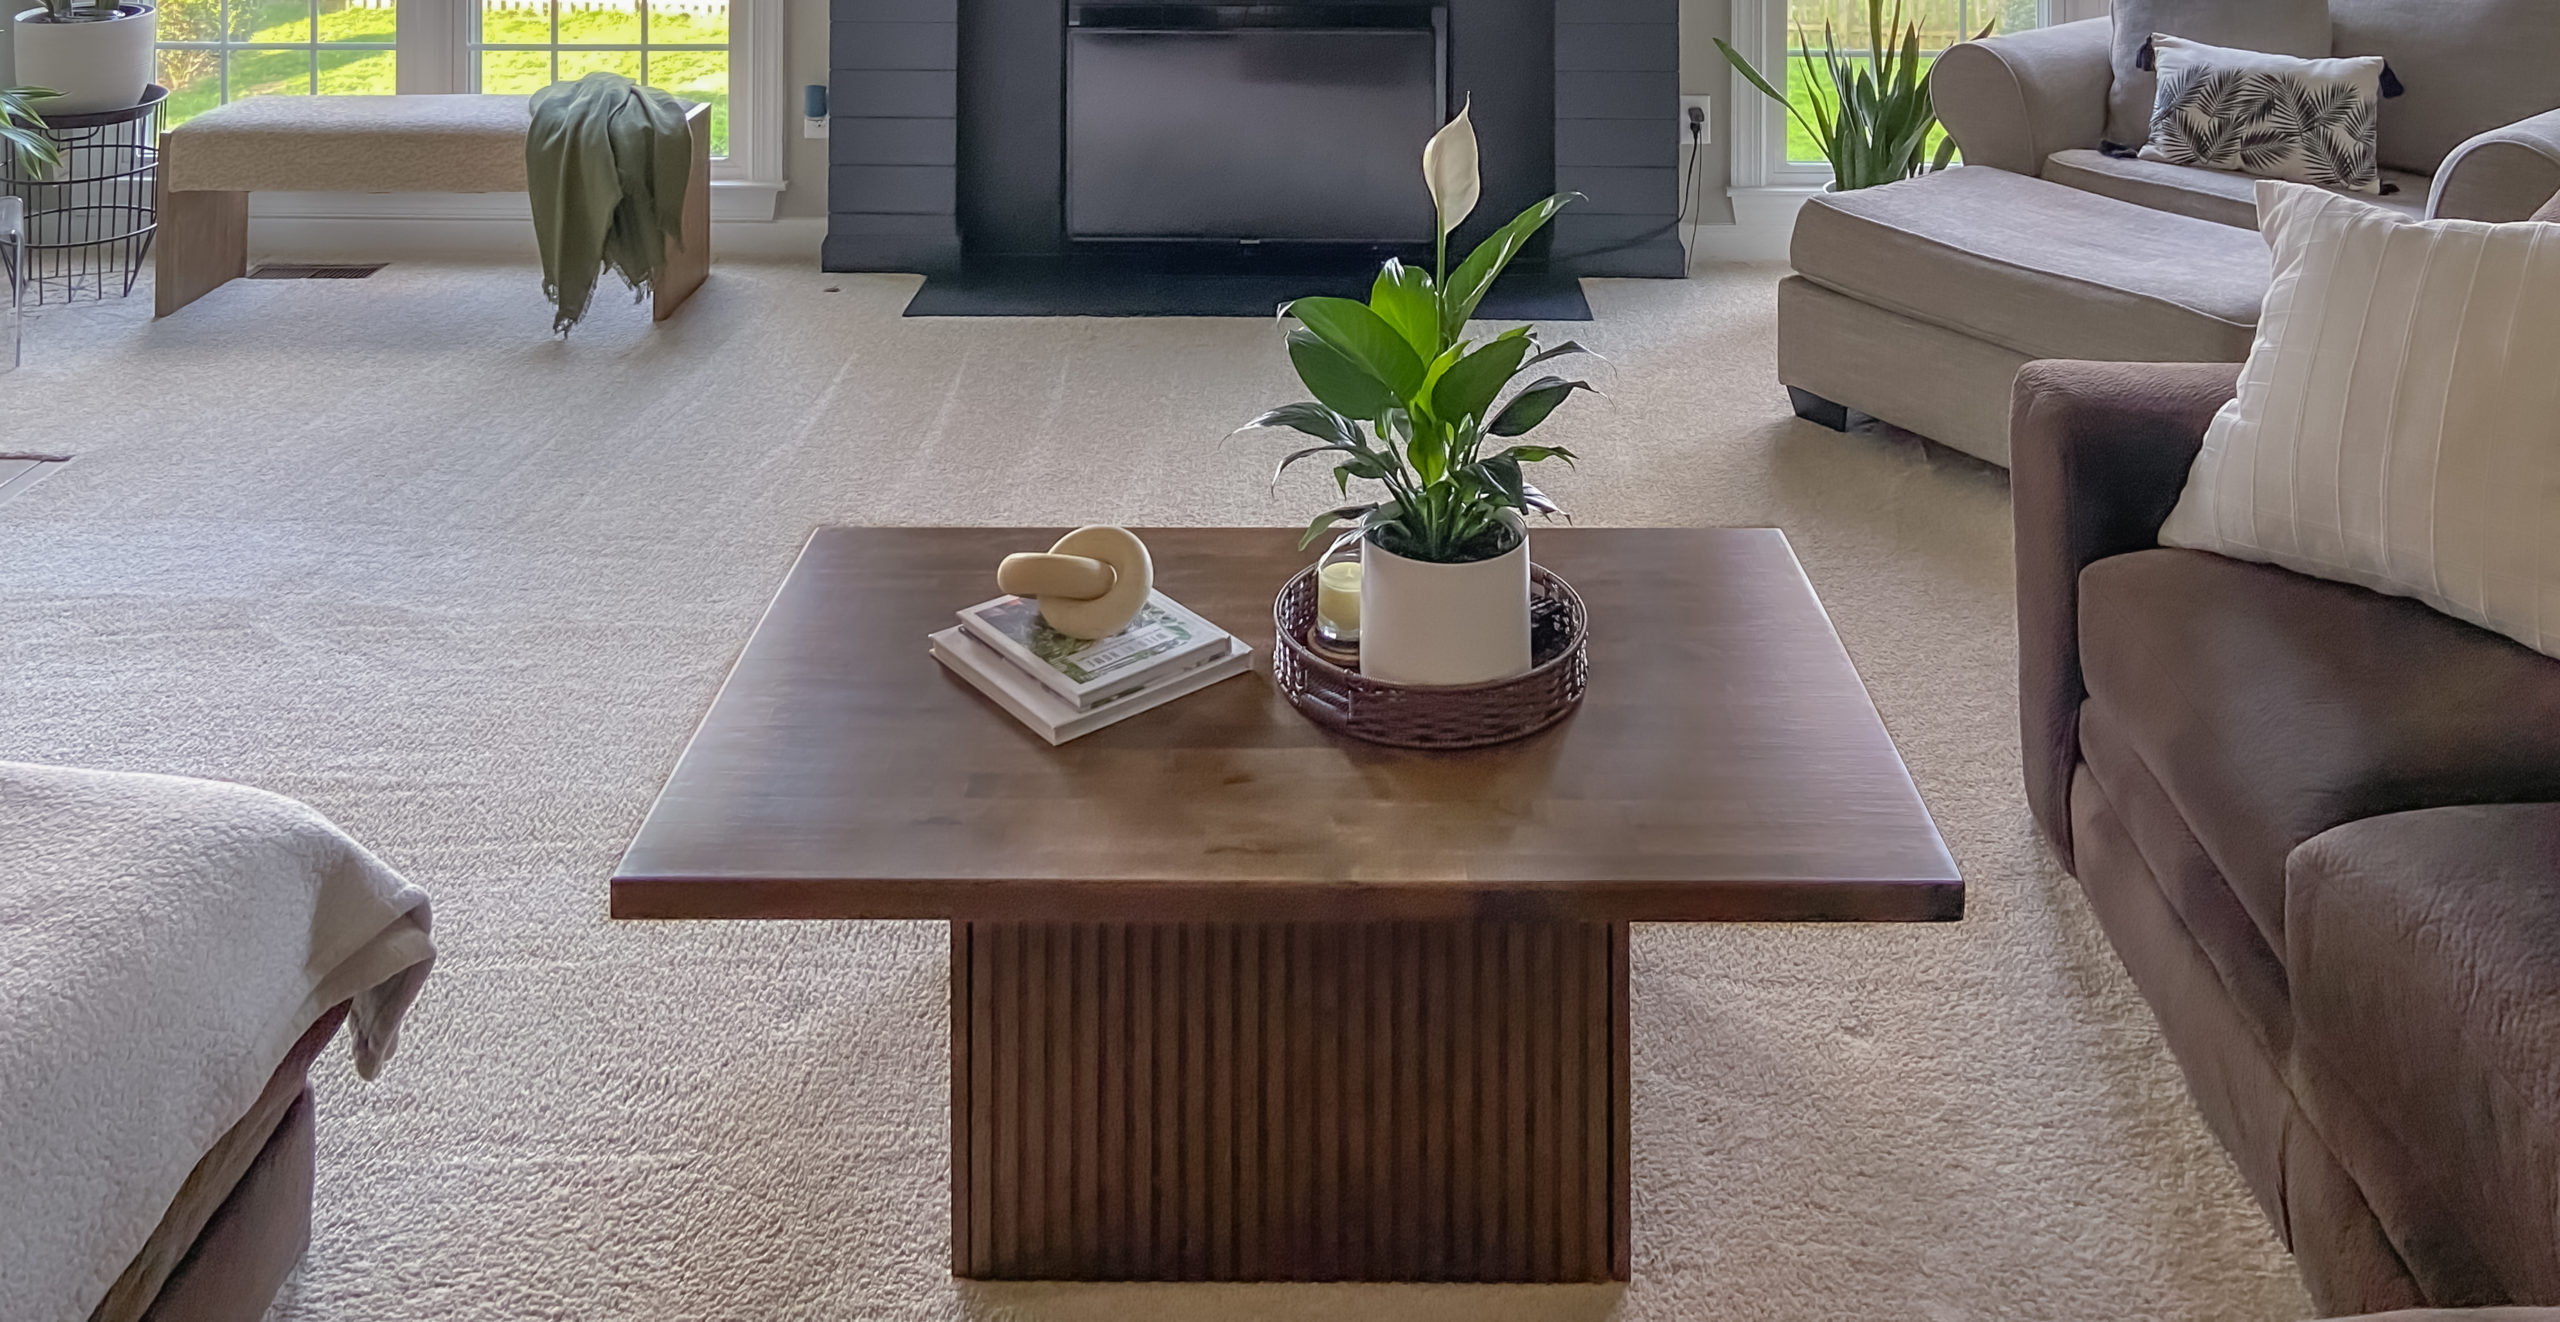
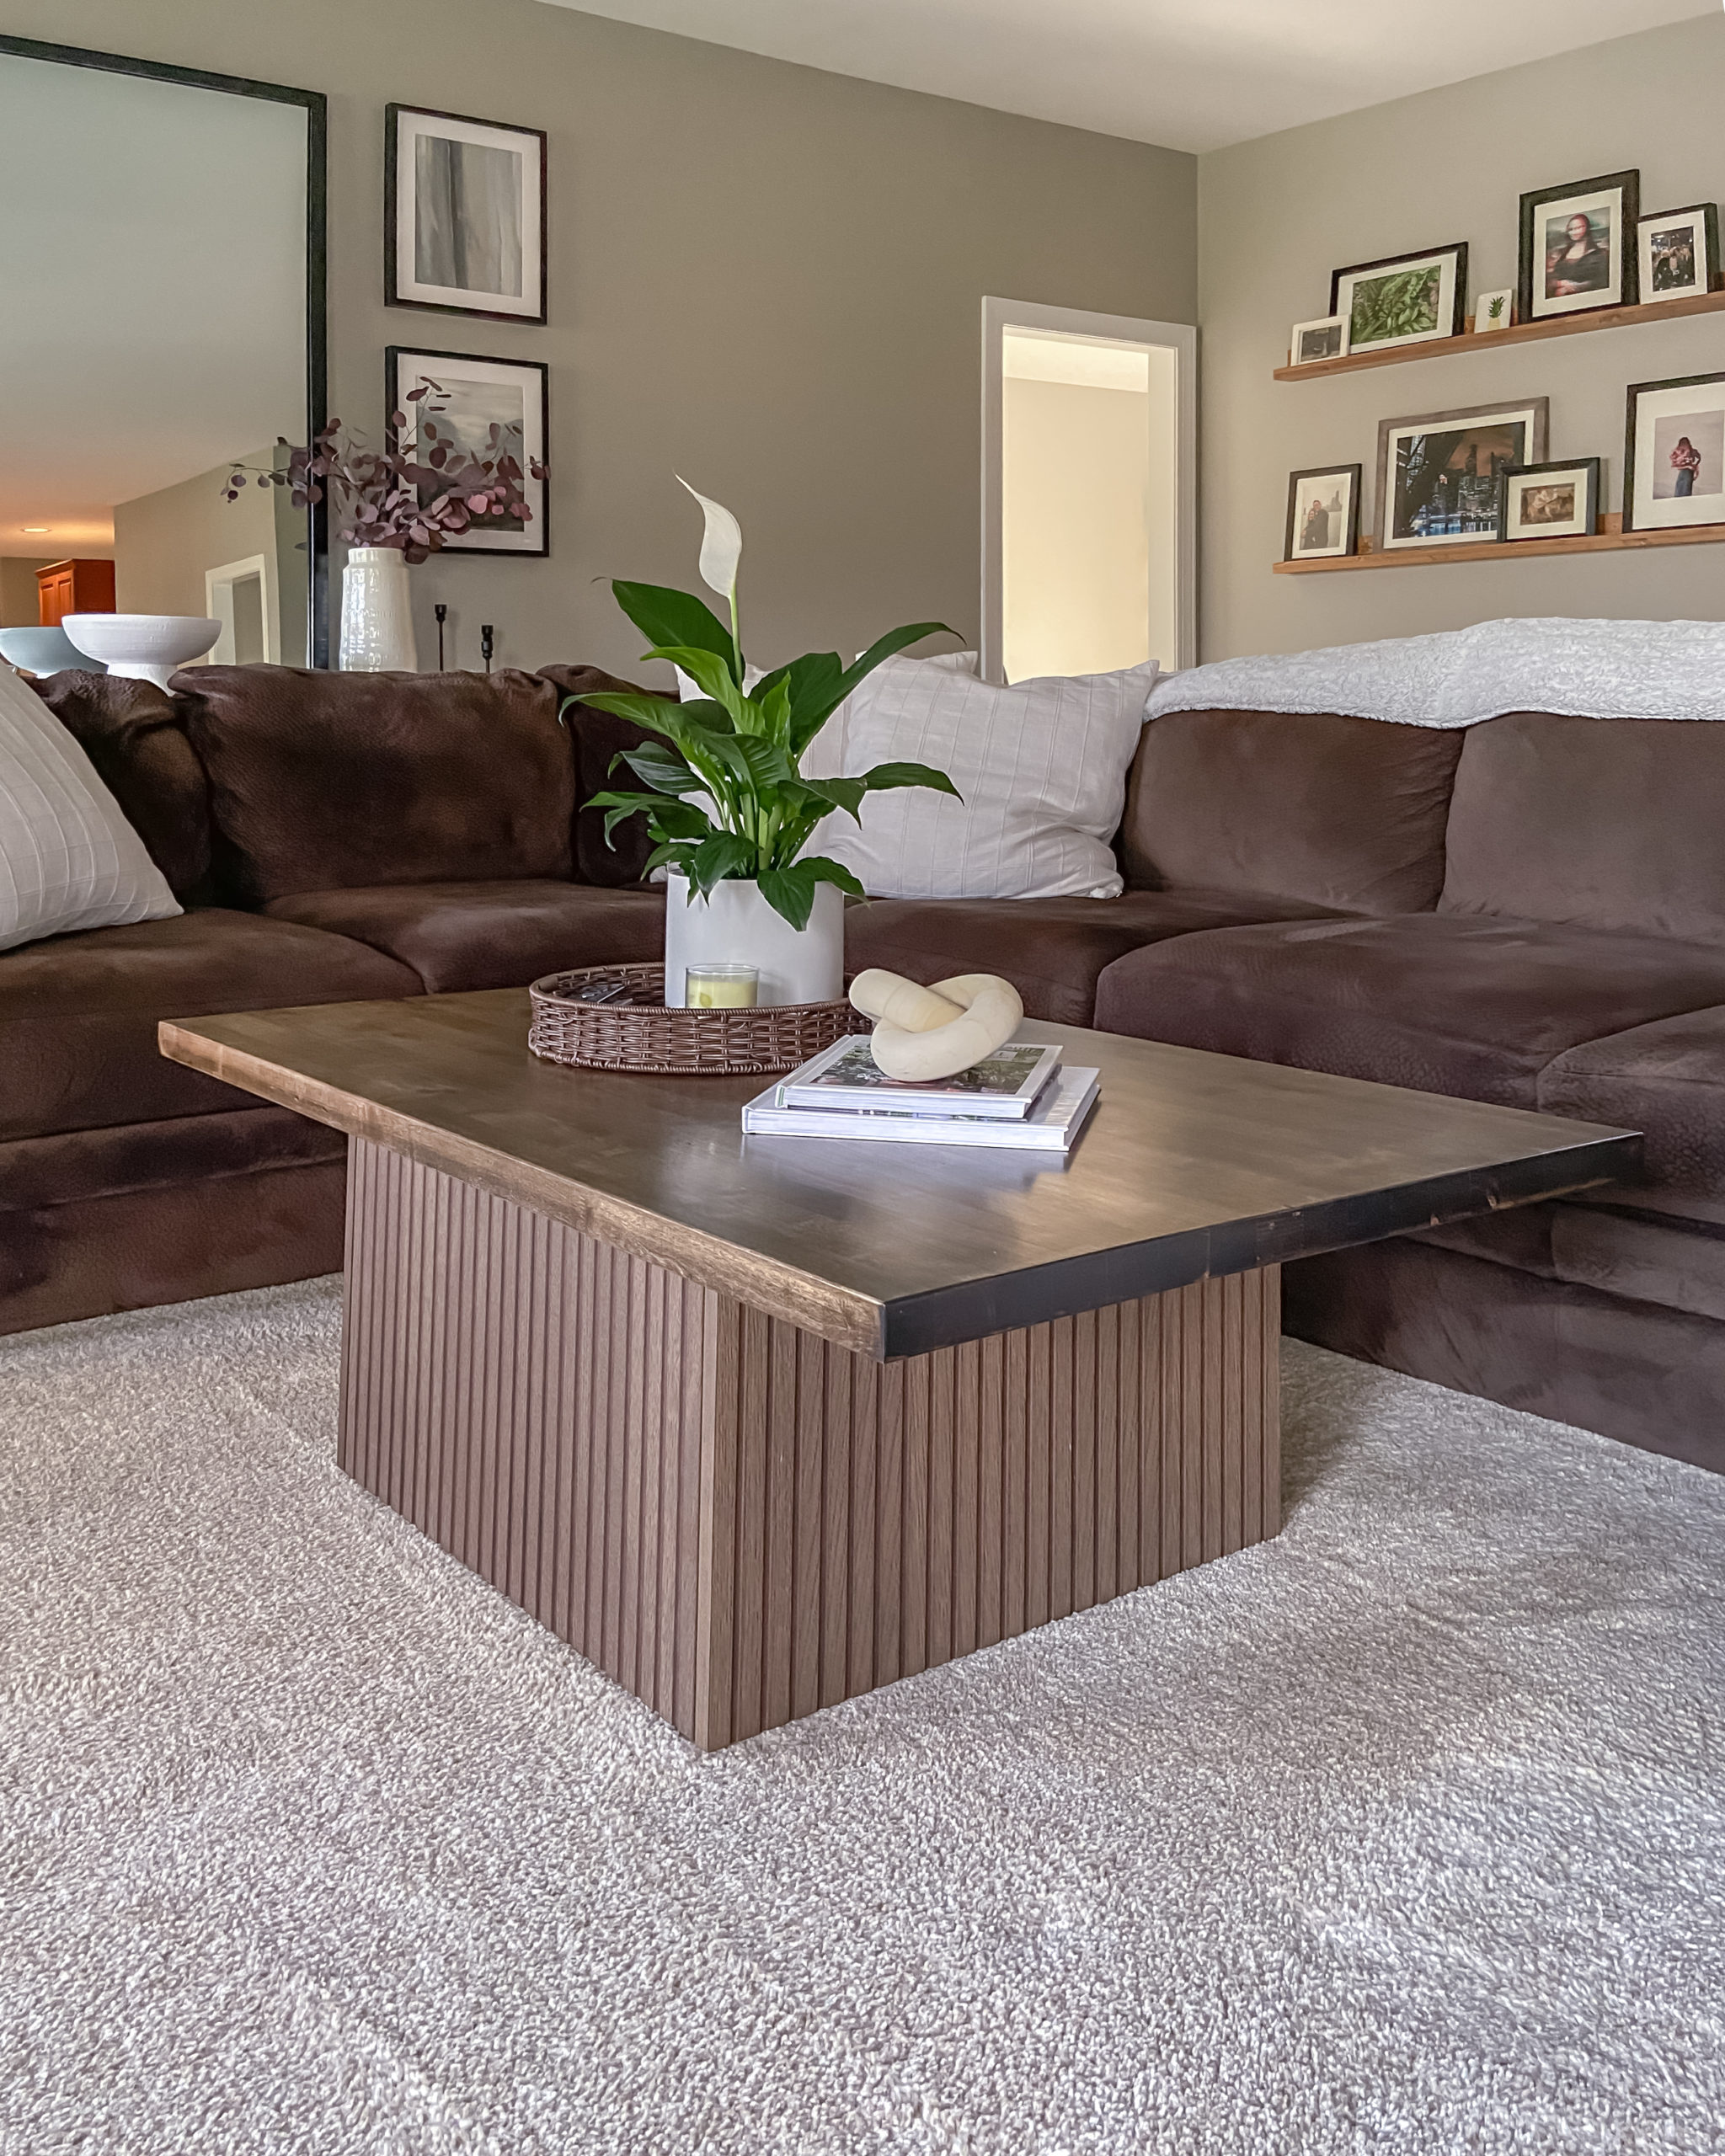
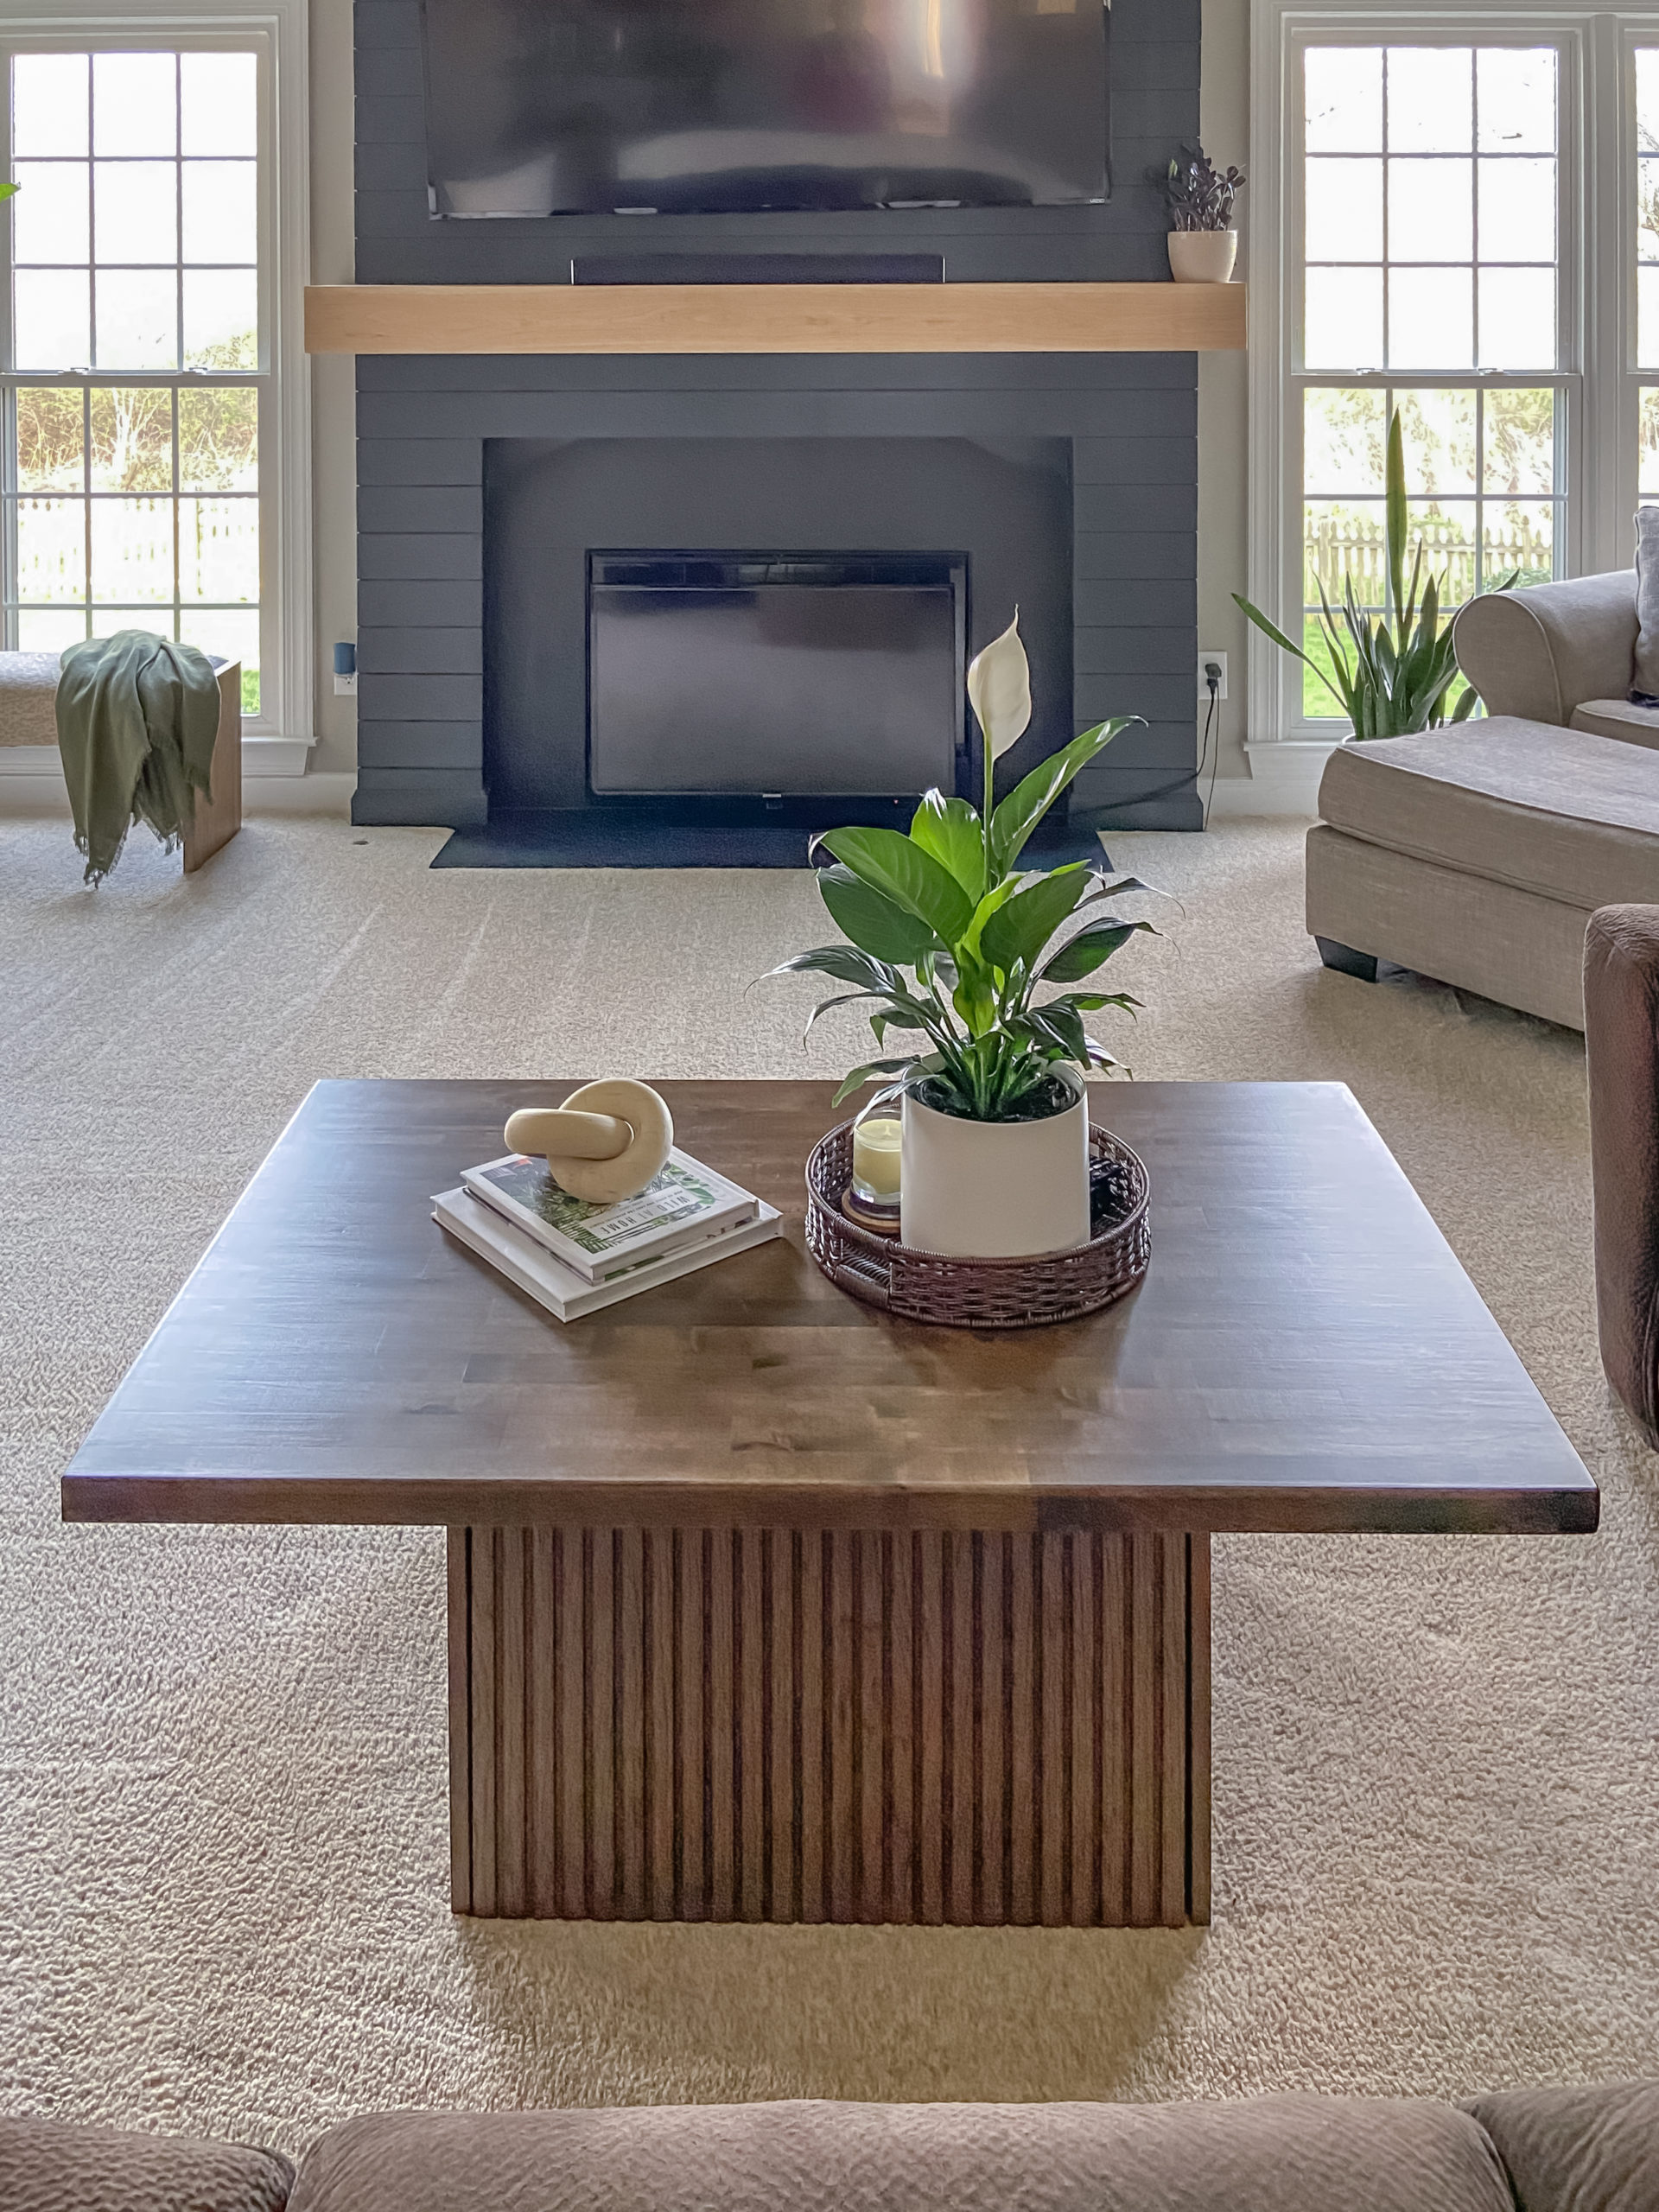
After finishing my Shiplap Fireplace, my living room demanded a new coffee table. I’ve been obsessed with the fluted look that’s been trending lately. From furniture designs to DIY projects causing pole wrap to be out of stock, it’s literally everywhere and I knew I had to incorporate it into my house somewhere. The fluting mixed with a midtone wood perfectly fits in my transitional-leaning design aesthetic.
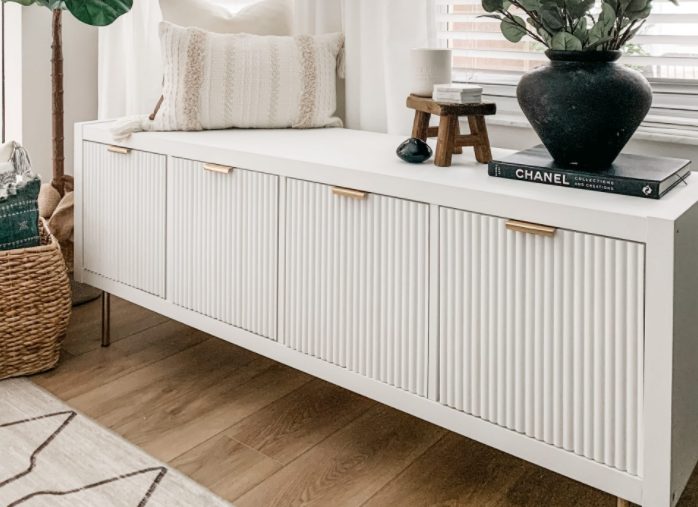
I saw Annie (aka Champagne Chaos) build this fluted DIY coffee table on Instagram and knew immediately that this was it. See her blog tutorial for it, HERE. I followed her process almost exactly, but swapped out the drawer hardware.
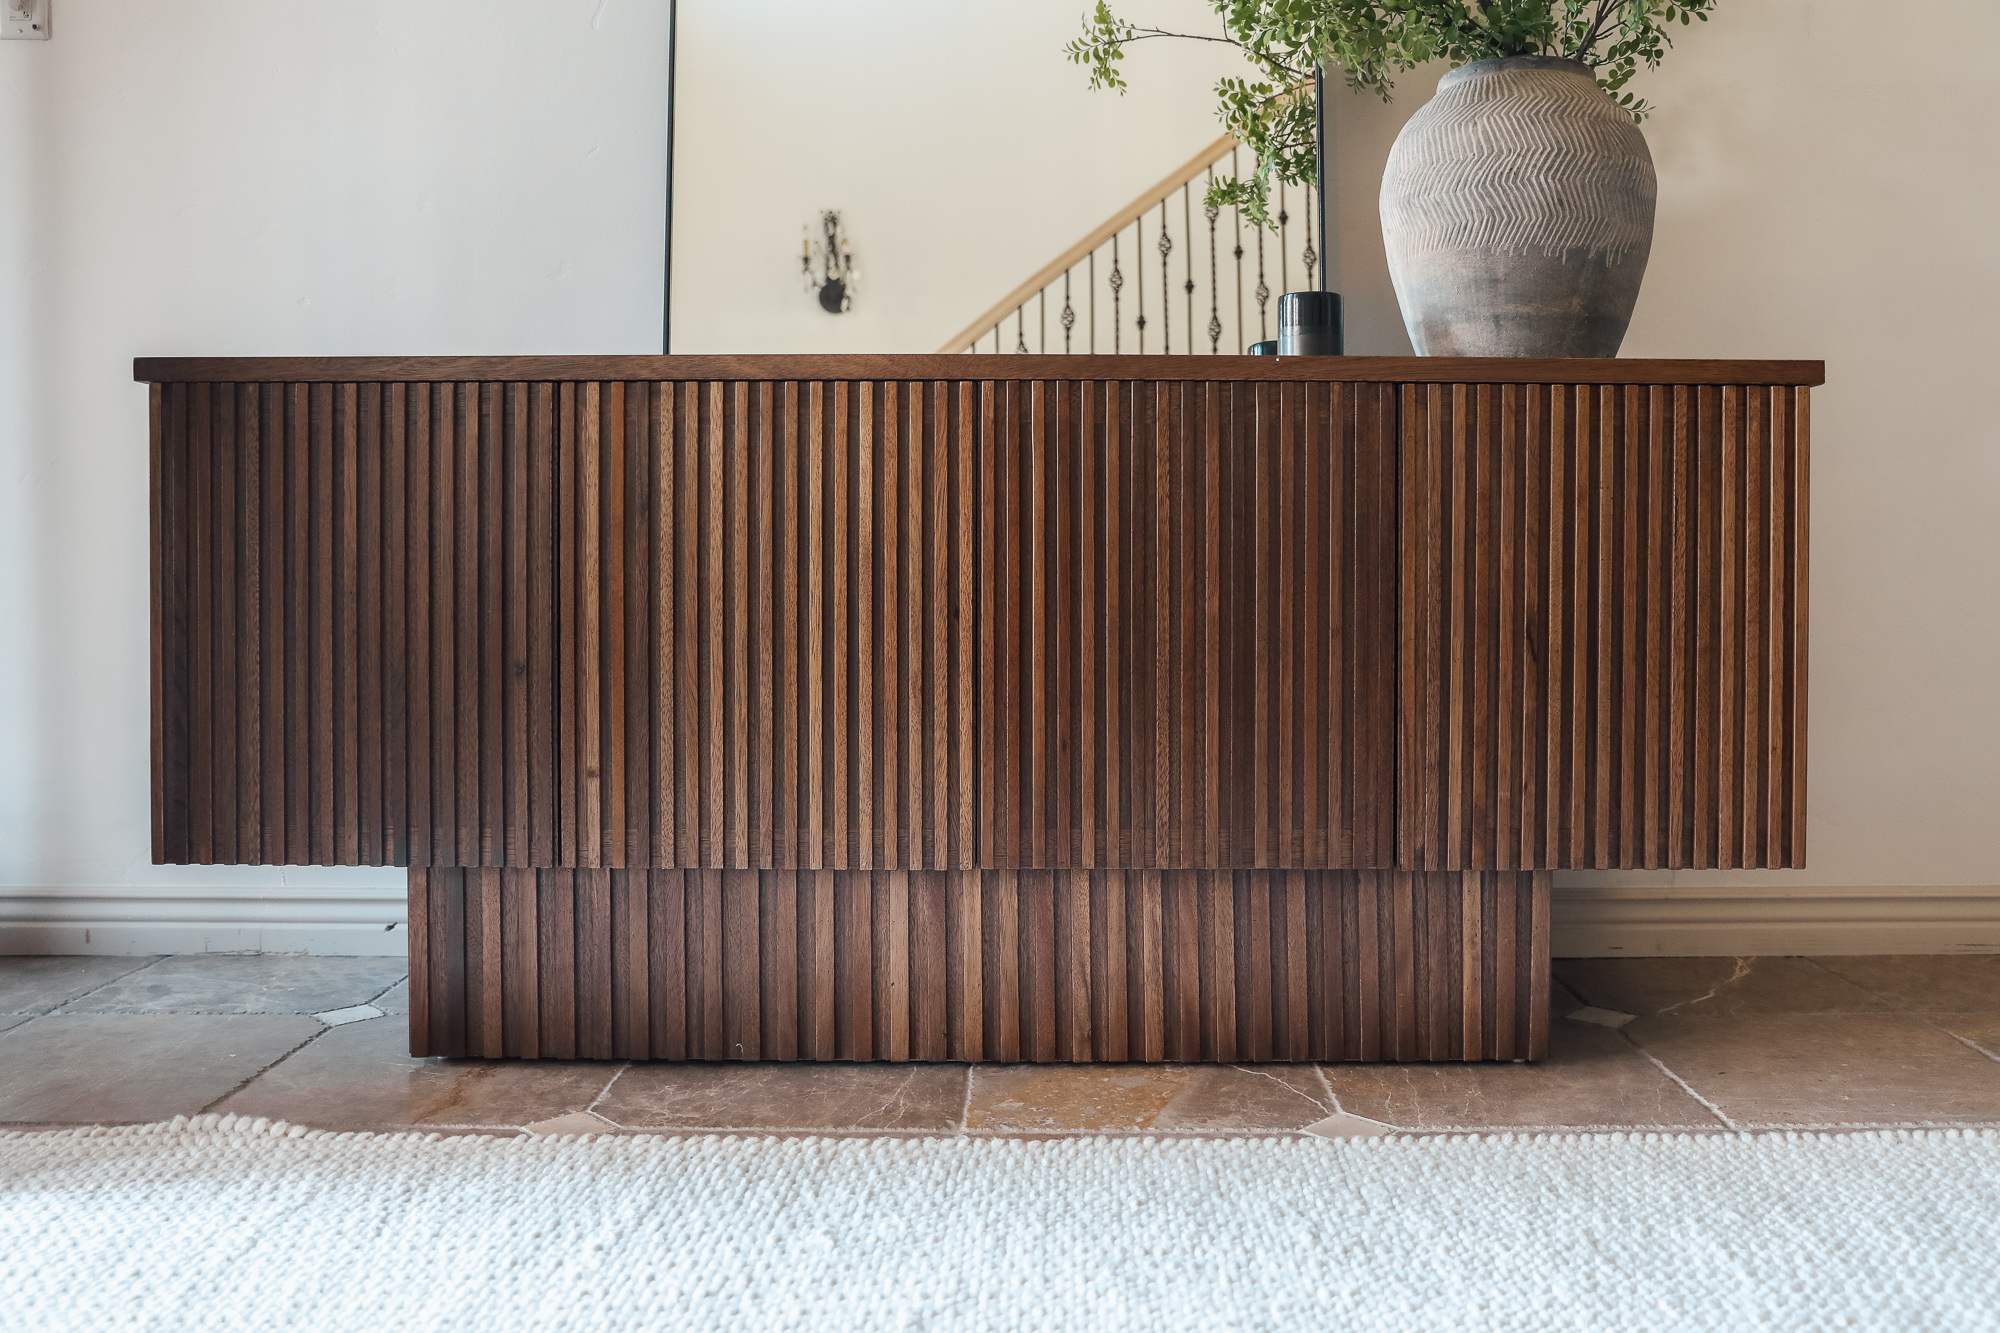
This build uses the BJÖRKÖVIKEN fluted drawer fronts from IKEA (meant for their BESTÅ unit). Using these oak veneer drawer fronts takes the risk out of trying to create the fluted look myself. This is also one of the items that I recommended in my IKEA blog, The Best Solid Wood Furniture from IKEA and the ‘other stuff’ that’s worth buying anyway! I was so excited to use them and get started!
MATERIALS:
2″ x 4″ Studs
3/4″ Plywood
4- IKEA BJÖRKÖVIKEN Fluted Drawer Fronts
Hardwood Reflections Birch Butcher Block (48″ x 30″ x 1.5″)
STEP 1: Plan your Dimensions
Following Annie’s tutorial, (but using a different drawer insert), I needed to calculate all my dimensions first. You are limited by the dimensions of the drawer fronts and the drawer hardware in this build. I used SketchUp to model my coffee table, working backwards from the dimensions that were fixed to see how I needed to build my base. Each drawer front is 23 + 5/8″ wide, 15″ high and roughly 5/8″ thick. Keep in mind that two sides of the base will equal the length of the drawer front (23 + 5/8″), while the other two sides will overlap and make those sides longer (25″). The drawer hardware require supports that were 22.25″ wide. Here is the model that I created with the top and actual drawer/front removed so you can see the frame:

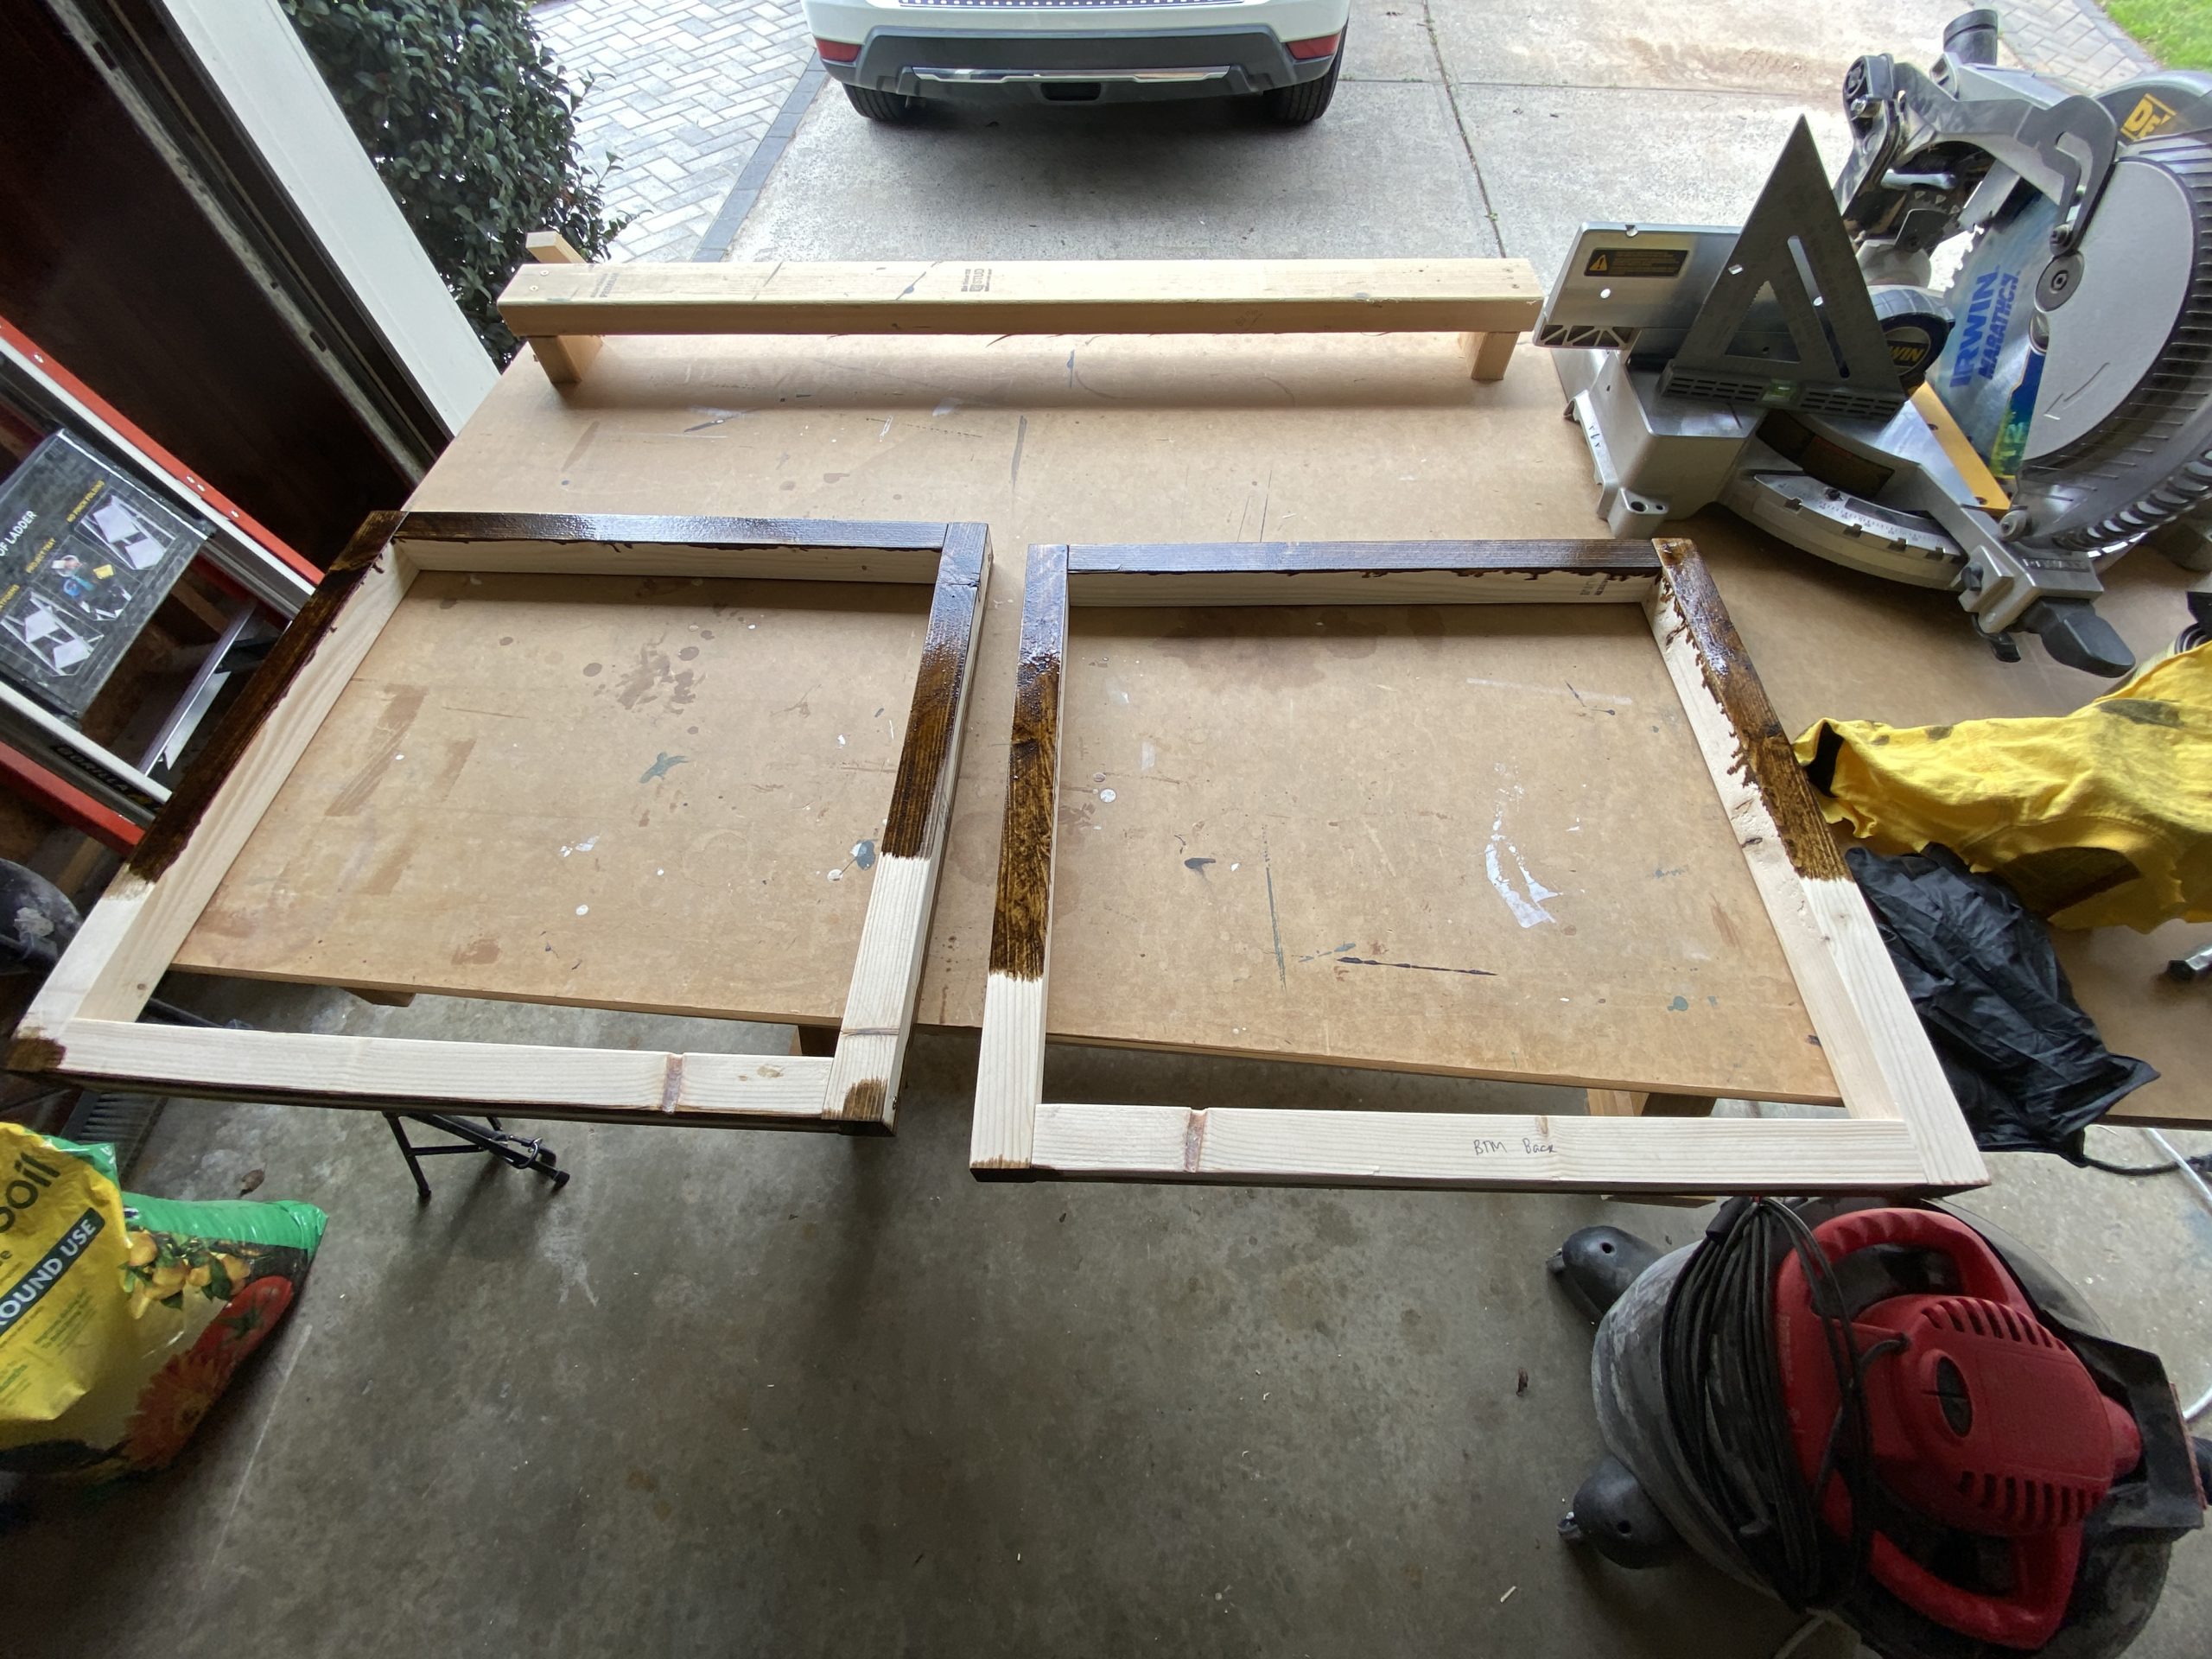
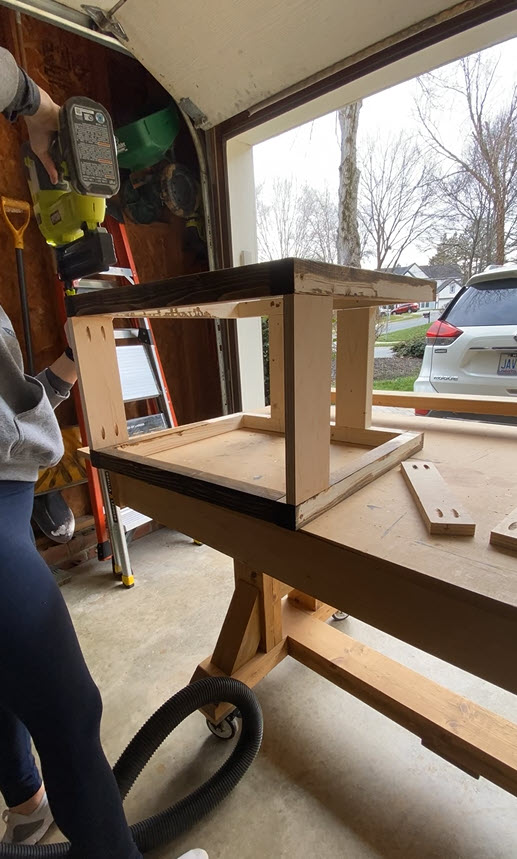
STEP 2: Build the Base Frame
I ripped 2×4’s in half for the top and base, then the supports for the drawer were made from 3/4″ plywood to get the exact 22.25″ width needed for the drawer & hardware. The rest of the supports were made from 3/4″ plywood and 2×4″‘s (not cut).
I added 0.5″ to the total height of my base so that the drawer wouldn’t touch or interfere with the table on top, or the carpet that the table would sit on. The 0.25″ on the top was enough clearance for the butcher block but my carpet is pretty plush, so I ended up nailing some additional 0.25″ wood blocks to the base to keep it up off the carpet at the end. It’s completely unnoticeable in the space.
Before I fully assembled the base, I stained some of the parts that might show when the drawer is open. I used Varathane Dark Walnut for the best match to the drawer fronts.
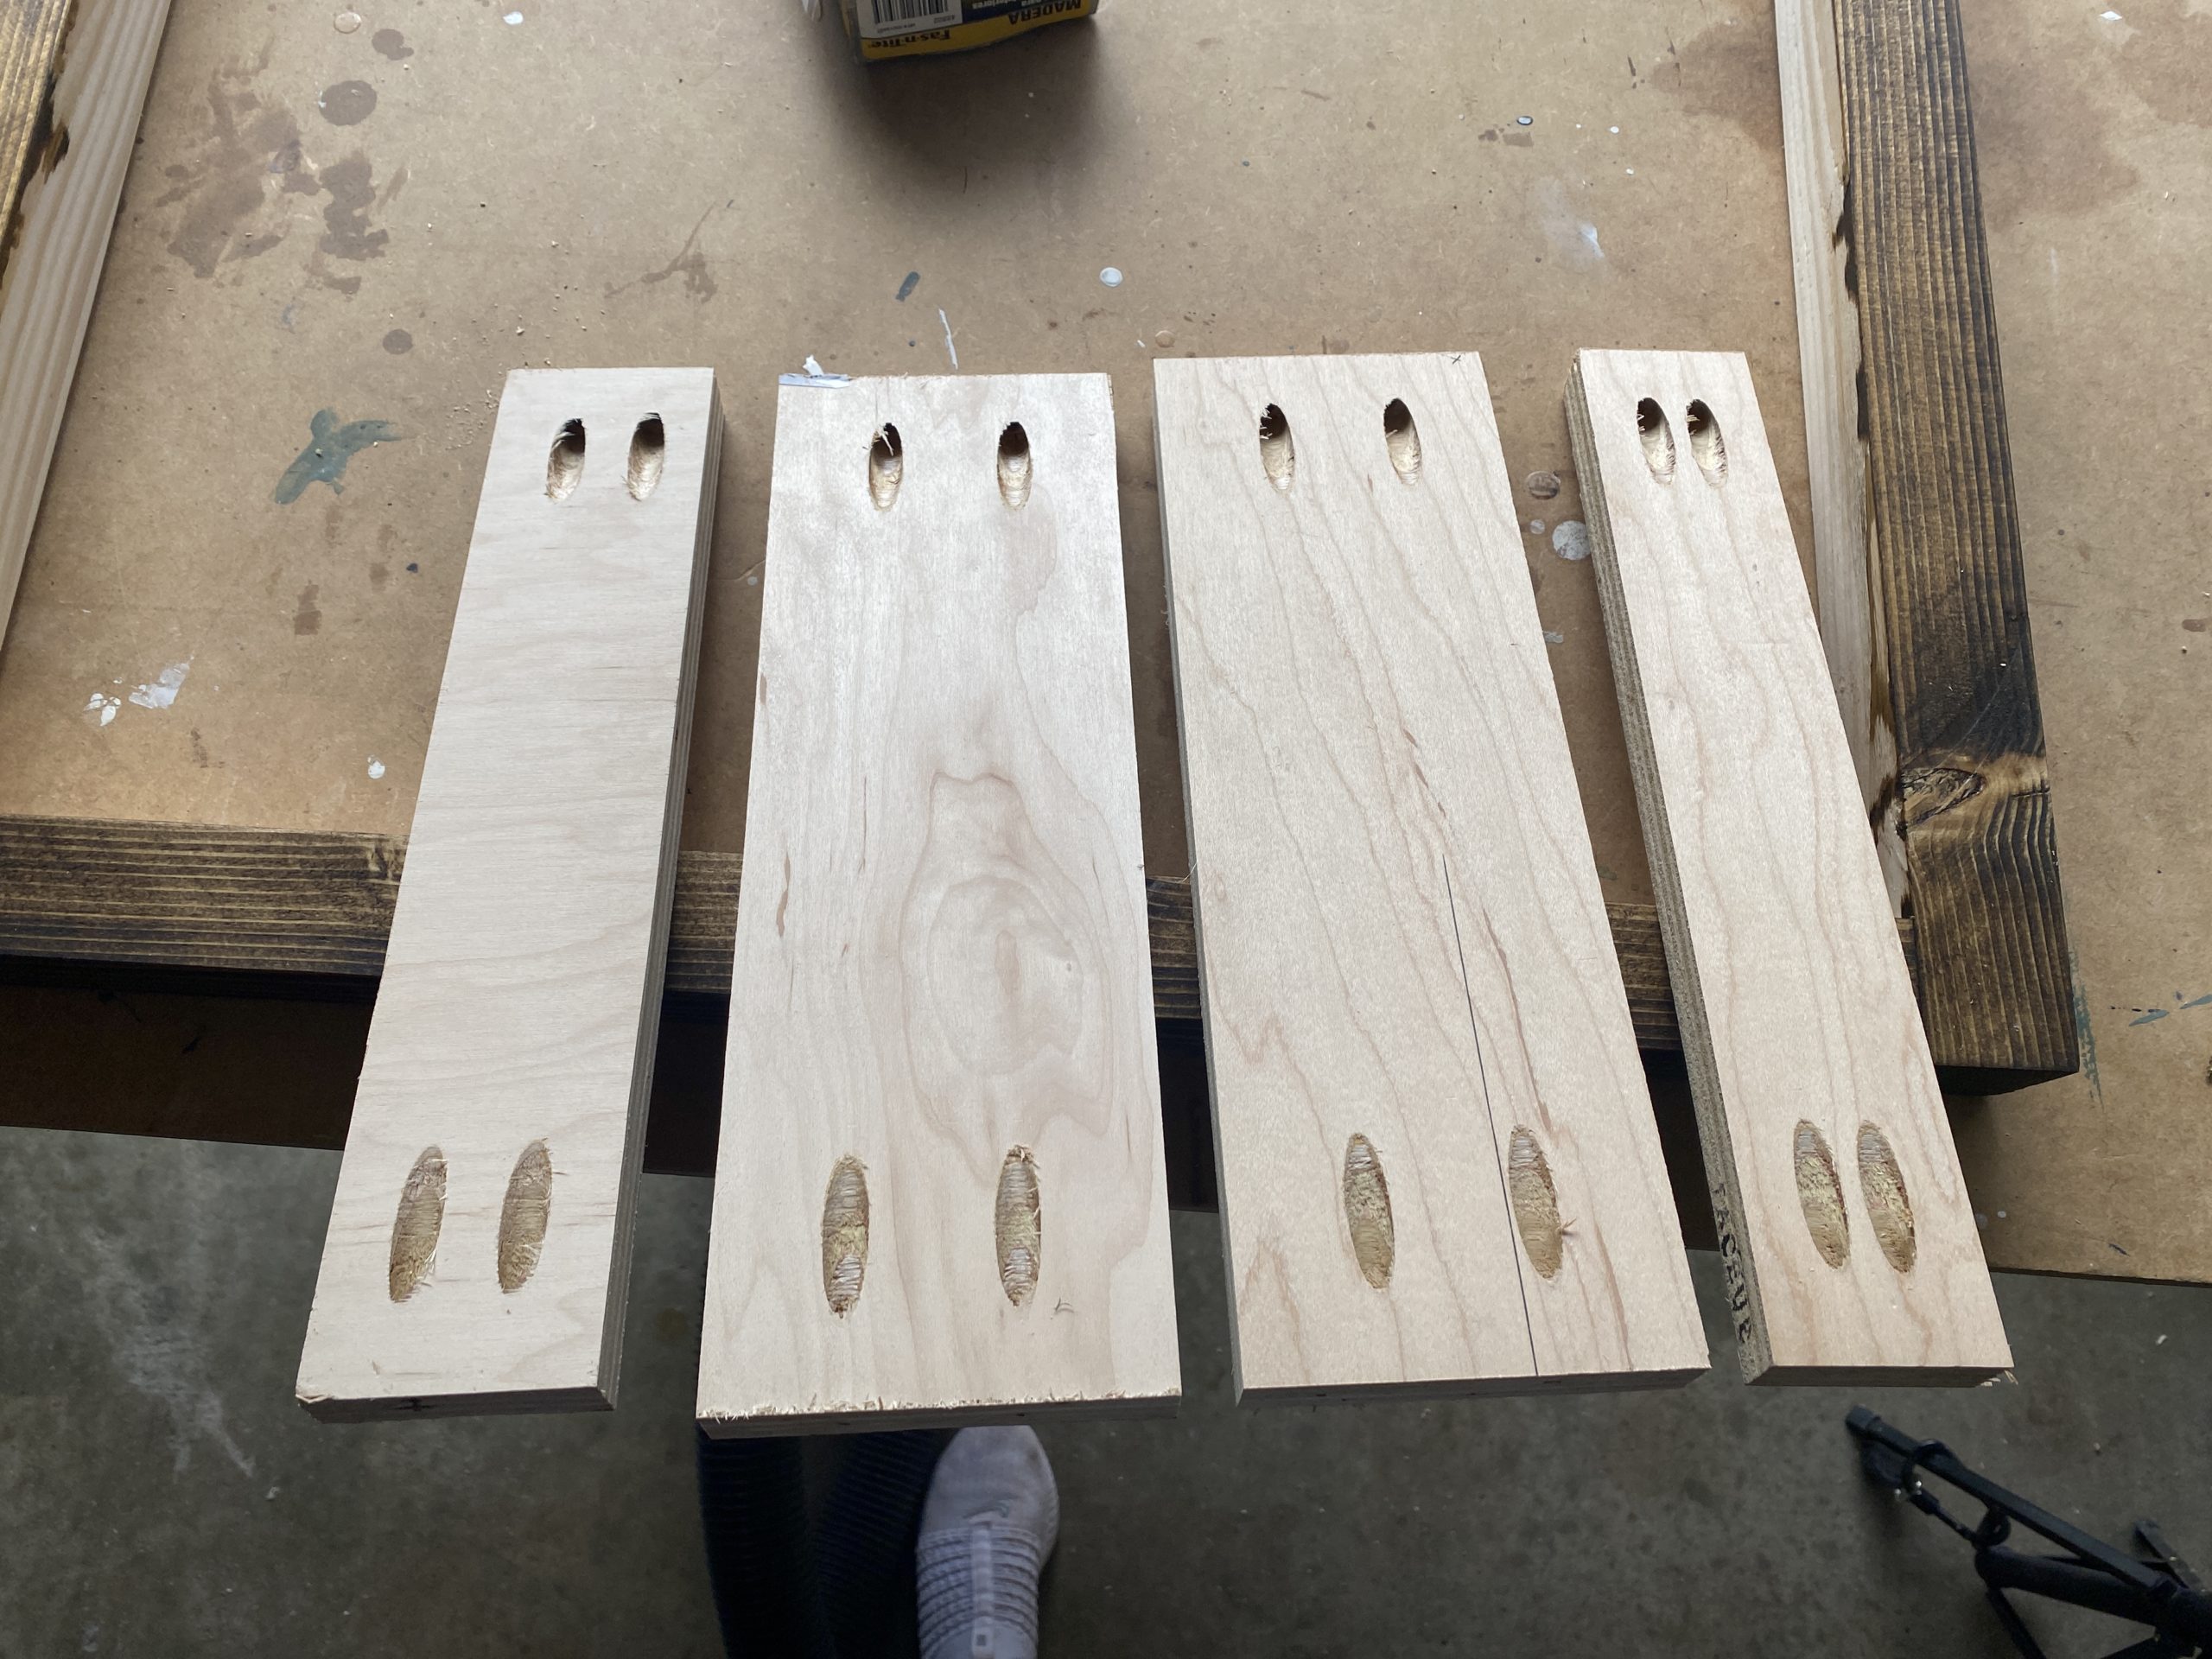
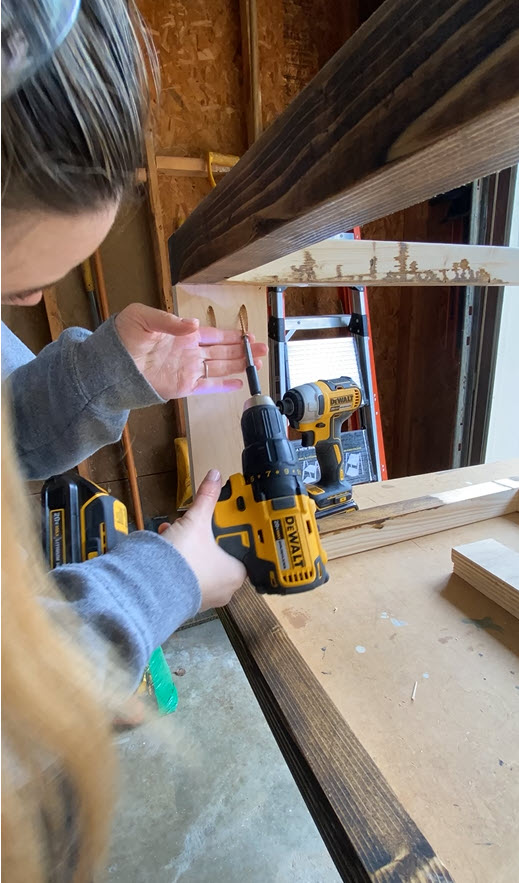
To connect the top and base, I used pocket holes in the plywood but I also used one of my favorite woodworking tricks.
Pocket Hole Trick
Pocket holes are a great way to join wood, but they can be tricky to attach and keep your two pieces flush, even if you clamp them together! In order to keep the two pieces flush, first drive a finish nail into the two pieces to keep them connected, then screw your pocket hole in as normal.
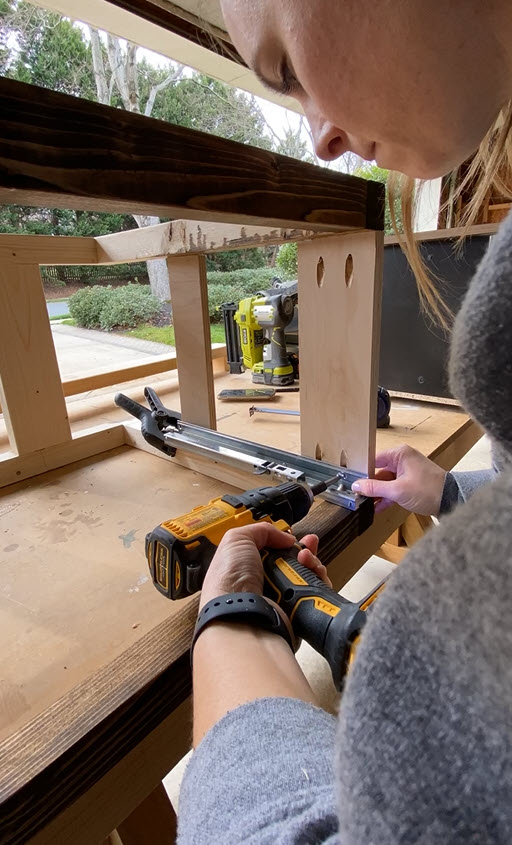
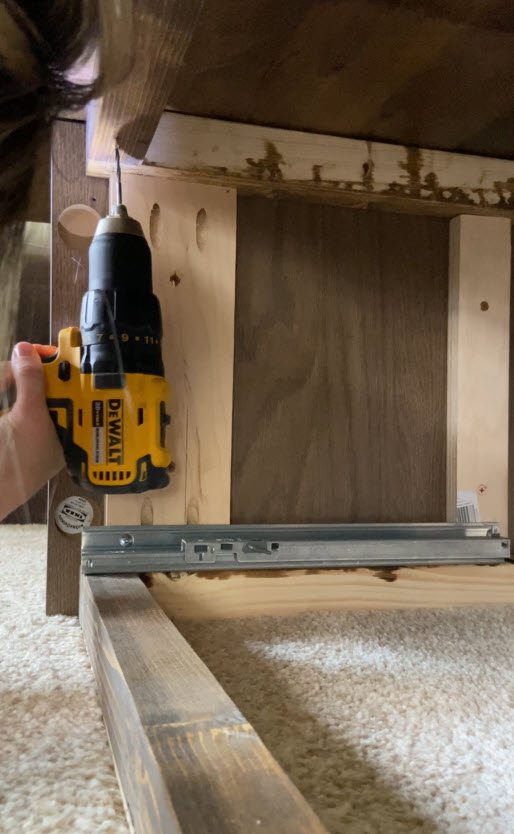
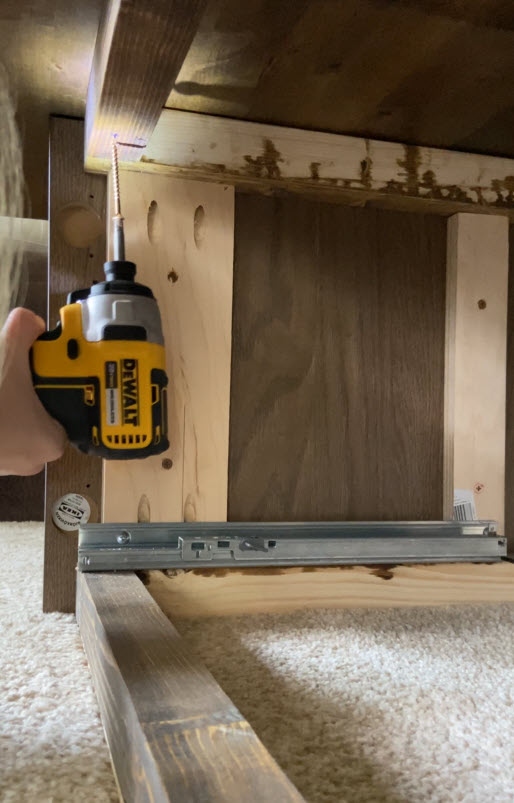
STEP 3: Install the Drawer
It’s easy to install the push-open drawer hardware- just screw them into the side supports. Follow the instructions that came with the IKEA drawer to assemble the drawer then slide it into the hardware. Since this is a push-open drawer, there are some adjustments you can make to how far the drawer sticks out (or needs to be pushed in) in order to open it. I made these adjustments after attaching all the drawer fronts to the base.
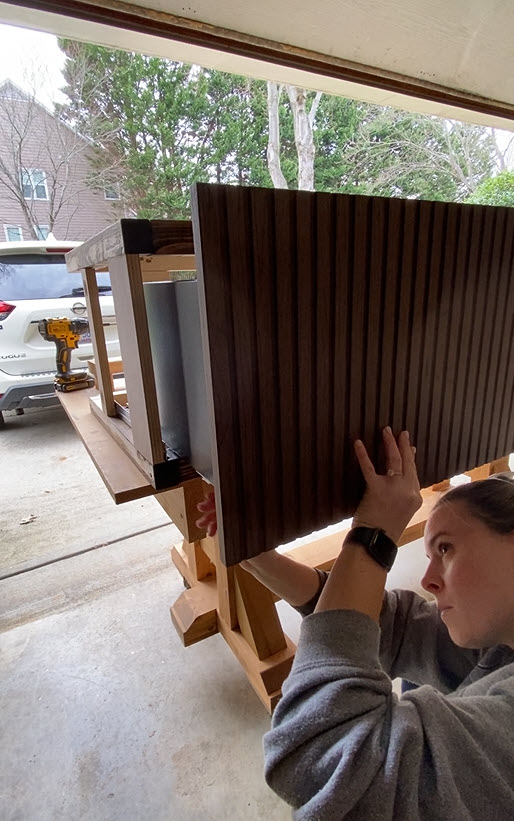
STEP 4: Attach the Sides of the Base
Next up is attaching the drawer fronts to the base. Simply clamp the drawer fronts in place to dry fit them. I used a stack of 5 business cards under all the drawer fronts to keep them all level with each other. Then, from the inside, use screws to screw them into the base framing, just make sure to choose the right length screw so that they don’t come through the other side!

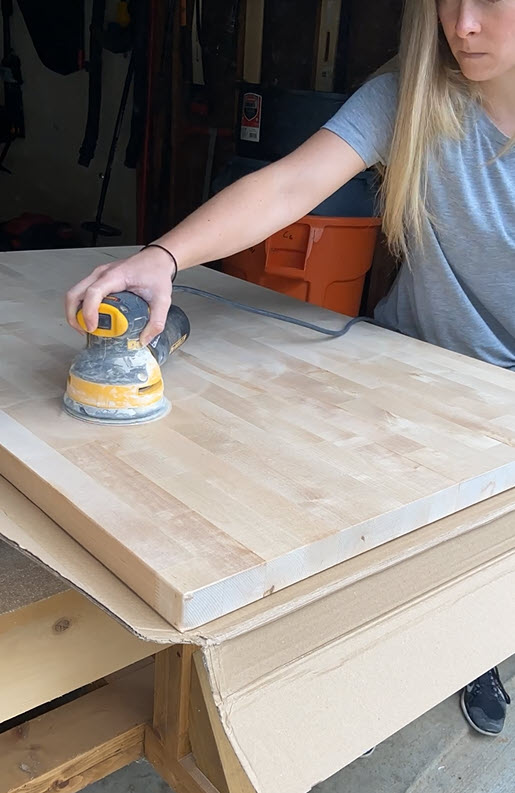
STEP 5: Finish the Tabletop
Making a tabletop from scratch is hard- and this DIY coffee table that will get heavy use was not the time or place for me to put my skills to the test. I bought a pre-fab Birch Butcher Block from Hardwood Reflections to use for the top of my table. It comes unfinished so you can stain and poly it the exact shade you want!
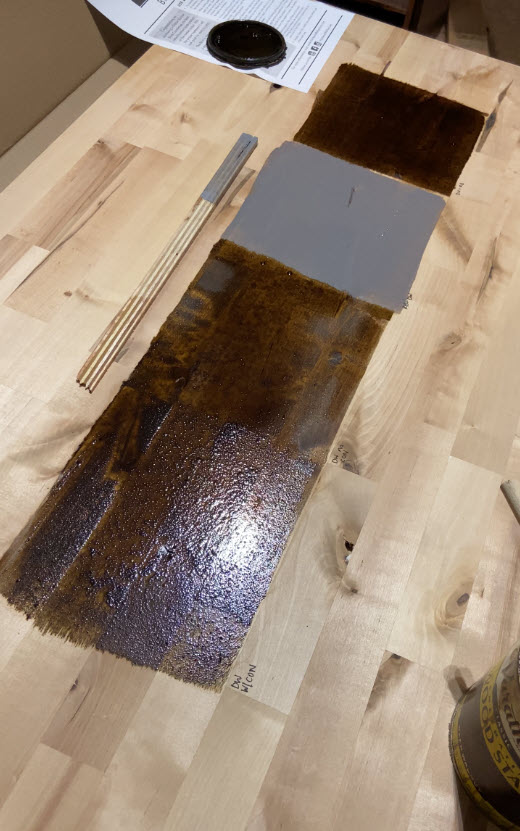
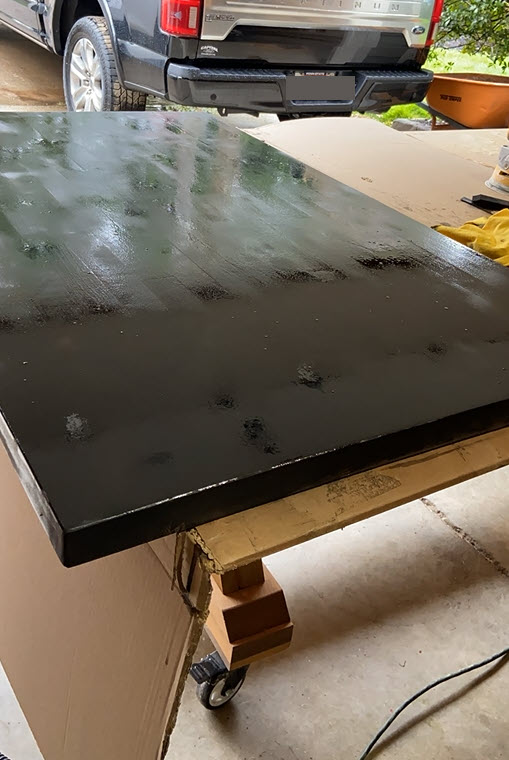
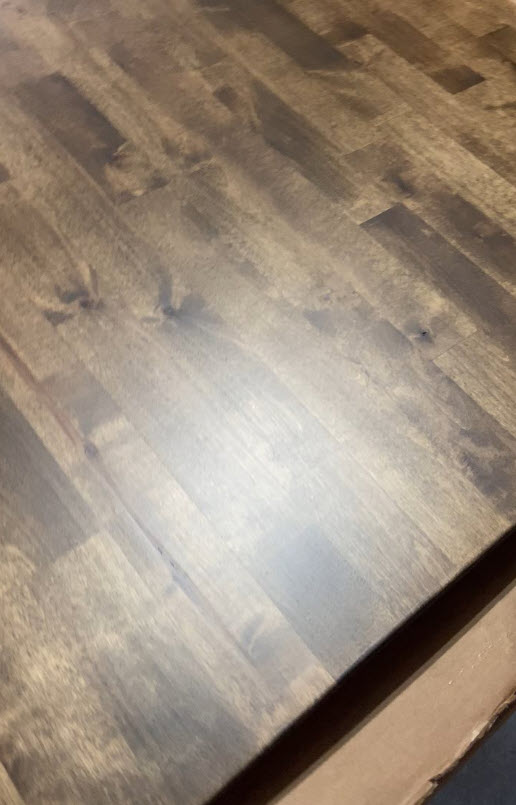
I tested out a few different stains and combos but ended up following Annie’s recommendation of Varathane Dark Walnut Stain to match the base. I used two coats of stain, wiping it off completely each time.

After the stain was dry, I finished the table with 6 coats of Minwax Satin Poly. Between each coat, I sanded the table with sandpaper, starting with 220-320 for the first couple coats, then ending with 320-550 wet/dry for the last few coats.
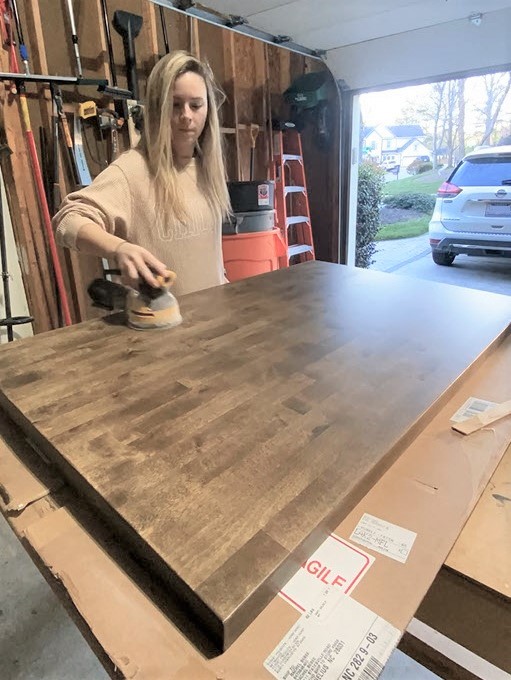

Look at how perfect that shine is!
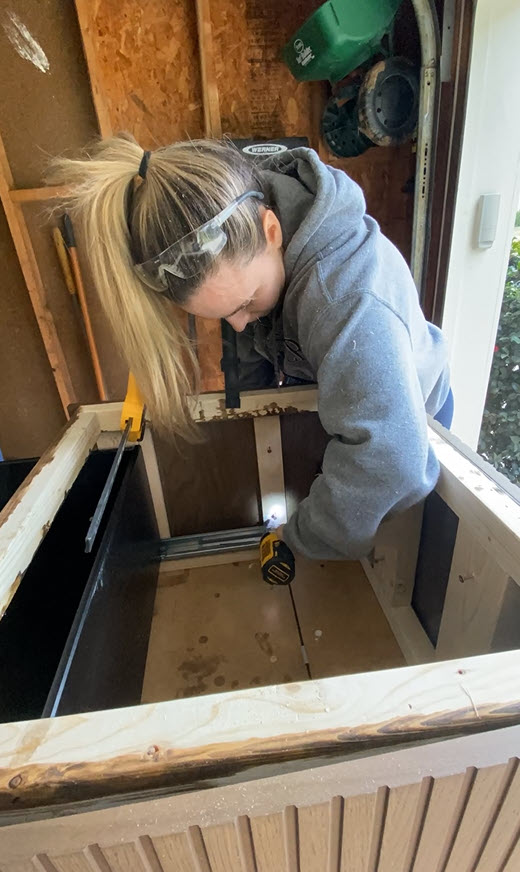
STEP 6: Assemble the Table Top
Before this step, I brought my coffee table into the living room where it would live. Make sure to confirm any doorways are wide enough for you to fit this table through if you plan to attach the top before bringing it into your space.
To attach the top to the frame, I removed the drawer so that I could get access to the frame from underneath. I centered the two pieces together then drilled 4 pilots holes and 2 1/2″ screws through the frame up into the table top. If you’re not using the exact components/dimensions that I am, make sure to triple check that your screw is not longer than the depth of your wood.
Once the screws are securely installed, reinsert the drawer and enjoy your DIY Coffee Table!
Push-Open Drawer Hardware

I opted to use an IKEA BESTÅ Drawer and Push-Open drawer slide for my DIY coffee table. This makes the drawer that’s low to the ground easy to open/close with the push of your foot. It was actually a lot easier to install than I originally thought. It installs the same as any side-mounted drawer hardware- you just have to build the supports to the correct width.

The Typical View:
Want to keep up with my newest projects? Come hang out on Instagram!