Step-by-Step Guide: How to Install Mosaic Tile

Can you imagine still wearing the same style of clothes you rocked 20 years ago? Okay, wait this is a bad example because those mom jeans and crop tops you wore in the 90’s are actually in style again. But when it comes to home design, the same doesn’t always hold true. While vintage accents are making a comeback in home decor, full rooms stuck in the past can leave you feeling like you’re living in a time capsule and it’s not the vibe! That’s why I decided to give my outdated powder room a modern refresh, starting with adding a small-patterned mosaic tile to the floors.
When I started planning my bathroom makeover, I knew I wanted replace my existing damaged tile for an all-white mosaic tile because it’s durable, water-resistant and the intricate patterns can create such a unique texture in the space. But installing mosaic tile can be a bit more of a challenge compared to larger tiles. With all the intricate patterns and smaller pieces, it can feel overwhelming.
In this step-by-step tutorial, I’ll show you how to bring your space into the current decade by removing old tile, installing cement board, and finally, tiling your bathroom floor with mosaic tiles. So, while you may be able to rock those flare jeans again, let’s leave the past where it belongs and give your floors the stylish refresh they deserve.
Check out all the videos for how to tile on my Tile Instagram Highlight!
How to Install Mosaic Tile
This post contains affiliate links which means I receive a small compensation at no cost to you. As an Amazon Associate I earn from qualifying purchases. You can read more about it here. Thank you for supporting my blog!
MATERIALS:
TOOLS:
Step 1: Remove the Old Tile
If you have existing tile on your bathroom floor, you’ll need to remove it before installing the mosaic tile. I removed my old tile using a hammer and trim puller. If you have a large amount of tile to remove, I recommend renting (or buying) a power hammer/chisel.

You can use a floor scraper or a 5 in one tool to carefully scrape off any remaining thinset after the tiles are removed. If the leftover thinset is thick or just stubborn you can also use a grinder or sander with a diamond blade to remove it. Be sure to wear safety glasses, a dust mask, and gloves for this whole process. Shards of tile were flying in my face even doing all the work manually!


If your existing tile is in good condition and not too thick, you can install the mosaic tile directly over it. However, it’s always best to remove the old tile if possible, to ensure a smooth and even surface for the new tile.


Step 2: Install Cement Board
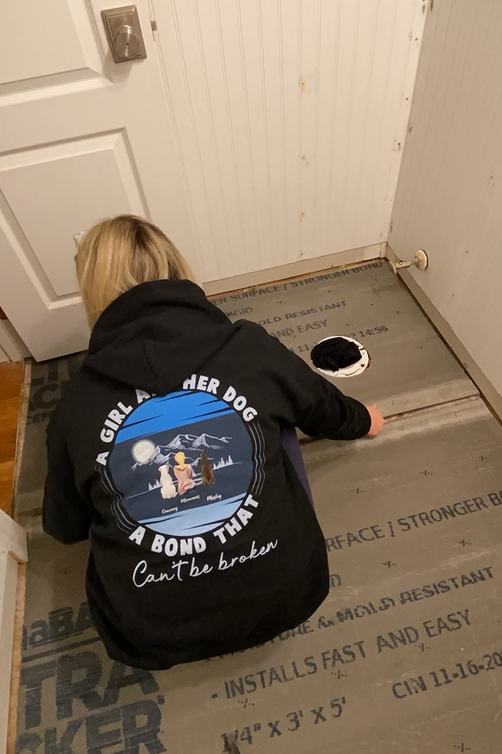
Before installing the mosaic tile, you’ll need to install cement board for a stable foundation. Cement board is a moisture-resistant backing material that provides a stable surface for tile installation. Be sure to leave a small gap between the cement board and the wall to allow for expansion. Also leave small gaps (~0.25″) between the pieces of cement board. We’ll connect them later.


To install the cement board, measure the dimensions of the bathroom floor and cut the cement board to fit. You can use a utility knife or a jigsawwith a carbide blade to make the cuts for the toilet, vents or any other obstacles your bathroom has that you need to cut around.


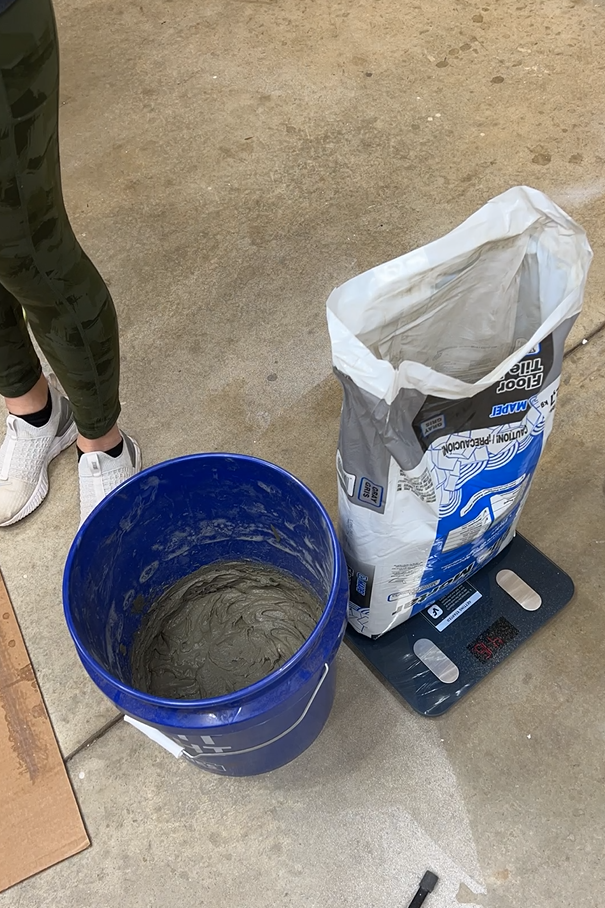
Mix & Apply Thinset
Now it’s time to mix the thinset mortar. Thinset is a special adhesive used to attach cement board to your subfloor. (We’ll also use it again to attach the mosaic tile to the cement board). Follow the instructions on the bag to mix the thinset powder with water until it has a smooth, peanut butter-like consistency. I used this 30″ Eggbeater Mixer to mix my thinset (and grout!)
Choose the right thinset. There are different types of tile adhesives and it’s important to choose the right one for your specific tile material. For example, porcelain tile should be installed with a polymer modified thinset, which is a liquid additive. Your cement board and tile packaging should instruct you which kind of thinset you should be using.

Once the thinset is mixed, use a notched trowel to apply a thick layer to the subfloor then use the notched side to create a pattern. Pushing down at a perpendicular angle so that the thinset on your floor is the same depth of the notches. Once you’ve covered the floor with thinset, place your cement board on top of it. Adjust the placement of the cement board if needed then evenly and carefully step on the board to really secure it with the thinset.
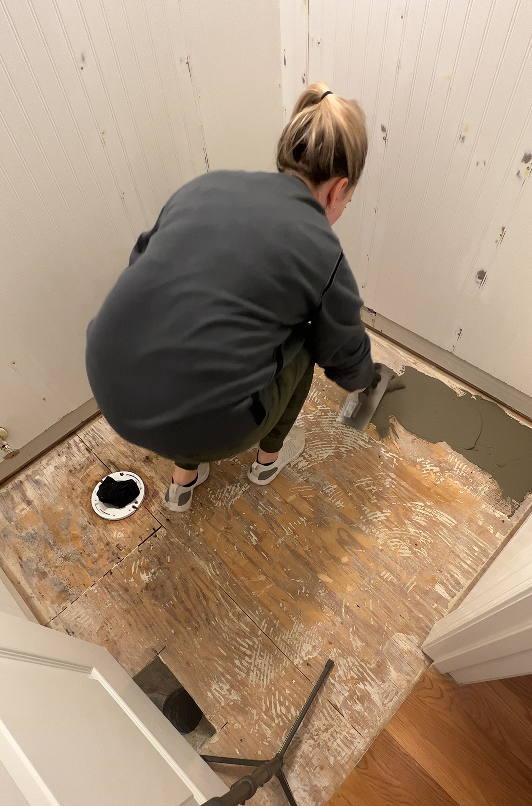


Follow this step for the remainder of the space.
Seal Cement Board Seams and screw the cement board into the floor
Once the cement board is all laid down, you’ll need to seal the seams between the boards with thinset and fiberglass tape. Start by applying a layer of thinset over the seam between two cement boards. Then, press the fiberglass tape into the wet thinset, making sure to cover the seam completely. Using a putty knife or a flat trowel, gently feather out the thinset on either side of the seam to create a smooth, even surface.


Use these Backer-On Screws and drill through the cement boards, into the subfloor. Space these screws 6 inches apart throughout the entire board, staying 2″ away from the edges. Wait 24-48 hours for the thinset and cement board to cure in place before you start to tile.


If you’re tiling a wet area, you’ll also need to use a waterproofing membrane on top of your cement board. This will prevent moisture from seeping through the tiles into the subfloor. Powders rooms and bathroom floors outside of showers are not considered wet areas so cement board was sufficient for me.
Step 3: Dry Fit your Tile and Make Cuts
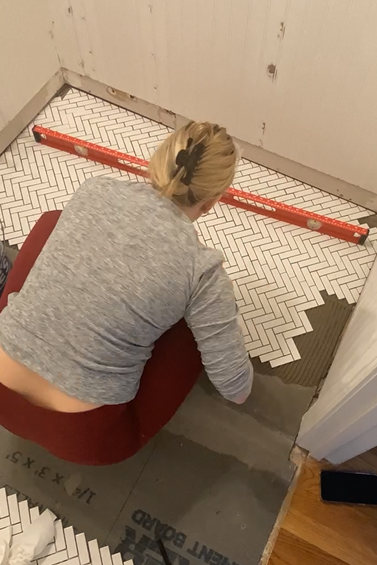
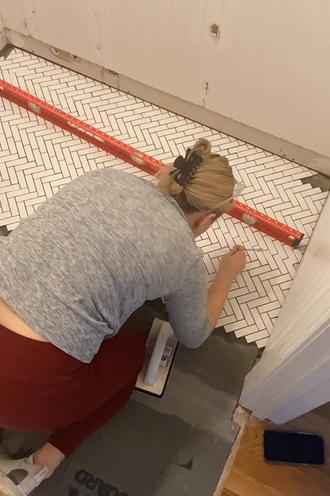
Before you start installing your tile, you need to complete a “dry fit”. A dry fit is where you lay out your tiles on your surface without adhesive so you can determine the pattern and make any modifications. You’ll also make a lot of your straight cuts (for against walls) at this point. If you wait until you’re adhering the tile to make the majority of your cuts, your thinset could dry out. Use a laser level to line up where you want to start your tile line and DON’T MOVE IT until you’ve fully adhering the first row of tile down. Make sure to start your pattern in the furthest corner of the bathroom and work your way out so you don’t accidently tile yourself into a corner!


If your bathroom floor has any uneven areas or obstacles, such as pipes or corners, make sure to cut your tiles accordingly to fit these areas. For cuts in the middle of the floor, you can wait to cut them as your tiling, to make sure your cuts are accurate.


To make cuts it’s best to use a wet saw and be sure to wear eye protection. I found that it was easiest to cut tile with the netting (bottom) facing up, so that the sheet remained more stable as it went through the saw. You can also use your grout float as a push stick to hold the tile down while cutting with the wet saw.
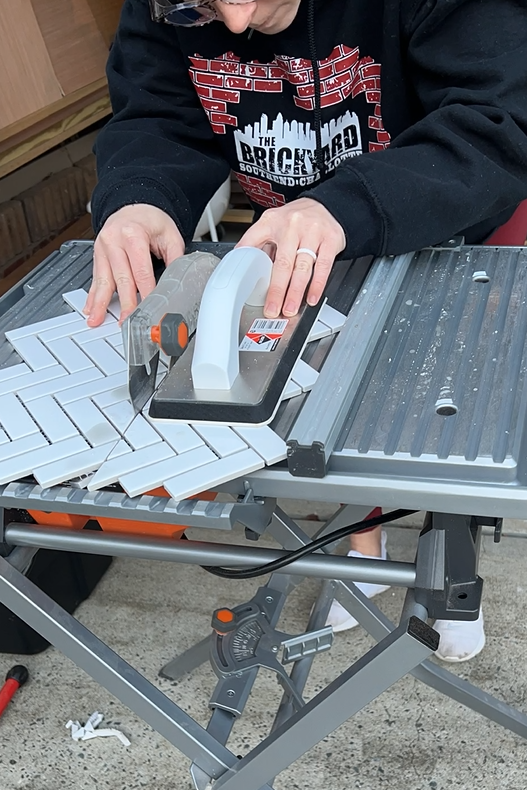

Always measure twice and cut once to avoid wasting any tiles! Otherwise, you’ll measure once and cuss twice! Take your time with the cutting process, especially with intricate cuts. Once all the cuts are made, lay out the tiles again to make sure everything fits together nicely.
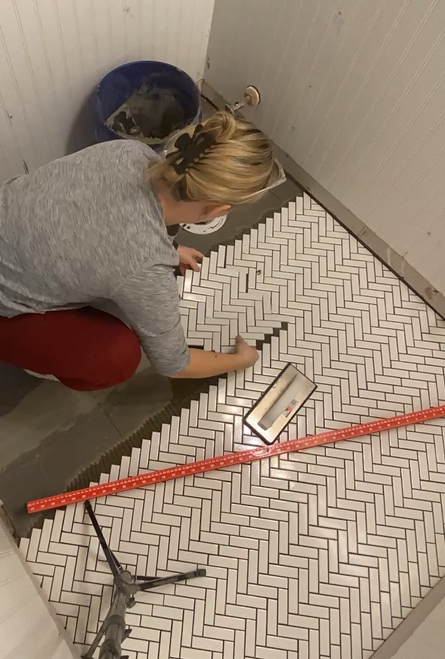
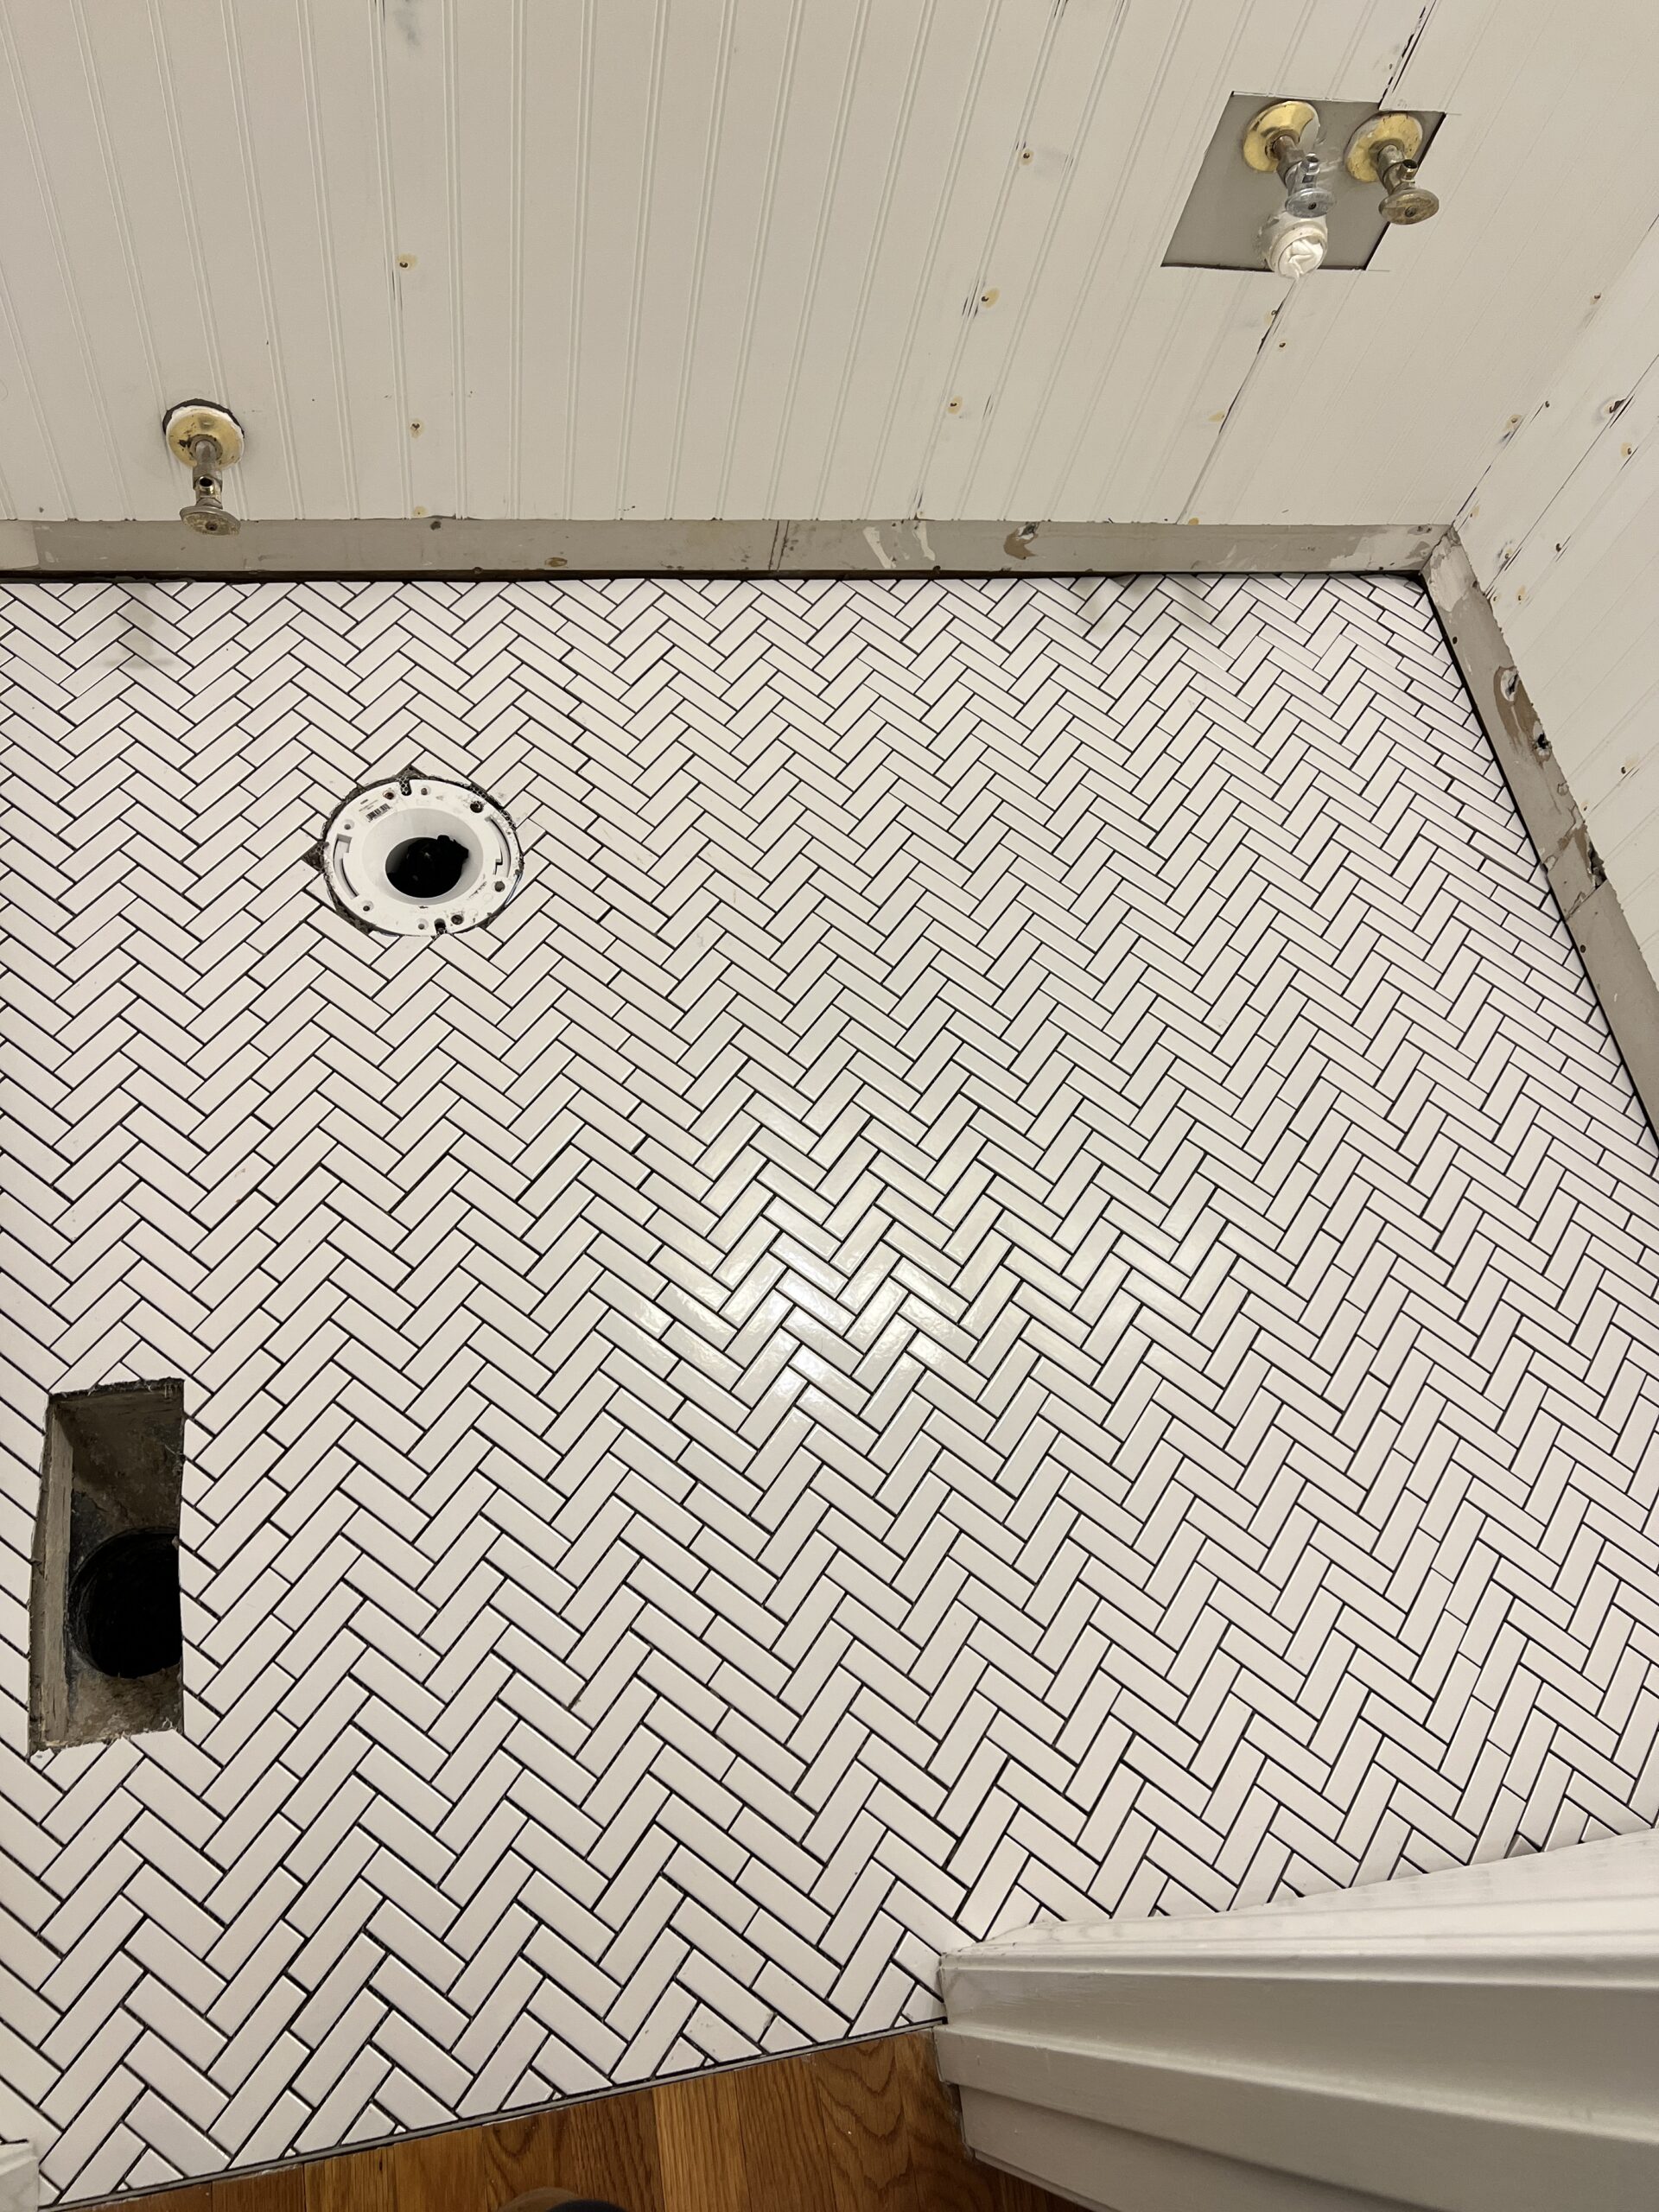
Step 4: Install Mosaic Tile
It’s thinset time again! Once again, follow the instructions on the bag to mix the thinset until it has that smooth, peanut butter-like consistency. Apply the thinset to the floor, starting against your level line . Start in a small area, only applying enough thinset to install a sheet or two at a time. Try to work quickly because thinset can start to dry out after about 20-30 minutes.

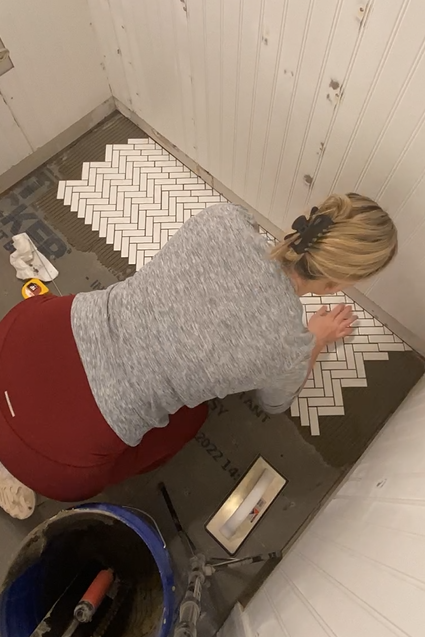
Carefully place the mosaic tile on top of the thinset and if you can, use spacers for even spacing. Spacers are small plastic pieces that are inserted between the tiles to maintain consistent spacing and ensure a professional finish. They are available in different sizes, and you should choose the right size based on the tile you’re using. My mosaic tiles didn’t have consistent spacing (crazy!) so I couldn’t use spacers.
Press each tile firmly into the thinset and make sure it is level with the surrounding tiles using a level. Continue spreading thinset and installing tiles in small sections until the entire bathroom floor is covered.
Wipe away excess thinset from the surface of the tiles and in the cracks as you lay them. I used a metal skewer to dig out any high thinset spots.


Transition Tips:
If you’re tiling against another floor surface, like hardwood or carpet, consider using a metal transition Schluter piece, which can create a seamless transition while also protecting the edges of your tile. Simply lay the transition piece down and then tile up to it, ensuring that the tiles are flush with the top of the transition.
Another option is to use a stone threshold piece. Tile and hardware stores typically sell a variety of stone transition pieces that are chamfered or angled on one of the long edges. You can install this piece just like a long tile and butt your existing tile design up to it.


Allow a full 48 hours for the thinset and tile connection to fully cure.

Step 5: Grout the Tile
Mix the grout according to the instructions on the packaging and apply it to the tile using a grout float. Work in small sections, making sure to push the grout into the gaps between the tiles. When you’re sure the grout is in all the gaps, wipe the top of the tiles with the grout float at a 45-degree angle. This will scrape off most of the excess grout without removing any from the gaps.


Once you’ve completed a section, after about 10 minutes, very lightly wipe off the tiles with a damp sponge. Again, make sure not to press too hard or remove grout from inside the gaps. Don’t worry about getting all the grout cleaned from the tile, you just want to dilute the grout that IS sitting on the tile so that when it dries, it can easily be removed.

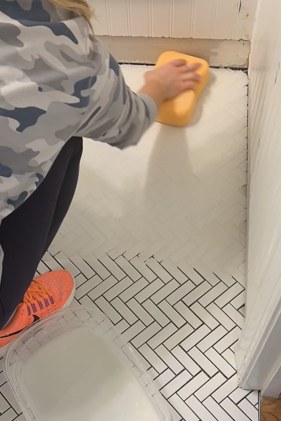

Complete grouting the floor in small sections. After 30 minutes to an hour, go back with a microfiber cloth and buff the grout residue off the top of the tiles (this is commonly called grout “haze”). Since I used white grout with white tiles, it was difficult to see where I’d already buffed so I used a flashlight to help me keep track. The grout in the gaps of the tile will still be soft so be careful not to disturb that area. Let the grout cure for 24 hours.


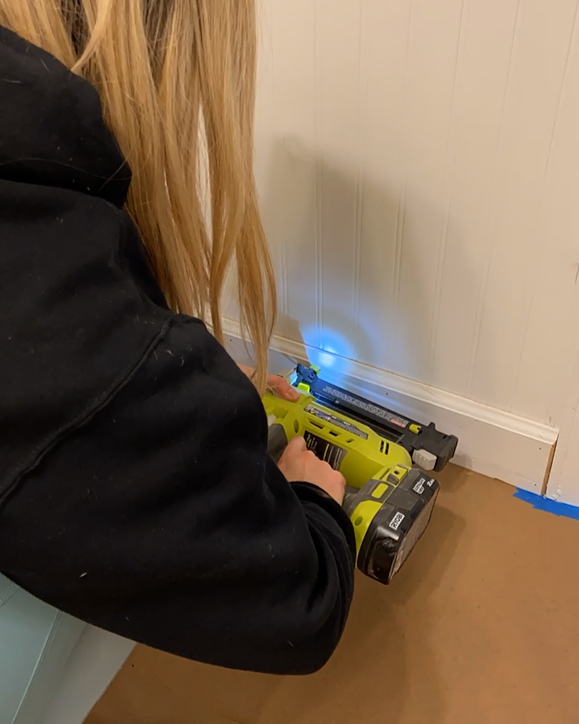
Step 6: Sand and Reapply Baseboards
Finally, it’s time to reapply your baseboards and complete the floor! Whenever I remove baseboards, I always sand them down and repaint them to make sure they look fresh against the new tile! I also prefer not to reinstall the quarter round if I don’t absolutely need to, in this case, I didn’t.
Use a nail gun or finishing nails to secure the baseboards to the wall.

Optional Step: Seal your grout
Once the grout has dried, you can take this extra step to seal the tile and grout to protect it from moisture and staining. This is especially important if you’re using a finnicky tile material, like marble. Use this grout sealer and apply it according to the instructions on the packaging.

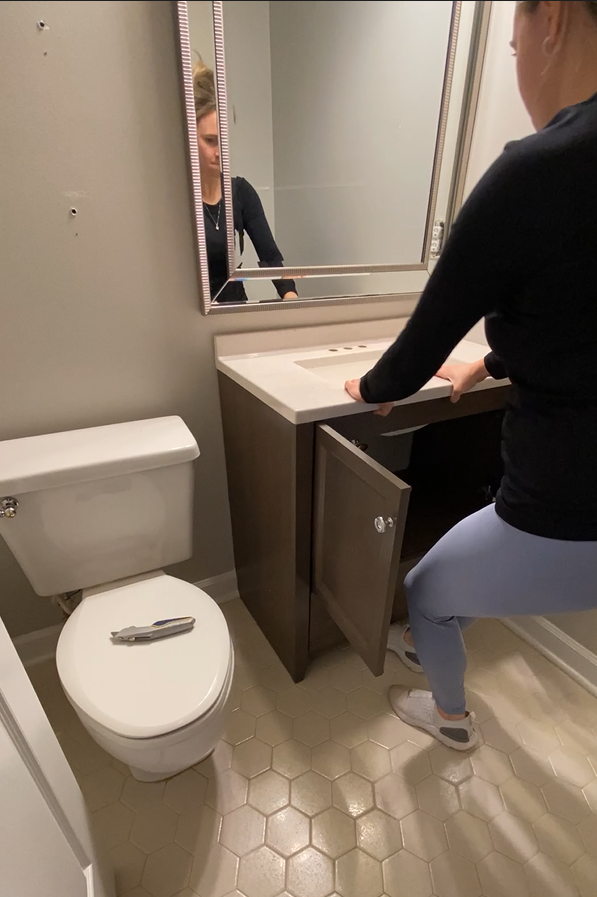
Now that you’ve successfully installed your gorgeous new mosaic tile floor, your prize is that you get to reinstall your toilet!! Haha!
But seriously, the process may have been a bit tricky, but the end result is well worth the effort. If you liked this tutorial and want to see more of my bathroom design, head over to my Instagram account where I shared the full bathroom refresh as well as all my home DIY projects and design tips.
If you have any additional questions about tiling, leave a comment!
Want to keep up with my newest projects? Come hang out on my social media accounts, below!